How To: Docker With Spring Boot
This tutorial will show you how to build and run a simple web application into the Docker-compatible image using Cloud Native Buildpacks support, from Spring Boot 2.3.0.
Join the DZone community and get the full member experience.
Join For FreeIf you are reading this, there is no doubt you have heard of Docker. Living up to the hype, Docker has become the relative standard for DevOps operations. Its ability to simplify deployments and testing by creating efficient and immutable images of the applications working in their own silo has greatly helped with its popularity. The majority of Docker’s attention can be attributed to its improved efficiency regarding placement of applications—making tech central for cloud applications.
By unifying application development Docker makes the target environment part of your app in the form of a container rather than forcing you to prepare its environment on each machine. This means you no longer have to deal with conflicting library versions or overlapping network posts. Built images are immutable, allowing your application to work the same way locally, on a team member’s computer, or the cloud. In addition to this, it is possible to run many instances of the container on the same machine, which helps to increase the density of deployments, and in turn, brings down costs.
This tutorial will show you how to build and run a simple web application into the Docker-compatible image using Cloud Native Buildpacks support, from Spring Boot 2.3.0.
Prerequisites:
Bootstrap a Secure Spring Boot Application
Start by creating a Spring Boot application using Spring Boot Initializr. This can be done via the web interface or using a handy curl command:
curl https://start.spring.io/starter.tgz -d dependencies=web,okta \
-d bootVersion=2.4.1 \
-d groupId=com.okta \
-d artifactId=demospringboot \
-d type=gradle-project \
-d language=kotlin \
-d baseDir=springboot-docker-demo | tar -xzvf -
This command requests that Spring Boot Initializr generate an application that uses the Gradle build system and Kotlin programming language. It also configures dependencies on Spring Web and Okta. The created project is automatically unpacked to the springboot-docker-demo directory.
Update your main application class to allow unauthenticated access in WebSecurityConfigurerAdapter. While in there, add a controller that welcomes the user. It’s safe to put everything in a single file src/main/kotlin/com/okta/demospringboot/DemoApplication.kt:
xxxxxxxxxx
package com.okta.demospringboot
import org.springframework.boot.autoconfigure.SpringBootApplication
import org.springframework.boot.runApplication
import org.springframework.security.config.annotation.web.builders.HttpSecurity
import org.springframework.security.config.annotation.web.configuration.WebSecurityConfigurerAdapter
import org.springframework.context.annotation.Configuration
import org.springframework.web.bind.annotation.RequestMapping
import org.springframework.web.bind.annotation.RestController
import java.security.Principal
class DemoApplication
fun main(args: Array<String>) {
runApplication<DemoApplication>(*args)
}
class OktaOAuth2WebSecurityConfigurerAdapter: WebSecurityConfigurerAdapter() {
override fun configure(http: HttpSecurity) {
http.authorizeRequests().anyRequest().permitAll()
}
}
class WebController {
("/")
fun home(user: Principal?) = "Welcome, ${user?.name ?: "guest"}!"
}
Run Your Spring Boot Application
Start your application in the project folder via the command line:
xxxxxxxxxx
./gradlew bootRun
Then, open a browser at http://localhost:8080. Your web application greets the guest user: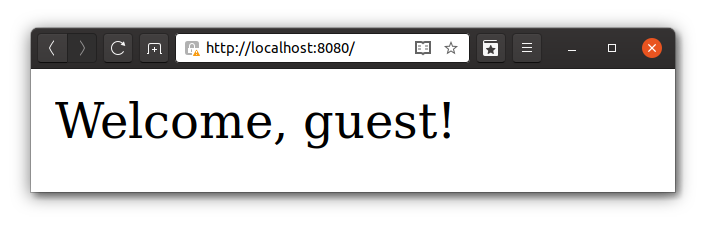
Build a Spring Boot Docker Image
Since version 2.3.0, Spring Boot has supported Cloud Native Buildpacks. It has become straightforward to deploy a web service to the popular clouds using Buildpacks due to the mass adoption of this technology.
Build your application and send the image to the local Docker daemon:
xxxxxxxxxx
./gradlew bootBuildImage --imageName=springbootdemo
Next, start your containerized web application with Docker:
xxxxxxxxxx
docker run -it -p8080:8080 springbootdemo
As expected, your web application will be available on http://localhost:8080.
Secure Your Spring Boot Application in Docker
User management is never an easy task and, most certainly, is not the main objective of your application. Okta is an identity provider that helps you to take care of routine work such as implementing OAuth 2.0, social login, and SSO (Single Sign-On). It’s very developer-friendly, and it has excellent integration with different frameworks, including Spring Boot.
Start with installing the Okta CLI tool - it’s a real time saver for developers.
Create your free developer account with Okta, no credit card required:
Don’t forget to set your password using the link above!Java
xxxxxxxxxx1
1okta register23...(provide registration details)...4...5To set your password open this link:6https://dev-xxxxxxxxxxxx.okta.com/welcome/ABCDEFG
-
Create an Okta application. In your project directory, execute:JavaThe Okta CLI will prompt you for an application name—choosing the default is OK. Next, select 1 (Web), then 1 (Okta Spring Boot Starter). Accept defaults, the Okta CLI will configure the default login redirect URI (
xxxxxxxxxx1
1okta apps create --redirect-uri http://localhost:8080/login/oauth2/code/okta
http://localhost:8080/login/oauth2/code/okta) and logout redirect URI (http://localhost:8080). Don’t worry, you can change these values later if something needs to be adjusted.
3. When an application successfully created, its configuration is saved in the current folder, in a.okta.envfile.JavaYou’ll need to run
xxxxxxxxxx1
1cat .okta.env2export OKTA_OAUTH2_ISSUER="https://dev-xxxxxx.okta.com/oauth2/default"3export OKTA_OAUTH2_CLIENT_SECRET="yyy"4export OKTA_OAUTH2_CLIENT_ID="zzz"
source .okta.envto set these values as environment variables. If you’re on Windows, rename the file to.okta.batand changeexporttoset. These parameters need to be injected into the application to enable OAuth flows for authentication and authorization.NOTE: make sure you never check in credentials to your source control system.
Configure Spring Security to Lock Down AccessPreviously, your webpage was accessible for everyone. To allow access for authorized users only, update the Spring Security configuration in
src/main/kotlin/com/okta/demospringboot/DemoApplication.kt:Java
xxxxxxxxxx1
12class OktaOAuth2WebSecurityConfigurerAdapter: WebSecurityConfigurerAdapter() {3override fun configure(http: HttpSecurity) {4http.authorizeRequests().anyRequest().authenticated();5}6}
That’s it. The Okta Spring Boot Starter takes care of the rest!
Rebuild the application again:
Java
xxxxxxxxxx1
1./gradlew bootBuildImage --imageName=springbootdemo
The
--imageNameparameter allows specifying an image name. Without it, the name would be something likeappName:0.0.1-SNAPSHOT.Start Spring Boot Application in Docker
When your application starts, the Okta module reads environment variables to configure security in your application. Start your application with your values set:
Java
xxxxxxxxxx1
1docker run -it -p8080:8080 \2-e OKTA_OAUTH2_ISSUER="https://dev-xxxxxx.okta.com/oauth2/default" \3-e OKTA_OAUTH2_CLIENT_SECRET="yyyyyyyyyyyyyyyyyyy" \4-e OKTA_OAUTH2_CLIENT_ID="zzzzzzzzzzzzzzzz" \5springbootdemo
The argument
-eallows to set an environment variable for the application running inside your container and-pmaps container’s point to thelocalhost.Now, head over to
http://localhost:8080, and you’ll be asked to log in using Okta’s standard form. Enter your login credentials and, upon successful sign-in, your web browser will be redirected to the main page, displaying a welcoming message.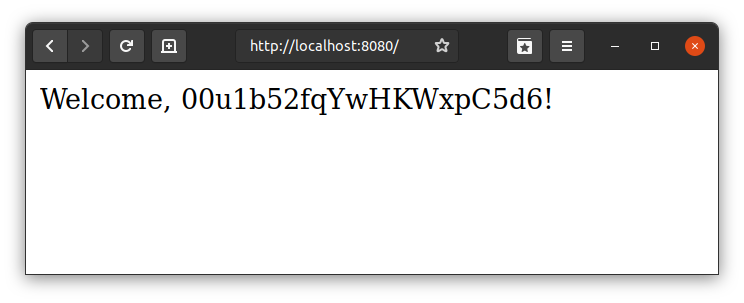
Create a
.envfile in the root of the project and set desirable environment variables:Always be extra careful with credentials - avoid leaking them to the version control system even for the pet project. AddJava
xxxxxxxxxx1
1OKTA_OAUTH2_ISSUER=https://{yourOktaDomain}/oauth2/default2OKTA_OAUTH2_CLIENT_SECRET={yourClientSecret}3OKTA_OAUTH2_CLIENT_ID={yourClientId}
.envto.gitignore.Run Docker providing yourJava
xxxxxxxxxx1
1echo ".env" >> .gitignore
.envfile via--env-fileargumentJava
xxxxxxxxxx1
1docker run -it -p8080:8080 --env-file .env springbootdemo
Looks much cleaner, doesn’t it?
Deploy Spring Boot + Docker to Heroku
If you’d like to deploy your dockerized Spring Boot app to Heroku, you’ll need to use Heroku Buildpacks. This is because the Paketo buildpacks refuse to allocate heap on containers smaller than 1GB of RAM. A free Heroku dyno has 512MB.
First, you’ll need to add the following to
src/main/resources/application.propertiesso Spring Boot uses Heroku’sPORTenvironment variable.Java
xxxxxxxxxx1
1server.port=${PORT:8080}
Then, build your image with
--builder heroku/spring-boot-buildpacks:Java
xxxxxxxxxx1
1./gradlew bootBuildImage --imageName=springbootdemo --builder heroku/spring-boot-buildpacks
Create an app on Heroku:
Java
xxxxxxxxxx1
1heroku create
Log in to Heroku’s container registry and push your app:
Java
xxxxxxxxxx1
1heroku container:login2docker tag springbootdemo registry.heroku.com/<your-app-name>/web3docker push registry.heroku.com/<your-app-name>/web
Set your Okta app settings as environment variables:
Java
xxxxxxxxxx1
1heroku config:set \2OKTA_OAUTH2_ISSUER="https://{yourOktaDomain}/oauth2/default" \3OKTA_OAUTH2_CLIENT_ID="{clientId}" \4OKTA_OAUTH2_CLIENT_SECRET="{clientSecret}"
Next, release your container and tail the logs.
Java
xxxxxxxxxx1
1heroku container:release web2heroku logs --tail
You’ll need to update your Okta OIDC app to have your Heroku app’s redirect URIs as well.
- Login redirect URI:
https://<your-app-name>.herokuapp.com/login/oauth2/code/okta - Logout redirect URI:
https://<your-app-name>.herokuapp.com
Run
heroku opento open your app and sign in.Learn More About Docker, Spring Boot, and Buildpacks
In this brief tutorial, you created a secure Spring Boot application and packaged it with Docker. You configured Okta as an OAuth 2.0 provider, built an image into your local Docker daemon, and learned how to run your app in Docker. This bootstrap project is a great starting point for your next cloud-native project.
You can find the source code for this example on GitHub.
Follow us for more great content and updates from our team! You can find us on Twitter, Facebook, subscribe to our YouTube Channel or start the conversation below!
- Dec 31, 2020: Updated post to add Heroku instructions, since it requires another buildpack. Thanks for the idea, Maurizio! See the code changes in the example on GitHub. Changes to this post can be viewed in oktadeveloper/okta-blog#514.
- Login redirect URI:
Published at DZone with permission of Ruslan Zaharov. See the original article here.
Opinions expressed by DZone contributors are their own.
Comments