Dynamic Web Forms In React For Enterprise Platforms
With JSON-based dynamic forms in React, you can achieve seamless integration with APIs and ensure consistency throughout the project.
Join the DZone community and get the full member experience.
Join For FreeForms are some of the easiest things to build in React, thanks to the useForm hook. For simple forms such as login, contact us, and newsletter signup forms, hard coding works just fine. But, when you have apps that require frequent updates to their forms, for example, surveys or product configuration tools, hard coding becomes cumbersome.
The same goes for forms that require consistent validation or forms in apps that use micro frontends. For these types of forms, you need to build them dynamically. Fortunately, JSON and APIs provide a straightforward way to define and render these types of forms dynamically.
In this guide, we’ll go over how you can use JSON and APIs (REST endpoints) to do this and how to set up a UI form as a service. Let’s start with creating dynamic forms based on JSON.
Dynamic Forms in React Based on JSON
What are Dynamic Forms in React?
In React, dynamic forms based on JSON are forms where the structure (fields, labels, validation rules, etc.) is generated at runtime based on a JSON configuration. This means you don’t hard-code the form fields, labels, etc. Instead, you define all of this information in a JSON file and render your form based on the JSON file’s content.
Here’s how this works:
- You start by defining your JSON schema. This will be your form’s blueprint. In this schema, you define the input field types (text, email, checkboxes, etc.), field labels and placeholders, whether the fields are required, and so on, like below:
JSON
{ "title": "User Registration", "fields": [ { "name": "fullName", "label": "Full Name", "type": "text", "placeholder": "Enter your full name", "required": true }, { "name": "email", "label": "Email Address", "type": "email", "placeholder": "Enter your email", "required": true }, { "name": "gender", "label": "Gender", "type": "select", "options": ["Male", "Female", "Other"], "required": true }, { "name": "subscribe", "label": "Subscribe to Newsletter", "type": "checkbox", "required": false } ] } - Create a form component (preferably in Typescript).
- Import your JSON schema into your component and map over it to create and render the form dynamically.
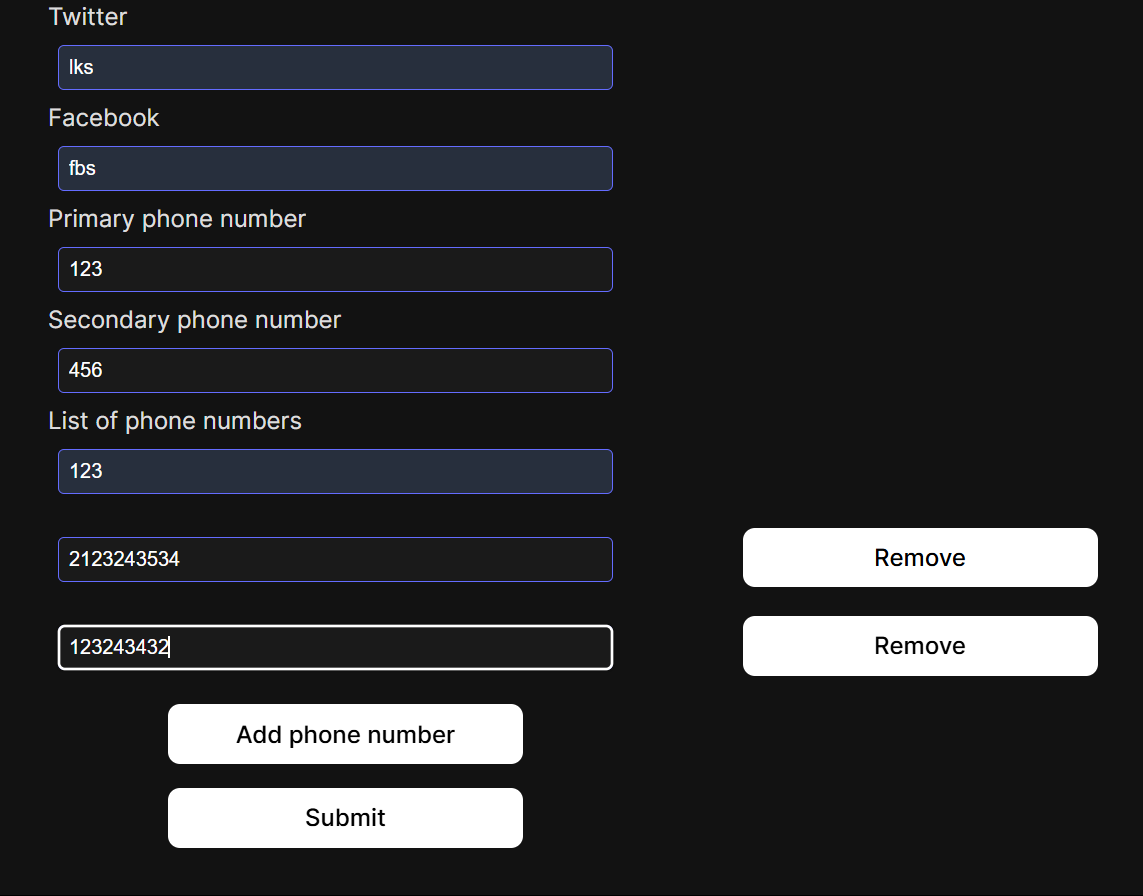
Note: When looking into dynamic forms in React, you will likely come across them as forms where users can add or remove fields based on their needs. For example, if you’re collecting user phone numbers, they can choose to add alternative phone numbers or remove these fields entirely.
This is a feature you can hard-code into your forms using the useFieldArray hook inside react-hook-form.
But in our case, we refer to the dynamic forms whose renders are dictated by the data passed from JSON schema to the component.
Why Do We Need Dynamic Forms?
The need for dynamic forms stems from the shortcomings of static forms. These are the ones you hard-code, and if you need to change anything in the forms, you have to change the code. But dynamic forms are the exact opposite.
Unlike static forms, dynamic forms are flexible, reusable, and easier to maintain. Let’s break these qualities down:
- Flexibility. Dynamic forms are easier to modify. Adding or removing fields is as easy as updating the JSON scheme. You don’t have to change the code responsible for your components.
- One form, many uses. One of React’s key benefits is how its components are reusable. With dynamic forms, you can take this further and have your forms reusable in the same way. You have one form component and reuse it for different use cases.
For example, create one form but with a different schema for admins, employees, and customers on an e-commerce site.
- Custom, consistent validation. You also define the required fields, regex patterns (for example, if you want to validate email address formats), and so on in JSON. This ensures that all forms follow the same validation logic.
These features make dynamic forms ideal for enterprise platforms where forms are complex and need constant updates.
Why JSON for Dynamic Forms?
JSON (short for Javascript Object Notation) is ideal for defining dynamic forms. Its readability, compatibility, and simplicity make it the best option to easily manipulate, store, and transmit dynamic forms in React. You can achieve seamless integration with APIs and various systems by representing form structures as JSON.
With that in mind, we can now go over how to build dynamic forms in React with JSON.
Building Dynamic Forms in React With JSON
JSON Structure for Dynamic Forms
The well-structured JSON schema is the key to a highly useful dynamic form. A typical JSON structure looks as follows:
{
  "title": "Registration",
  "fields": [
    {
      "fieldType": "text",
      "label": "First Name",
      "name": "First_Name",
      "placeholder": "Enter your first name",
      "validationRules": {
        "required": true,
        "minLength": 3
      }
    },
    {
      "fieldType": "text",
      "label": "Last Name",
      "name": "Last_Name",
      "placeholder": "Enter your Last Name",
      "validationRules": {
        "required": true,
        "minLength": 3
      }
    },
    {
      "fieldType": "email",
      "label": "Email",
      "name": "email",
      "placeholder": "Enter your email",
      "validationRules": {
        "required": true,
        "pattern": "^[a-zA-Z0-9+_.-]+@[a-zA-Z0-9.-]+$"
      }
    },
    {
      "fieldType": "text",
      "label": "Username",
      "name": "username",
      "placeholder": "Enter your username",
      "validationRules": {
        "required": true,
        "minLength": 3
      }
    },
    {
      "fieldType": "select",
      "label": "User Role",
      "name": "role",
      "options": ["User", "Admin"],
      "validationRules": {
        "required": true
      }
    }
  ],
  "_comment": "Add more fields here."
}
Save the above code as formSchema.JSON.
Now that we have the JSON schema, it's time to implement and integrate it into the React form.
Implementing JSON Schema in React Dynamic Forms
Here is a comprehensive guide for implementing dynamic forms in React.
Step 1: Create React Project
Run the following script to create a React project:
npx create-react-app dynamic-form-app
cd dynamic-form-app
After creating your React app, start by installing the React Hook Form this way:
npm install react-hook-formThen, destructure the useForm custom hook from it at the top. This will help you to manage the form’s state.
Step 2: Render the Form Dynamically
Create a React Dynamic Forms component and map it through the JSON schema by importing it.
import React from 'react';
import { useForm } from 'react-hook-form';
import formSchema from './formSchema.json';

const DynamicForm = () => {
  const {
    register,
    handleSubmit,
    formState: { errors },
  } = useForm();

  const onSubmit = (data) => {
    console.log('Form Data:', data);
  };

  const renderField = (field) => {
    const {
      fieldType,
      label,
      name,
      placeholder,
      options,
      validationRules
    } = field;

    switch (fieldType) {
      case 'text':
      case 'email':
        return (
          <div key={name} className="form-group">
            <label>{label}</label>
            <input
              type={fieldType}
              name={name}
              placeholder={placeholder}
              {...register(name, validationRules)}
              className="form-control"
            />
            {errors[name] && (
              <p className="error">{errors[name].message}</p>
            )}
          </div>
        );

      case 'select':
        return (
          <div key={name} className="form-group">
            <label>{label}</label>
            <select
              name={name}
              {...register(name, validationRules)}
              className="form-control"
            >
              <option value="">Select...</option>
              {options.map((option) => (
                <option key={option} value={option}>
                  {option}
                </option>
              ))}
            </select>
            {errors[name] && (
              <p className="error">{errors[name].message}</p>
            )}
          </div>
        );

      default:
        return null;
    }
  };

  return (
    <form onSubmit={handleSubmit(onSubmit)} className="dynamic-form">
      <h2>{formSchema.title}</h2>
      {formSchema.fields.map((field) => renderField(field))}
      <button type="submit" className="btn btn-primary">
        Submit
      </button>
    </form>
  );
};

export default DynamicForm;
Please note that you must handle different input types in dynamic forms with individual cases. Each case handles a different data type:
const renderField = (field) => {
  switch (field.type) {
    case 'text':
    case 'email':
    case 'password':
      // ... other cases ...
      break;
    default:
      return <div>Unsupported field type</div>;
  }
};
Step 3: Submit the Form
When the form is submitted, the handleSubmit function processes the data and sends it to the API and the state management system.
const onSubmit = (data) => {
  // Process form data
  console.log('Form Data:', data);

  // Example: Send to API
  // axios.post('/api/register', data)
  //   .then(response => {
  //     // Handle success
  //   })
  //   .catch(error => {
  //     // Handle error
  //   });
};
So that’s how you can create dynamic forms using JSON to use in your React app. Remember that you can integrate this form component in different pages or different sections of a page in your app.
But, what if you wanted to take this further? By this, we mean having a dynamic form that you can reuse across different React apps. For this, you’ll need to set up a UI form as a service.
Setting Up Your Dynamic Form as a UI Form as a Service
First things first, what is a UI form as a service? This is a solution that allows you to render dynamic forms by fetching the form definition from a backend service. It is similar to what we’ve done previously.
Only here, you don’t write the JSON schema yourself — this is provided by a backend service. This way, anytime you want to render a dynamic form, you just call a REST endpoint, which returns the UI form component ready to render.
How This Works
If you want to fetch a REST API and dynamically render a form, here’s how you can structure your project:
- Set up a backend service that provides the JSON schema.
- The frontend fetches the JSON schema by calling the API.
- Your component creates a micro frontend to render the dynamic form. It maps over the schema to create the form fields.
- React hook form handles state and validation.
Step 1: Set Up a Back-End Service That Provides JSON Schema
There are two ways to do this, depending on how much control you want:
- You can build your own API using Node.j, Django, or Laravel. Here’s an example of what this might look like with Node.js and Express backend.
const express = require("express");
const cors = require("cors");

const app = express();
app.use(cors()); // Enable CORS for frontend requests

// API endpoint that serves a form schema
app.get("/api/form", (req, res) => {
  res.json({
    title: "User Registration",
    fields: [
      {
        name: "username",
        label: "Username",
        type: "text",
        required: true
      },
      {
        name: "email",
        label: "Email",
        type: "email",
        required: true
      },
      {
        name: "password",
        label: "Password",
        type: "password",
        required: true,
        minLength: 8
      },
      {
        name: "age",
        label: "Age",
        type: "number",
        required: false
      },
      {
        name: "gender",
        label: "Gender",
        type: "select",
        options: ["Male", "Female", "Other"],
        required: true
      }
    ]
  });
});

app.listen(5000, () => console.log("Server running on port 5000"));
To run this, you’ll save it as sever.js, install dependencies (express CORS), and finally run node server.js. Now, your react frontend can call http://localhost:5000/api/form to get the form schema.
- If you don’t want to build your own backend, you can use a database service, such as Firebase Firestore, that provides APIs for structured JSON responses.
If you just want to test this process you can use mock APIs from JSON Placeholder. This is a great example of an API you can use: https://jsonplaceholder.typicode.com/users.
Step 2: Create Your Dynamic Form Component
You’ll create a typical React component in your project. Ensure to destructure the useEffect and useForm hooks to help in handling side effects and the form’s state, respectively.
import React, { useState, useEffect } from "react";
import { useForm } from "react-hook-form";

const DynamicForm = ({ apiUrl }) => {
  const [formSchema, setFormSchema] = useState(null);
  const {
    register,
    handleSubmit,
    formState: { errors }
  } = useForm();

  // Fetch form schema from API
  useEffect(() => {
    fetch(apiUrl)
      .then((response) => response.json())
      .then((data) => setFormSchema(data))
      .catch((error) => console.error("Error fetching form schema:", error));
  }, [apiUrl]);

  const onSubmit = (data) => {
    console.log("Submitted Data:", data);
  };

  if (!formSchema) return <p>Loading form...</p>;

  return (
    <form onSubmit={handleSubmit(onSubmit)}>
      <h2>{formSchema.title}</h2>

      {formSchema.fields.map((field) => (
        <div key={field.name}>
          <label>{field.label}:</label>
          {field.type === "select" ? (
            <select
              {...register(field.name, {
                required: field.required
              })}
            >
              <option value="">Select</option>
              {field.options.map((option) => (
                <option key={option} value={option}>
                  {option}
                </option>
              ))}
            </select>
          ) : (
            <input
              type={field.type}
              {...register(field.name, {
                required: field.required,
                minLength: field.minLength
              })}
            />
          )}
          {errors[field.name] && <p>{field.label} is required</p>}
        </div>
      ))}

      <button type="submit">Submit</button>
    </form>
  );
};

export default DynamicForm;
This form will fetch the schema from the API and generate fields dynamically based on it. React hook form will handle state management and validation.
Step 3: Use the Form Component in Your App
This step is quite easy. All you have to do is pass the API endpoint URL as a prop to the dynamic form component.
import React from "react";
import DynamicForm from "./DynamicForm";

const App = () => {
  return (
    <div>
      <h1>Form as a Service</h1>
      <DynamicForm apiUrl="https://example.com/api/form" />
    </div>
  );
};

export default App;
React will create a micro-frontend and render the form on the frontend.
Why Would You Want to Use This?
As mentioned earlier, a UI form as a service is reusable, not only across different pages/page sections of your app, but also across different apps. You can pass the REST endpoint URL as a prop in a component of another app.
What’s more, it keeps your application lean. You manage your forms centrally, away from your main application. This can have some significant performance advantages.
Advantages and Limitations of Dynamic Forms
Advantages
- Reduced redundant code enables developers to manage and handle complex forms conveniently.
- Dynamic forms are easier to update, as changing the JSON schema automatically updates the form.
- JSON schemas can be reused across different parts of the application. You can take this further with a UI form as a service that is reusable across different applications.
- Dynamic forms can handle the increased complexity as the application scales.
Limitations
- Writing validation rules for multiple fields and external data can be cumbersome. Also, if you want more control with a UI form as a service, you’ll need to set up a custom backend, which in itself is quite complex.
- Large or highly dynamic forms affect the performance of the application. With the first method where you’re creating your own JSON file, you still have to write a lot of code for each form field.
- Finding and resolving bugs and errors in dynamically generated forms can be challenging.
Bonus: Best Practices for Dynamic Forms in React
On their own, dynamic forms offer many advantages. But to get the best out of them, you’ll need to implement the following best practices.
Modular Programming
Divide the rendering logic into modules for better navigation and enhanced reusability. This also helps reduce the code complexity. This is something you easily achieve with a UI form as a service. It decouples the form’s logic from your application logic. In the event that one of the two breaks down, the other won’t be affected.
Use the Validation Library
It is best to use a validation library to streamline the process for complex validation rules. This will abstract you from writing validation rules for every possible scenario you can think of.
Extensive Testing
Test your dynamic forms extensively to cover all possible user inputs and scenarios. Include various field types, validation rules, and submission behaviors to avoid unexpected issues.
Performance Optimization
As mentioned earlier, the increased dynamicity affects the application's performance. Therefore, it is crucial that you optimize the performance by implementing components like memoization, lazy loading, and minimizing the re-renders.
Define Clear and Consistent JSON Schemas
Stick to a standard structure for defining all the JSON schemas to ensure consistency and enhance maintainability. Moreover, clear documentation and schema validation can also help prevent unexpected errors and faults. Furthermore, it aids team collaboration.
With these best practices, you can achieve highly robust, efficient, and maintainable dynamic forms in React with JSON.
Conclusion
Dynamic forms in React based on JSON serve as a powerful tool for designing flexible user interfaces. By defining the form structure in JSON schemas, you can streamline form creation and submission dynamically. Moreover, this helps enhance the maintainability and adaptability of the application. Although this process has a few limitations, the benefits heavily outweigh them.
In addition, you can work around some of the limitations by using the UI form as a service. This solution allows you to manage your dynamic forms independently of your application. Because of this, you can reuse these forms across multiple apps.
With JSON-based dynamic forms, you can achieve seamless integration with APIs and ensure consistency throughout the project.
Opinions expressed by DZone contributors are their own.
Comments