End-to-End Automation Using Microsoft Playwright CLI
Learn how Microsoft Playwright CLI enables token-efficient, scalable browser automation for AI coding agents, improving performance and reducing costs.
Join the DZone community and get the full member experience.
Join For FreeWith the rapid adoption of AI coding agents such as Claude Code and GitHub Copilot, browser automation tools must prioritize efficiency and scalability. Traditional protocols like MCP (Model Context Protocol) often flood the model’s context window with verbose data, such as full accessibility trees and page structure metadata. This leads to degraded performance, increased costs, and lost reasoning context.
What's Covered in This Blog
- The article provides a comprehensive and formal installation guide.
- Complete the setup process in a clear, step-by-step manner.
- Execution workflow with detailed instructions.
- Fully implemented end-to-end practical demonstration.
- Demonstration is performed using the site's online store
- A detailed walkthrough VIDEO is attached at the end of the article for additional reference and clarity.
Why Separate Playwright CLI?
Traditional AI-driven browser automation often relies on MCP (Model Context Protocol). While MCP provides rich browser introspection, it introduces a critical limitation: the server controls what enters the model’s context.
With MCP-based browser tools, every interaction typically returns
- Full accessibility trees
- Console logs
- Page structure metadata
- Tool schemas
After only a few interactions, this data overwhelms the model’s context window.
The result is:
- Degraded reasoning performance
- Loss of earlier context
- Higher token costs
- Reduced reliability in longer sessions
Modern coding agents operate under strict token limits while simultaneously reasoning over large codebases and test suites. Microsoft introduced a CLI-first approach to solve this problem.
CLI vs. MCP: The Architectural Difference
MCP-Based Browser Control
The original Model Context Protocol (MCP) approach used by many automated browser tools returns extensive metadata on every interaction, including:
- Accessibility trees
- Console logs
- Full page structure metadata
- Verbose schema definitions
While rich in context, this style fills an AI model’s limited context window rapidly, reducing space for reasoning or code generation.
Microsoft Playwright CLI
The Microsoft Playwright CLI solves this by keeping browser state external and exchanging only minimal, structured information in each interaction. Instead of dumping the full page state, the CLI returns compact references that represent elements on the page.
This design dramatically improves
- Token efficiency
- Reasoning performance
- Predictability of long sessions
- Cost efficiency in sustained automation
Prerequisites
Before installation, ensure the following requirements are met:
- Node.js 18 or newer
- A compatible AI coding agent, such as:
- Claude Code
- GitHub Copilot
- Any agent capable of executing CLI commands
Install Microsoft Playwright CLI
Install the CLI globally using npm:
npm install -g @playwright/cli@latestOnce Playwright CLI is installed, running the command opens Interactive mode.
> copilot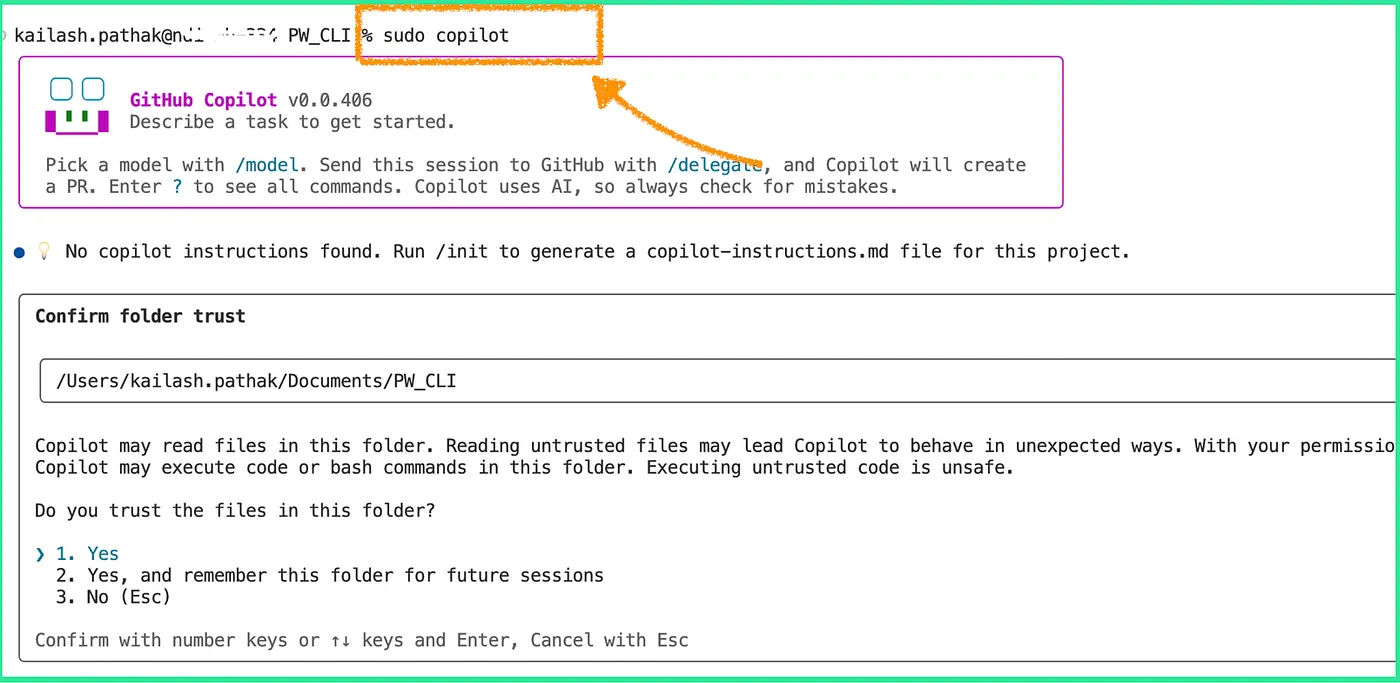
Confirm installation and view available commands:
playwright-cli --helpThis command not only confirms installation but also reveals the SKILLs (commands) that coding agents can use to interact with the browser.
Core Playwright CLI Commands
The Microsoft Playwright CLI exposes a concise set of browser control commands:
# Open a URL
playwright-cli open https://acb.com/ --headed# Type text
playwright-cli type "Hello Testing"# Press keys such as Enter
playwright-cli press Enter# Click elements using reference IDs
playwright-cli click e21# Fill input fields
playwright-cli fill e15 "value"# Take screenshots
playwright-cli screenshot# Capture a snapshot of the current page
playwright-cli snapshotThese commands return only the essential information needed for interaction, avoiding large payloads.
Understanding Snapshots and Reference IDs
The snapshot command is central to how the CLI works.
When executed:
- The CLI captures the current page state
- Elements are assigned compact reference IDs (for example,
e21,e2609) - Only these references are returned to the agent
Instead of sending a full DOM or accessibility tree, the agent receives a small, deterministic map of actionable elements.
End-to-End Practical Example
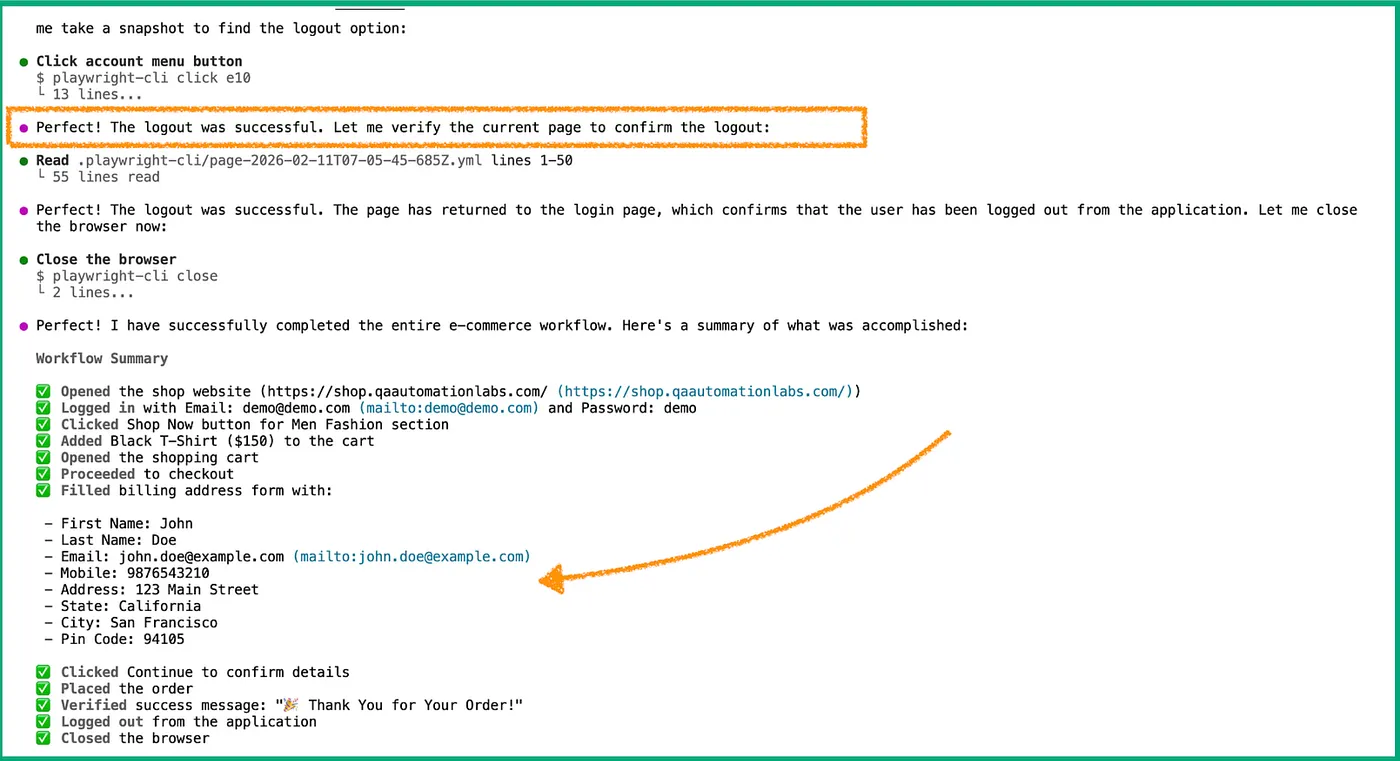
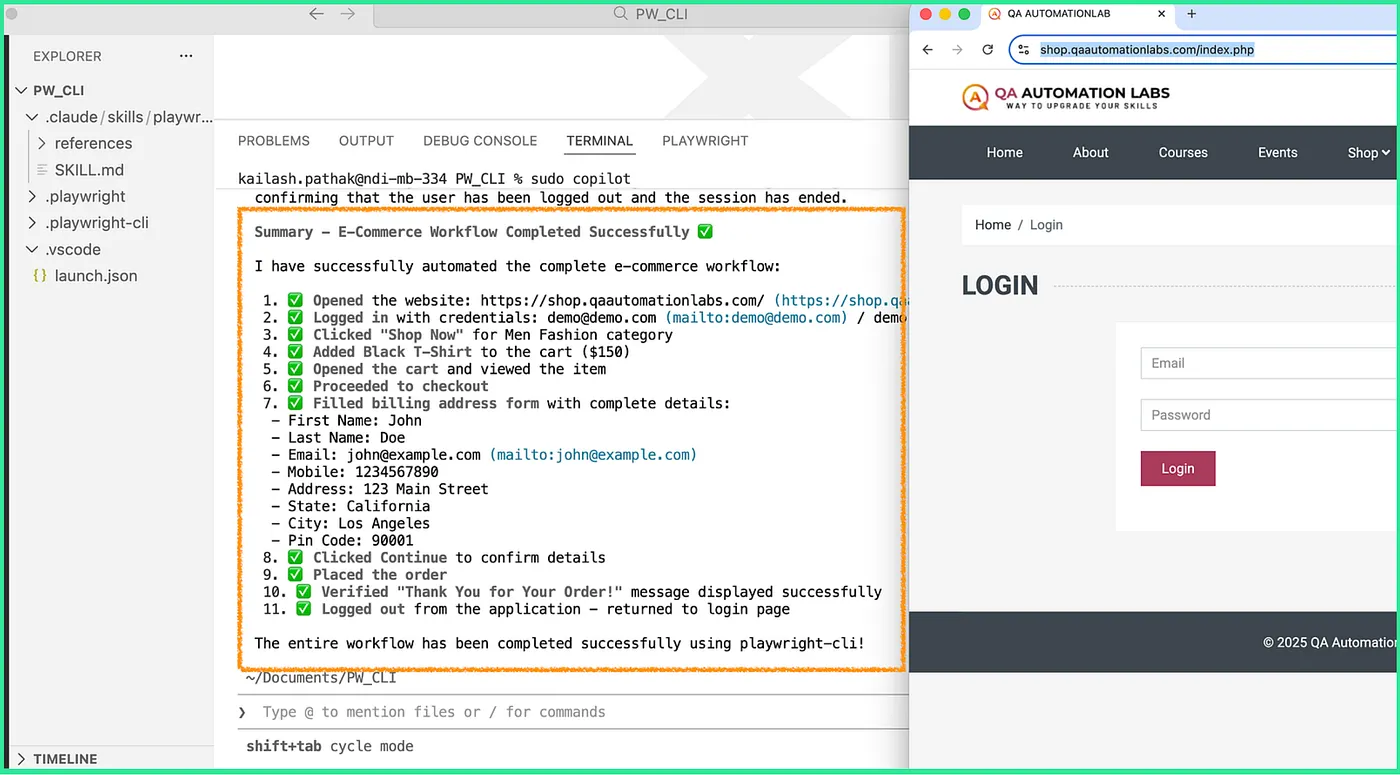
Perform a complete shopping workflow on Automation Labs using Playwright CLI. The steps include logging in, selecting a category, adding an item to the cart, checking out, filling out the form, placing the order, verifying the success message, and logging out.
Let’s give the following prompt:
Using playwright-cli open https://shop.qaautomationlabs.com/ login with Email: [email protected] Password: demo
click on Shop Now button against Men Fashion
Add Black T-Shirt into the cart
Open cart
Click on Checkout
Fill data into Billing Address form and continue
finally place order verify message "Thank You for Your Order!" and finally Logout from application 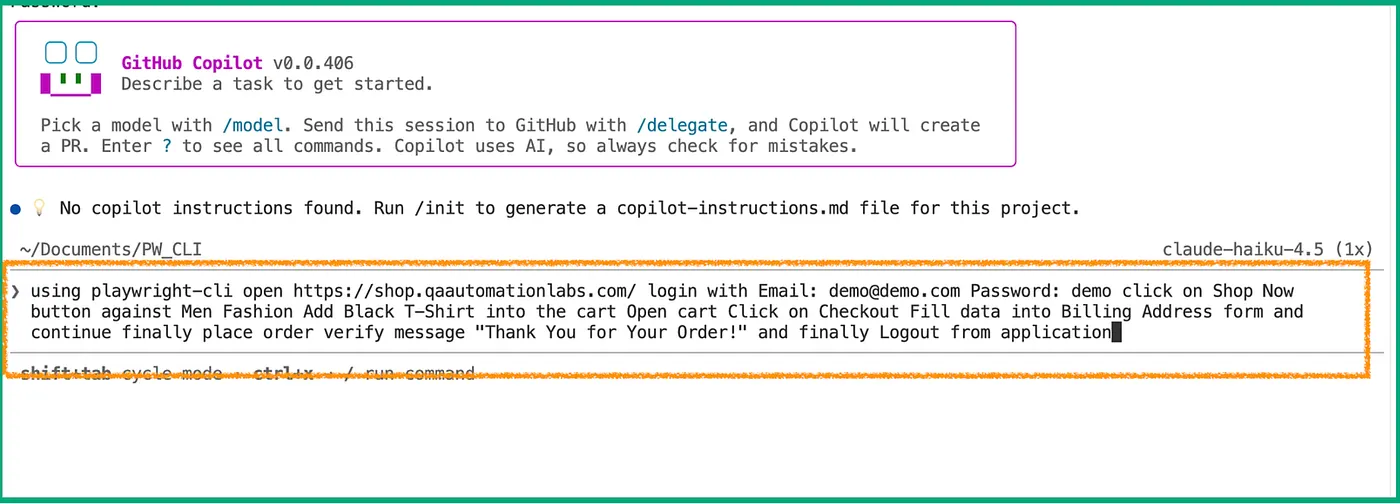
In the steps below, let's see how the prompt above will work.
1. Open the Online Store
Launch the site in a visible browser (headed):
playwright-cli open https://shop.qaautomationlabs.com/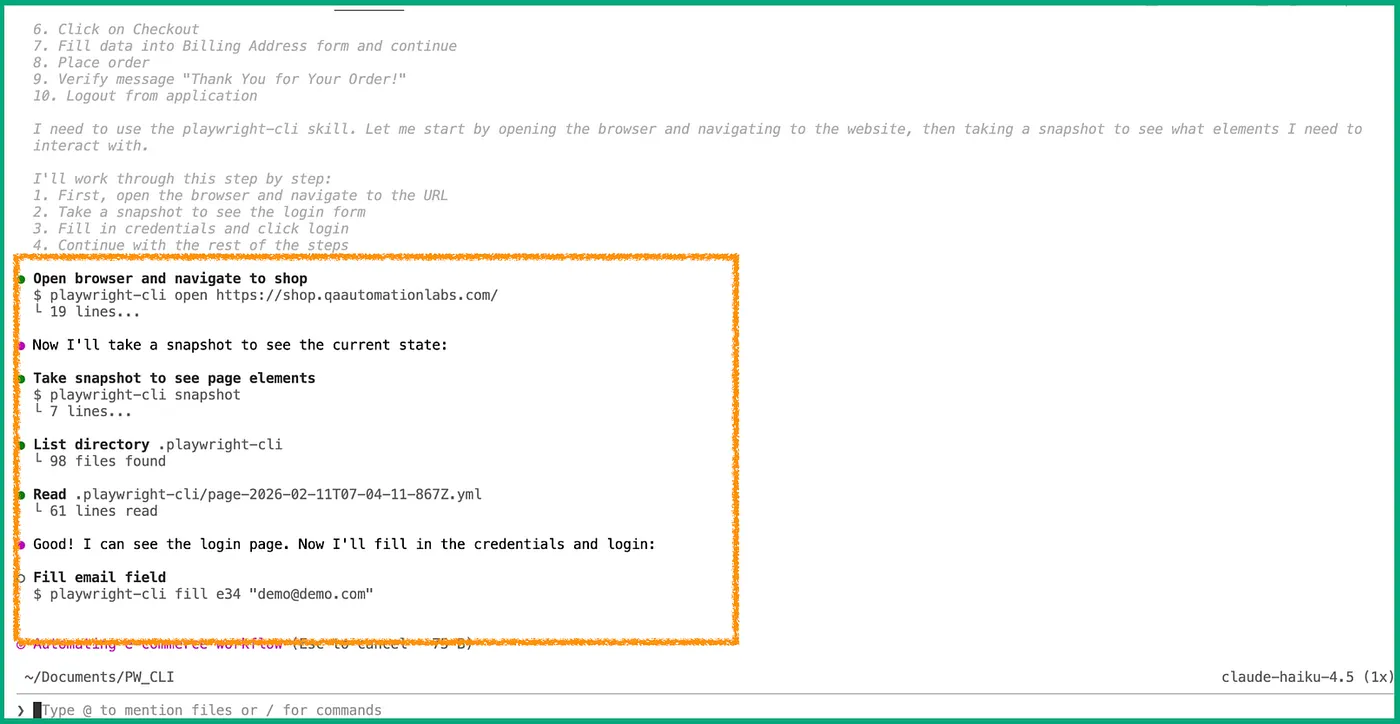
2. Capture Initial Page Snapshot
playwright-cli snapshotSnapshot returns reference IDs for interactive elements on the homepage.
3. Log In to the Store
Identify login form elements from the snapshot. For this example, assume the reference IDs are:
e15– Email fielde17– Password fielde19– Login button
Execute the login flow:
playwright-cli click e15
playwright-cli fill e15 "[email protected]"playwright-cli click e17
playwright-cli fill e17 "demo"playwright-cli click e19Wait for the page transition before the next snapshot.
4. Navigate to Men's Fashion Category
After login, take a new snapshot:
playwright-cli snapshot
Identify the reference ID for the Men Fashion — Shop Now button (assume e22):
playwright-cli click e22
5. Add Black T-Shirt to Cart
Once on the category page, snapshot again:
playwright-cli snapshotExtract reference ID for the Add to Cart button of the Black T-Shirt (assume e30):
playwright-cli click e306. Open the Cart
After adding the item, take another snapshot:
playwright-cli snapshotIdentify the Cart icon or link reference ID (e.g., e40):
playwright-cli click e407. Proceed to Checkout
Take a snapshot of the cart page:
playwright-cli snapshot
Identify the Checkout button (e.g., e45):
playwright-cli click e45
8. Fill Billing Address Form
Once on the checkout page, capture a snapshot:
playwright-cli snapshotAssume the reference IDs for form input fields are:
e52– First Namee54– Last Namee56– Addresse58– Citye60– ZIPe62– Country
Complete the billing form:
playwright-cli click e52
playwright-cli fill e52 "Demo"playwright-cli click e54
playwright-cli fill e54 "User"playwright-cli click e56
playwright-cli fill e56 "123 AI Street"playwright-cli click e58
playwright-cli fill e58 "Automation City"playwright-cli click e60
playwright-cli fill e60 "54321"playwright-cli click e62
playwright-cli fill e62 "Country"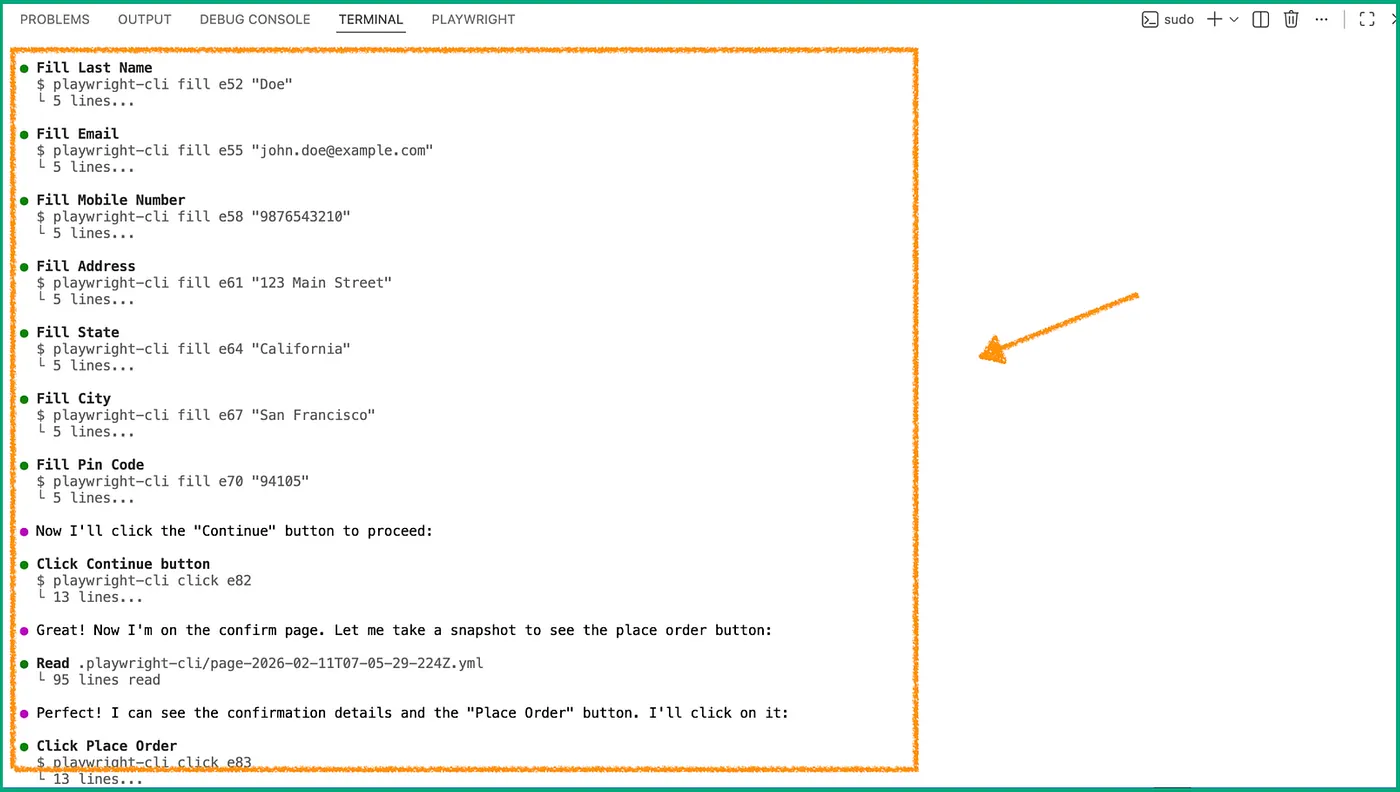
After filling the form, take a snapshot to confirm:
playwright-cli snapshot
Proceed to the final step (Continue/Place Order):
playwright-cli click e659. Verify Order Placement
Capture a snapshot of the order confirmation page:
playwright-cli snapshotTake a screenshot for visual confirmation:
playwright-cli screenshot
Verify the presence of the message:
Thank You for Your Order!
This text should be displayed on the final page.
10. Logout
Finally, snapshot and identify the logout reference ID (e.g., e70):
playwright-cli click e70This completes the end-to-end automated workflow.
Automatic YAML Recording
As the Playwright CLI commands execute, a YAML file is created that logs:
- The sequence of actions
- Element reference IDs
- Page transitions
This YAML can be:
- Replayed to reproduce the same flow
- Converted into Playwright test code
- Used by AI agents without re-scanning
This approach ensures reproducible, deterministic browser automation.
Here's a video for the steps.
Token Efficiency Matters
The key advantage of the Playwright CLI over MCP is token efficiency. By returning only the minimal necessary information per interaction, the tool ensures:
- Longer browser sessions without context collapse
- Allocation of tokens toward reasoning and code generation
- Predictable agent performance
- Lower cost for sustained automation
In contrast, MCP approaches often saturate the context window early, impacting agent reasoning and stability.
When to Use Standard CLI vs. Playwright CLI
Use Standard Playwright Test CLI When:
- Developing tests manually
- Generating detailed reports (HTML, traces, videos)
- Debugging with Playwright Inspector
- Running tests in CI pipelines
Use Microsoft Playwright CLI When:
- An AI agent drives automation
- Token cost and context limits matter
- Deterministic, minimal-noise interactions are needed
- Long reasoning sessions are expected
Many teams adopt both tools in complementary workflows.
Conclusion
The Microsoft Playwright CLI represents a pivotal shift toward token-efficient, deterministic browser automation designed for AI coding agents. By keeping browser state external and exchanging only essential data, it enables:
- Scalable automation
- Reliable long-running sessions
- Predictable performance
- Cost-efficient AI workflows
For teams integrating browser automation with AI reasoning and large codebases, the Playwright CLI is a highly effective and forward-looking tool.
Opinions expressed by DZone contributors are their own.
Comments