ESP8266 Wi-Fi Fan Controller
Learn how to build a Wi-Fi-capable fan controller. For this project, we'll use EasyIoT Cloud and assorted hardware to build a temperature-sensing fan.
Join the DZone community and get the full member experience.
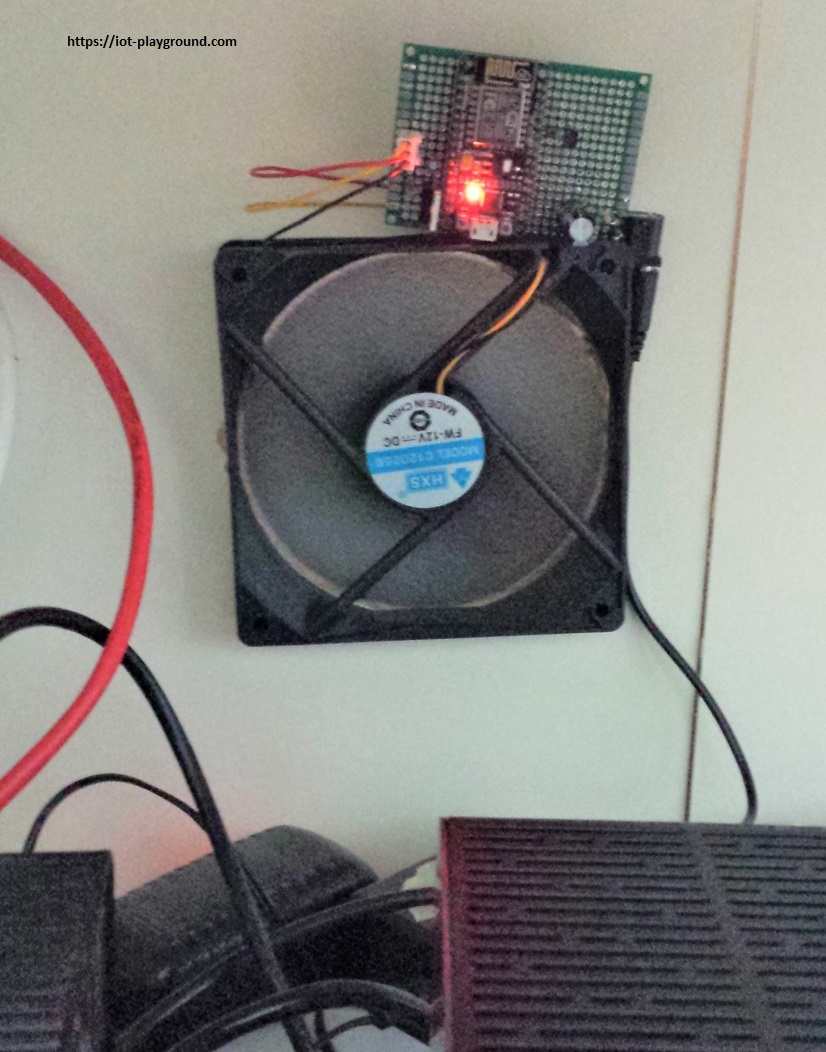
Join For FreeIn this tutorial, we will show how to build Wi-Fi fan controller. The fan controller is connected to the internet and EasyIoT Cloud over Wi-Fi. For this purpose, we will use an ESP8266. The controller can monitor temperature and, in case the temperature increases, power on the fan.
Main ESP8266 Fan Controller Features
- Wi-Fi connected
- 12V fan output
- Temperature monitor
- Fan switch based on temperature
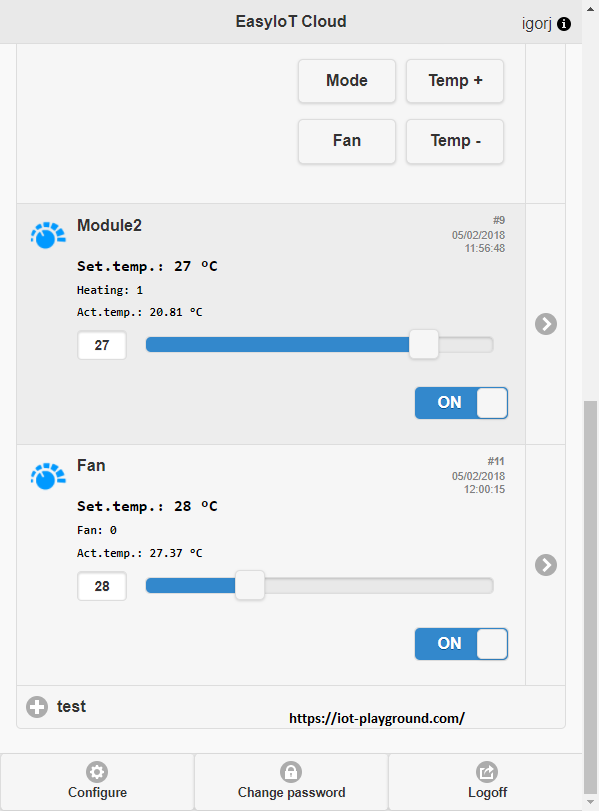
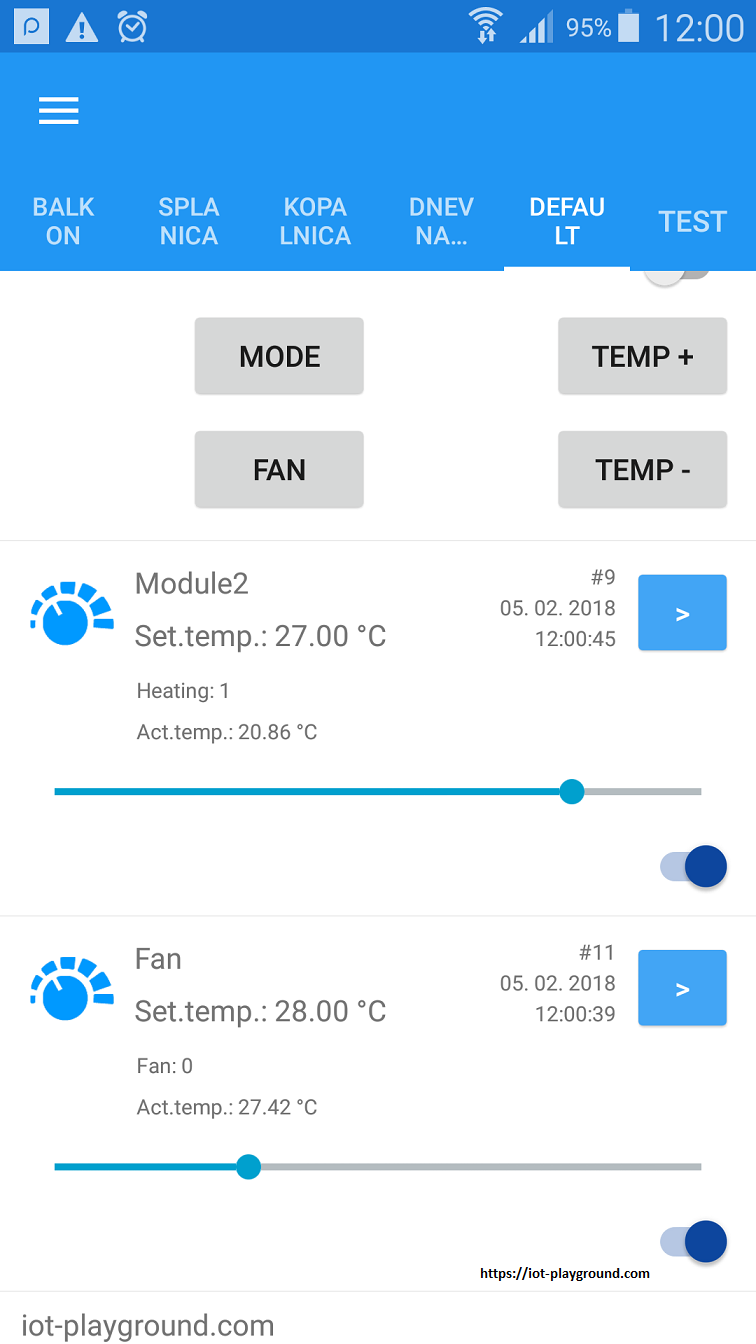
- Web and mobile application
- Connected to EasyIoT Cloud
- ESP8266 WEB configuration page
Materials
ESP8266 Wi-Fi module
DS18B20 Dallas temperature sensor
12V 3Pin DC Brushless PC Computer Case Cooling Fan
N-Channel MOSFET (IRLZ44N)
Resistors 220M, 4.4K, 1K
Prototype PCB
AMS1117-3.3V regulator
220uF capacitor
12V 1A/2A Transformer Travel Power Supply Adapter US EU UK Plug
Build
For simplicity, we will use ESP8266 NODE MCU, but you can use any other type of ESP8266.
Connections
Power Supply
ESP8266 uses a 3.3V power supply and 12V computer fan. In our case, we will use 12V power supply and add an additional 3.3V AMS1117 regulator to step down the voltage to 3.3 V.
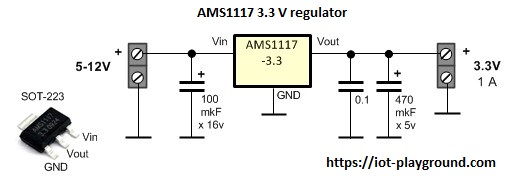
We connect the GND and the 3.3V output of the regulator to the ESP8266 GND and 3.3V pin.
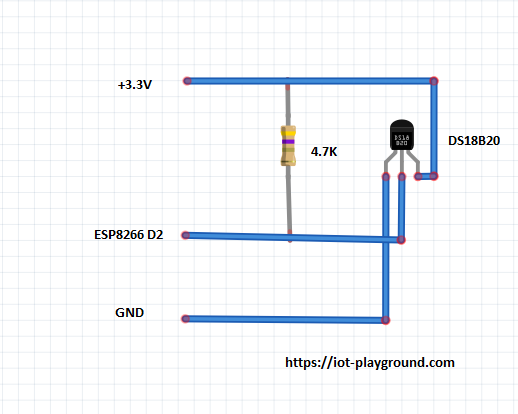
DS18B20 Dallas Temperature Sensor
DS18B20 is powered by 3.3V, and the digital output is connected to the ESP8266 D2 pin. We also use a 4.7K pull up resistor.
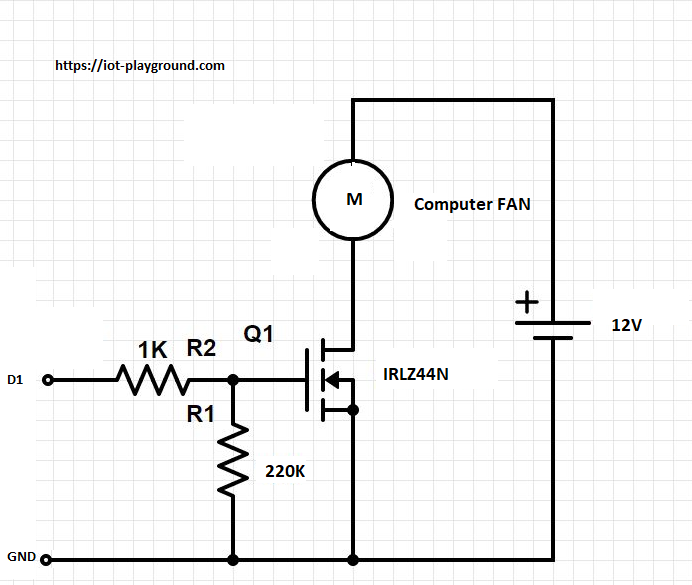
Computer Fan
The computer fan is powered by 12V AC. There are 3- and 4-pin connection versions. In our case, we will use only 2 pins — GND and 12V VCC. The fan is controlled by a MOSFET IRLZ44N connected to the ESP8266 D1 pin.
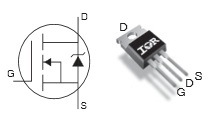
IRLZ44N pinout
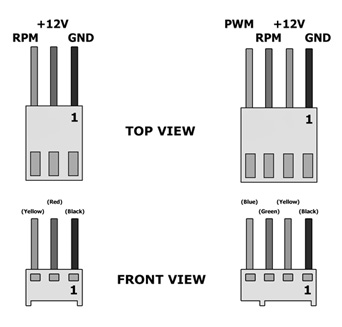
Computer fan pinout
Source Code
Additional libraries are here: lib.
ESP8266 Source Program
The ESP8266 source code can be found on GitHub. Upload the program with ESP8266 Arduino IDE.
Before you upload the program to the ESP8266, it's recommended to change these lines:
#define AP_SSID "xxx"
#define AP_PASSWORD "xxx"
#define EIOTCLOUD_USERNAME "xxx"
#define EIOTCLOUD_PASSWORD "xxx"
If you forget to change those settings, you can press the FLASH button on the ESP8266 NODE MCU module. The ESP8266 will go into config mode. This means it works as an access point with the configuration server. After you press the FLASH button, use a mobile phone and search for AP (access points) available nearby. Connect to the access point with the name Device xx-xx-xx-xx-xx. xx-xx-xx-xx-xx will be some random letters. After you connect to the AP, open a web browser and enter the IP address 192.168.1.4. If you did everything correctly, the browser opens a config page:

After you enter the correct data, press the submit button and the ESP8266 will restart with the new settings.
Configure EasyIoT Cloud
No manual configuration is needed. The program will automatically add the new module to EasyIoT Cloud. First, you need to register to EasyIoT Cloud.
Published at DZone with permission of Igor Jarc. See the original article here.
Opinions expressed by DZone contributors are their own.
Comments