DZone
Thanks for visiting DZone today,
Edit Profile
  • Manage Email Subscriptions
  • How to Post to DZone
  • Article Submission Guidelines
Sign Out View Profile
  • Post an Article
  • Manage My Drafts
Over 2 million developers have joined DZone.
Log In / Join
Please enter at least three characters to search
Refcards Trend Reports
Events Video Library
Refcards
Trend Reports

Events

View Events Video Library

Zones

Culture and Methodologies Agile Career Development Methodologies Team Management
Data Engineering AI/ML Big Data Data Databases IoT
Software Design and Architecture Cloud Architecture Containers Integration Microservices Performance Security
Coding Frameworks Java JavaScript Languages Tools
Testing, Deployment, and Maintenance Deployment DevOps and CI/CD Maintenance Monitoring and Observability Testing, Tools, and Frameworks
Culture and Methodologies
Agile Career Development Methodologies Team Management
Data Engineering
AI/ML Big Data Data Databases IoT
Software Design and Architecture
Cloud Architecture Containers Integration Microservices Performance Security
Coding
Frameworks Java JavaScript Languages Tools
Testing, Deployment, and Maintenance
Deployment DevOps and CI/CD Maintenance Monitoring and Observability Testing, Tools, and Frameworks

The software you build is only as secure as the code that powers it. Learn how malicious code creeps into your software supply chain.

Apache Cassandra combines the benefits of major NoSQL databases to support data management needs not covered by traditional RDBMS vendors.

Generative AI has transformed nearly every industry. How can you leverage GenAI to improve your productivity and efficiency?

Modernize your data layer. Learn how to design cloud-native database architectures to meet the evolving demands of AI and GenAI workloads.

Related

  • Code Play #1: WebSockets With Vert.x and Angular
  • Event Driven Architecture (EDA) - Optimizer or Complicator
  • Event-Driven Microservices: How Kafka and RabbitMQ Power Scalable Systems
  • Exploring Intercooler.js: Simplify AJAX With HTML Attributes

Trending

  • How To Build Resilient Microservices Using Circuit Breakers and Retries: A Developer’s Guide To Surviving
  • The Future of Java and AI: Coding in 2025
  • Monolith: The Good, The Bad and The Ugly
  • How To Introduce a New API Quickly Using Quarkus and ChatGPT
  1. DZone
  2. Coding
  3. Frameworks
  4. Event Emitter Example with Angular 7

Event Emitter Example with Angular 7

Take a look at this brief example of how to construct an event emitter using Angular 7.

By 
ARINDAM GOSWAMI user avatar
ARINDAM GOSWAMI
·
Jun. 01, 20 · Tutorial
Likes (3)
Comment
Save
Tweet
Share
10.2K Views

Join the DZone community and get the full member experience.

Join For Free

Here I am going to show you a basic example of event emitter with Angular 7. Here it goes.

The app component is the parent component. It has two child components. 

  1. my-comp -> used to insert the data into an array using event emitter
  2. my-comp2  --> used to fetch the data in the array using event emitter decorator.

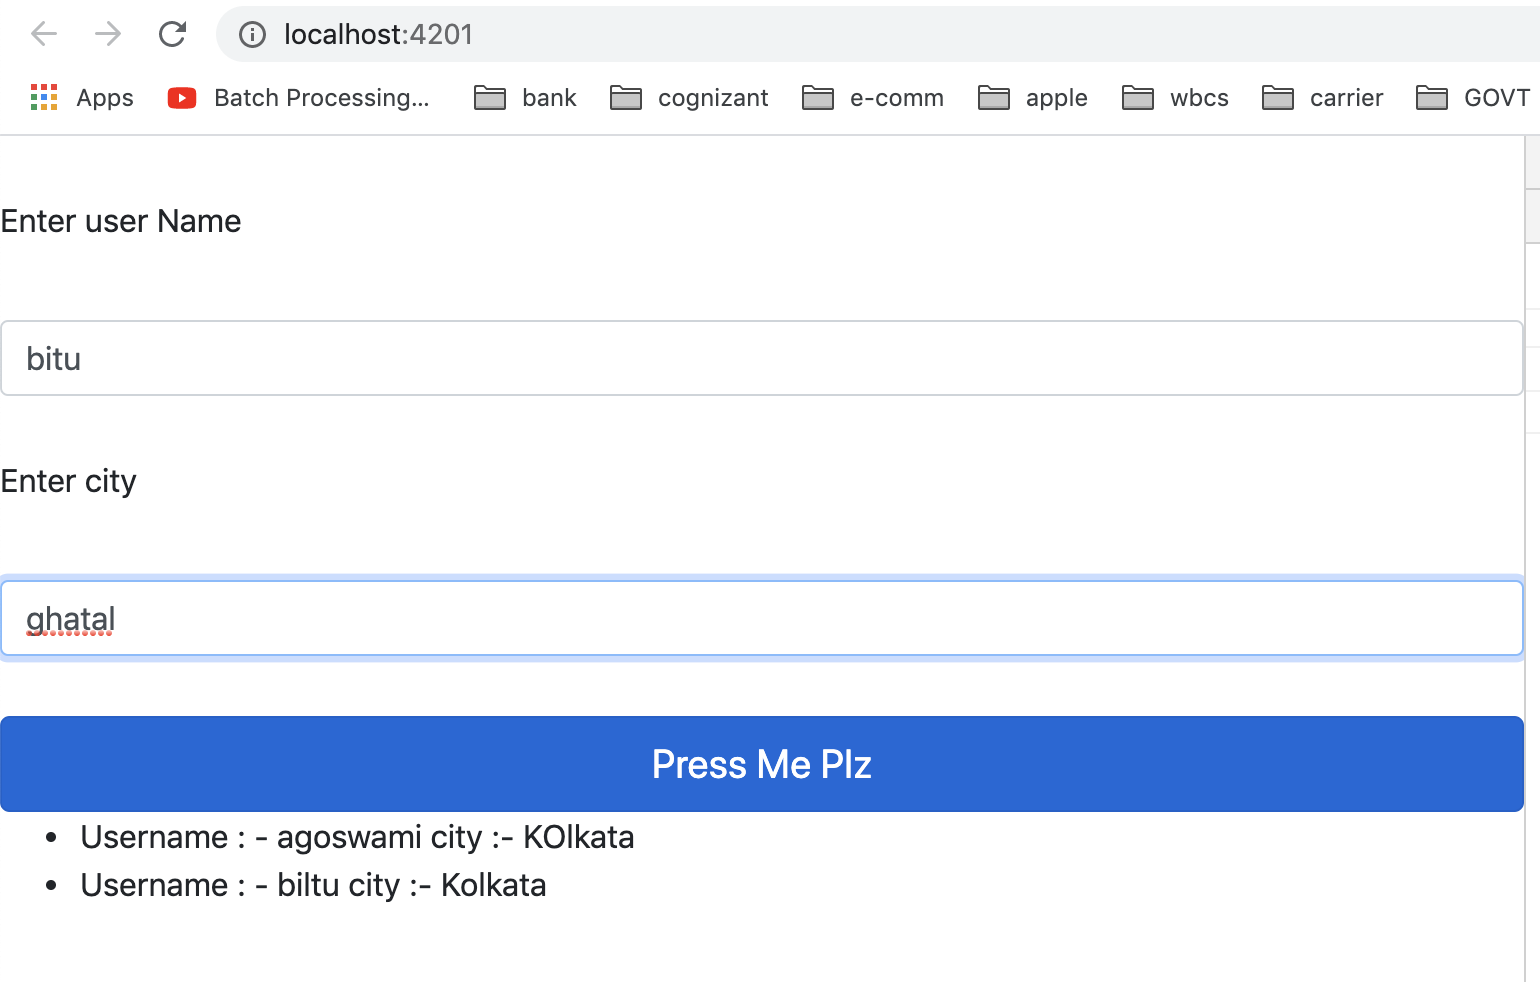
my-comp.component.html (Contains the input Forms and submit button)

========================

HTML


x
13


1
<form>
2

          
3
    <label style="margin-top: 30px;" class="label">Enter user Name</label>
4

          
5
    <input  type="text" [(ngModel)] ="username" class="form-control" style="margin-top: 30px;" name="username"/>
6

          
7
    <label style="margin-top: 30px;" class="label">Enter city</label>
8

          
9
    <input  type="text" [(ngModel)] ="city" class="form-control" style="margin-top: 30px;" name="city"/>
10

          
11
    <button type="submit" (click) = "OnSubmitFun()" class="btn btn-primary btn-block btn-lg" style="margin-top: 30px;" >Press Me Plz</button>
12

          
13
</form>


  ========================

my-comp.component.ts 

See the Event emitter is created here. 

JavaScript


xxxxxxxxxx
1
33


1
import { Component, OnInit, Output, EventEmitter,Input } from '@angular/core';
2

          
3
@Component({
4
  selector: 'app-my-comp',
5
  templateUrl: './my-comp.component.html',
6
  styleUrls: ['./my-comp.component.css']
7
})
8
export class MyCompComponent implements OnInit {
9

          
10
username : string;
11
city : string;
12

          
13
@Output() userArrayOut = new EventEmitter();
14

          
15
OnSubmitFun () {
16

          
17
  const user = {
18
      U : this.username,
19
      C : this.city
20
  }
21
  
22
  if( this.username != '')  {
23
          this.userArrayOut.emit(user);
24
          this.username = '';
25
          this.city ='';
26
  }
27
} 
28
ngOnInit(): void {
29
}
30

          
31

          
32
}
33


In the app-component.ts (Mother Component)

JavaScript


xxxxxxxxxx
1


1
userArray = [];
2

          
3
  storeUser (userArrayOut) {
4

          
5
    this.userArray.push(userArrayOut);
6

          
7
    console.log(this.userArray);
8

          
9
 }


In the app-component.html

HTML


xxxxxxxxxx
1


1
<app-my-comp (userArrayOut)="storeUser($event)"></app-my-comp>
2
<app-my-comp2 [users] = "userArray"></app-my-comp2> 


Please make sure the event name userArrayOut exactly matches with the below. 

 @Output() userArrayOut = new EventEmitter();  

Here in child component (my-comp), the data is populated in the userArrayOut array.

Then in mother app-component.ts, it is stored in the userArray variable. After that in the app-component.html file,  it is again stored in the users array. See the 2nd line in app-componnet.html.

Now the data insertion into the array is completed. Here goes the way to show the data in the other component.

my-comp2.component.ts

=====

JavaScript


x


1
export class MyComp2Component implements OnInit {
2

          
3
  constructor() { }
4

          
5
  ngOnInit(): void {
6
  }
7

          
8
  @Input() users : {}
9

          
10
}


Just add the @Input decorator users array. Now the user array is filled with data.

Now, print the data in the my-comp2 component by iterating users array.

my-comp2.component.html

=====

HTML


x


1
<ul>
2
    <li *ngFor="let user of users">
3
      Username : - {{user.U }}
4
      city :- {{user.C}}
5
    </li>
6
  </ul>


That is it. Once you fill the information and click on the submit button, the array will be loaded and printed as below.

Array output

Event AngularJS

Opinions expressed by DZone contributors are their own.

Related

  • Code Play #1: WebSockets With Vert.x and Angular
  • Event Driven Architecture (EDA) - Optimizer or Complicator
  • Event-Driven Microservices: How Kafka and RabbitMQ Power Scalable Systems
  • Exploring Intercooler.js: Simplify AJAX With HTML Attributes

Partner Resources

×

Comments
Oops! Something Went Wrong

The likes didn't load as expected. Please refresh the page and try again.

ABOUT US

  • About DZone
  • Support and feedback
  • Community research
  • Sitemap

ADVERTISE

  • Advertise with DZone

CONTRIBUTE ON DZONE

  • Article Submission Guidelines
  • Become a Contributor
  • Core Program
  • Visit the Writers' Zone

LEGAL

  • Terms of Service
  • Privacy Policy

CONTACT US

  • 3343 Perimeter Hill Drive
  • Suite 100
  • Nashville, TN 37211
  • support@dzone.com

Let's be friends:

Likes
There are no likes...yet! 👀
Be the first to like this post!
It looks like you're not logged in.
Sign in to see who liked this post!