Test APIs in FitNesse - Part 1
A tutorial on how to use the open source FitNesse testing tool to create a simple test API.
Join the DZone community and get the full member experience.
Join For FreeIn my last article https://dzone.com/articles/a-quick-glance-at-fitnesse-testing, we had a walkthrough of how FitNesse can benefit testing an application and a high level overview of its Testing Architecture. In this article I will show you how to write and execute FitNesse test.
Prerequisite
- Java 6 or later
Eclipse (or any IDE) - nice to have
Create Calculator API
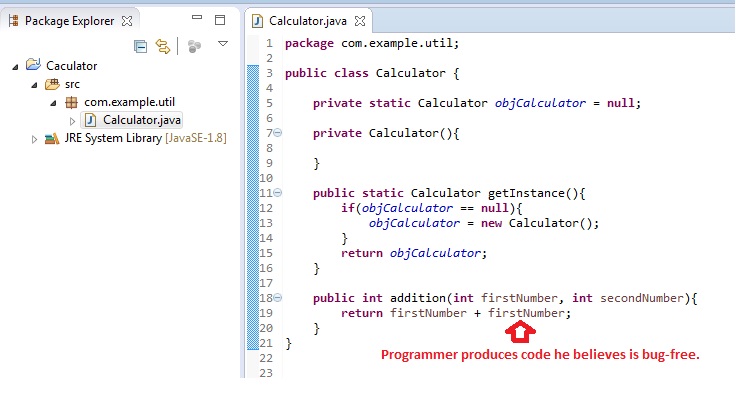
Let's create a simple java project 'Calculator' which will have a singleton class 'Calculator.java' and a method for addition of two numbers.
Install FitNesse
There is no special procedure for FitNesse installation. You just need to download the latest FitNesse .jar and execute it.
Download fitnesse-standalone.jar
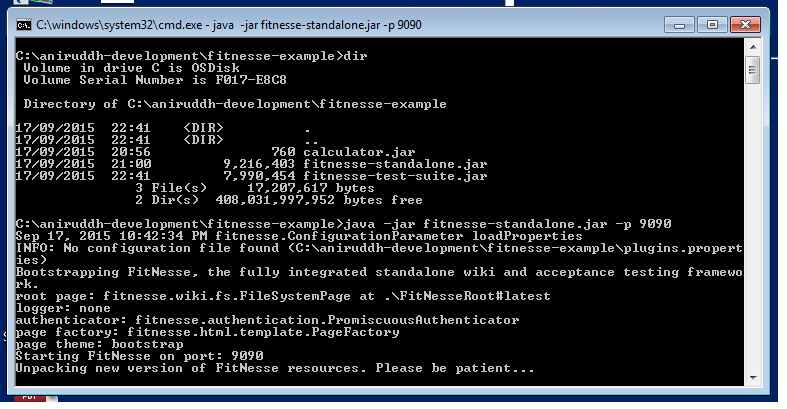
Execute jar using "java -jar fitnesse-standalone.jar -p 9090"
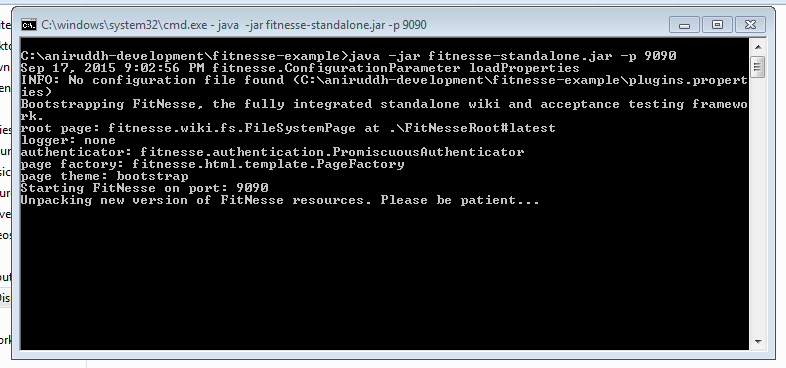
By default FitNesse runs on port 8080. You can use any other port by providing argument -p <port_number> to java command line.
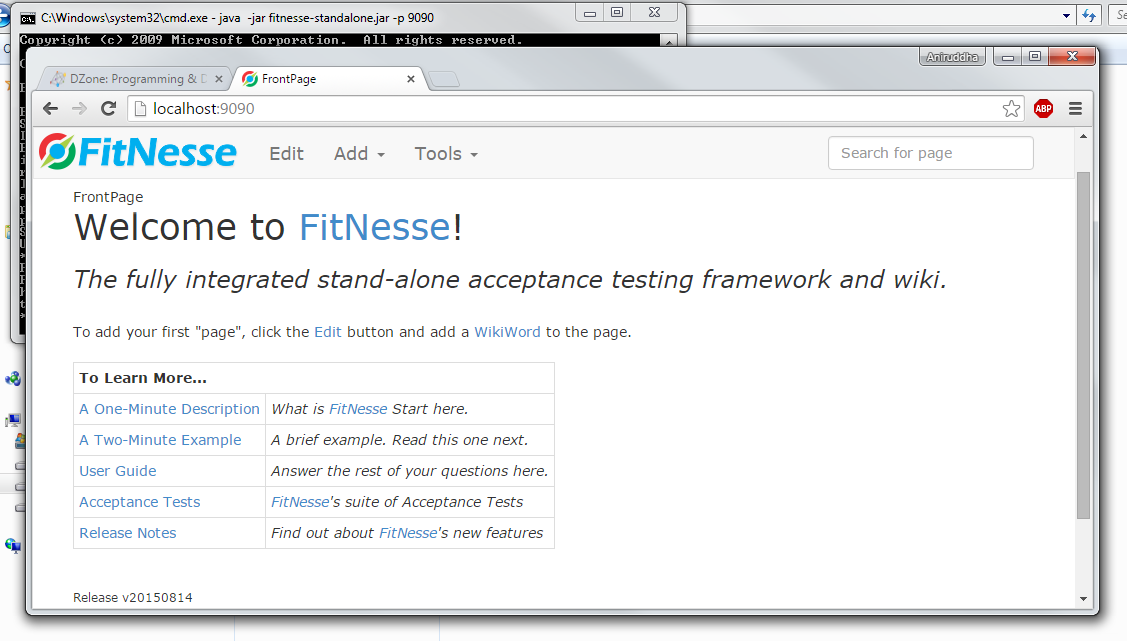
Verify FitNesse Web Server by opening url - http://localhost:9090
Create FitNesse Test
It's time to decide test cases.

In FitNesse, tests are expressed as tables of input data and expected output data. A fixture acts as a mediator between Test Engine and System Under Test. Fixture accepts input data from test table and invoke necessary method of system under test, also it returns result back to test engine which generate test result based on expected output and actual result.
So, flow of a test case will be:

Generally, writing test case in FitNesse starts with defining table in Wiki, however in this example we will write fixture first. Fixture is a POJO class with additional method(s) for making call to system under test. You can save fixtures in same 'Calculator' project or create a new project for test purpose. In order to integrate with build process and continuous integration tool, it's better to save fixtures in same project of system under test however in this article we'll create a new project 'FitNesseTestSuit'.
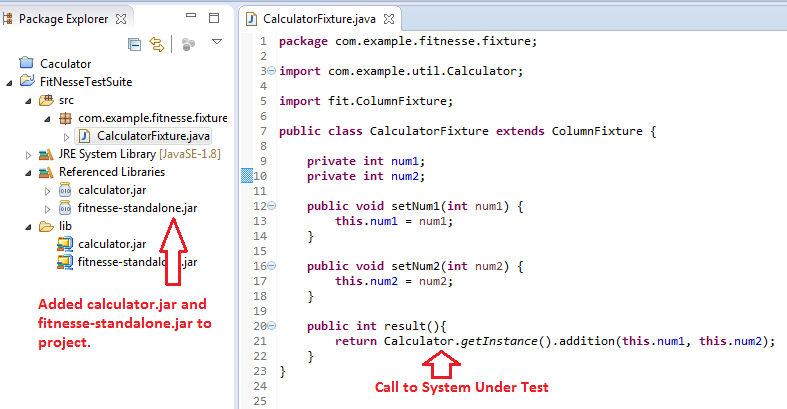
Now, copy the FitNesse .jar, test suit .jar, and calculator .jar in a directory ('FITNESSE_ROOT') and start a FitNesse server.
Create a FitNesse Test Suite Page by adding new a test to the Wiki:
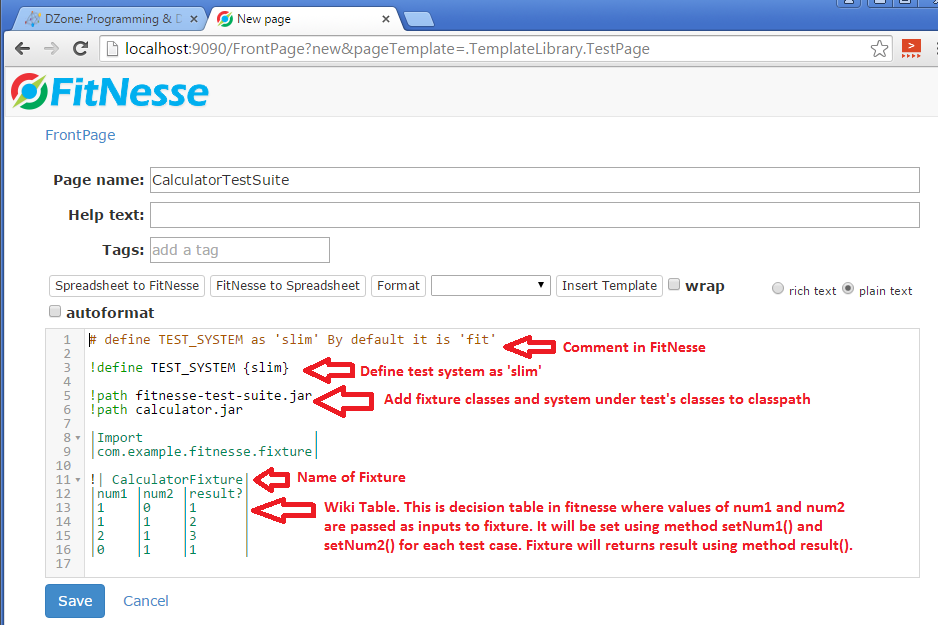
If you notice, on startup FitNesse server created a new directory 'FitNesseRoot', which contains the source of all Wiki pages. You can save the Wiki test cases as a part of the 'FitNesseTestSuite' source as well and reuse the same cases as FitNesseRoot.

CalculatorTestSuite page is under FrontPage and can be accessed as below:

Run Test
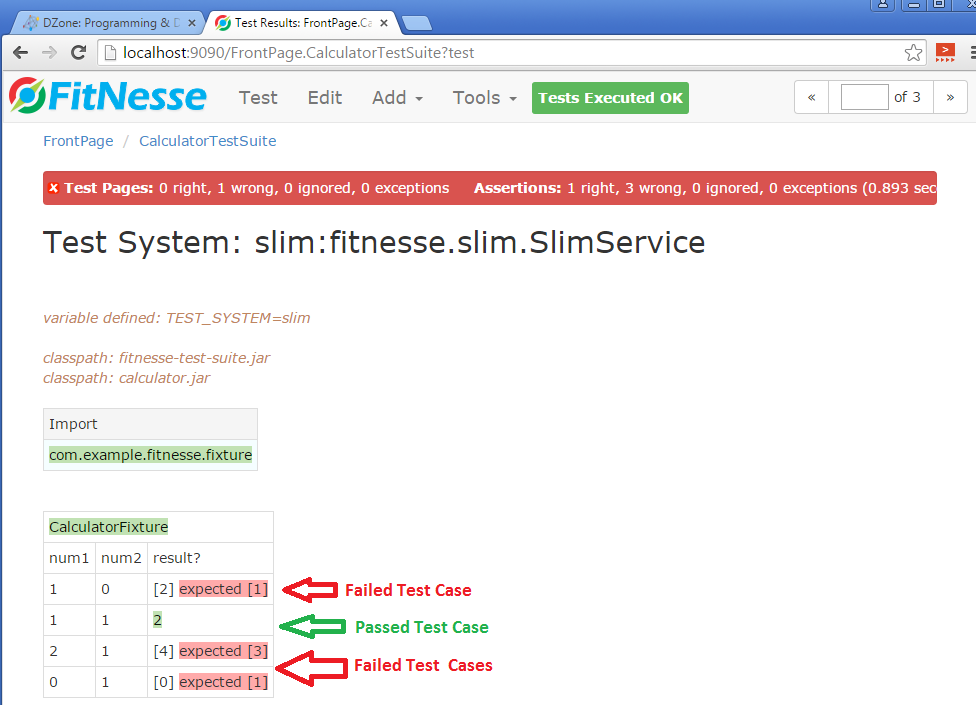
You can run the test suite by executing Test Menu on page. You will get result of test execution as below:
Conclusion
FitNesse provides an Open Source testing framework which is flexible enough to support most testing needs. It is simple to install and integrate with your applications. In this article, we've seen examples of Decision Table, however you can use Query Table, Script Table etc. based on the need of your test case. In the next article we will integrate FitNesse with Continuous Integration Tool e.g. Jenkins.
Opinions expressed by DZone contributors are their own.

Comments