Develop a Full-Stack Java Application With Kafka and Spring Boot
This tutorial shows how to publish and subscribe to Kafka messages in a Spring Boot application and how to display the messages live in the browser.
Join the DZone community and get the full member experience.
Join For FreeWhat You Will Build
You will build a full-stack reactive web app that sends and receives messages through Kafka. The app uses Spring Boot and Java on the server, Lit and TypeScript on the client, and the Hilla framework for components and communication.

What You Will Need
- 20 minutes
- Java 11 or newer
- Node 16.14 or newer
- An IDE that supports both Java and TypeScript, such as VS Code.
Technology Overview
Kafka
Apache Kafka is a distributed event streaming platform. You can think of it as a publish/subscribe system on steroids. Kafka producers can send messages to a topic, and consumers can then read those messages. However, unlike most pub/sub systems, the messages do not get removed from the topic when you read them. This allows you to perform stream processing to analyze, aggregate, or transform data from different events in real-time.
If you want to learn the fundamentals of Kafka, I highly recommend watching this video by Tim Berglund:
Spring Boot and Spring Kafka
Spring Boot is an opinionated way of using Spring. It reduces the amount of configuration code to a bare minimum by relying on conventions over configuration. In addition, Spring Kafka adds support for configuring Kafka Producers and Consumers and listening for incoming messages by annotation methods.
Hilla
Hilla is a front-end framework built for Java. It combines a Spring Boot backend with a reactive TypeScript frontend built in Lit. Hilla automatically generates TypeScript types based on your server endpoint signatures, which helps keep your front end and back end in sync as you develop your application.
Download and Run Kafka
This tutorial uses a local Kafka broker. Follow the steps below to download and start Kafka on your computer:
- Go to the Kafka download page and download Kafka.
- Extract the downloaded archive
tar -xzf kafka<,version>.tgz - Open the directory
cd kafka_<version> - Start Zookeeper to manage the local Kafka cluster
bin/zookeeper-server-start.sh config/zookeeper.properties - Open a second terminal and run
bin/kafka-server-start.sh config/server.propertiesto start the Kafka broker. - You now have Kafka running and are ready to start building your application.
Create a New Project
Begin by creating a new Hilla project. This will give you a Spring Boot project configured with a TypeScript-Lit front end.
- Use the Vaadin CLI to initialize the project:
npx @vaadin/cli init --hilla --empty hilla-kafka - Open the project in your IDE of choice.
- Start the application using the included Maven wrapper. The command will download Maven and npm dependencies and start the development server. Note: the initial launch can take several minutes. However, subsequent starts are almost instantaneous.
./mvnw
Add Kafka Spring Dependencies
Add Kafka support to the application by including the following dependencies to the pom.xml file's <dependencies>:
<dependency>
    <groupId>org.springframework.kafka</groupId>
    <artifactId>spring-kafka</artifactId>
</dependency>

<dependency>
    <groupId>com.fasterxml.jackson.datatype</groupId>
    <artifactId>jackson-datatype-jsr310</artifactId>
</dependency>
The parent Spring Boot BOM covers the dependencies, so you don't need to add the version number explicitly.
Define a Data Model
Begin by creating a new Java package: com.example.application.model.
In this newly created package, create a new Java class, Message.java, to represent the message you will send over Kafka. Then, add the following content to the class:
package com.example.application.model;


import java.time.Instant;
import dev.hilla.Nonnull;

public class Message {

    private @Nonnull String text;
    private Instant time;
    private @Nonnull String userName;

    public String getText() {
        return text;
    }

    public void setText(String text) {
        this.text = text;
    }

    public Instant getTime() {
        return time;
    }

    public void setTime(Instant time) {
        this.time = time;
    }

    public String getUserName() {
        return userName;
    }

    public void setUserName(String userName) {
        this.userName = userName;
    }

}
The Hilla framework uses the @Nonnull annotations to guide TypeScript type generation: they do not have an impact on Java behavior.
Sending Custom Objects With Kafka
In this tutorial, you will send a Java object as a message instead of employing a primitive method like a string or number. To do this, you need to create a custom serializer and deserializer.
In the same package, create the following two new classes, MessageSerializer.java and MessageDeserializer.java with the following content:
package com.example.application.model;

import org.apache.kafka.common.errors.SerializationException;
import org.apache.kafka.common.serialization.Serializer;
import com.fasterxml.jackson.core.JsonProcessingException;
import com.fasterxml.jackson.databind.ObjectMapper;
import com.fasterxml.jackson.databind.json.JsonMapper;

public class MessageSerializer implements Serializer<Message> {

    public static final ObjectMapper mapper = JsonMapper.builder()
            .findAndAddModules()
            .build();

    @Override
    public byte[] serialize(String topic, Message message) {
        try {
            return mapper.writeValueAsBytes(message);
        } catch (JsonProcessingException e) {
            throw new SerializationException(e);
        }
    }
}
package com.example.application.model;
import java.io.IOException;
import org.apache.kafka.common.errors.SerializationException;
import org.apache.kafka.common.serialization.Deserializer;
import com.fasterxml.jackson.databind.ObjectMapper;
import com.fasterxml.jackson.databind.json.JsonMapper;
public class MessageDeSerializer implements Deserializer<Message> {
public static final ObjectMapper mapper = JsonMapper.builder()
.findAndAddModules()
.build();
@Override
public Message deserialize(String topic, byte[] data) {
try {
return mapper.readValue(data, Message.class);
} catch (IOException e) {
throw new SerializationException(e);
}
}
}The serializer and deserializer use Jackson to convert the object to and from JSON. The findAndAddModules() builder method allows Jackson to support JSR310 data types through the dependency you added.
Configure Kafka
Next, configure Kafka by adding the following to the src/main/resources/application.properties file:
# A custom property to hold the name of our Kafka topic:
topic.name=chat

# Set up Kafka:
spring.kafka.bootstrap-servers=localhost:9092

# Configure the consumer:
spring.kafka.consumer.client-id=chat-consumer
spring.kafka.consumer.group-id=chat-group
spring.kafka.consumer.key-deserializer=org.apache.kafka.common.serialization.StringDeserializer
spring.kafka.consumer.value-deserializer=com.example.application.model.MessageDeSerializer

# Configure the producer:
spring.kafka.producer.client-id=chat-producer
spring.kafka.producer.key-serializer=org.apache.kafka.common.serialization.StringSerializer
spring.kafka.producer.value-serializer=com.example.application.model.MessageSerializer
Update Application.java to configure the topic programmatically.
package com.example.application;

import org.apache.kafka.clients.admin.NewTopic;
import org.springframework.beans.factory.annotation.Value;
import org.springframework.boot.SpringApplication;
import org.springframework.boot.autoconfigure.SpringBootApplication;
import org.springframework.context.annotation.Bean;
import org.springframework.context.annotation.Configuration;
import org.springframework.kafka.config.TopicBuilder;
import com.vaadin.flow.component.page.AppShellConfigurator;
import com.vaadin.flow.server.PWA;
import com.vaadin.flow.theme.Theme;

/**
 * The entry point of the Spring Boot application.
 *
 * Use the @PWA annotation to make the application installable on phones, tablets, and some desktop
 * browsers.
 *
 */

@SpringBootApplication
@Theme(value = "hilla-kafka")\
@PWA(name = "hilla-kafka", shortName = "hilla-kafka", offlineResources = {})
@Configuration

public class Application implements AppShellConfigurator {

    @Value("${topic.name}")
    private String topicName;

    public static void main(String[] args) {
        SpringApplication.run(Application.class, args);
    }

    @Bean
    NewTopic chatTopic() {

        return TopicBuilder
                .name(topicName)
                .partitions(1)
                .replicas(1)
                .build();
    }
}
Here are the essential parts explained:
- Inject the topic name through Spring.
- Use the TopicBuilder bean configuration to define and configure a new topic. In this example app, you are only setting up one partition and one replica. In an actual application, you will want to set up more partitions and replicas to ensure the cluster performs well and reliably.
Create a Server Endpoint
You are now ready to start using Kafka. Next, create the server endpoint that will communicate with the Kafka broker and the client web application.
Create a new Java file, MessageEndpoint.java, in the com.example.application package and add the following code to it:
package com.example.application;

import java.time.Instant;
import org.springframework.beans.factory.annotation.Value;
import org.springframework.kafka.annotation.KafkaListener;
import org.springframework.kafka.core.KafkaTemplate;
import com.example.application.model.Message;
import com.vaadin.flow.server.auth.AnonymousAllowed;
import dev.hilla.Endpoint;
import reactor.core.publisher.Flux;
import reactor.core.publisher.Sinks;
import reactor.core.publisher.Sinks.EmitResult;
import reactor.core.publisher.Sinks.Many;

@Endpoint
@AnonymousAllowed
public class MessageEndpoint {

    @Value("${topic.name}")
    private String topicName;

    private final Many<Message> chatSink;
    private final Flux<Message> chat;

    private final KafkaTemplate<String, Message> kafkaTemplate;

    MessageEndpoint(KafkaTemplate<String, Message> kafkaTemplate) {
        this.kafkaTemplate = kafkaTemplate;
        chatSink = Sinks.many().multicast().directBestEffort();
        chat = chatSink.asFlux();
    }

    public Flux<Message> join() {
        return chat;
    }

    public void send(Message message) {
        message.setTime(Instant.now());
        kafkaTemplate.send(topicName, message);
    }

    @KafkaListener(topics = "chat", groupId = "chat-group")
    private void consumer(Message message) {
        chatSink.emitNext(message,
                (signalType, emitResult) -> emitResult == EmitResult.FAIL_NON_SERIALIZED);
    }
}
Here are the essential parts explained:
- The @Endpoint annotation tells Hilla to make all public methods available as TypeScript methods for the client. @AnonymousAllowed turns off authentication for this endpoint.
- The chatSink is a programmatic way to pass data to the system. It emits messages so that any client that has subscribed to the associated chat Flux will receive them.
- The constructor gets a KafkaTemplate injected by Spring and saves it to a field.
- The join()-method returns the chat Flux, which you will subscribe to on the client.
- The send()-method takes in a message, stamps it with the send time, and sends it using the kafkaTemplate.
- The consumer()-method has a @KafkaListener annotation which tells Spring Kafka to run this method on incoming messages. The method emits the received message to the chatSink, which will notify all clients that are subscribed to the chat Flux.
Enable Reactive Endpoints
The current version of Hilla, as of writing this tutorial (1.2,) supports Flux endpoint methods through a feature flag. Enable the feature by creating a new file, src/main/resources/vaadin-featureflags.properties, with the following content:
# Push support in Hilla
com.vaadin.experimental.hillaPush=true
Create a View for Sending and Receiving Messages
Now that you have configured Kafka and set up the server to send and receive messages, the final step is creating a web view that you can use to send and receive messages.
Hilla includes the Vaadin component set, which has over 40 components. You can use the <vaadin-message-list> and <vaadin-message-input> components to build out the main chat UI. You can also use the <vaadin-text-field> component to capture the current user's name.
Hilla uses Lit to create views. Lit is conceptually similar to React: components consist of a state and a template. The template gets re-rendered any time the state changes.
Begin by renaming the generated placeholder view. Rename frontend/views/empty/empty-view.ts folder and file to frontend/views/messages/messages-view.ts. Replace the contents of the file with the following code:
import { View } from "Frontend/views/view";
import { customElement, state } from "lit/decorators.js";
import { html } from "lit";
import "@vaadin/message-list";
import "@vaadin/message-input";
import "@vaadin/text-field";
import { TextFieldChangeEvent } from "@vaadin/text-field";
import { MessageEndpoint } from "Frontend/generated/endpoints";
import Message from "Frontend/generated/com/example/application/model/Message";

@customElement("messages-view")
export class MessagesView extends View {
  @state() messages: Message[] = [];
  @state() userName = "";

  render() {
    return html`
      <h1 class="m-m">Kafka message center</h1>
      <vaadin-message-list
        class="flex-grow"
        .items=${this.messages}
      ></vaadin-message-list>
      <div class="flex p-s gap-s items-baseline">
        <vaadin-text-field
          placeholder="Your name"
          @change=${this.userNameChange}
        ></vaadin-text-field>
        <vaadin-message-input
          class="flex-grow"
          @submit=${this.submit}
        ></vaadin-message-input>
      </div>
    `;
  }

  userNameChange(e: TextFieldChangeEvent) {
    this.userName = e.target.value;
  }

  async submit(e: CustomEvent) {
    MessageEndpoint.send({
      text: e.detail.value,
      userName: this.userName,
    });
  }

  connectedCallback() {
    super.connectedCallback();

    this.classList.add("flex", "flex-col", "h-full", "box-border");

    MessageEndpoint.join().onNext(
      (message) => (this.messages = [...this.messages, message])
    );
  }
}
Here are the essential parts explained:
- Lit tracks the @state() decorated properties, and any time they change, the template gets re-rendered.
- The Message data type is generated by Hilla based on the Java object you created on the server.
- The list of messages is bound to the message list component with .items=${this.messages}. The period in front of items tells Lit to pass the array as a property instead of an attribute.
- The text field calls the userNameChange-method whenever the value gets changed with @change=${this.userNameChange} (the @ denotes an event listener).
- The message input component calls MessageEndpoint.send() when submitted. Note that you are calling a TypeScript method. Hilla takes care of calling the underlying Java method on the server.
- Finally, call MessageEndpoint.join() in connectedCallback to start receiving incoming chat messages.
- In addition to the Vaadin components, you are also using Hilla CSS utility classes for basic layouting (flex, flex-grow, flex-col).
Finally, update the routing to match the new name of the view. Replace the contents of routes.ts with the following:
import { Route } from "@vaadin/router";
import "./views/messages/messages-view";

export const routes: Route[] = [{ path: "", component: "messages-view" }];
Run the Completed Application
If your application is still running, re-start it. Once the server starts, you can access the application at http://localhost:8080. Try opening the app in multiple browsers to see the messages displayed in real time across them all.
./mvnw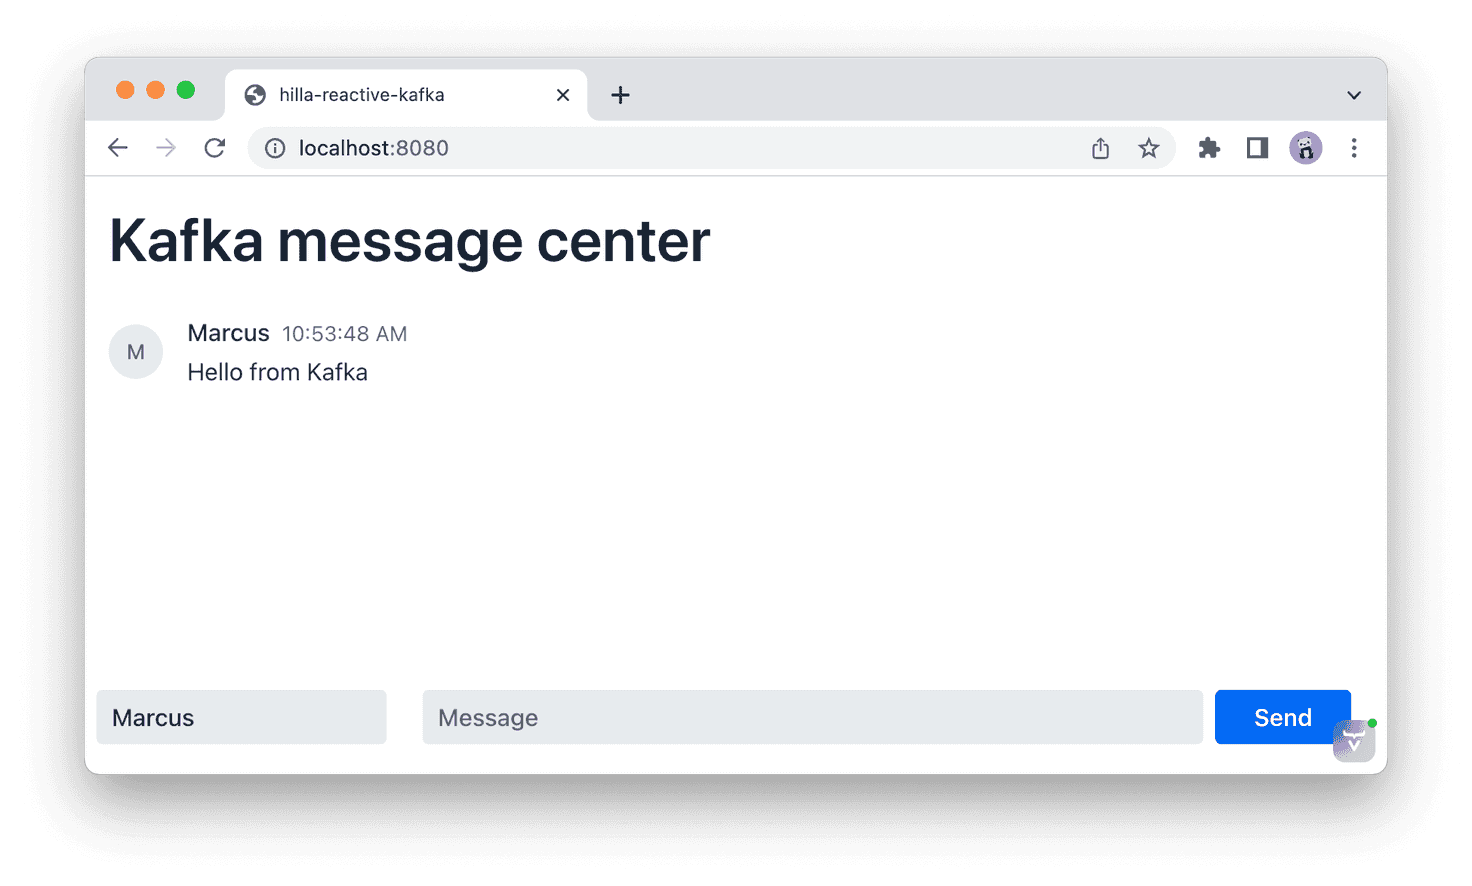
Published at DZone with permission of Marcus Hellberg. See the original article here.
Opinions expressed by DZone contributors are their own.
Comments