Google Authentication for Your AWS Management Console With OAuth 2.0
Learn how to deploy an alternative sign-in mechanism for AWS management console that's using Google accounts for authentication.
Join the DZone community and get the full member experience.
Join For FreeWe're going to deploy an alternative sign-in mechanism for AWS management console that's using Google accounts for authentication. Fine-grained authorization is still managed on the AWS side using IAM, but user identification is delegated to Google's identity service.
How Can This Be Useful?
Although there are many pros and cons to this approach, some of the possible benefits are:
- A better understanding of federated authentication mechanism.
- Simplifying credential management for teams who already have Google accounts.
- Customizing authentication mechanisms at very low maintenance costs.
- Serving as a good alternative to deploying and configuring our own IDP service (e.g. with Shibboleth).
Authentication Flow
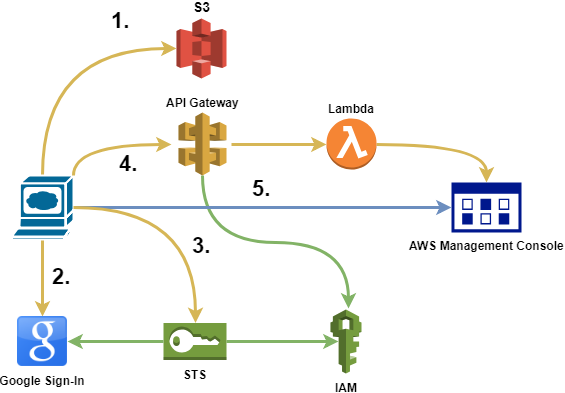
- Users are downloading the HTML page from S3 that's going to control the authentication mechanism.
- User's browser is authenticating with Google.
- An authentication token is then passed to STS.
- STS verifies the token with Google.
- Also, STS checks if the submitted IAM role has the necessary privileges.
- Lambda is called through the API Gateway which is going to generate a temporary sign-in token for the AWS management console.
- The API Gateway will verify if the caller has the necessary credentials to use the Lambda function.
- The user is redirected to the management console.
Implementation Steps
Create an S3 Bucket for the Static Website
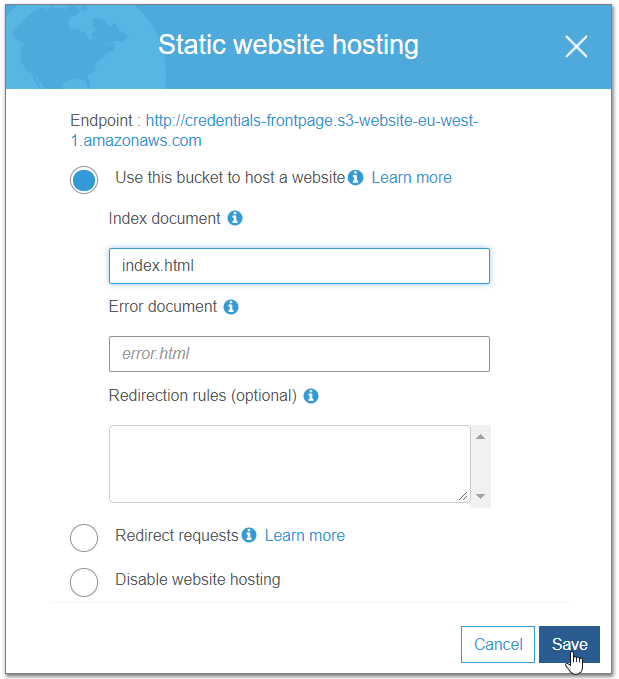
Create a new bucket in your AWS account. Enable static website hosting for that bucket. Set index.html as the "Index document."
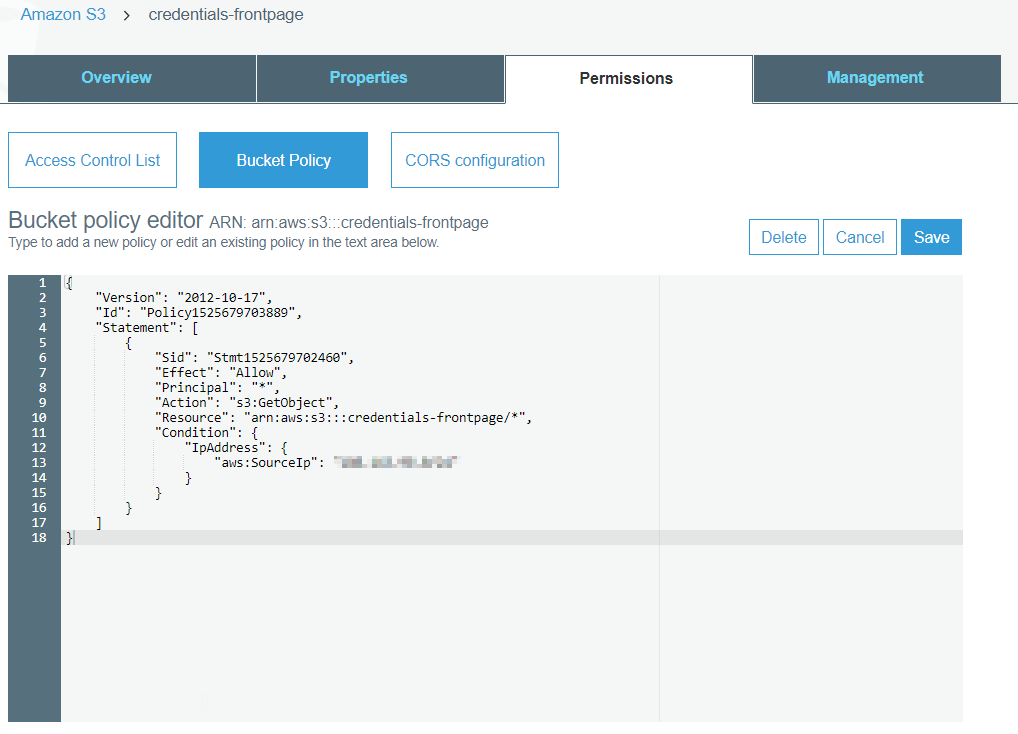
Set permissions for the new bucket. Go to "Permissions" -> "Bucket Policy" and enable s3:GetObject action for all users. You can restrict access to a specific IP range as well.
{
    "Version": "2012-10-17",
    "Id": "Policy1525679703889",
    "Statement": [
        {
            "Sid": "Stmt1525679702460",
            "Effect": "Allow",
            "Principal": "*",
            "Action": "s3:GetObject",
            "Resource": "arn:aws:s3:::credentials-frontpage/*",
            "Condition": {
                "IpAddress": {
                    "aws:SourceIp": "1.2.3.0/24"
                }
            }
        }
    ]
}
Test your configuration by accessing the bucket in the browser. You should get an HTTP 404 response.

Create Google Client ID
Note that registering to Google Cloud is not necessary to create the OAuth client ID.
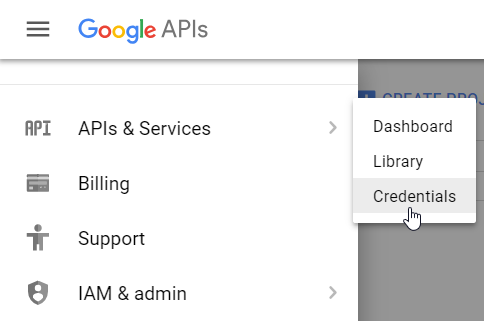
First, go to the Google developer console. Sign-in with your account that you would like to use for API management.
Select "APIs & Services" -> "Credentials" from the menu. If you haven't done so, you also have to create a project.
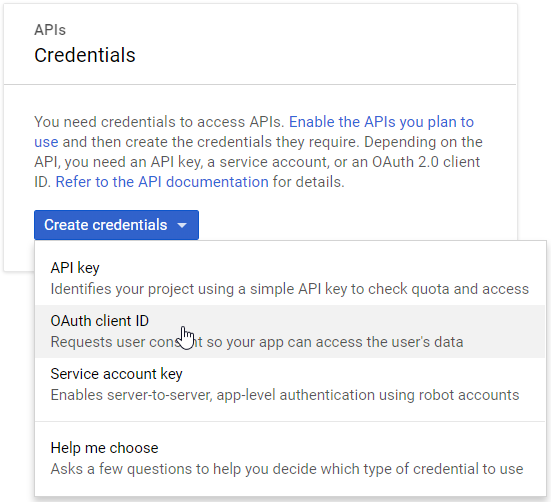
Create "OAuth client ID" as a new credential. You will also have to fill in the "OAuth consent screen" for the first time.
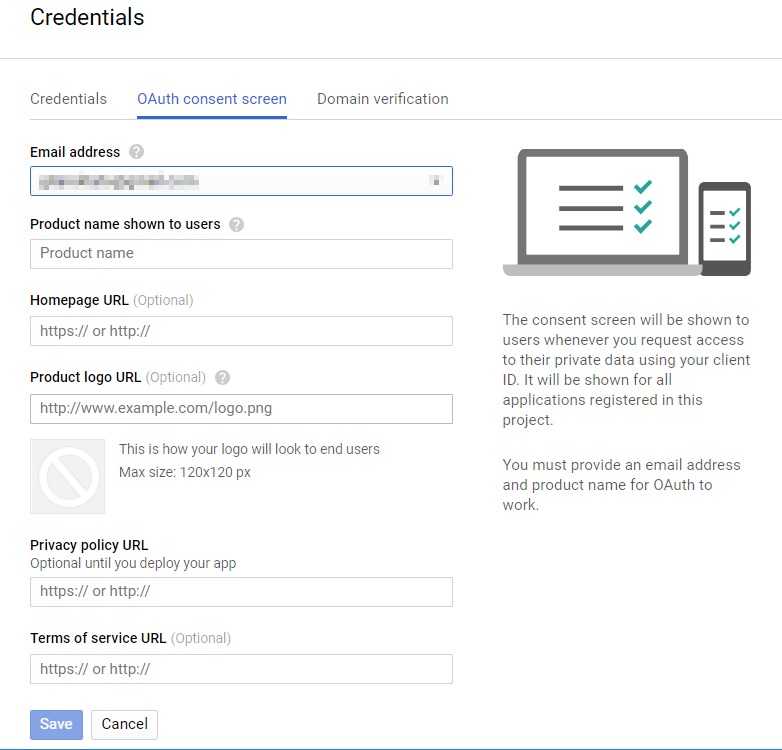
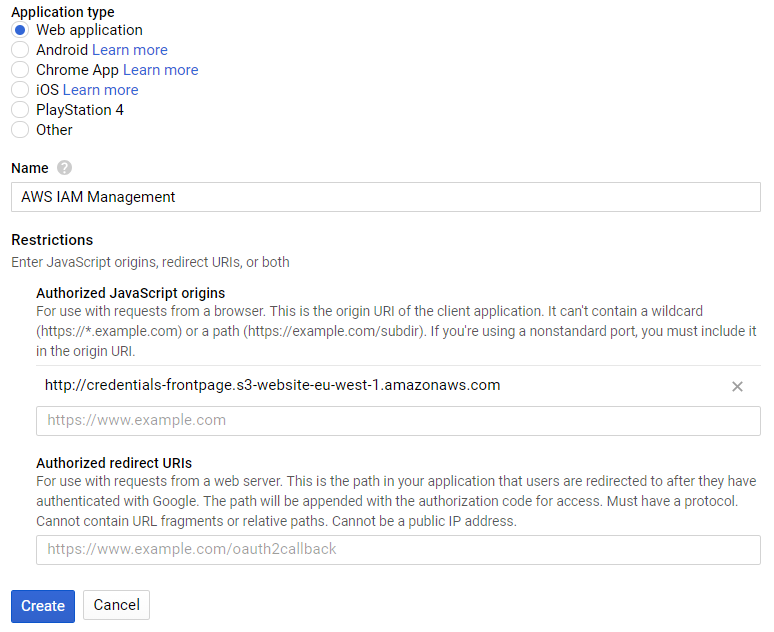
The application type should be "Web Application." Also, you should set the S3 web URL in the "Authorized JavaScript origins" field.
Install Static Website to S3
Next, we should configure the static website and install it to the newly created S3 bucket.
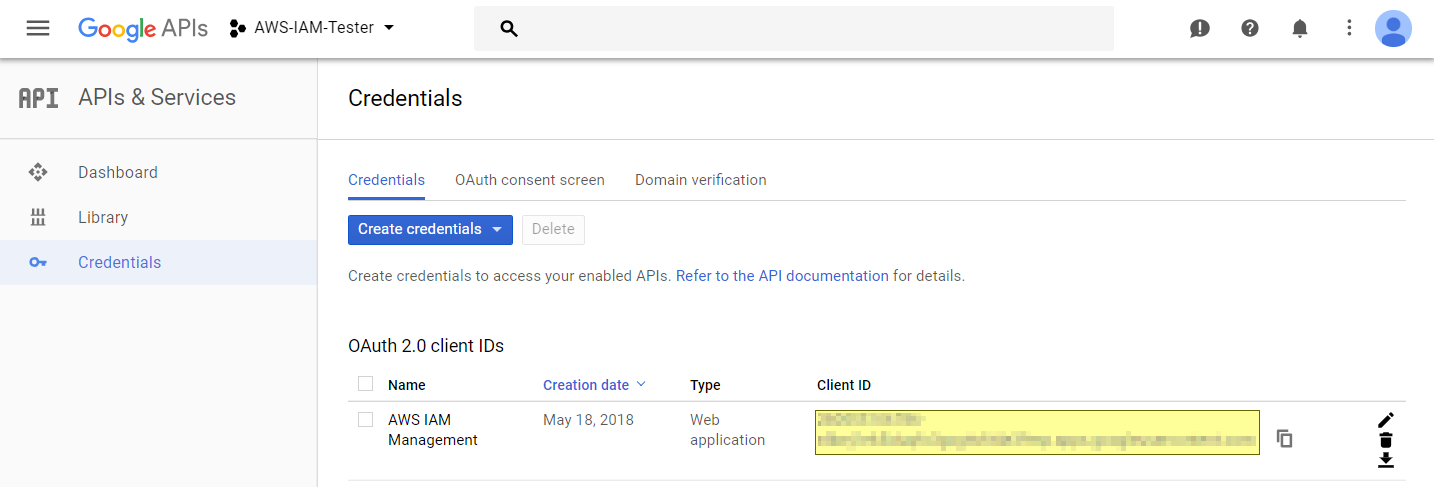
Download the static website from here. Copy the Google Client ID from the newly created credentials and add it to the index.html page.
<head>
    ...
    <!-- GOOGLE CLIENT ID -->
    <meta name="google-signin-client_id" content="YOUR-CLIENT-ID">
    ...
</head>
Upload awsconfig.js, index.html , and authentication.js to the S3 bucket.
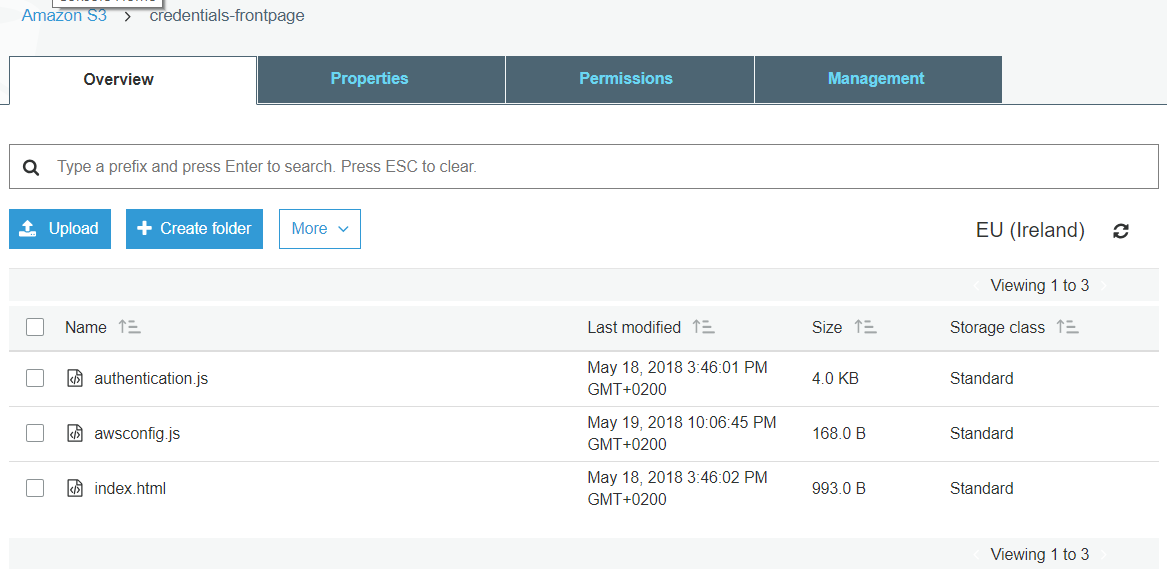
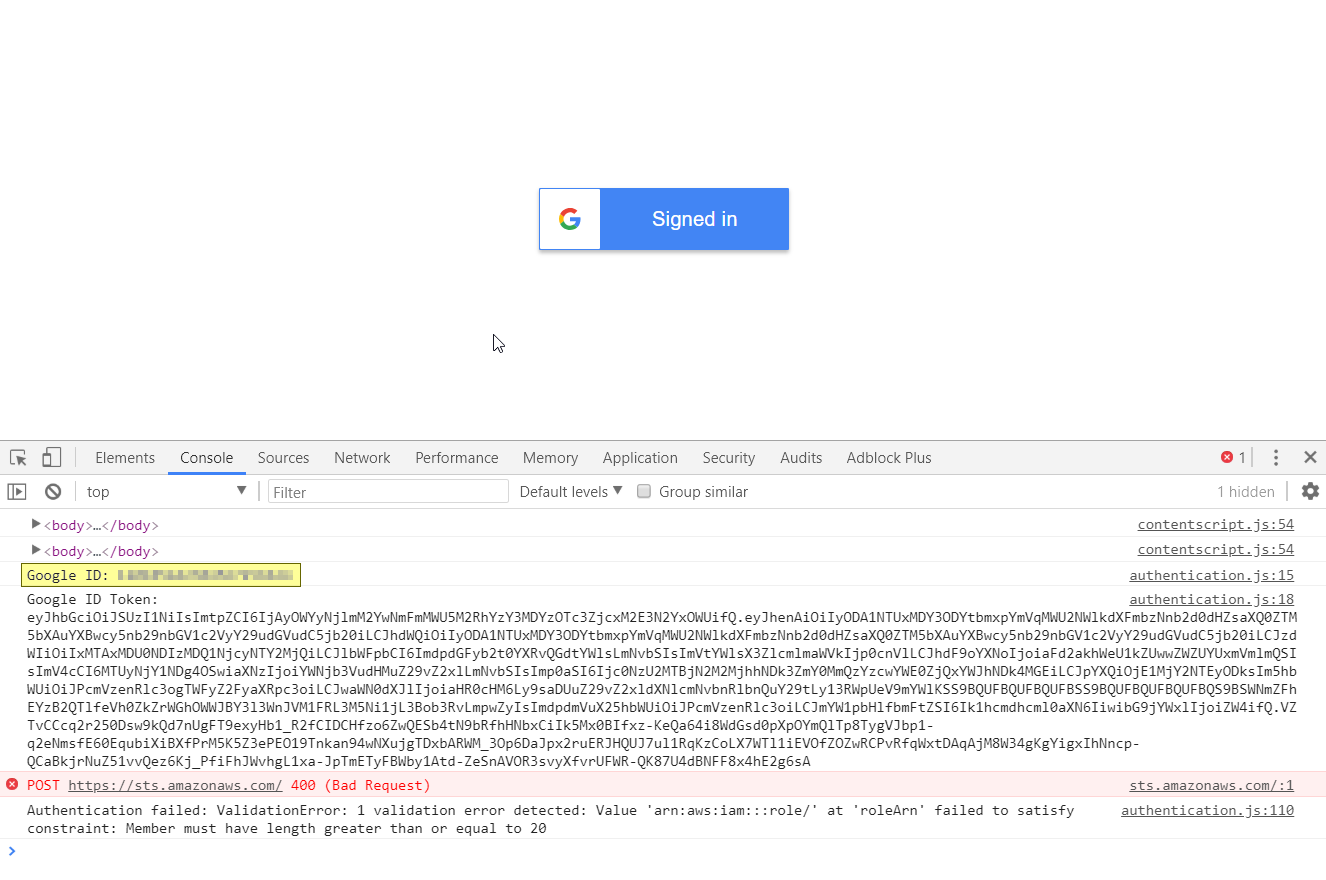
Open the website again in your browser and see if the first authentication step from the authentication flow diagram is completed successfully. Sign in with any Google account. Open the JavaScript console (press F12) and check the response from Google's authentication API. You will need the Google ID returned from the API for the next step.
Add Policies
We need to create the related IAM role in AWS and assign the necessary policies so the STS API can send us temporary access/secret key pairs.
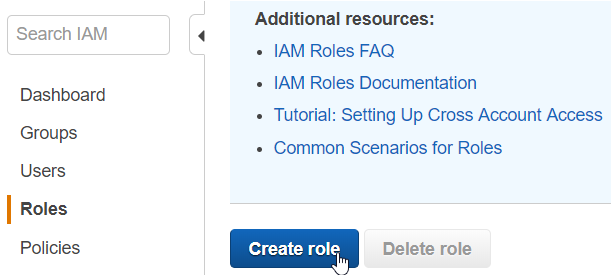 Log into your AWS console and navigate to IAM management. Create a new IAM role by selecting Roles and clicking on the "Create role" button.
Fill in the form by choosing "Web Identity." Copy your Google Client ID to the "Audience" section. Restrict role usage by adding a condition that will check the Google ID of the user who would sign-in. You should paste the Google ID to the "Value" field as it is. Without this condition, anyone with a Google account could sign-in to your AWS management console!
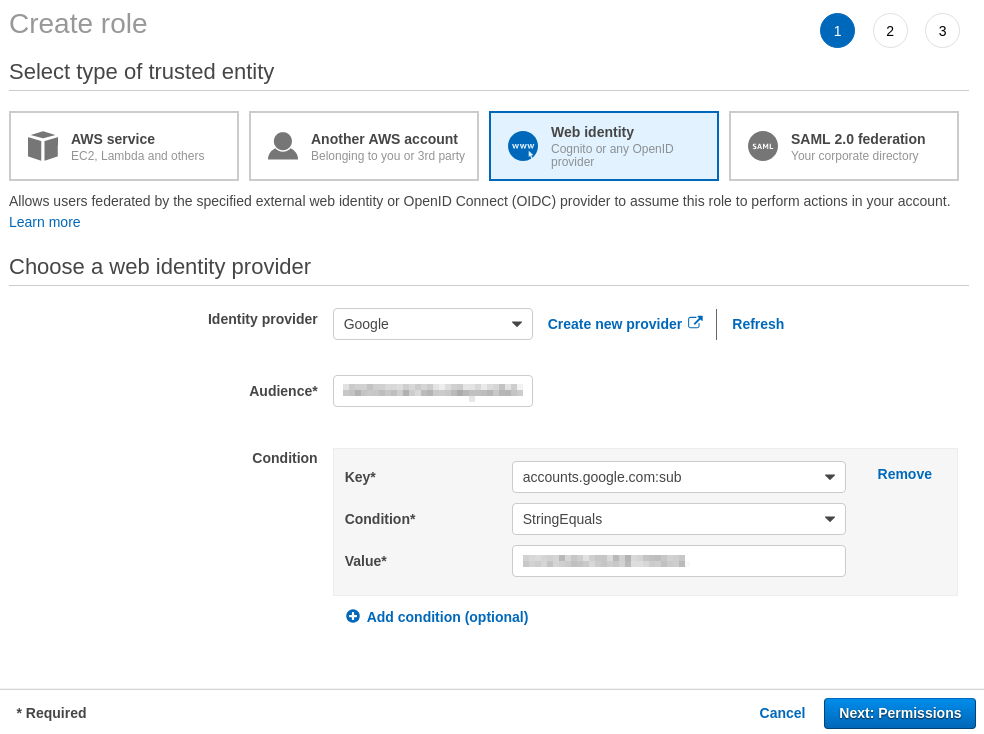
The user's Google ID is printed out in the JavaScript console during authentication when you visit your installed static website in the previous step. You can specify more user by using a JSON array.
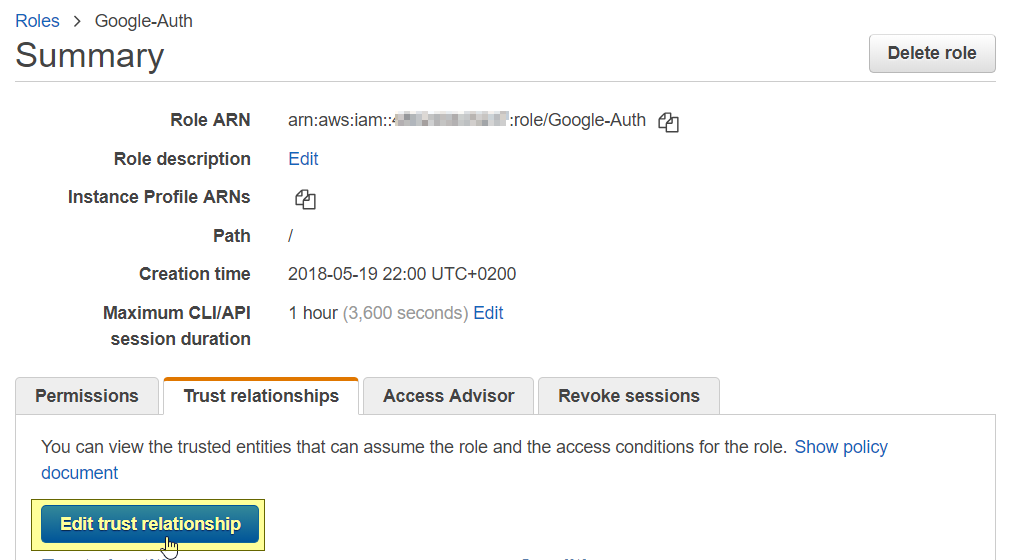
Verify if the generated trust policy is correct, by clicking on "Trust relationships" and then "Edit trust relationship." You should see something similar as the JSON below.
{
  "Version": "2012-10-17",
  "Statement": [
    {
      "Effect": "Allow",
      "Principal": {
        "Federated": "accounts.google.com"
      },
      "Action": "sts:AssumeRoleWithWebIdentity",
      "Condition": {
        "StringEquals": {
          "accounts.google.com:aud": "YOUR_GOOGLE_CLIENT_ID",
          "accounts.google.com:sub": [
                  "GOOGLE_USER_ID",
                  "ANOTHER_GOOGLE_USER_ID"
              ]
        }
      }
    }
  ]
}
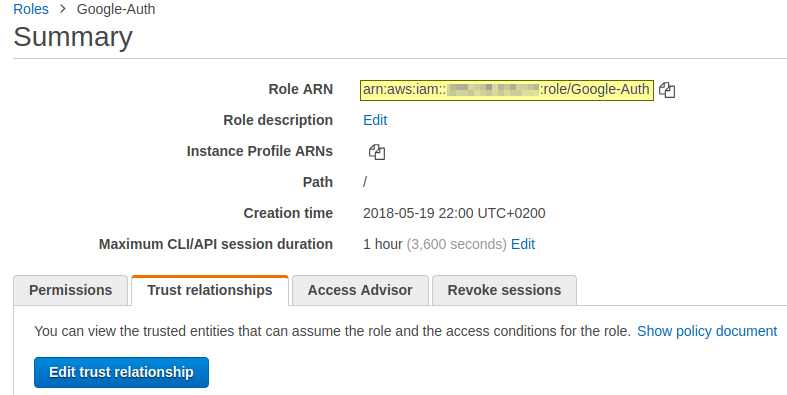
Add policies for the IAM role (you can skip this step for now). You should assign policies based on what users with this role will be able to to do. Update the roleArn property in your awsconfig.js in the static website. You should copy and paste your role ARN to awsconfig.js and then upload the file to your S3 bucket.
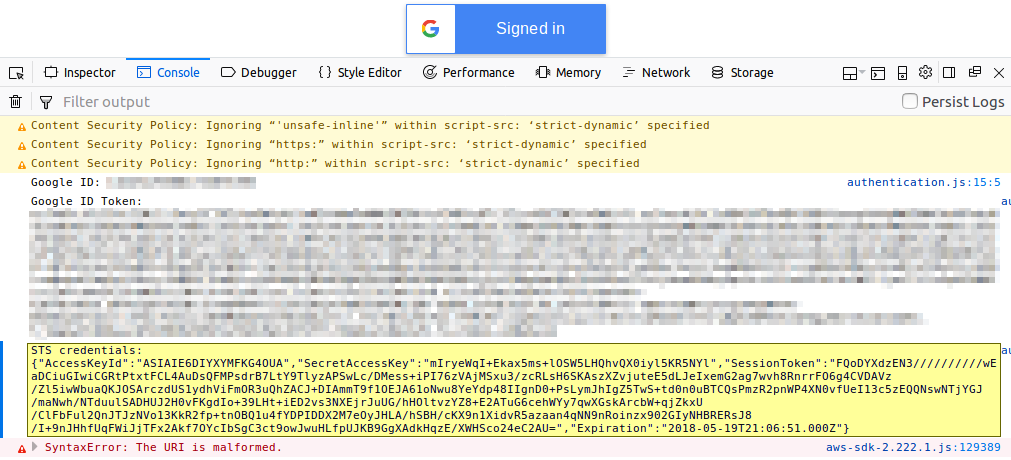
Test the STS token generation. Go back to the static website in the previous step and verify if STS is returning an access and secret key pair.
Install a Lambda Function
In the next step, we will create a Lambda function that's going to generate a sign-in token for accessing the AWS management console.
Go to Lambda in your AWS management console and create a new function. Give it a name and assign a role to it. It doesn't really matter what role you choose. The lambda is going to call a public AWS API.

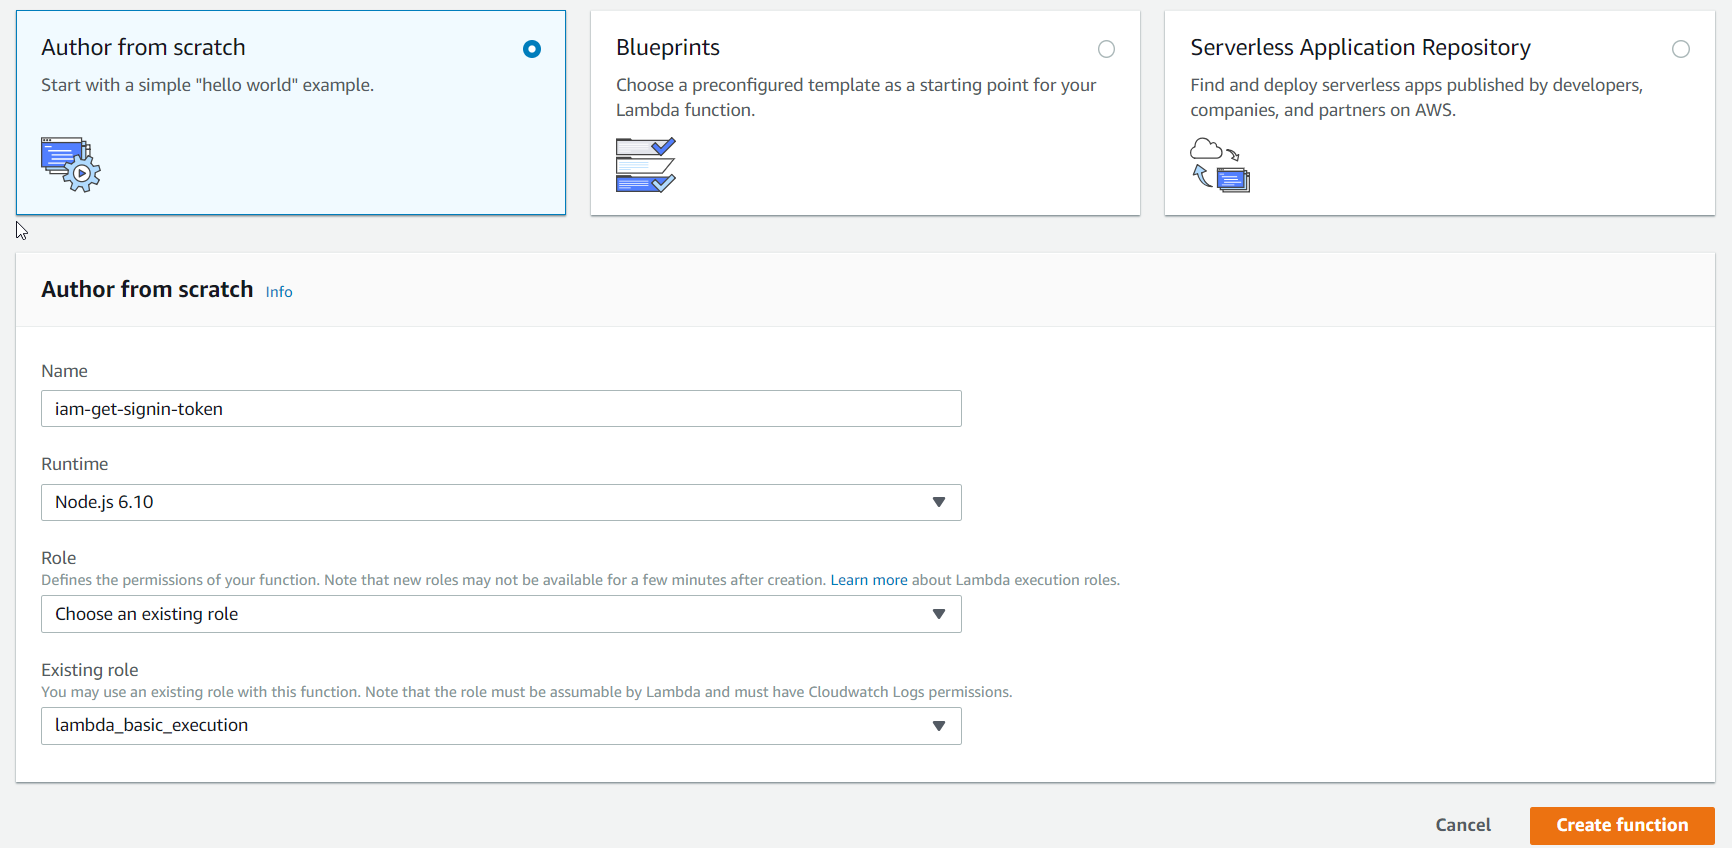
Copy and paste the lambda definition from here and save the function.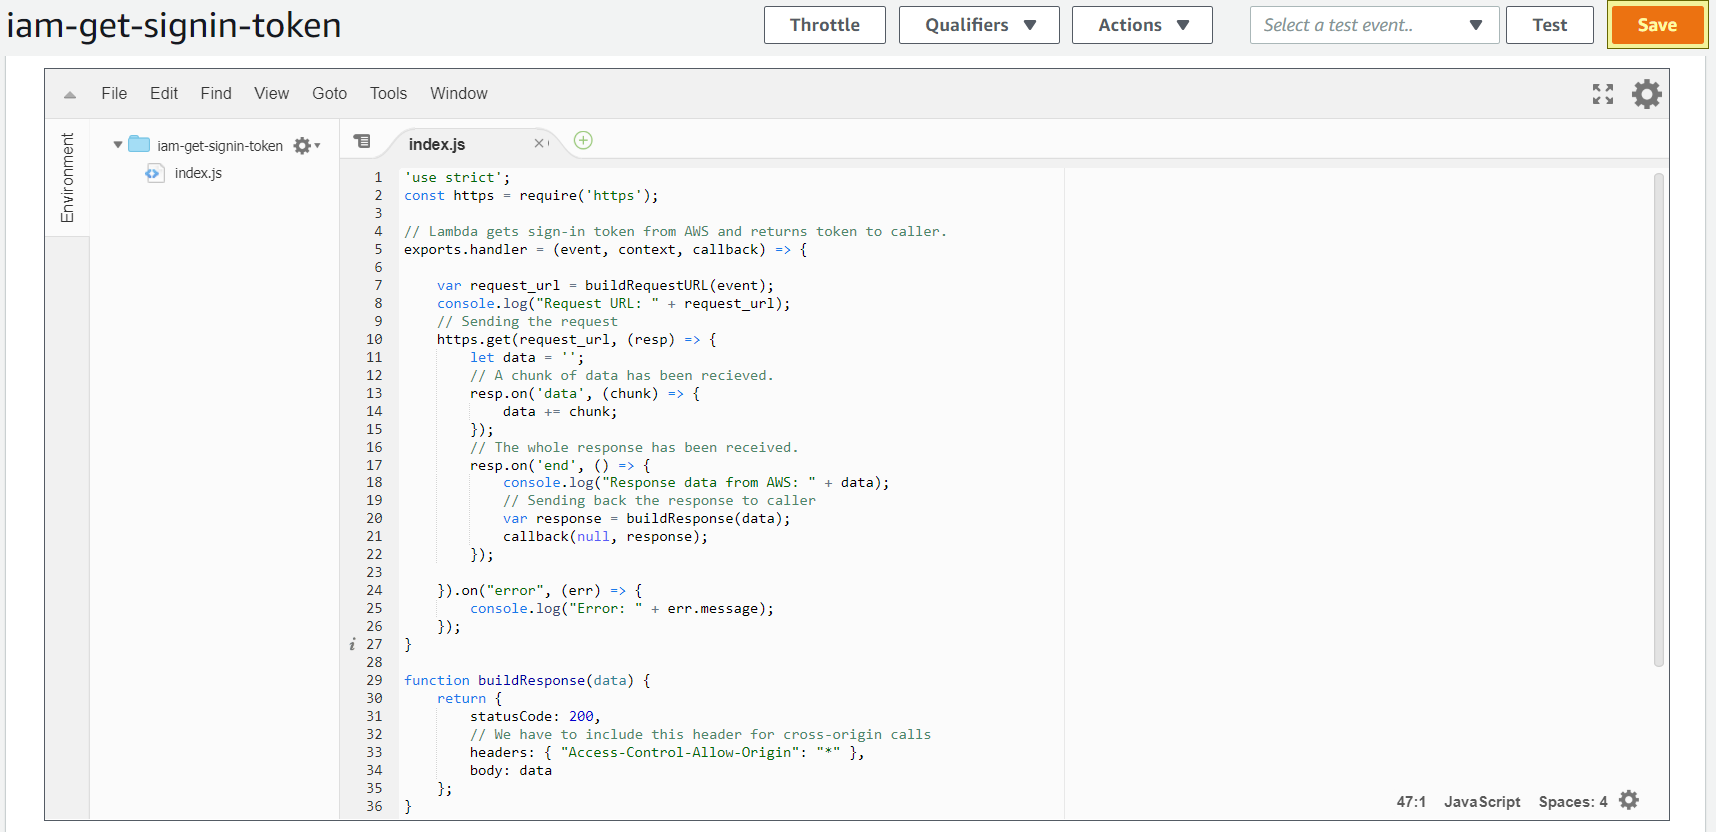
Create an API Gateway
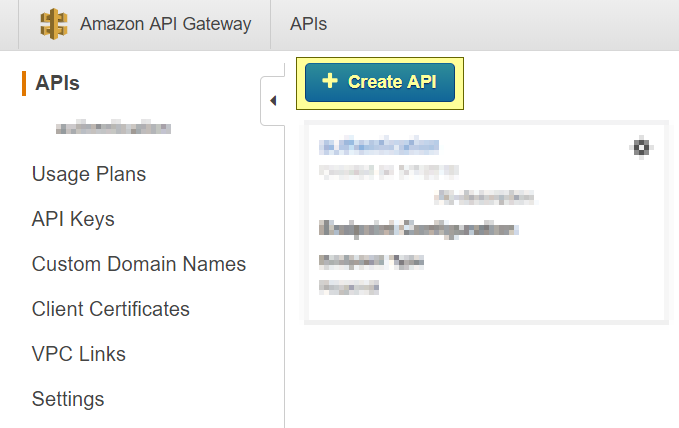
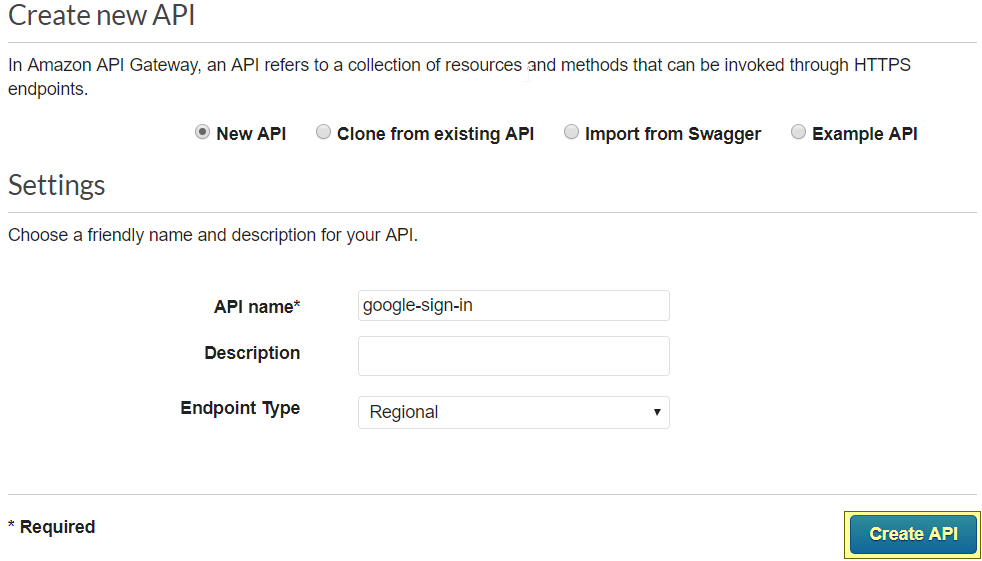
Go to the API Gateway in your AWS management console and click on "Create API." Give your new API a meaningful name.
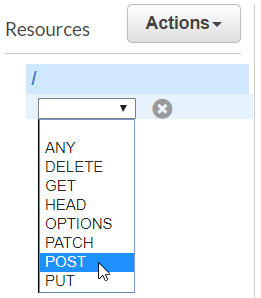
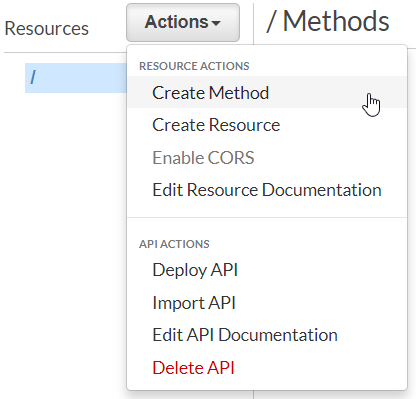 From the "Actions" drop-down select "Create Method."
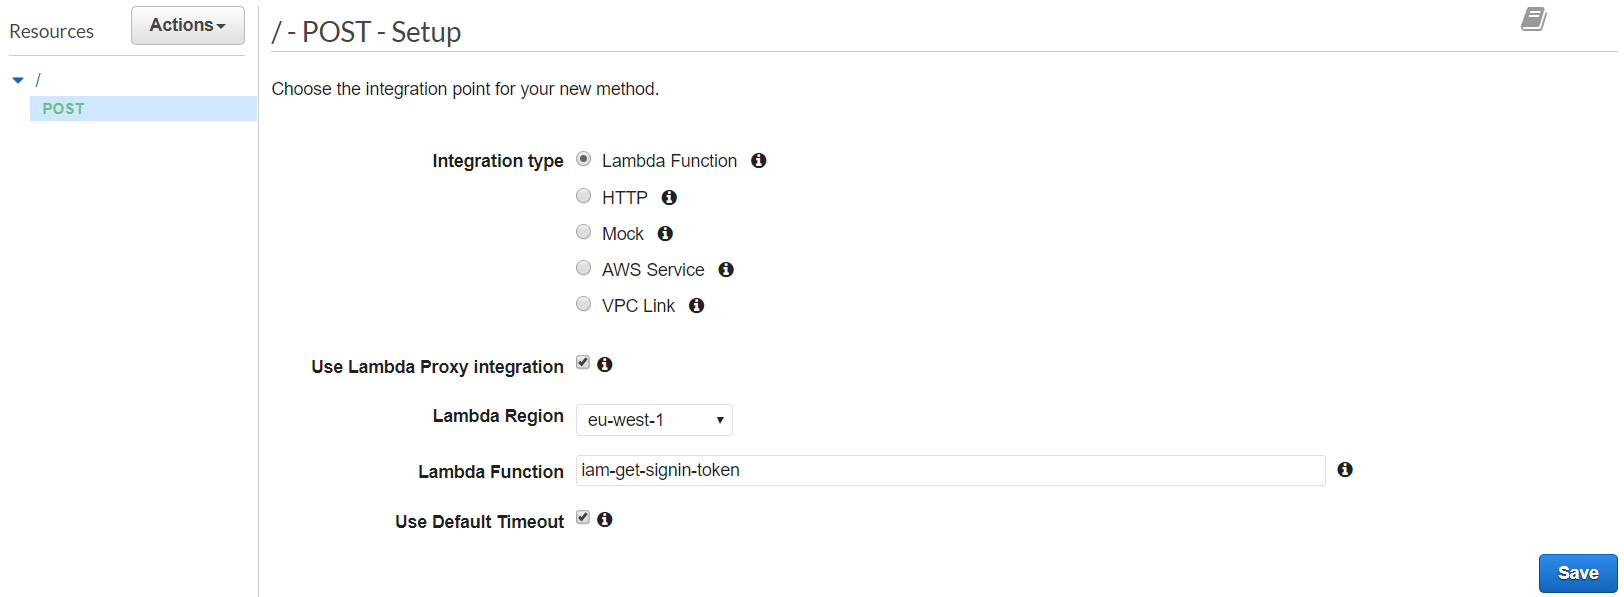
Select POST as the method type.
Select "Lambda Function" as the "Integration type." Check "Use Lambda Proxy Integration." Select your previously created function as the "Lambda Function."
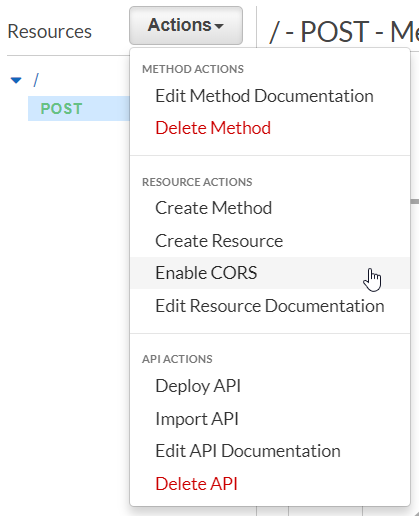 Select "Enable CORS" from the "Actions" menu. Add
 X-Amz-User-Agent to the "Access-Control-Allow-Headers."

Add IAM Authorization to Your API
We will ensure that only Google users associated with our new IAM role can call our newly created API.
Select your POST method and click on "Method Request." Select "AWS_IAM" from the drop-down and select the checkbox to save your changes.
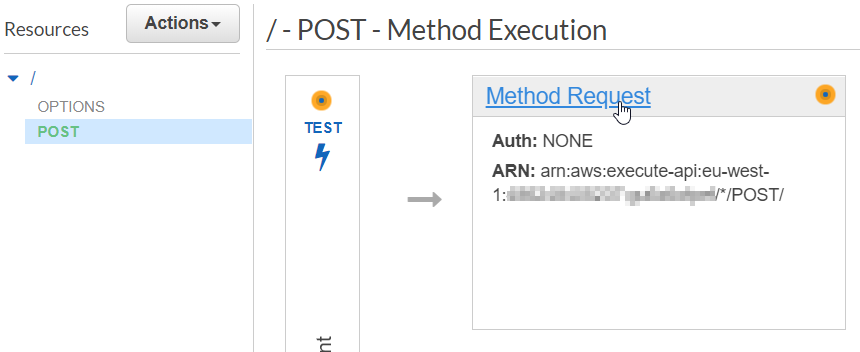
 Copy and save the ARN from both the
POST and OPTIONS methods.
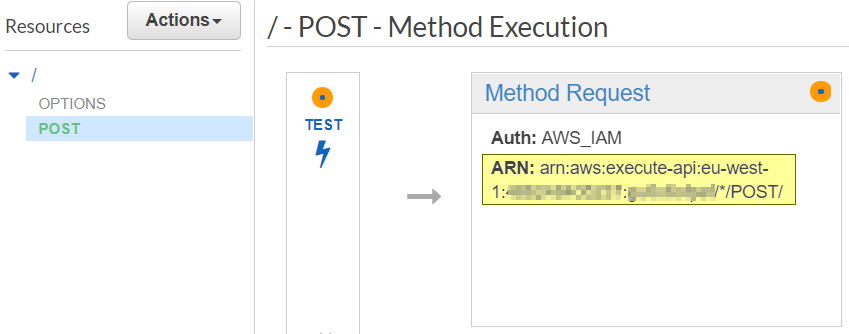
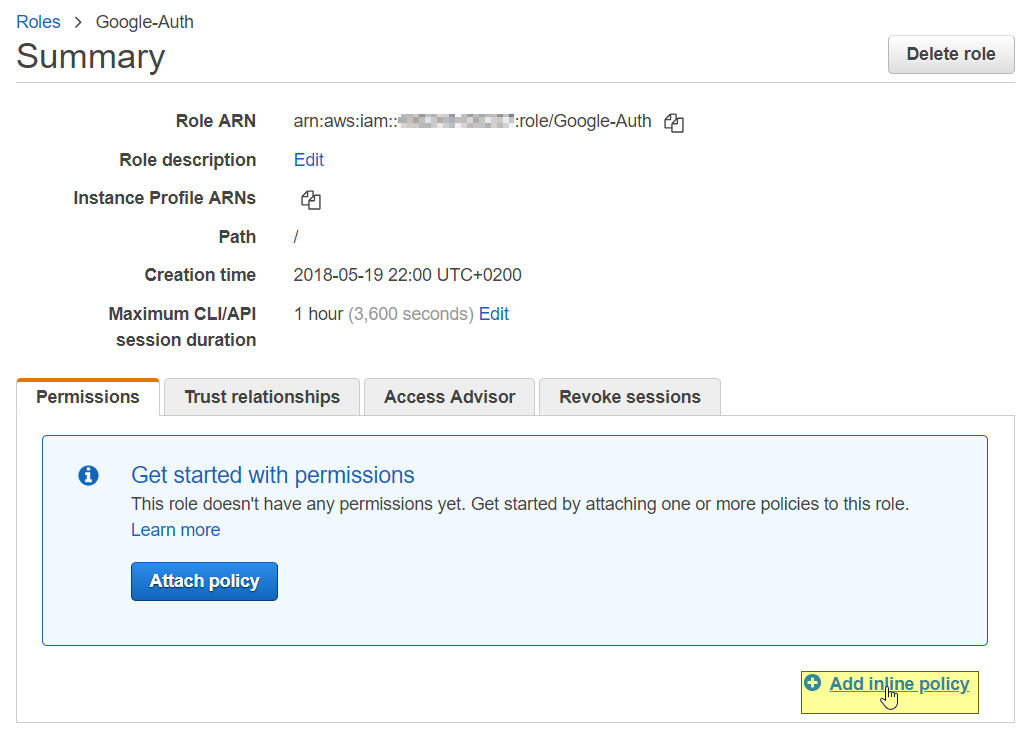
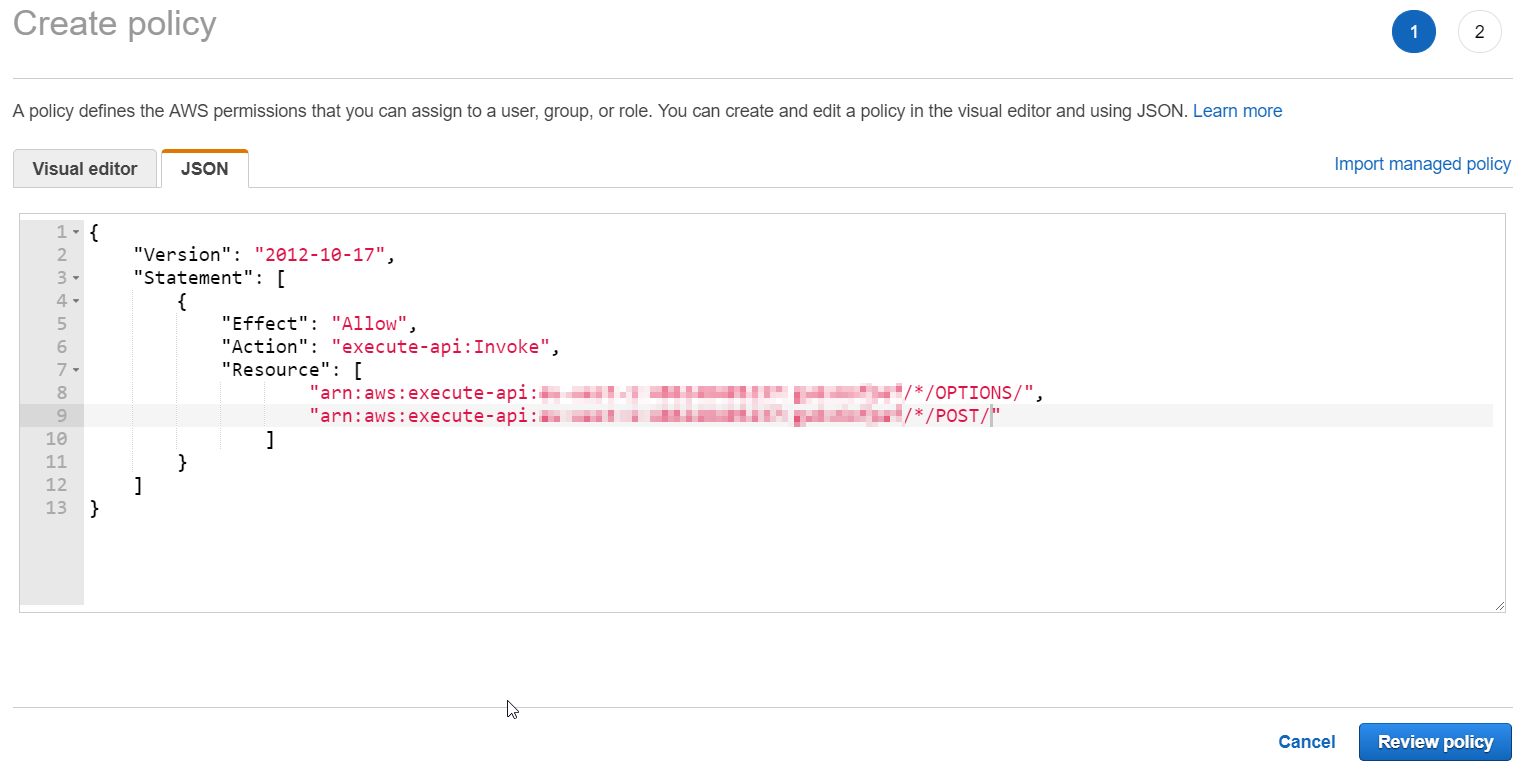
Go to IAM management and select the role we've created in the previous steps. Select "Add inline policy." Copy and paste the following JSON and add ARNs forPOST and OPTIONS operations you've saved in the previous step. It should look like something similar.
{
    "Version": "2012-10-17",
    "Statement": [
        {
            "Effect": "Allow",
            "Action": "execute-api:Invoke",
            "Resource": [
                    "arn:aws:execute-api:REGION:ACCOUNT_ID:API_ID/*/OPTIONS/",
                    "arn:aws:execute-api:REGION:ACCOUNT_ID:API_ID/*/POST/"
                ]
        }
    ]
}
Deploy API and Test the Authentication Mechanism
Deploy your API by selecting "Deploy API" from "Actions" drop-down. Select "[New Stage]" and enter a name for your new deployment stage.
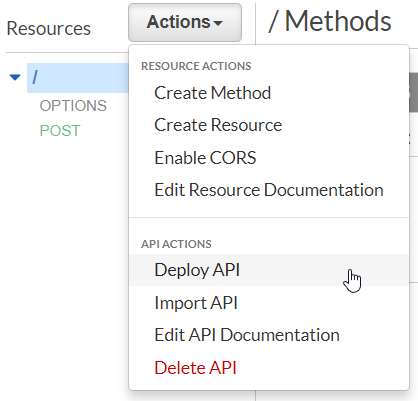
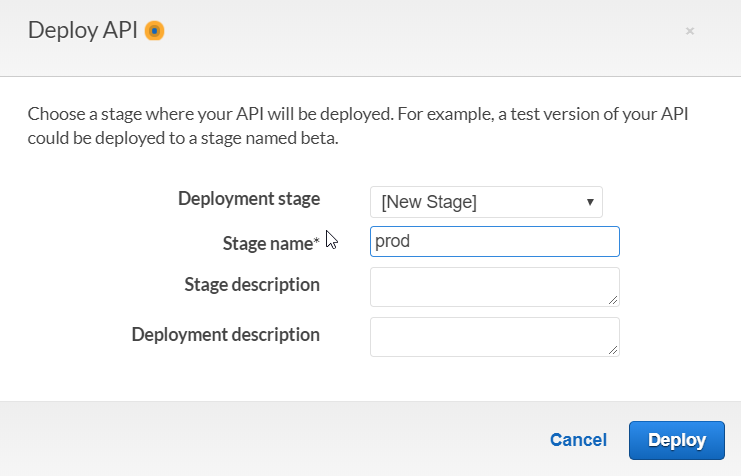
After deploying, copy and save your API URL for configuring your static website.

Open the awsconfig.js file and set the region, apiGatewayUrl and apiGatewayPath variables. It should be similar to the following:
window.config = {
    roleArn: "arn:aws:iam::ACCOUNT_ID:role/Google-Auth",
    region: "eu-west-1",
    apiGatewayUrl: "https://YOUR_API_ID.execute-api.YOUR_REGION.amazonaws.com",
    apiGatewayPath: "/prod"
}
Upload awsconfig.js to your static website in S3. Test your new authentication mechanism. At this point, you should be able to log in to your management console with your Google account.
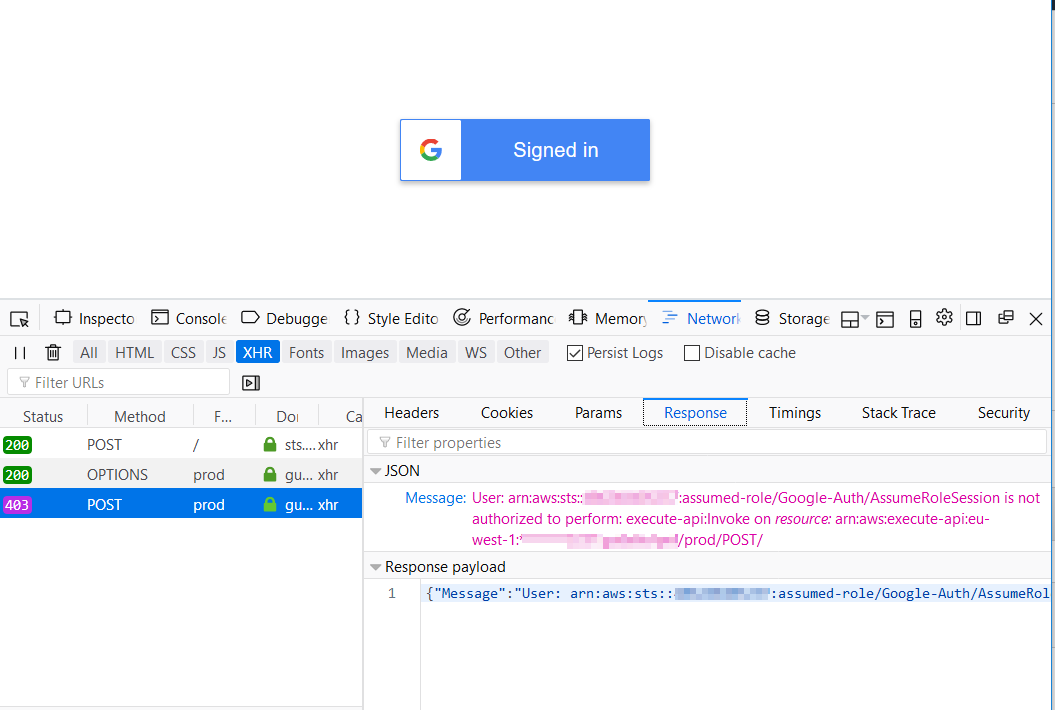
If anything goes wrong, open the developer toolbar in your browser and check the JavaScript console and the "Network" tab for errors.
For example, I had an issue with the attached policy definition that allows my role to call the deployed API and it looked like this in the browser:
Reasoning
Why Do I Need a Lambda?
The AWS federation sign-in API is not giving back proper CORS headers. That's why we had to create a proxy call with Lambda and enable CORS in the API gateway.
Why Not Use SAML Authentication With Google?
My initial goal was to find the cheapest possible solution with the least management overhead. SAML authentication is only available at Google for G Suite users and only allows a 14-day trial.
Why Not Host Everything in a Single Instance?
Hosting application code in one 't2.nano' instance would cost around $4.50 per month.
Using Lambda and API Gateway reduces the expected cost to cca. $0.01 per month.
You can create your own estimated budget comparison at servers.lol
Known Issues
Changing the "Authorized JavaScript origins" for your OAuth client ID looks like broken. If you changed its value, you'd get an error message when trying to sign-in with your Google account. In these cases, you have to create a new "OAuth client ID" in the Google admin console and change Client ID in your index.html. Don't forget to upload it to S3 again.
Opinions expressed by DZone contributors are their own.

Comments