Guide To Install NPM and Node.js on Mac and Windows
Let’s explore the installation process step-by-step to get one step ahead in our software project, and to precisely understand this, firstly, we will learn about NPM.
Join the DZone community and get the full member experience.
Join For FreeWith exponential growth and demand for full-stack development, JavaScript has become a reliable technology for developing a full-fledged business application.
Several backend and frontend frameworks and libraries are available, which are based on JavaScript and are highly compatible with each other. Node.js is a technology that professionals appraised for fabricating a scalable server-side for robust and responsive applications.
Before having in-depth knowledge about Node.js, it is necessary to answer the two most raised queries. The first one is how to install npm on Mac, and the second is quite similar: how to install NPM on Windows.
If you are also facing difficulty installing Node.js and NPM on your Windows and macOS systems, you are in the right place.
Let’s Understand What NPM Is
Node Package Manager or NPM is the only default and official package manager utilized for installing Node.js on a computer system.
In addition, it offers a command-line interface to access and utilize packages during software development, and all the packages are defined under a default file known as package.json. It also aids the users in managing multiple dependencies from a single CLI.
It is downloaded and installed simultaneously with Node.js on your system, which means that you don’t require any additional or different files to install NPM and Node.js on your system.
Below is a snippet that displays how web developers leverage NPM CLI to install and utilize relevant packages in their applications.
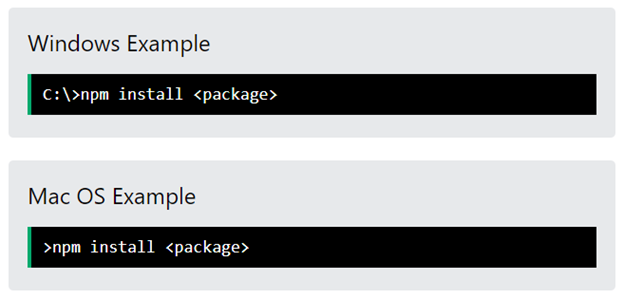
Moreover, the Website, Command Line Interface, and Registry are the three main components of the Node Package Manager.
The website is the official NPM online platform, where you can directly download the essential packages. In addition, CLI can be operated from your machine’s terminal and linked to the Registry, an extensive database holding meta-data and details of various JavaScript projects.
A Step-by-Step Guide on NPM and Node.js Installation
Before starting with the installation process, you must check your system information and whether it can handle, install, and maintain the functioning of Node.js and NPM packages.
You can assure it by cross-verifying your computer’s details with the below-listed minimum Node.js requirements:
- 4GB RAM
- Minimum of Intel Core i3 processor @ 2.5 GHz or higher
- 256 GB of Free Storage Space
- One GE interface
- Chocolatey Software
Now, let’s get started and move further to get a detailed insight into every step involved in Node.js and NPM Installation on Windows and macOS.
How To Install NPM on Windows
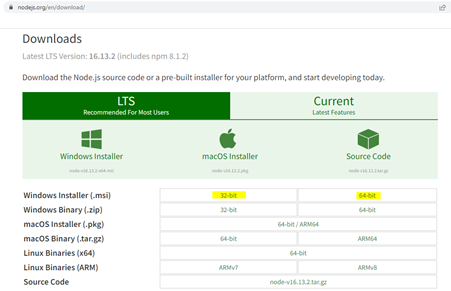
Step 1: Download the Package Manager From the Official Website
The first step in installing the Node.js on the system is downloading its package manager, the NPM.
You can search the official website on Google, or you can click on this link to navigate.
For Windows, you have to select the Windows Installer (.msi) according to the architecture of your installed operating system. Both 32-bit and 64-bit versions are available, and you can download them just by clicking on them.
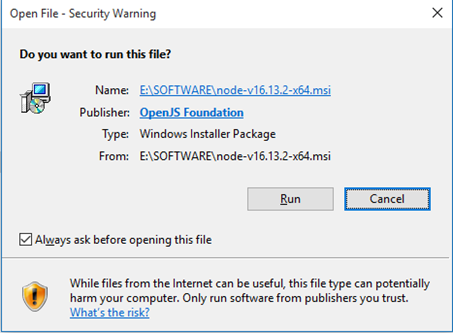
Step 2: Running the Downloaded File on Your System
Once the installation package is downloaded, locate it on your system and double-click on it.
After that, a dialogue box will appear, seeking permission to run the NPM. Click on Run to start the installation process.
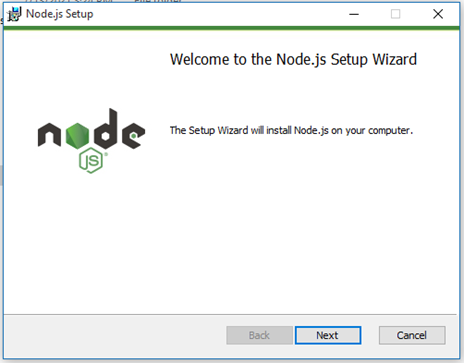
Step 3: Install NPM Windows Through Wizard
Once the Run button is clicked, a new dialogue box will be displayed.
Click on Next to continue with the process.
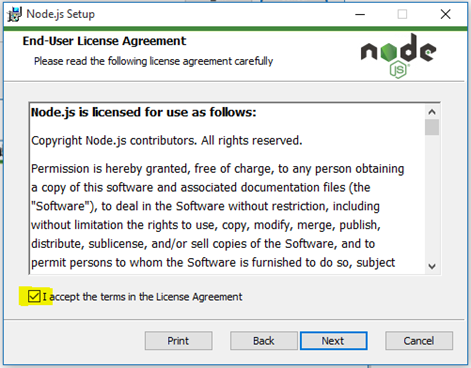
Step 4: Accepting the Terms and Conditions
Further, select the check box to agree with the terms and conditions to use the Node.js on your computer system. Then, select Next to move ahead.
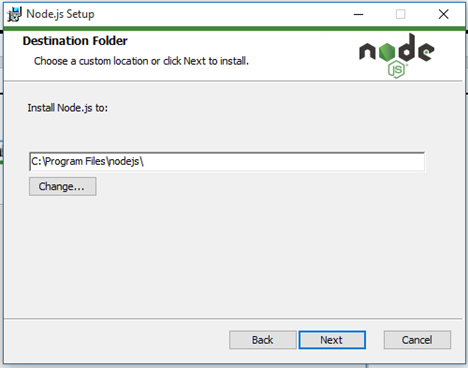
Step 5: Defining the Path
You have to define the location where you want to install the Node.js on your machine. By default, the destination for the file is set to the Program Files folder available in Local Disk C.
You can modify the file destination through the Change button.
In addition, all the core files and future updates will be stored in this location only. So, ample storage space must be available to allow Node.js to function efficiently.
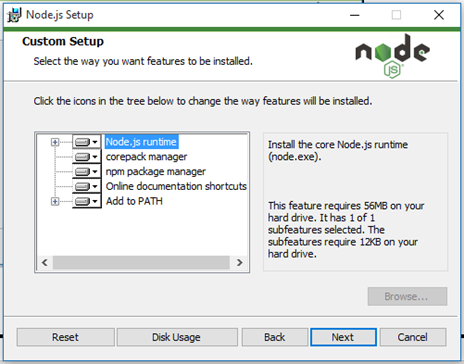
Step 6: Defining the Core Features To Be Installed
After finalizing the path, you will be headed to select Custom Setup, where you have to choose the features to be installed.
A total of 143MB of free storage is required to install the main components as listed below:
- js runtime
- Corepack manager
- Npm package manager
- Online documentation shortcuts
You can check the details of each feature by clicking on it, and its information will be displayed in the right panel.
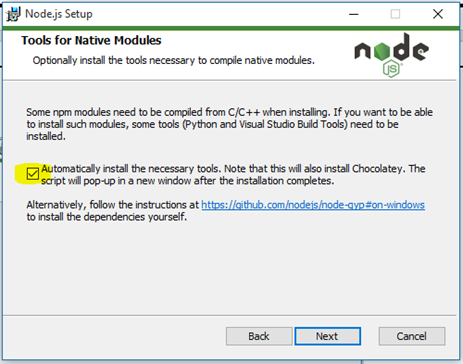
Step 7: Allowing Automatic Tool Installation (Optional)
This is an optional step, and you can ignore it if you don’t require any tools to be installed with Node.js.
If you require any extra tools, you can select the check box and move further by clicking on the Next button.
The appropriate package to install these tools will be downloaded after the successful configuration of Node.js.
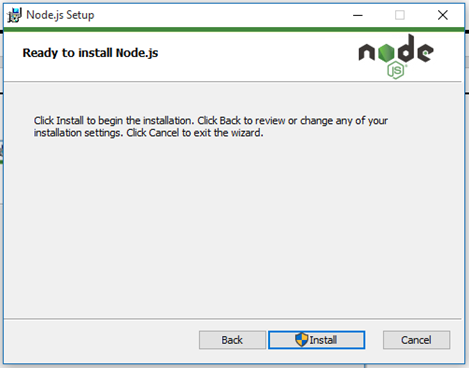
Step 8: Install Node.js Windows
Click on the Install button to start the process and wait for it to complete. Also, you can go back if you want to modify any setting.
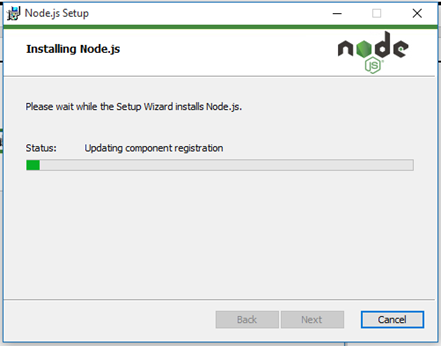
Step 9: Installation in Progress
When the Node.js installation is in-between, you will see a progress bar providing the current status.
Step 10: NPM and Node.js Are Installed
After configuring all the relevant settings and processing core operations, all the files will be installed on your computer, and you will be ready to start using them.

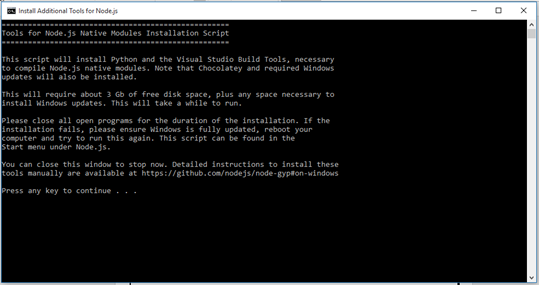
Step 11: Installing Additional Tool
If you have selected the check box to have additional tools, then CMD will open after Node.js has been installed, and you have to follow the provided instructions.
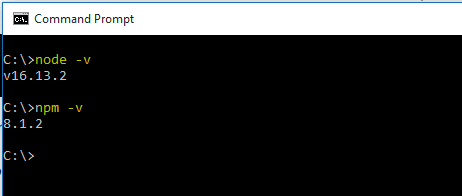
Let’s Check Whether Node.js and NPM are installed Successfully or Not
To verify the Node.js and NPM installation, we will open the CMD from the startup menu and type the following commands:
How To Install NPM on Mac
Step 1: Downloading the NPM Package for macOS
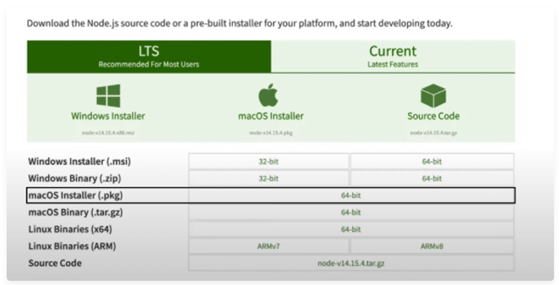
Go to the official website of Node.js to download the NPM package for the Mac Operating System.
You can click here to open the download page and select the appropriate file for your system.
Step 2: Running the Package Manager as per Guidelines
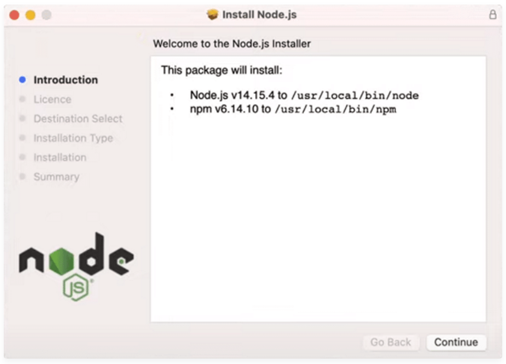
Open the folder where the downloaded file is present and double-click to run it.
A dialogue box will appear on the screen. Click on Continue to move further and side-by-side by reading the provided information.
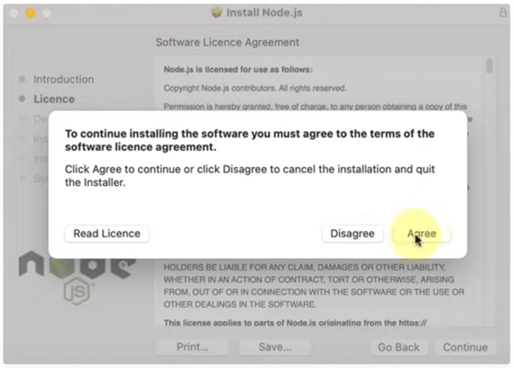
Step 3: Agreeing to License Terms and Conditions
You have to agree to the license terms at this stage, and you can also read all the conditions through the Read License button.
If you disagree with the terms, then Installation will be automatically canceled. You can easily read through all the terms and conditions through the reading License.
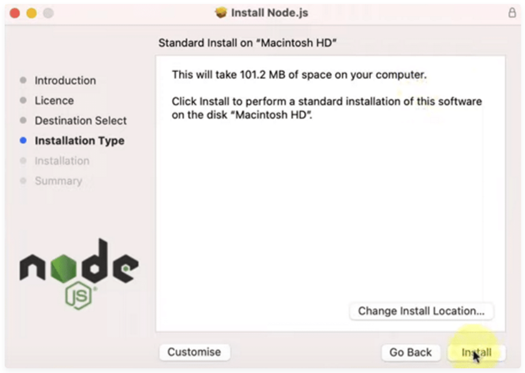
Step 4: Moving To Final Installation
After finalizing the file location, you have to click on Install to start the installation process. All the files will be stored on the Hard Disk of your Macintosh and can utilize up to 102 MB of storage space.
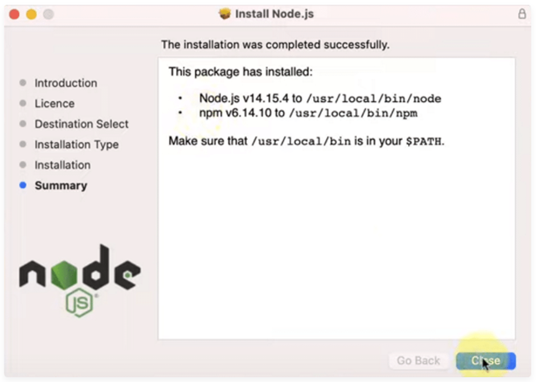
Step 5: Installation Completed
After the successful Installation of the Node.js with the help of NPM, you will see its detailed summary, providing information about the path where the file is present on your system.
Let’s Confirm the Installation
Node.js and NPM are successfully installed on your system, but it is essential to check whether they are working correctly or not and whether the updated version is installed or not.
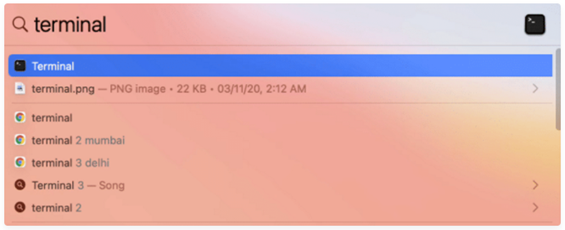
First, you have to open the macOS terminal by clicking the command + space or finding it from the search bar.
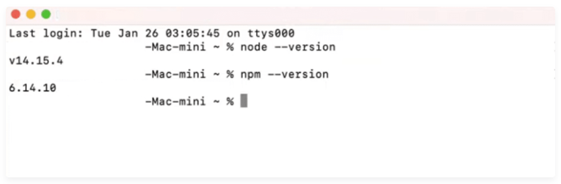
After opening the terminal, you now have to run the following commands:
- For checking Node.js installation à node – -version
- For checking NPM installation à npm – -version
Install NPM on Mac Using Homebrew
Homebrew is a free and open-source package management system used on macOS and Linux-based systems to straightforward the installation procedure. Let’s go through each step to install Node.js and NPM with it.
Step 1: Installing the Node.js and NPM
When you open the Homebrew, a command-line interface will be shown, and you can effortlessly unpack and install Node.js and NPM by running the brew install node command.
After this, Node.js and NPM will be installed, and you have to confirm its Installation.

Step 2: Verifying Installation
To confirm the Installation of Node.js and NPM, you have to open the terminal and type the node -v and npm -v command to check the installed version.

If the Homebrew hasn’t installed the latest version of Node.js, you can open it again and run the command brew upgrade node. It will update the Node.js version.
Wrapping Up
After going through all these steps in this article, you will surely be successful in installing Node.js and NPM on your Windows and macOS-based machines. These are the easiest and ideal ways to install it. However, you can go any other way per your comfort, preference, and project requirements.
Installing Node.js and NPM is your first step and all you need to start your app development journey.
Published at DZone with permission of Tarush Arora. See the original article here.
Opinions expressed by DZone contributors are their own.
Comments