

How to Create an LDAP Server From Apache Directory Studio
This post will give all the steps for creating LDAP from Apache Directory Studio. Here post will be using Apache Directory Studio 1.5.3 version.
1. Create LDAP Server

2. Start server
3. Create the Connection
(for the default instance of the Apache directory server, user name is ‘uid=admin,ou=system’ and the Bind password is ‘secret’)

4. Then browser LDPA by click on the connection.(If the connection is successfully established, you should see an outline of the Directory Information Tree (DIT) in the LDAP Browser view)

5. Right-click on the node ou or dc and select New|New Entry. The New Entry wizard appears.

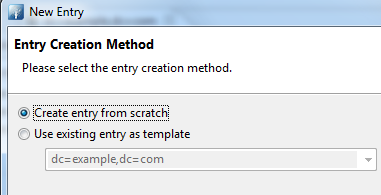
6. In the Entry Creation Method pane, select the Create entry from scratch radiobutton. Click Next.
7. Find the organizationalUnit object. Select it then click Add.

8. Click Next. On the RDN field enter ou. On the value field enter ‘Groups’. The DN Preview should like below
(Distinguished Name (dn), The Parent field should same like below)

9. Click Next. The Attributes window will appear. Examine the values.

10 . Do the same for Users as below

Now some users (Staff)
We'll place their personal information under the ou=users; whereas we'll place their authorization levels under the ou=groups.
Let's start with the ou=users. We'll be adding new user called ‘madhuka’. Person using theinetOrgPerson object.
The inetOrgPerson[1] object class is a general purpose object class that holds attributes about people.
11. Right-click the ou=Users entry. Select New. Select New Entry

12. Select Create entry from scratch. Click Next.
13. Find inetOrgPerson object. Select it then click Add.

14. On the RDN field enter cn. On the value field enter madhuka.
(If ‘dn’ not added defaults, you need to enter a Distinguished Name (dn).)

15. Under the sn attribute, enter ‘udantha’(sn stands for Surname)
16. You need to add a username for this user. Right-click on the same window. Select New Attribute. TheAttribute Type window will appear.

17. On the Attribute type field, enter uid. click for finsh

18. We need to add a password for this user. Right-click on the same window. Select New Attribute. The Attribute Type window will appear.
19. On the Attribute type field, enter userPassword.
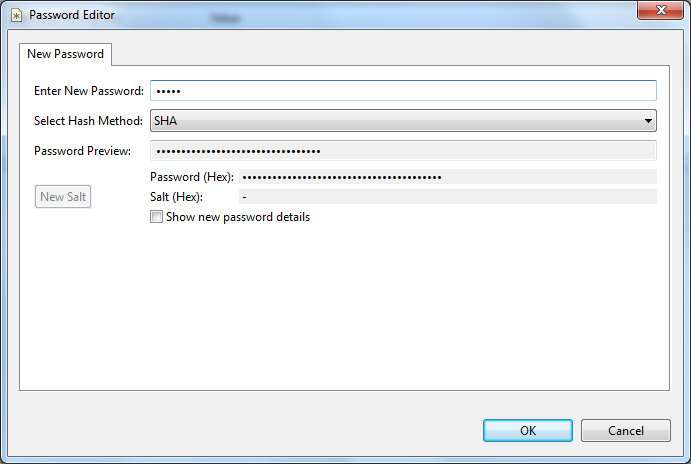
20 . You will be asked to enter a password. Enter pass as the new password. Make sure that the Select Hash Method is set to SHA
Add the Groups (Authorization Levels)
21. Same like above steps we select ‘New Entry’ and ‘Create entry from scratch’
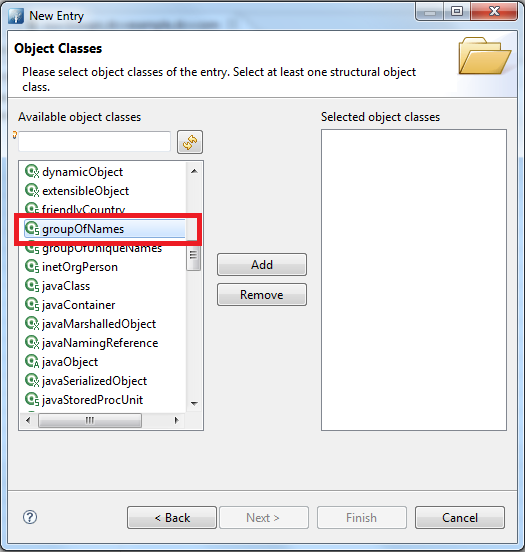
22. In ‘Object Classes’ window we will pick ‘groupOfNames’, Select it then click Add.
23. RDN field enter cn. On the value field enter ‘admin’
24. As we pcik ‘groupOfNames’ we will have member field and for that value we make double click
24. Then DN edit will come and then browser for the user that we need.

25. Field will be picked as ‘cn=madhuka,ou=users,dc=example,dc=com’ (If you have few member you can add you can add some groups as well).
26. Here is LDAP Browser panel. Expand the Root DSE folder.

(If you pick ‘uniqueMember ’ by slecting ‘groupOfUniqueNames’ object. A uniqueMember attribute. We'll be placing the Distinguished Name (dn) of our users in this entry. One uniqueMember attribute will represents one user.)
Published at DZone with permission of Madhuka Udantha. See the original article here.
Opinions expressed by DZone contributors are their own.