How To Add Live Activity to Your Existing Project
Using a use-case example, this tutorial-based article will instruct the reader on how to add Live Activity to an iOS app.
Join the DZone community and get the full member experience.
Join For FreeWhy Add Live Activity in the First Place?
The basic idea is that, as a user, you don’t have to open the app whenever you need to check crucial relevant information at a particular point in time.
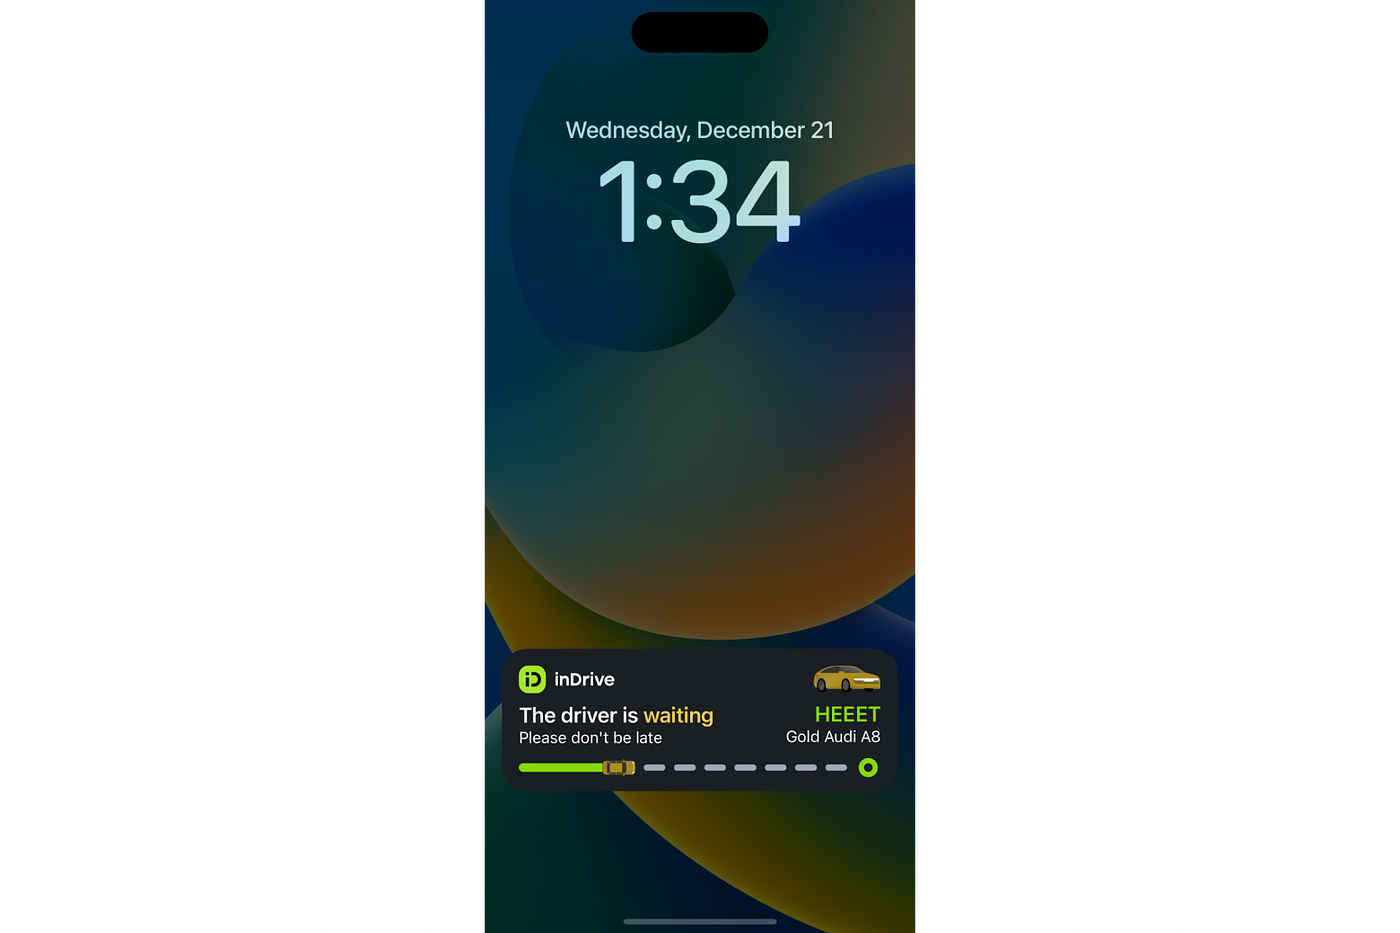
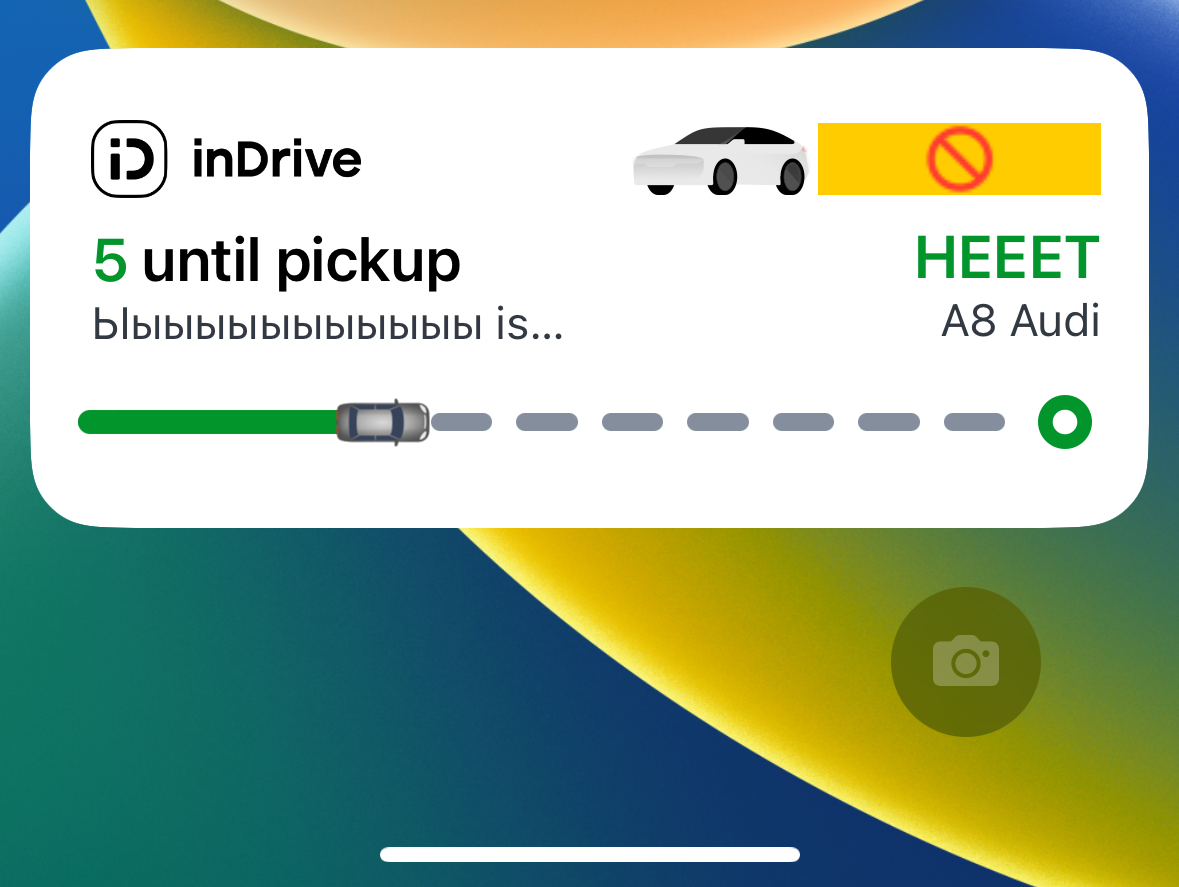
Here’s a simple example of how your Live Activity works. Let’s say you have ordered a service. In addition to the general status of “Your order is on the way,” a widget will be displayed on your lock screen with all the necessary information, such as order status, delivery time, details about the courier/driver, etc.

Adding to Production
There are many articles out there that describe the process of adding Live Activity to a project. The only difference is that none of them share the hands-on experience of adding the feature to a current project. That is what I want to tell you about in this article.
Our process started off with a demonstration of the Live Activity feature for businesses. The point was to “sell” the idea. We created a demo app loosely based on the relevant articles and official documentation. This helped us demonstrate the basic idea quite clearly.
After a short approval period, we went on to integrate the Live Activity feature into the inDrive project. We put together an action group, including, besides myself, another two iOS developers.
When integrating into a finished project, we came up against a number of issues that had to be addressed:
- XcodeGen and the first run — how to add a new target to project.yml, especially when it has to come complete with Live Activity support?
- An in-depth understanding of how Push Notification works with the Live Activity feature.
- We have our own design system; how can this be used within Live Activity?
- How to connect up translation resources.
- How to link the UDF to Live Activity.
XcodeGen and the First Run
In our project, we use XcodeGen to generate the *.xcodeproj file. That was a bit of a challenge, as we hadn’t used widgets in the project before. We had to add specific templates to the project.yml file of our app’s main module. A flag had to be added to the info section of the main target:
SupportsLiveActivities: trueThen we need to create a template for the Live Activity widget itself:
LiveActivity:
  type: app-extension
  platform: iOS
  info:
    path: "${target_name}/SupportingFiles/Info.plist"
    properties:
      CFBundleDisplayName: ${target_name}
      CFBundleShortVersionString: *cfBundleShortVersionString
      NSExtension:
        NSExtensionPointIdentifier: "com.apple.widgetkit-extension"
  settings:
    base:
      TARGETED_DEVICE_FAMILY: "$(inherited)"
      PRODUCT_BUNDLE_IDENTIFIER: ${bundleId}
    configs:
      debug:
        PROVISIONING_PROFILE_SPECIFIER: "match Development ${bundleId}"
        CODE_SIGN_IDENTITY: ""
        DEBUG_INFORMATION_FORMAT: ""
      release:
        PROVISIONING_PROFILE_SPECIFIER: "match AppStore ${bundleId}"
        CODE_SIGN_IDENTITY: ""
  dependencies:
    - framework: SwiftUI.framework
      implicit: true
    - framework: WidgetKit.framework
      implicit: true
And not to forget the following in the main target:
dependencies:
  - target: LiveActivity
Be sure to specify the appropriate bundle, which should be first linked to the Provision Profile (also separate for this bundle).
After working through all the moves and getting the long-awaited make finished successfully, your Live Activity feature has to be presented for the first time. Here, we will leave out the part about configuring Content State and defining static properties and those that should be updated. It’s important to remember to add “main” because you won’t be able to run the widget without it.
@available(iOSApplicationExtension 16.1, *)
@main
struct Widgets: WidgetBundle {
    var body: some Widget {
        LiveActivityWidgetView()
    }
}

 See below for how to launch Live Activity (iOS 16.1):
public func startWith(_ attributes: Attributes?, state: Attributes.ContentState, pushType: PushType?) {
 // 1
    guard ActivityAuthorizationInfo().areActivitiesEnabled,
    let attributes = attributes,
    activity.isNil
    else { return }

    do {
        // 2
        activity = try Activity<Attributes>.request(
            attributes: attributes,
            contentState: state,
            pushType: pushType
        )
        if let token = activity?.pushToken {
            let unwrappedToken = token.map { String(format: "%02x", $0) }.joined()
            logger.debug("Live Activity token: \(unwrappedToken)")
            // 3
            props.action.execute(with: .didStartActivityWith(token: unwrappedToken))
        } else {
            logger.error("Failed Live Activity")
        }
        // 4
        Task {
            guard let activity = activity else { return }
            for await data in activity.pushTokenUpdates {
                let token = data.map { String(format: "%02x", $0) }.joined()
                logger.debug("Live Activity token updates: \(token)")
                props.action.execute(with: .didPushTokenUpdates(token: token))
            }
        }
    } catch {
        logger.error("Failed Live Activity: \(error.localizedDescription)")
        props.action.execute(with: .didFailStartLiveActivity(error: error))
    }
}
We must ensure that the user can display Live Activity enabled in the settings and that there are no running activities.
1. When creating a request for an Activity, we need to communicate the pushType:
.token— Upgrade Live Activity via Push Notifications.nil— Only within the app’s life cycle.
2. If upgraded via .token, the pushToken will come in asynchronously and must be sent to the backend. This will ensure that the backend team knows we are ready to receive updates for Live Activity.
3. The Live Activity token is updated based on whether the app is running or downloaded. We need to keep track of this and report it to the backend.
To upgrade Activity via the app, if you don’t wish to use Push Notifications (iOS 16.1):
Task {
    await activity.update(using: state)
}
And to end the process:
Task {
    await activity.end(using: state, dismissalPolicy: .immediate)
}
After calling the startWith() method, you should see the Live Activity on your screen. If you go down that route, be sure to share your cases in the comments.
An In-depth Understanding of How Push Notification Works With the Live Activity Feature
Initially, we implemented the basic functionality with no push notifications. The Live Activity feature is designed so that it can be implemented without using any Push Notifications — just based on in-app statuses. Then we came up with these questions:
- How does Live Activity know which push is intended for it? It’s really all Apple under-the-hood magic. Based on the incoming push notification payload and ID, the system makes its own determination to find out which Live Activity the incoming information refers to.
- Can these push notifications be captured in the app itself? As of the time of writing, Apple has provided no information on how to catch a push notification in a running app. The guys and I checked to see whether this technique works:
application(_:didReceiveRemoteNotification:fetchCompletionHandler:)This method will not be called in the case of Live Activity Push Notifications.
- How do you test push notifications when there is still no backend? We devised a suitable Payload on our own and implemented the usual push notification flow on the test app. Next, we used this.
Most of the work had to be done on the backend. We sent sample requests to APNS indicating what Payload the client would be waiting for. Stay tuned for further details about our backend implementation efforts in the second part of the article.
curl -v \
--header "apns-topic:{Your App Bundle ID}.push-type.liveactivity" \
--header "apns-push-type:liveactivity" \
--header "authorization: bearer $AUTHENTICATION_TOKEN" \
--data \
'{"aps": {
   "timestamp":1663300480,
   "event": "update",
   "content-state": {
      "playerOnFirst": "Tony Stark",
      "currentLap": 2
   },
   "alert": {
      "title": "Race Update",
      "body": "Tony Stark is now leading the race!"
   }
}}' \
--http2 \
https://${APNS_HOST_NAME}/3/device/$DEVICE_TOKEN2
{
"aps": {
"timestamp": 1669698850,
"event": "update",
"content-state": {
"rideStatus": "on_ride",
"time": 5
}
}
}Proprietary Design System and Live Activity
We hadn’t used SwiftUI in the project before, so this was another challenge for us to get our heads around. After a successful launch via the demo app, we got down to ironing out the minor kinks and trying out common components from the design system.
1. The basic components, such as colors, fonts, and icons, were not a significant problem because starting from iOS 15, Apple has added an easy way to use UIKit components in SwiftUI.
We took it a little further and implemented it natively. Incidentally, we intend to release the basic components to Open Source so you can take a look.
2. Apple provides a simple mechanism for wrapping the UIView in SwiftUI.View (UIViewRepresentable), which was supposed to make our lives easier, but it turned out something like this:
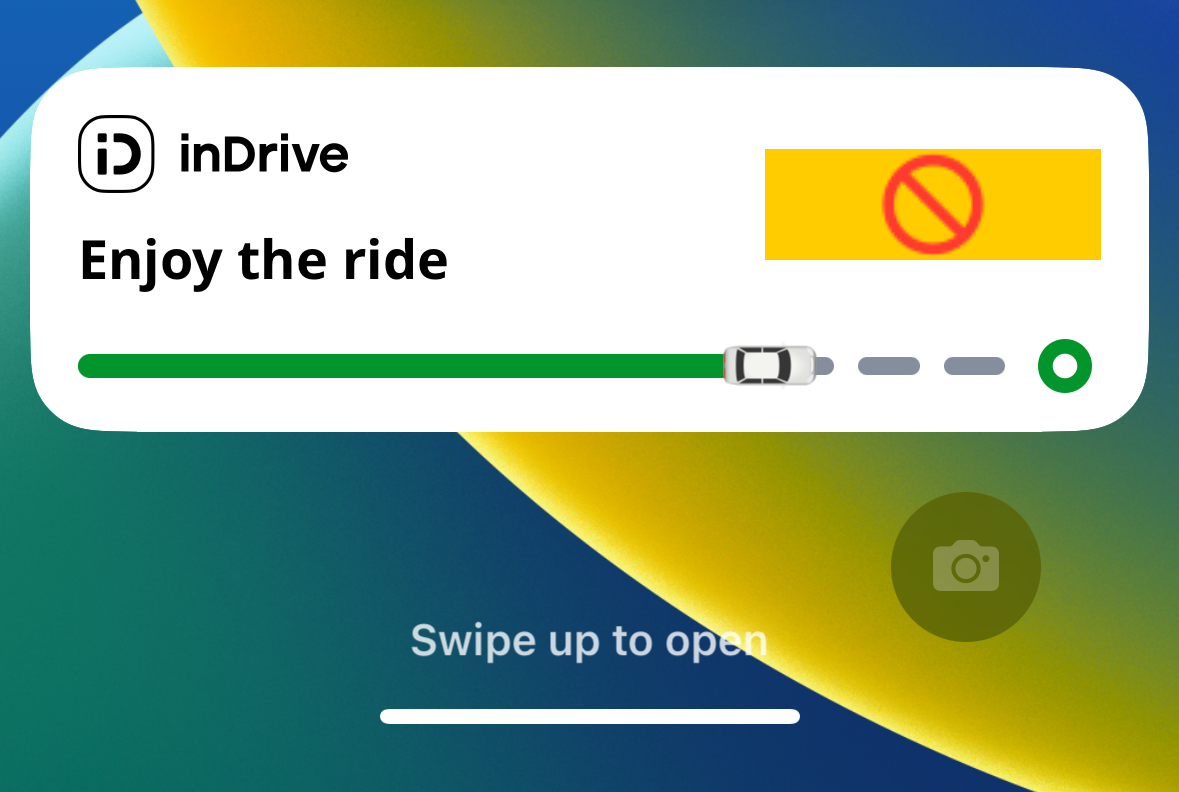
Although it was planned to be like this :)
And like this:
As we had not found an explanation for this online, we decided to drop some of the features until we switched components to native SwiftUI. If you have any ideas as to why this is the case, we’d love to hear from you.
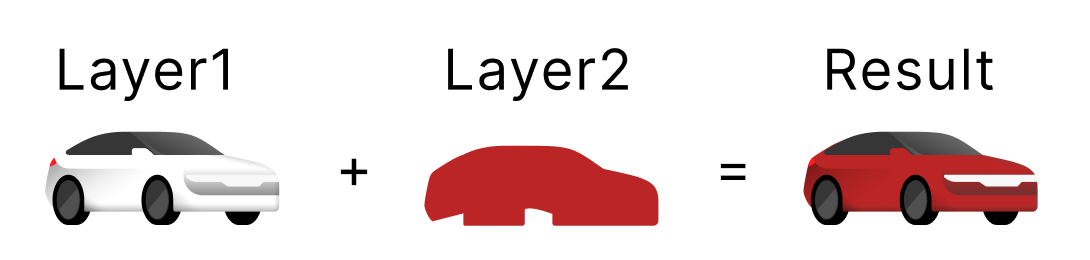
Vehicle Colors
In our main app, we don’t change the color of the vehicle that is en route to the user’s location. This icon is embedded in the app, and we just substitute it. For LiveActivity, I took an icon from Figma, placed it where I wanted it, and forgot all about it.
Then a colleague of mine came over and said, “Why don’t we paint the vehicles the color that comes in from the backend?” We found out that the color comes in simply as text: Gold, Blue, etc. We asked the backend team to send hex, too, so we could paint as well.
We had to use some clever tricks here, though. We broke the image down into several layers: the body that we would paint and the base of the vehicle, which would remain unchanged. The result was something like this:
How To Connect Translation Resources
We operate in 47 countries and support multiple languages. When launching a feature, we must ensure that all languages are supported, including Arabic (written from right to left).
We use the Crowdin platform to make it convenient to handle translations, and for the widget and the island, the settings must be adjusted depending on the locale involved. For this purpose, we used the “joys” that SwiftUI brings us in the form of Environment.
@Environment(\.layoutDirection) var directionUDF + Live Activity
We can use the UDF to implement the service component that will “monitor” the change events of a certain State, as well as generate our Live Activity and update it if necessary.
As shown above, we can wrap up the start, update, and end of Live Activity through the service component. This will be useful if you wish to update the status through the running app (with no remote push notifications).
It’s essential to keep this in mind. To update Live Activity via push notifications, it has to be explicitly run via the active app. From then on, Apple takes over to work all the magic needed.
import UDF
import ActivityKit

@available(iOS 16.1, *)
public typealias LiveActivityAttributes = ActivityAttributes & Equatable


@available(iOS 16.1, *)
open class LiveActivityServiceComponent<Attributes: LiveActivityAttributes>
    public var activity: Activity<Attributes>?
    public let disposer = Disposer()
    public var props: Props = .init() {
        didSet {
            render(props)
        }
    }

    public init() { }

    open func render(_: Props) {
        // the logic we implement here is based on the props that come in
        // or you can explicitly override this method in the descendants
        // call the startWith(),updateWith(), endWith() methods when needed
    }
}

// MARK: - LiveActivityServiceComponent

@available(iOS 16.1, *)
extension LiveActivityServiceComponent: ViewComponent {
    public func startWith(_ attributes: Attributes?, state: Attributes.ContentState, pushType: PushType?) {
        ...
    }

    public func updateWith(_ state: Attributes.ContentState) {
        ...
    }

    public func endWith(_ state: Attributes.ContentState) {
       ...
    }
}

// MARK: - Props

@available(iOS 16.1, *)
public protocol LiveActivityProps: Equatable {
    associatedtype Attributes: ActivityAttributes & Equatable
    var attributes: Attributes? { get }
    var contentState: Attributes.ContentState? { get }
    var pushType: PushType? { get }
    var action: CommandOf<LiveActivityAction> { get }

    init(
        attributes: Attributes?,
        contentState: Attributes.ContentState?,
        pushType: PushType?,
        action: CommandOf<LiveActivityAction>
    )
}

@available(iOS 16.1, *)
extension LiveActivityProps {
    init() {
        self.init(attributes: nil, contentState: nil, pushType: nil, action: .nop)
    }
}

@available(iOS 16.1, *)
public extension LiveActivityServiceComponent {
    struct Props: LiveActivityProps {
        public let attributes: Attributes?
        public let contentState: Attributes.ContentState?
        public let pushType: PushType?
        public let action: CommandOf<LiveActivityAction>

        public init(
            attributes: Attributes? = nil,
            contentState: Attributes.ContentState? = nil,
            pushType: PushType? = nil,
            action: CommandOf<LiveActivityAction> = .nop
        ) {
            self.attributes = attributes
            self.contentState = contentState
            self.pushType = pushType
            self.action = action
        }
    }
}

// MARK: - Action

public enum LiveActivityAction: Action {
    case didStartActivityWith(token: String)
    case didPushTokenUpdates(token: String)
    case didFailStartLiveActivity(error: Error)
}
Then you can capture LiveActivityAction in the desired reducer and send requests to the backend with the token to receive push notifications. You can use them to both refresh and end a Live Activity. This process is described in sufficient detail in Apple’s documentation.
The first part of the article is quite a long read and gives you enough material to process, but soon I’ll be sure to share some further observations about Live Activity. I would like to say special thanks to Lyosha Kakoulin and Petya Kazakov because nothing would have happened without these guys.
Useful Links:
Published at DZone with permission of Grigoriy Volgin. See the original article here.
Opinions expressed by DZone contributors are their own.
Comments