How To Create a WhatsApp Chatbot Using Flask Python Framework
Learn how to create a WhatsApp chatbot in Flask Python with the help of a no-code chatbot builder from Kommunicate step by step.
Join the DZone community and get the full member experience.
Join For FreeChatbots are software tools created to interact with humans through chat. The first chatbots could create simple conversations based on a complex system of rules. You can build intelligent chatbots for WhatsApp using the Python Framework Flask and the Kompose Bot builder. This post will teach us how to build a WhatsApp Chatbot in Flask Python Framework.
Prerequisites
You will need a Kommunicate account to deploy the chatbot.
Kommunicate is a no-code, hybrid chatbot platform built over a powerful conversational AI system.
Also, you will need Python and the Flask framework installed on your system. To read more info about the Flask framework, please follow this link.
We will be using Flask in this tutorial. If you are looking to add a Dialogflow chatbot to the Django framework, you can see this tutorial.
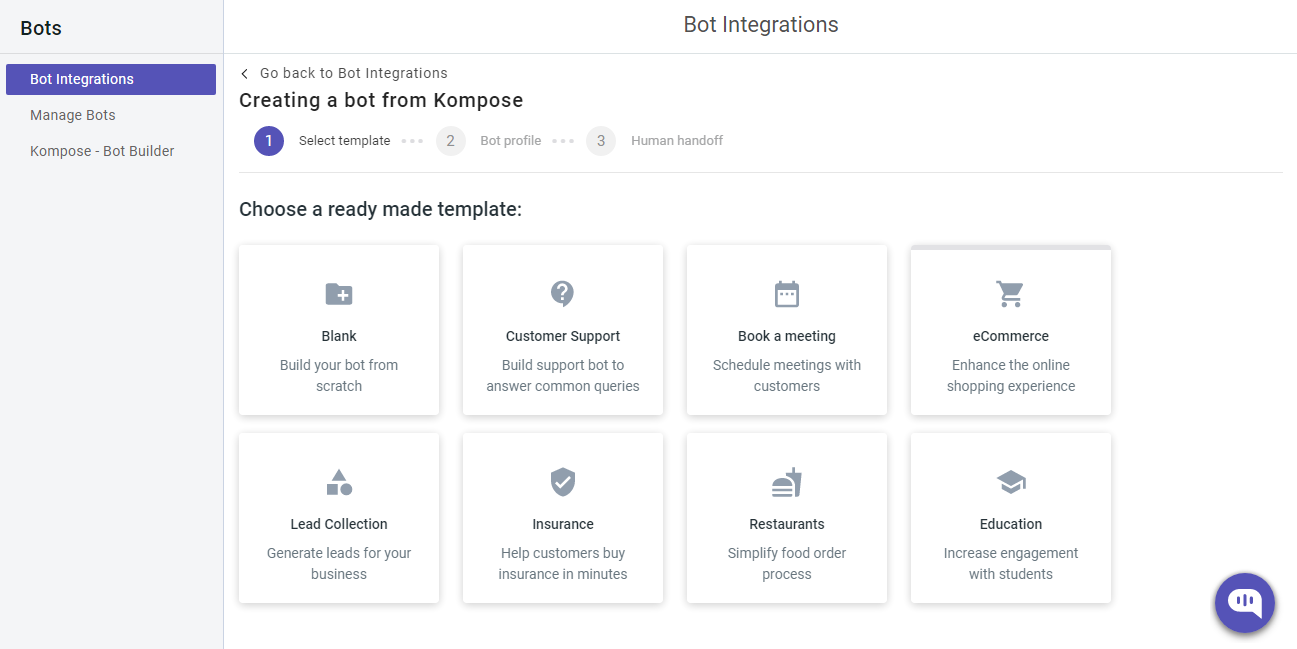
Steps To Create a WhatsApp Chatbot Using Kompose and Flask Python Framework
Step 1
Log in to your Kommunicate dashboard. If you don’t already have a Kommunicate account, you can create one here.
Navigate to the Kompose bot builder category and create a new bot by selecting the “Create Bot” button.
Step 2
Use Python with Flask and enable the webhook server.
The webhook requires a URL, and it should be an HTTPS protocol. The webhook URL will receive a POST request from the Kompose Bot every time an intent triggers the webhook.
We use the Python programming language and the Flask framework to create the webhook.
Create a file (for example – app.py). Import all the necessary libraries (ex: os, JSON, flask_ngrok, request) needed for Python. Please check if you have Flask on your system. If not, install it using pip, and here’s the documentation for the same.
To handle all the agent webhook requests, we need to define and add a route/webhook method with a POST request. A POST request will be sent to this URL /webhook. It executes all the methods inside the method.

After setting up the Python process, let’s use flask ngrok to create a public URL for the webhook and listen to port 5000 (in this example). For the Kompose webhook, you will need an HTTPS-secured server since the local server (localhost) will not work. You can also use a server and point a domain with HTTPS to that server.
You will get the following URL, where the webhook is the POST route for Kompose we mentioned in the Python file.
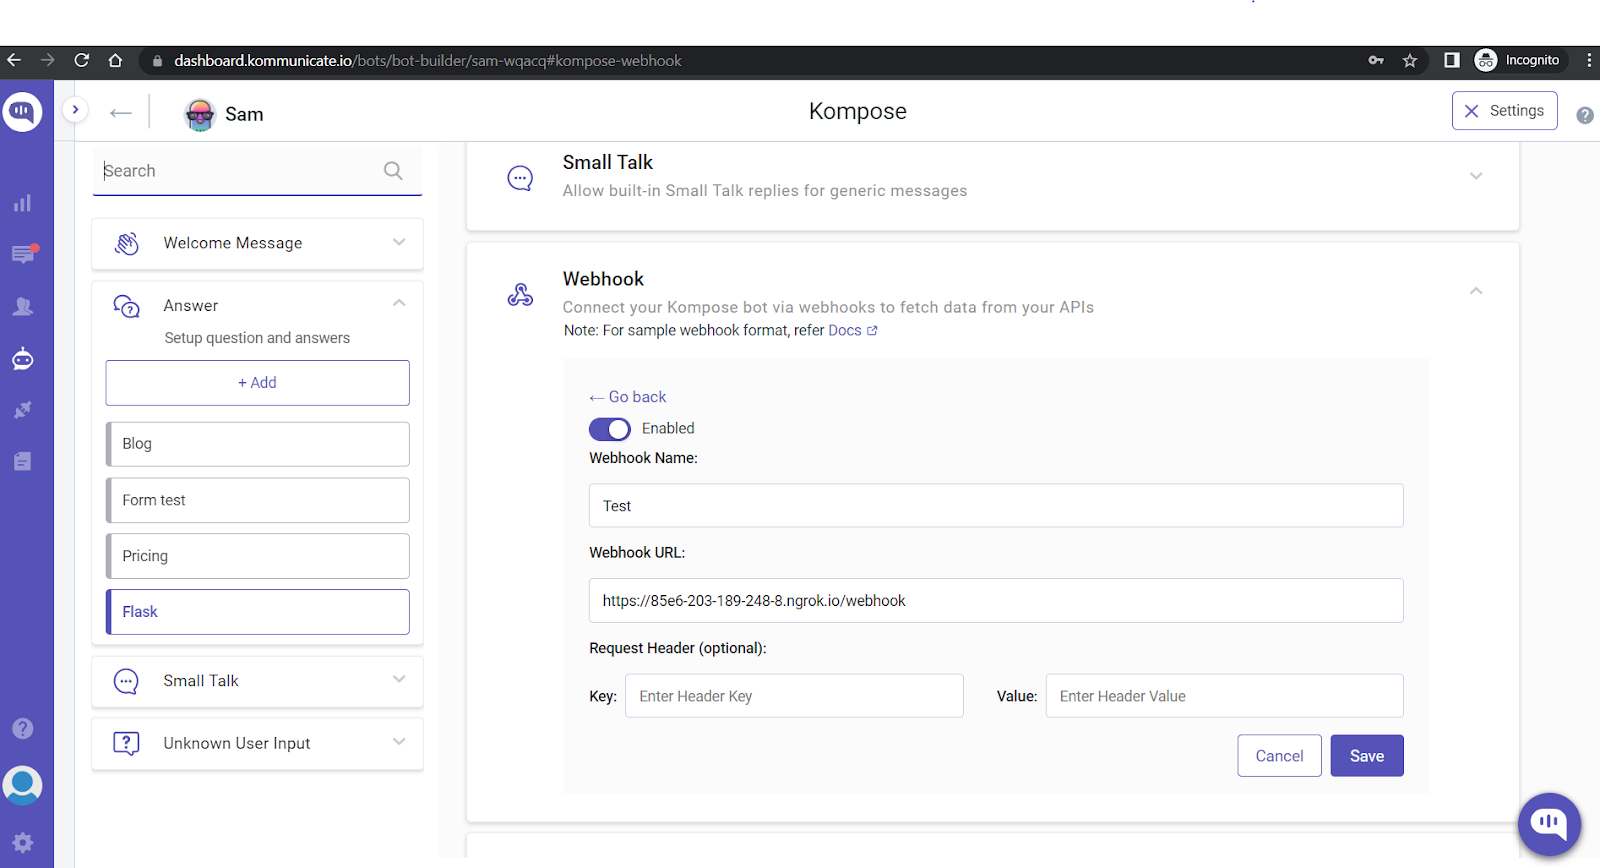
Step 3
Navigate to the Kompose Bot Builder, select your bot, and click on the “Settings” option at the top right corner.
Click on the Webhook option present on that page.
Copy the URL you created.
Paste it into the Kompose webhook URL field.
![webhook]()
Step 4
Create an intent by clicking on the +Add button under the “Answer” section and Train the Bot.
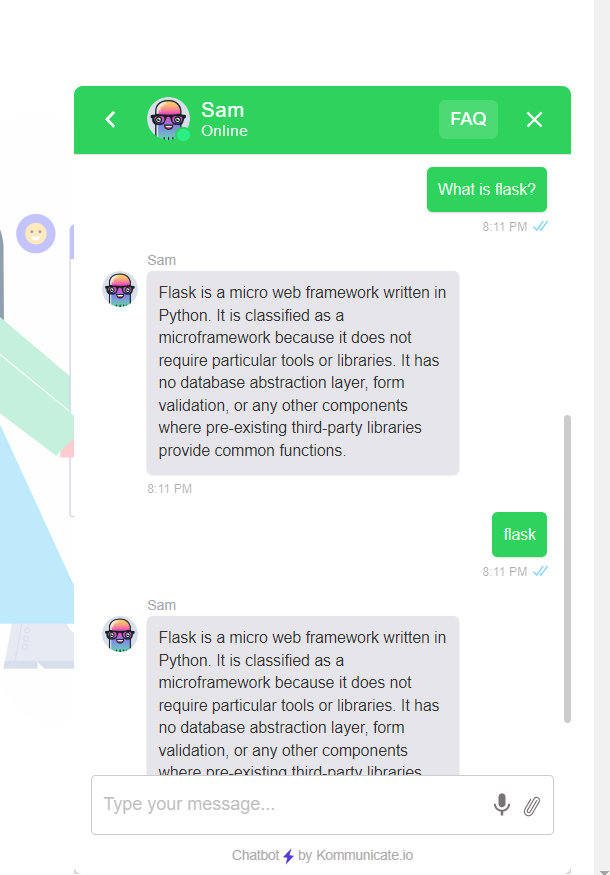
Here, I created Flask intent and added a training phrase such as “What is Flask?”
Step 5
Click on the “Bot Says'' option and select the webhook you created earlier. Now click on “Train Bot.”
Step 6
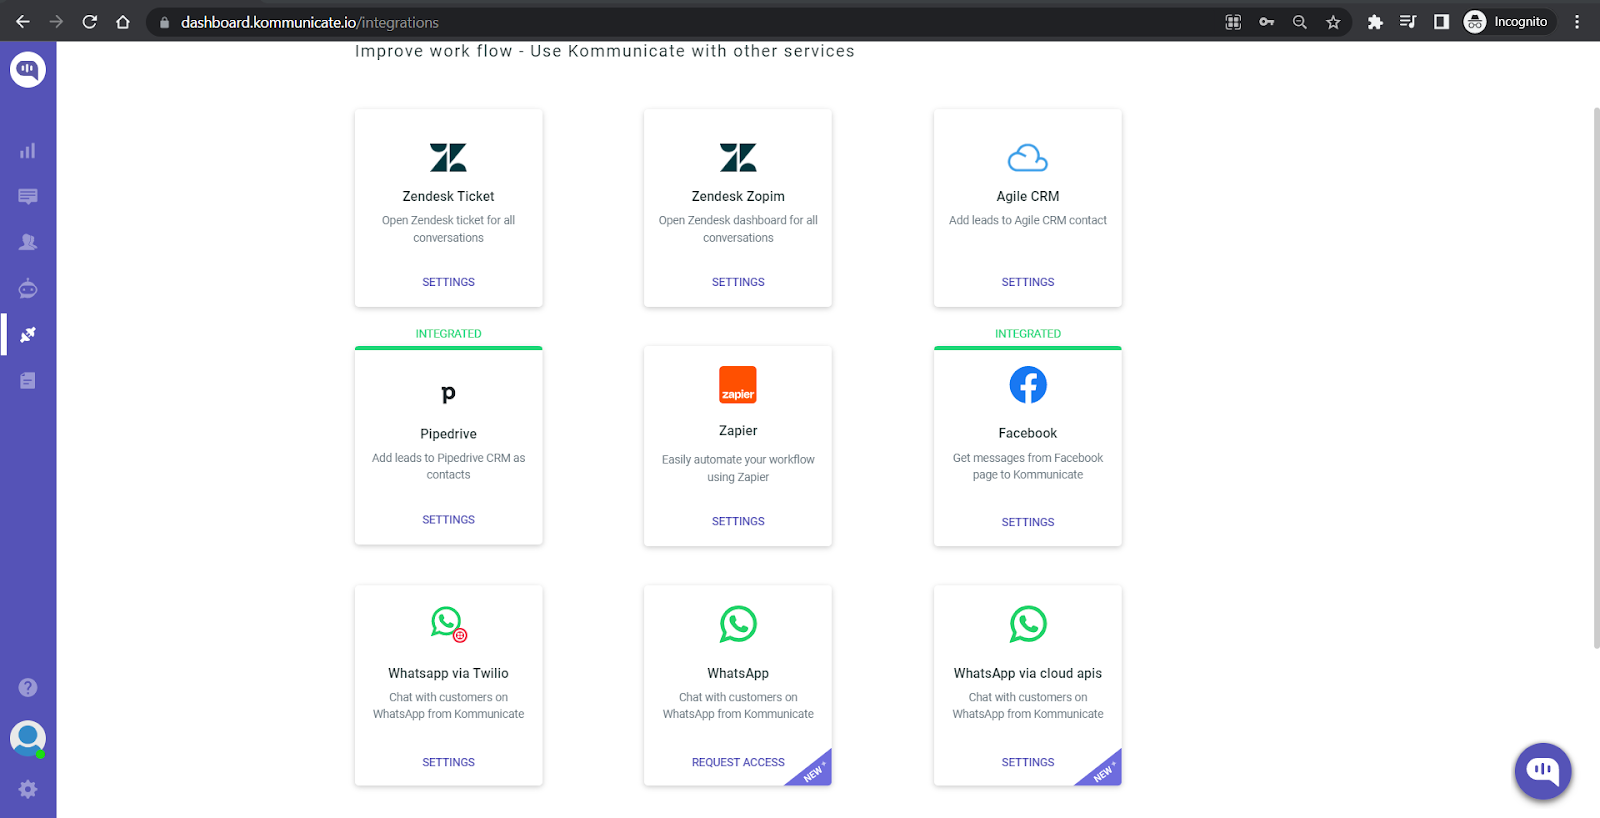
Integrating your WhatsApp number with Kommunicate.
Navigate to the integration section and click on “Request Access” on WhatsApp Tile and select on Sandbox option. Send a WhatsApp message from your phone to the phone number 4930609859535 with the content START.
As a response, you will receive your Test API Key on WhatsApp. Enter the API Key in “Test API Key” and click on the “ Update Sandbox ” button.
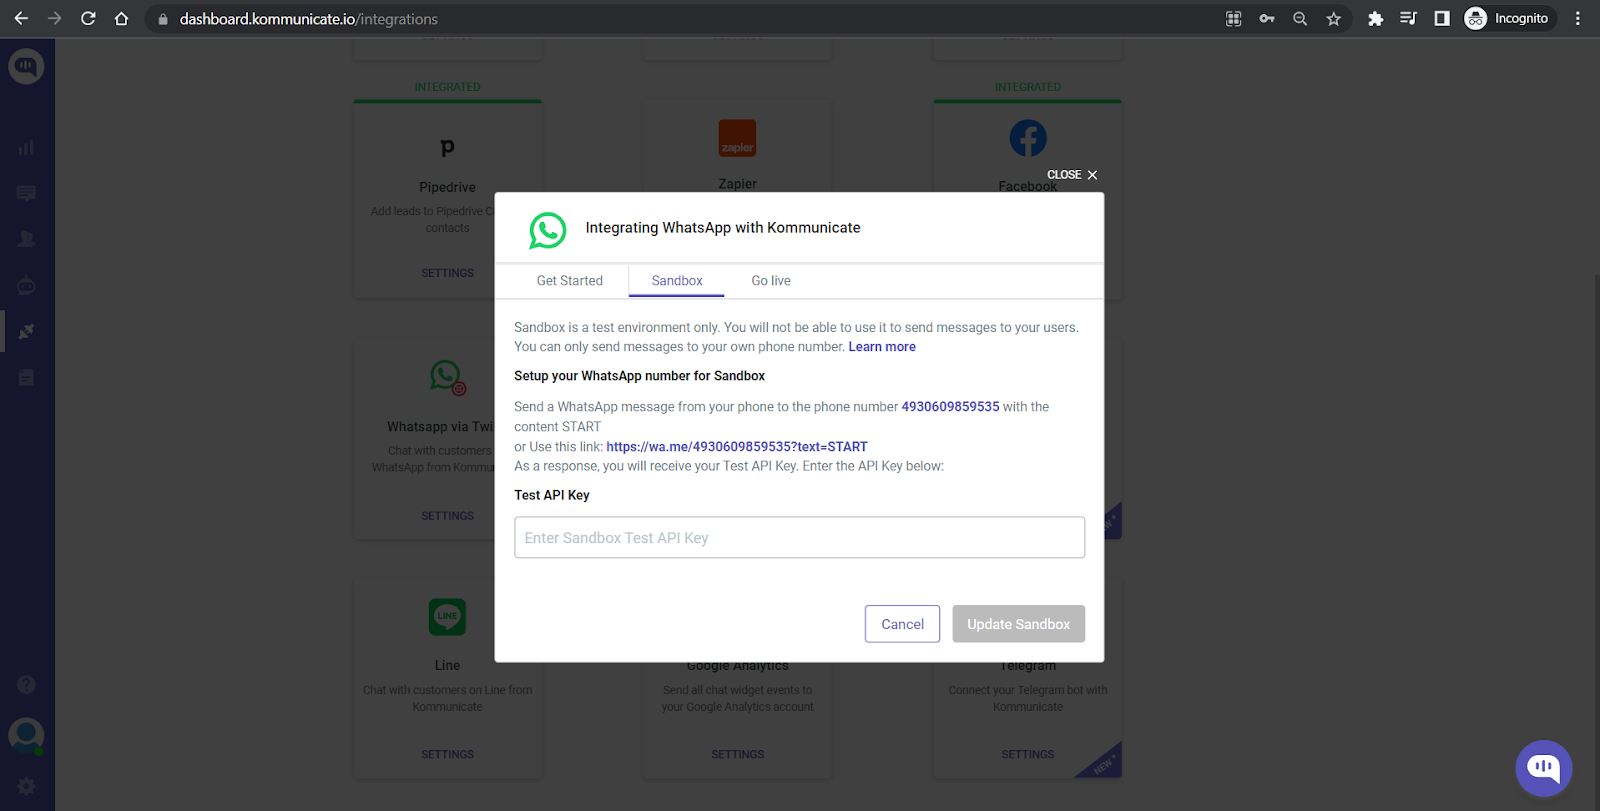
Please note that we are using 360Dialog Sandbox for testing purposes. You can do the same in Live Environment by selecting “Go Live” and submitting the details asked on that page.
To learn more about WhatsApp Integration with 360Dialog in Live Environment, please check this doc.
Now, our bot is ready, and we can test it on WhatsApp
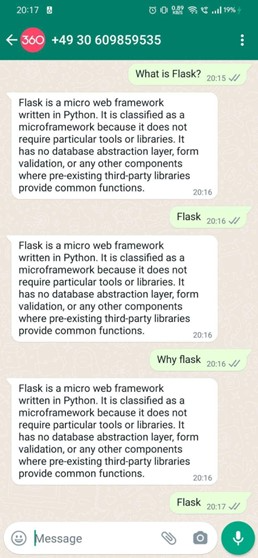
We can test our Bot using the test Bot link on a Browser by navigating to the Manage Bots section in our Dashboard and clicking on the “Test this Bot” button on that Bot.
You have now created your WhatsApp chatbot in Flask Python Framework.
Published at DZone with permission of Devashish Mamgain. See the original article here.
Opinions expressed by DZone contributors are their own.
Comments