How To Create Auto Scaling in AWS
This blog post will help you create Auto Scaling in AWS, a collection of Amazon Ec2 instances with similar characteristics among them in just a group.
Join the DZone community and get the full member experience.
Join For FreeThis blog post will help you create Auto Scaling in AWS, a collection of Amazon Ec2 instances with similar characteristics among them in just a group. These instances are treated as a logical group for scaling and management purposes.
Requirements
- Account in AWS
Step by Step on How To Create Auto Scaling in AWS
- Log in to the AWS account, is recommended with a user with certain permissions, not with a root user. Use the user’s access link (for example).
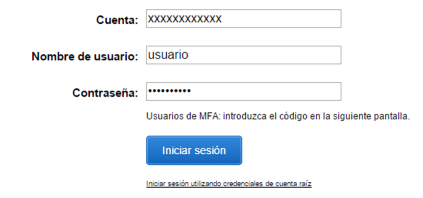
*Note: The account should be self-completed with a 12-digit number, change your username and password.
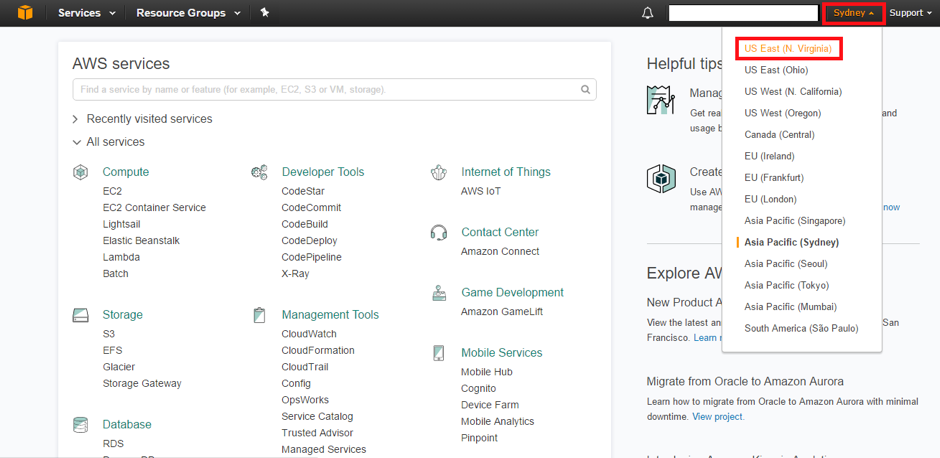
- Verify the region in which the infrastructure will be created. In the upper right corner, click on the button with the city name and choose the region, in this case, it will be Virginia.
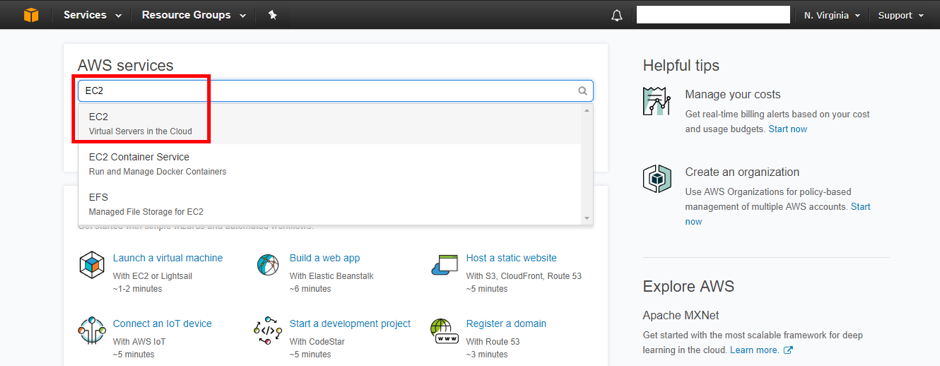
3. Select the EC2 service.
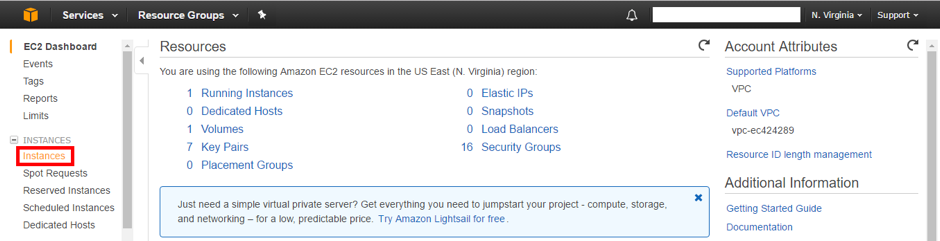
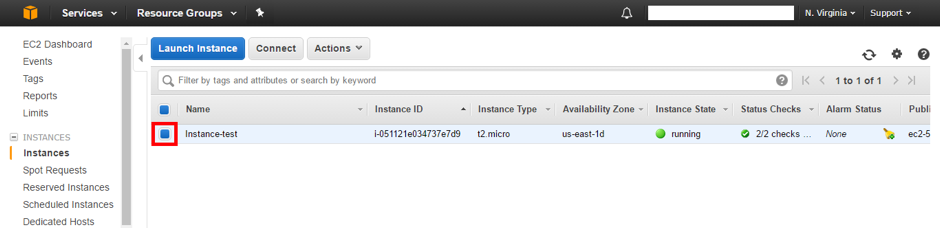
4. First, you must create an image of the instance (AMI), and select “Instances”.
5. Select the instance.
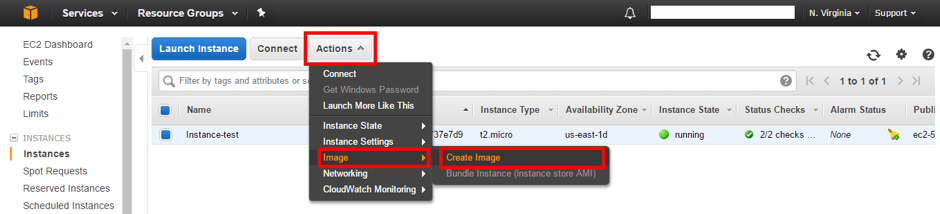
6. Press “Actions”> “Image”> “Create Image”.
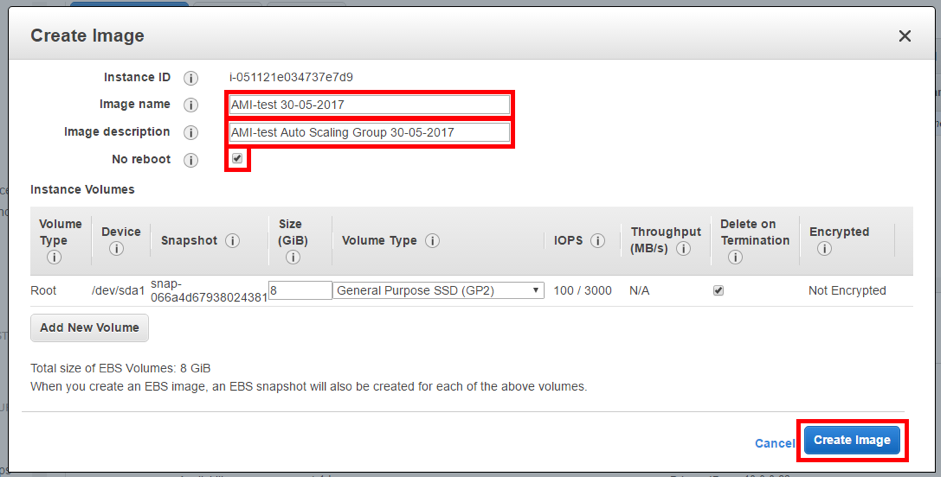
7. Assign a name to the AMI, description and activate the option “No reboot”, the latter to prevent the instance from restarting when creating the AMI.
8. Verify that the AMI has been created successfully, select “AMIs” from the side menu.
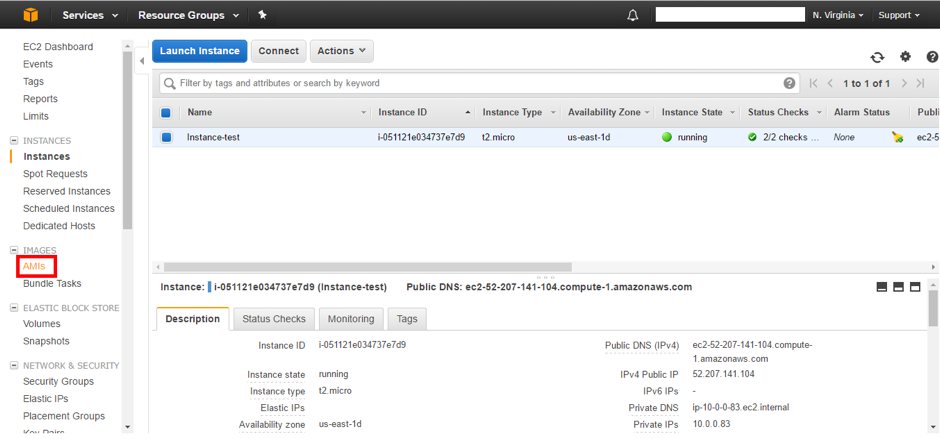
9. Check that the “Status” is “available”.

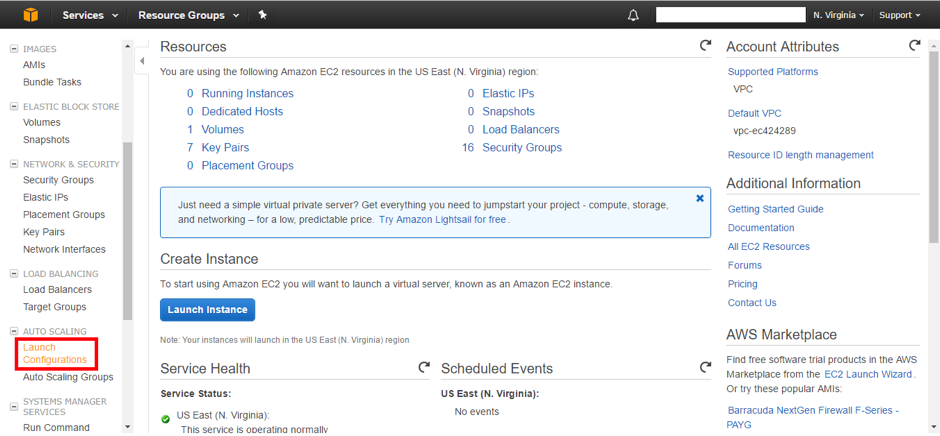
10. The next step is to create the Auto Scaling Group; select “Launch Configurations” from the side menu.
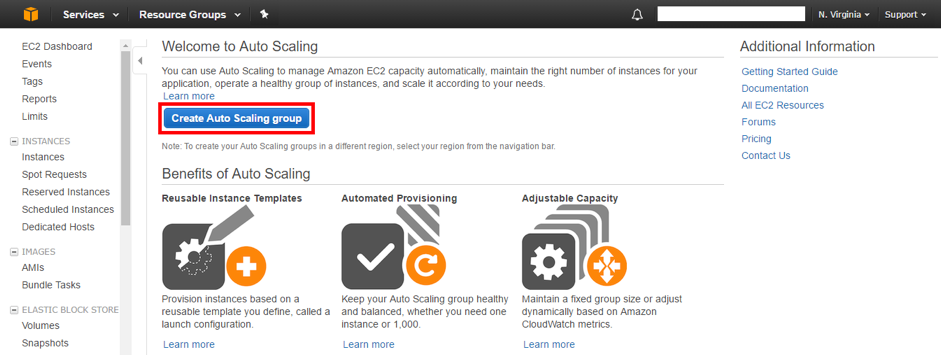
11. Click on “Create AWS Auto Scaling Group”.
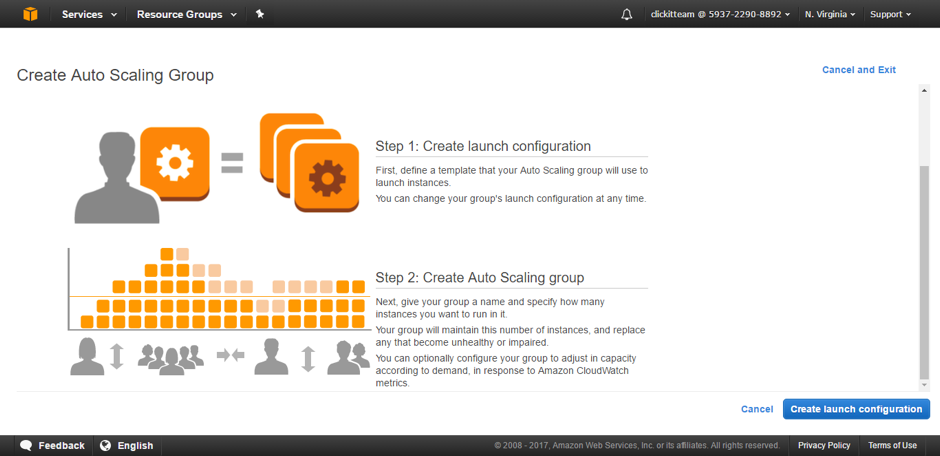
12. Press “Create Launch Configuration”.
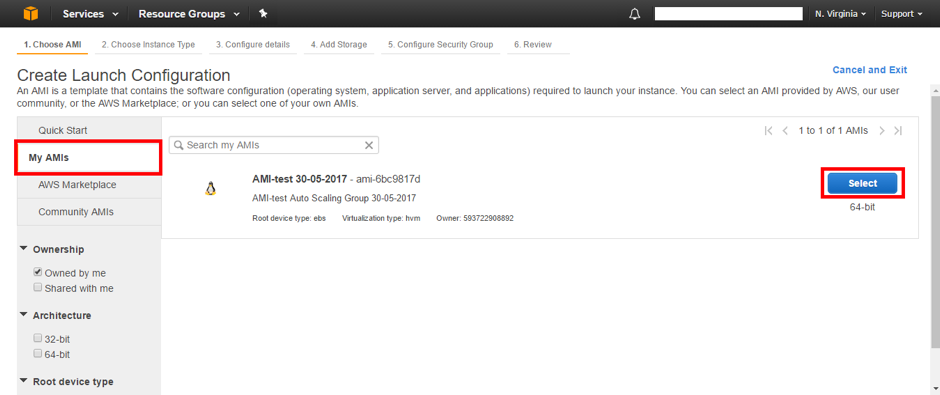
13. Select “My AMIs” and the previously created AMI.
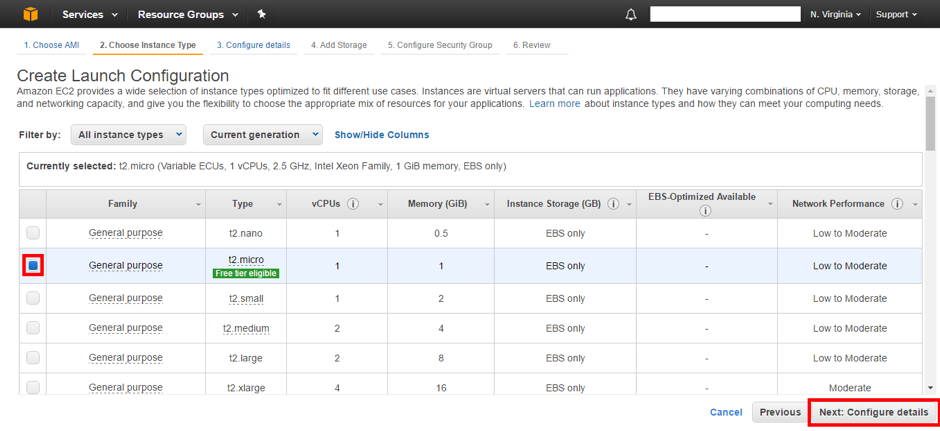
14. Select the type of instance desired for the slave instances (slaves) created by the Auto Scaling Group and press “Next: Configure details”.
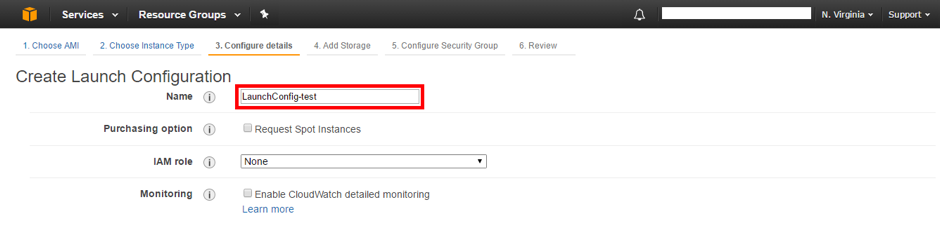
15. Assign a name to the launch configuration (Launch configuration).
16. In advanced details, in the “User data” section write the commands to mount the EFS and select the option where no public IP is assigned to any instance. Finally press “Next: Add Storage”.
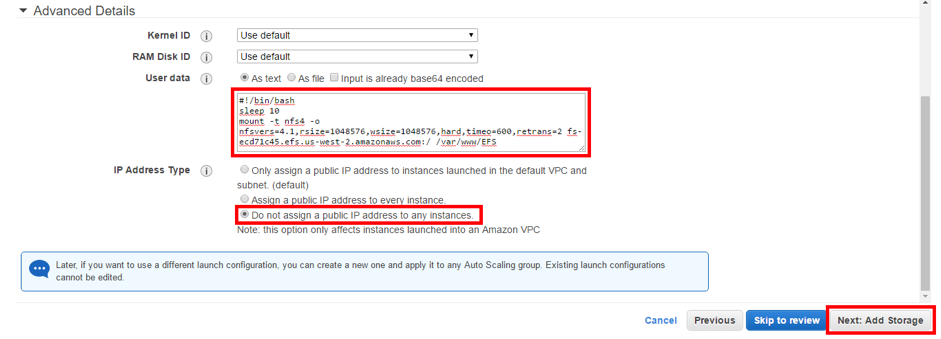
*Note: The MOUNT command is the same that AWS provided when mounting the EFS on the master instance, be sure to mount the desired one.
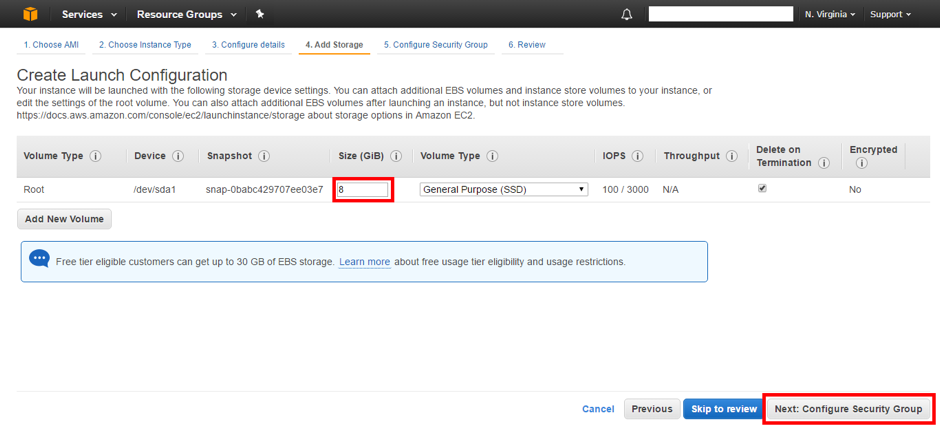
- The volume (disk) that will be assigned to the instances created by the Auto Scaling group will have a copy of the volume of the master instance. Press “Next: Configure Security group”.
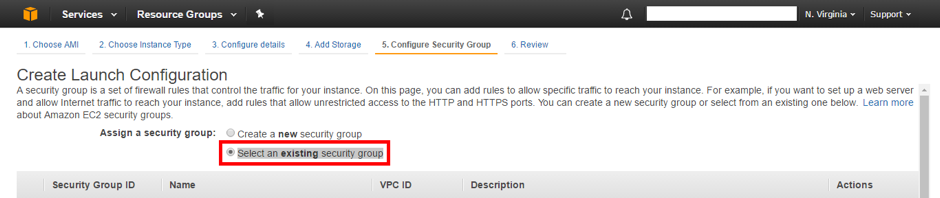
18. Select the option “Select an existing security group” to assign the same Security Group of the master instance, in this case, it will be sg-78920606.
19. Check that the settings are correct and create the launch configuration by pressing “Create launch configuration”.
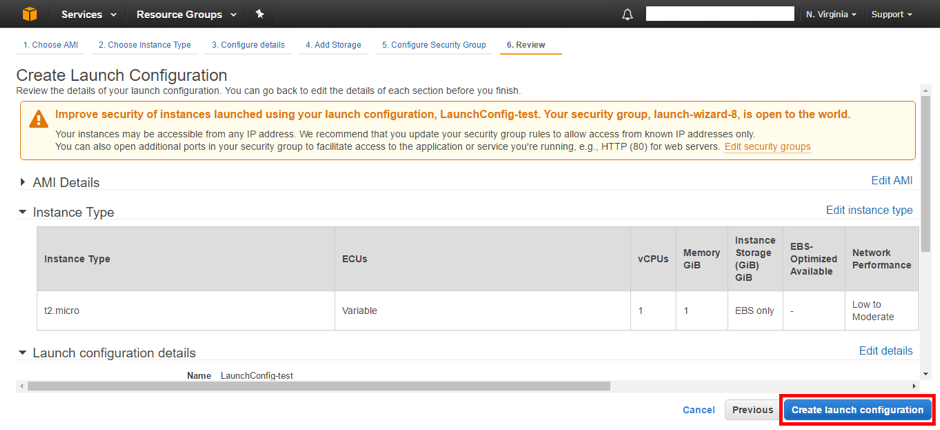
*Note: The warning is caused by the Security Groups because it can ensure even more to the instances and infrastructure in general, but taking this tutorial as a basic one can be advanced in this way.
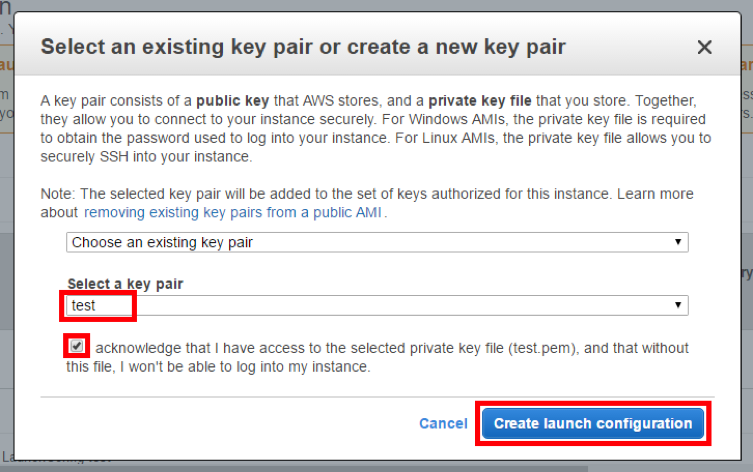
- Choose an existing key and accept that you have access to it; create the launch configuration.
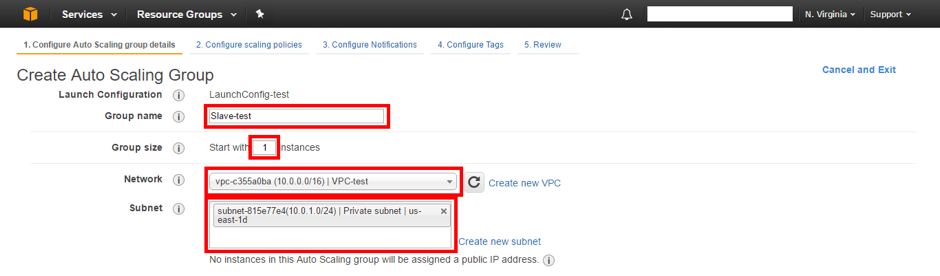
The next thing is to configure the AWS Auto Scaling group; Name the group of instances, determine the number of instances with which it will start, select the VPC and the private subnet, you must also specify that the traffic will come from a Load Balancer so that the “slave” instances are automatically added to it. Press “Next: Configure scaling policies.”
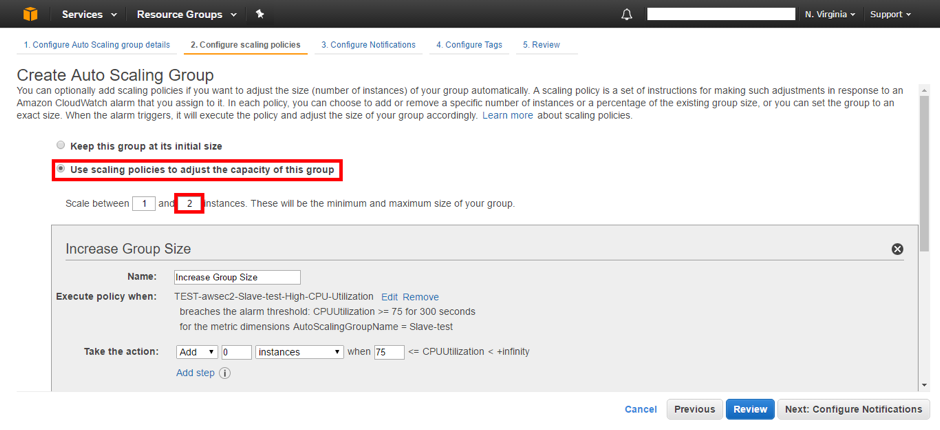
22. Adjust group policies.
- Determine the maximum number of possible instances in the group.
2. Add a new alarm for the increase of instances:
Create a topic (topic) to which the name is assigned and emails to which they will be notified (if they are two or more, separate them with commas), establish the maximum percentage in a period of time, name the alarm, and create it.
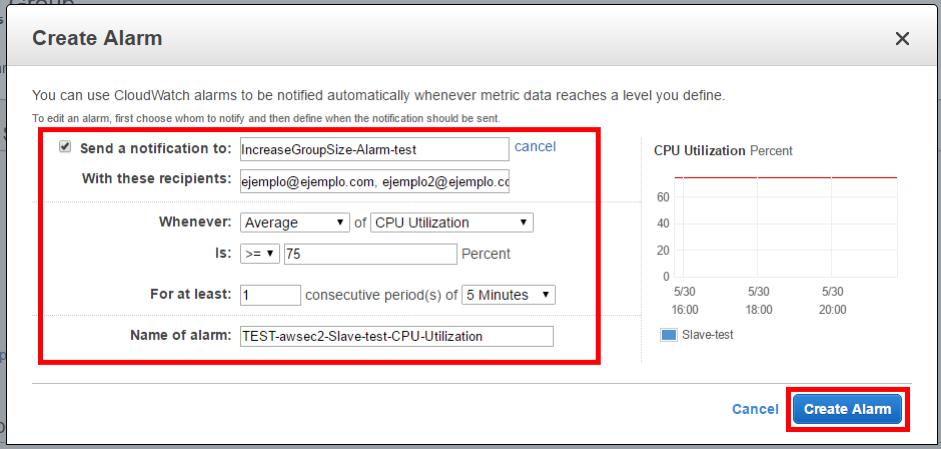
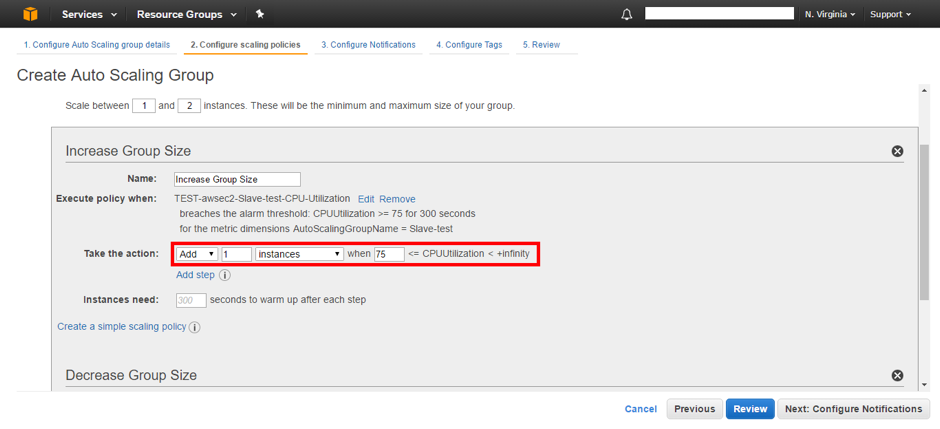
3. In “Take the action” we establish that it increases the number of instances by 1 in 1.
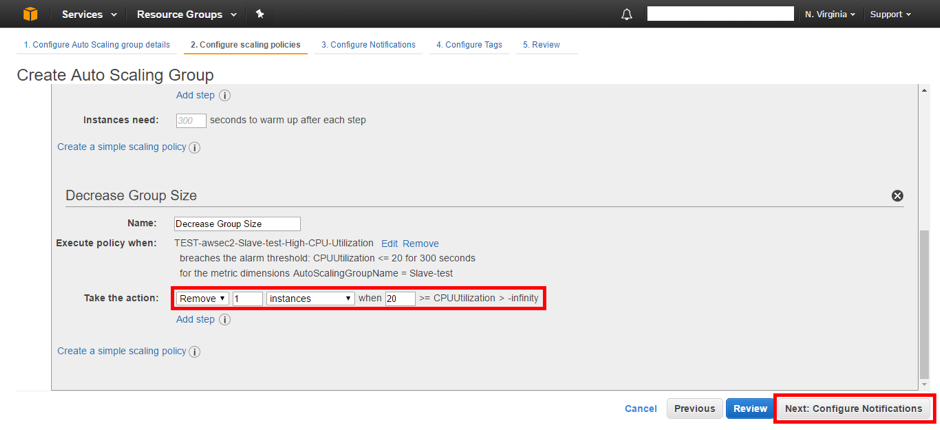
4. Add a new alarm for the decrement of instances:
Create a topic (topic) to which the name is assigned and emails to which they will be notified (if they are two or more, separate them with commas), establish the minimum percentage in a period of time, name the alarm, and create it.
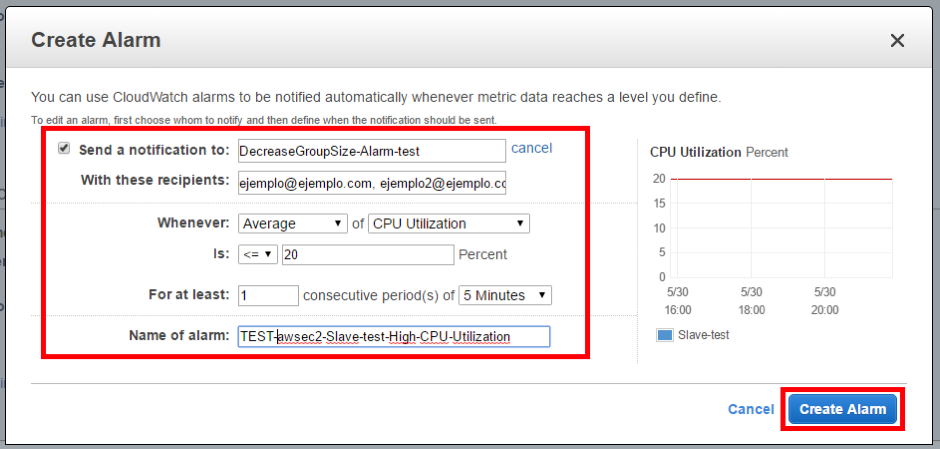
*Note: Change the “> =” (greater or equal) by a “<=” (less or equal) in the alarm to decrease the number of instances.
5. In “Take the action” we establish that the number of instances should decrease from 1 to 1; press “Next: Configure Notifications”.
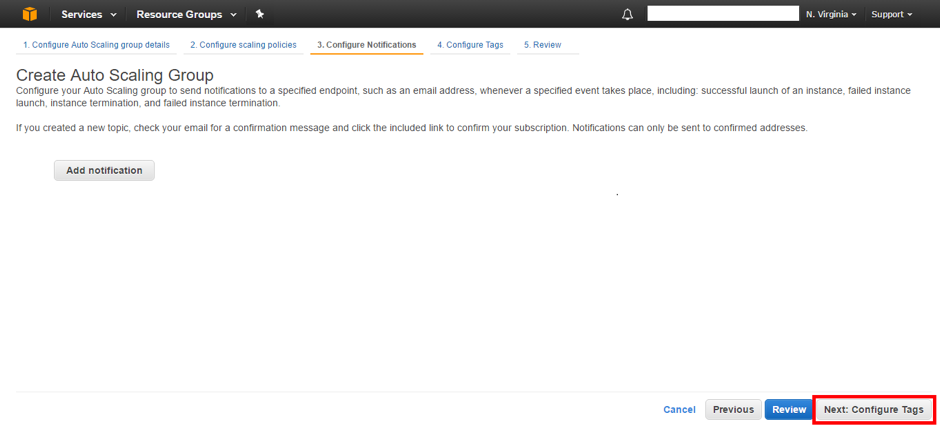
23. If you want to receive notifications when an instance is created or deleted, add a notification. On this occasion, you will not configure an extra alarm. Press “Next: Configure Tags”.
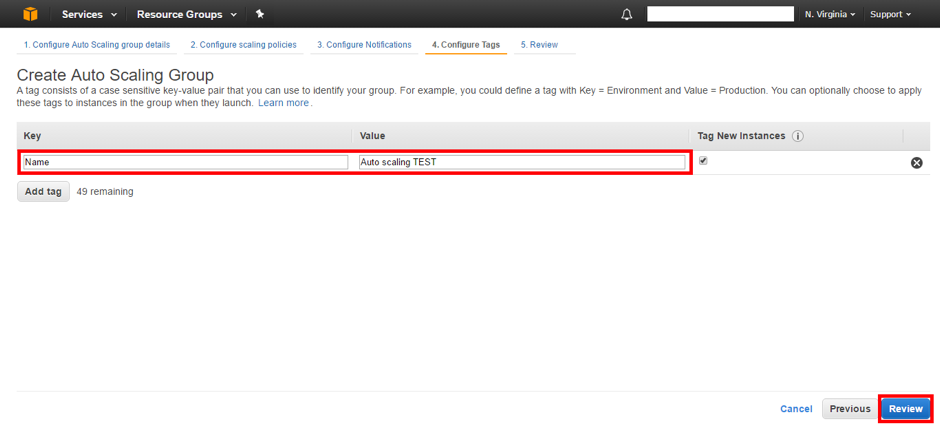
24. Optionally you can add a name to the Auto Scaling group, as shown in the following screenshot.
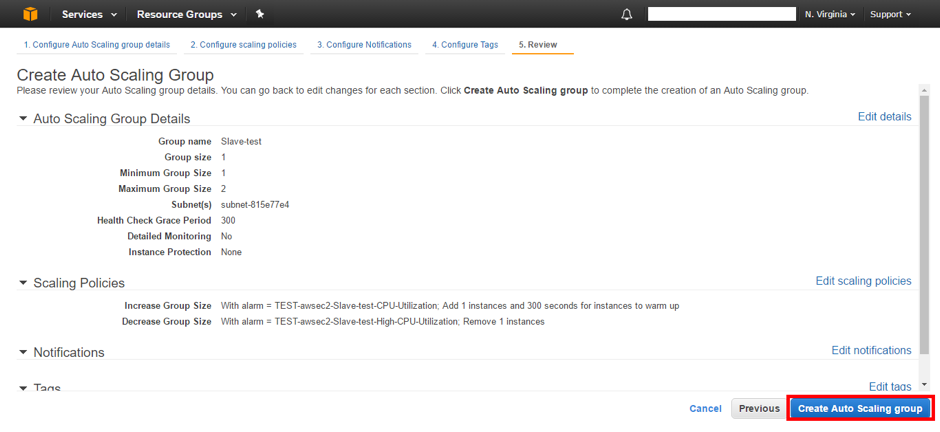
25. Review the configuration and create the Auto Scaling group.
26. In a few minutes, you can see in “Instances” the instance that is created automatically.
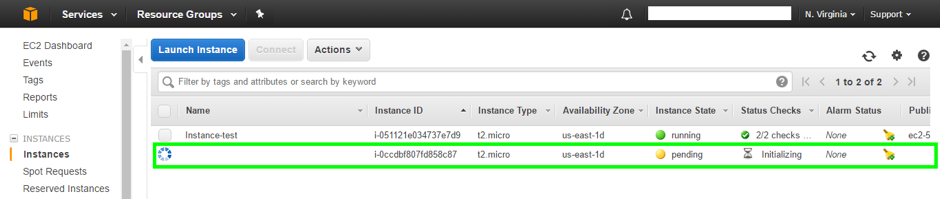
*Note: Wait until your state is “running”.
Those are all the steps that you need to follow to create an AWS AutoScaling Group.
Published at DZone with permission of Alfonso Valdes. See the original article here.
Opinions expressed by DZone contributors are their own.
Comments