How to Create Custom Azure Pipelines Build Agent Fully Automated
You can improve the value stream maps by speeding up the build process. If your code is taking too long to build using Azure DevOps build agents, no worries. You can create your own build agent to speed it up!
Join the DZone community and get the full member experience.
Join For FreeCurrently, most software teams that are using Azure DevOps to build their software choose to use Azure-hosted agents as their build server. This comes with a lot of benefits. Many libraries are already installed on these agents so it's quite compatible with most projects' specifications. For every build, you get a new agent that is provisioned and after the build will be destroyed. However, this has its own limitations. Azure Hosted Agents are using a specific type of VM so it is not possible to increase hardware specifications. If your projects also have libraries that are not supported by Azure Hosted agents, you need to install them on the agents. This might not be an issue for projects that have started in recent years, but if you have a legacy code that takes an hour to build then you might start to think about how you can speed up the build process. For such a situation, there are a lot of solutions like reconsidering the architecture of software and so on which is not the scope of this article. In this article, I am going to focus on how you can create a custom self-hosted agent.
Custom Self Hosted Agent
With Azure DevOps, it is possible to create an agent pool and add our own agents. These agents can be your personal laptop, on-premise server, or virtual machine. What we want to do in this tutorial is to see how we can create a fully automated process in which we create a custom Windows image. This gives us the benefit of having an image containing all the applications and settings we need. Additionally, we can provision a virtual machine using this image with desired hardware specifications.
Automated Solution Design Process
Design Problem
With this solution, I want to create custom build agents in Azure DevOps. This means I want to change the base windows server and add extra applications, settings, etc. Then create a virtual machine using a new image. I would like to make this solution scalable and at the same time keep the maintainability.
Solution in detail
I divided this process into two parts which are creating an image and deploying a virtual scale set. let's takes look into these parts in detail.
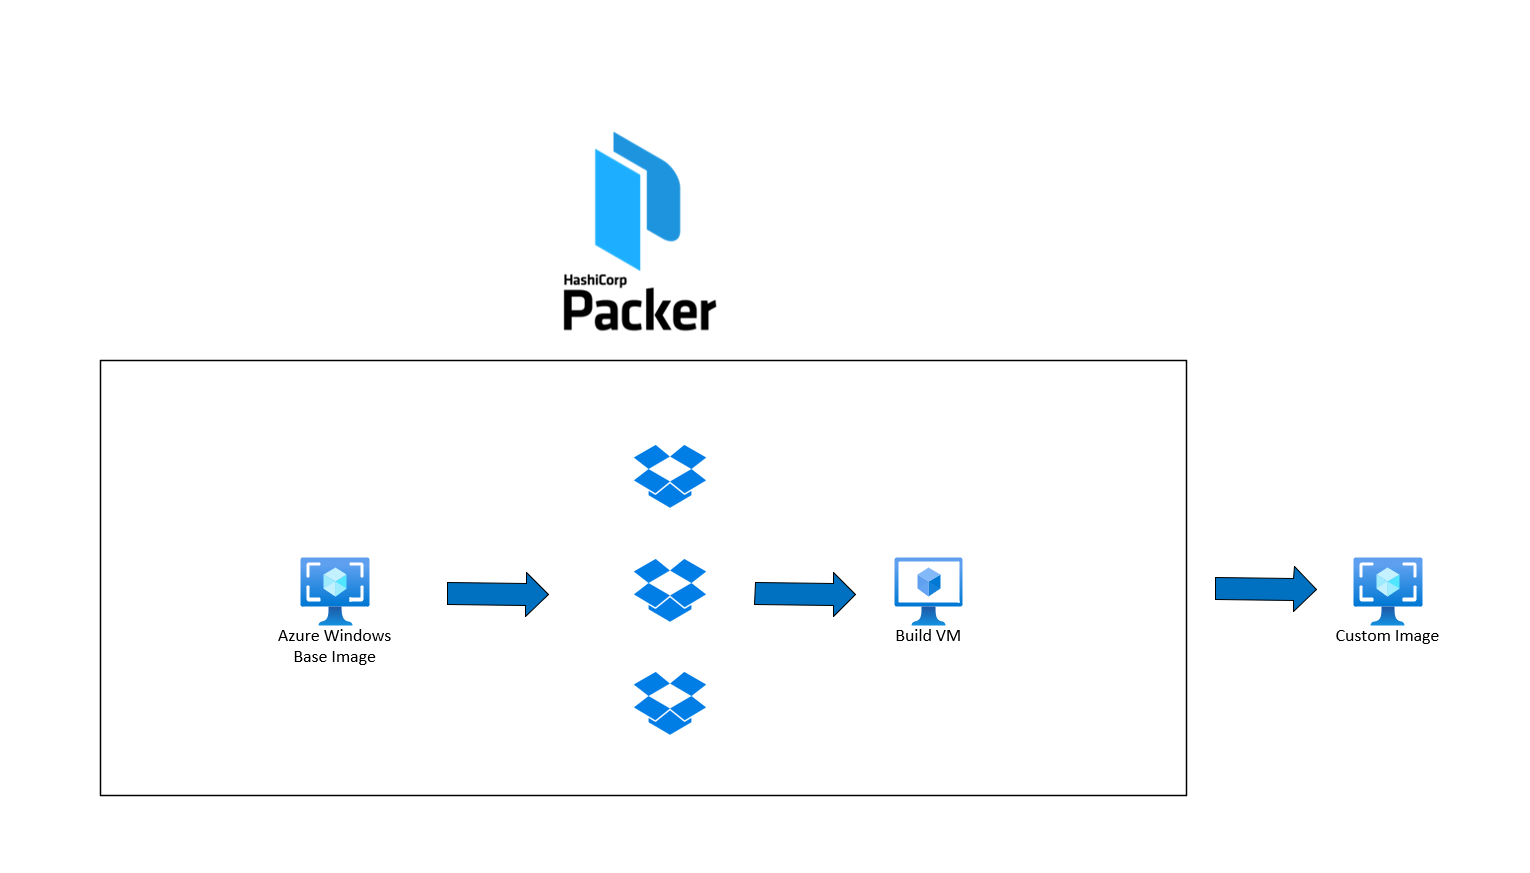
Image creation
One way to create a custom image is to use Packer. Packer is a tool that takes a template and compiles it to create a new image. You configure the environment in which Packer will compile your image and also the scripts you want to run on your base image to create your custom image. When we see that we can run a script, it makes our lives so much easier. You might already be familiar with Chocolatey. If not, I highly recommend you to try it. It's a package manager which you can use to install applications and libraries very fast. I used Chocolatey as my solution to add extra applications to my Windows Image. Image compilation takes time and this process
Virtual Machine Scale set Creation
Once the image is ready, you can use it to create a virtual machine but I would like to create several build agents. Additionally, I want to be able to scale up or scale down servers without so much effort. This is why I used the virtual machine scale set in which I defined my desired configurations for virtual machines and then the scale set will take care of the orchestration of virtual machines. You can easily scale up or down virtual machines by defining your desired capacity in the Virtual Machine Scale set policy.
 Orchestration Pipeline
In this solution, we have one pipeline in which we trigger the entire process. This contains three steps to build an agent image, deploy virtual machine scale sets and deploy azure DevOps agents on VM's. This could also be done in two steps, but to make it more clear and understandable for everyone, I decided to separate the agent deployment to avoid complexity and confusion.

How to test the solution
This project has been tested many times and you can be sure by following the guidelines to get the same results. Except for the source code provided here, you only need to have an Azure subscription and also provide value for variables in the pipeline.
Step 1: Clone this solution from GitHub
The full source of the project is available on the Azure DevOps git repository here. You can browse it and clone it from here.
https://github.com/CodingAsCreating/azure-pipelines-agent-builder
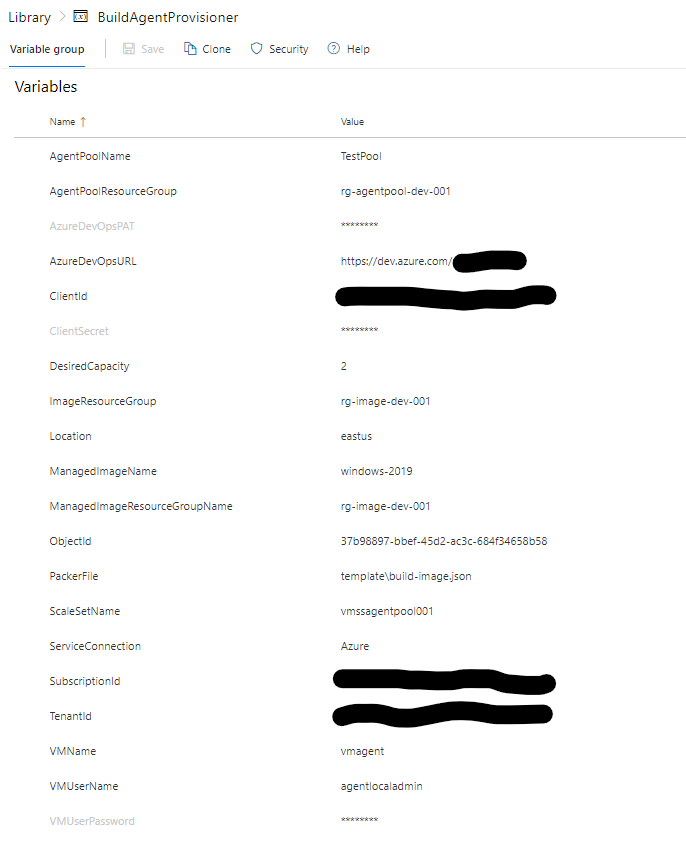
Step2: Create variable group and add value
There are variables that should be filled in the variables group. So create a variable group and add these variables.
You need to create an Azure service principal which you can do by running this Azure command:
x
az ad sp create-for-rbac --role="Contributor" --scopes="/subscriptions/{Your Azure Subscription ID}"
After running this command, you will get something similar to this:
xxxxxxxxxx
{
"appId": "d63c34e0-da9c-4dcf-b6f7-1324215d1362",
"displayName": "azure-cli-2021-05-02-22-59-07",
"name": "http://azure-cli-2021-05-02-22-59-07",
"password": "DMwHf_Wij~Saws3YJ-L99hw.ms9rRa~Hpr",
"tenant": "8ed60318-e8cd-444b-924b-fa314c6f4099"
}
Now, you can place these values for the variables we have. Just to help you a bit to avoid confusion about the variable names:
appId= ClientId
password=ClientSecret
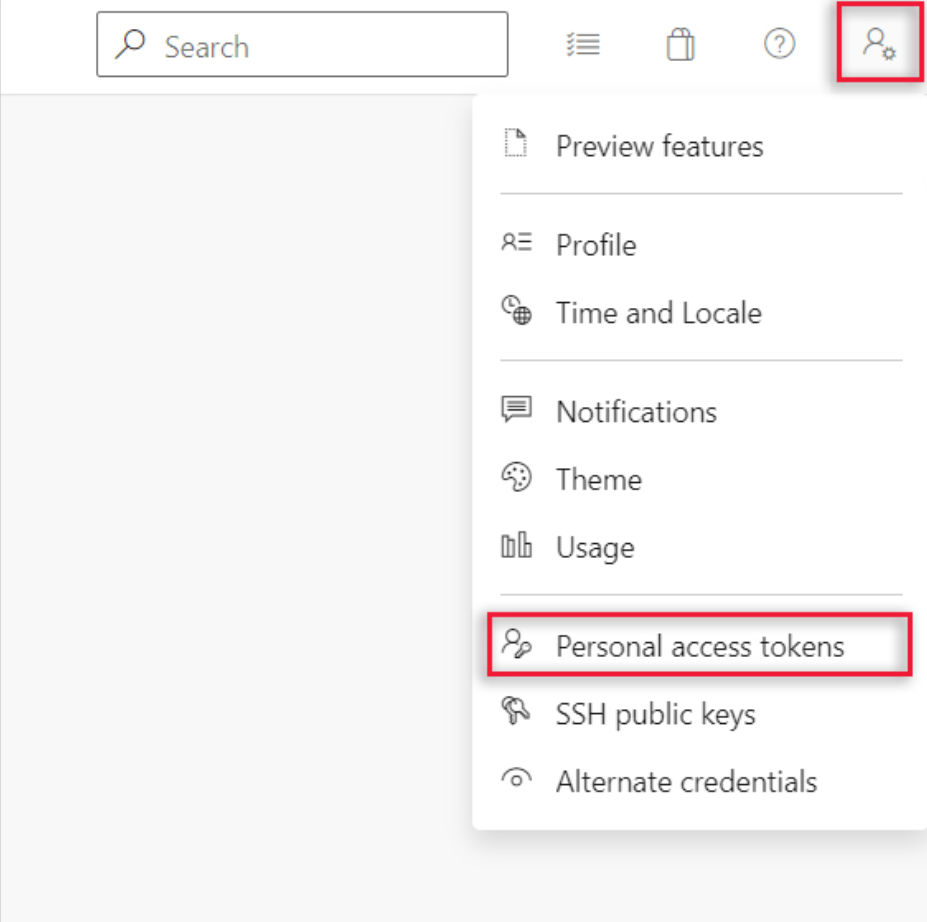
You also need to create an Azure DevOps personal access token which we call PAT. To do that, you can right-click on
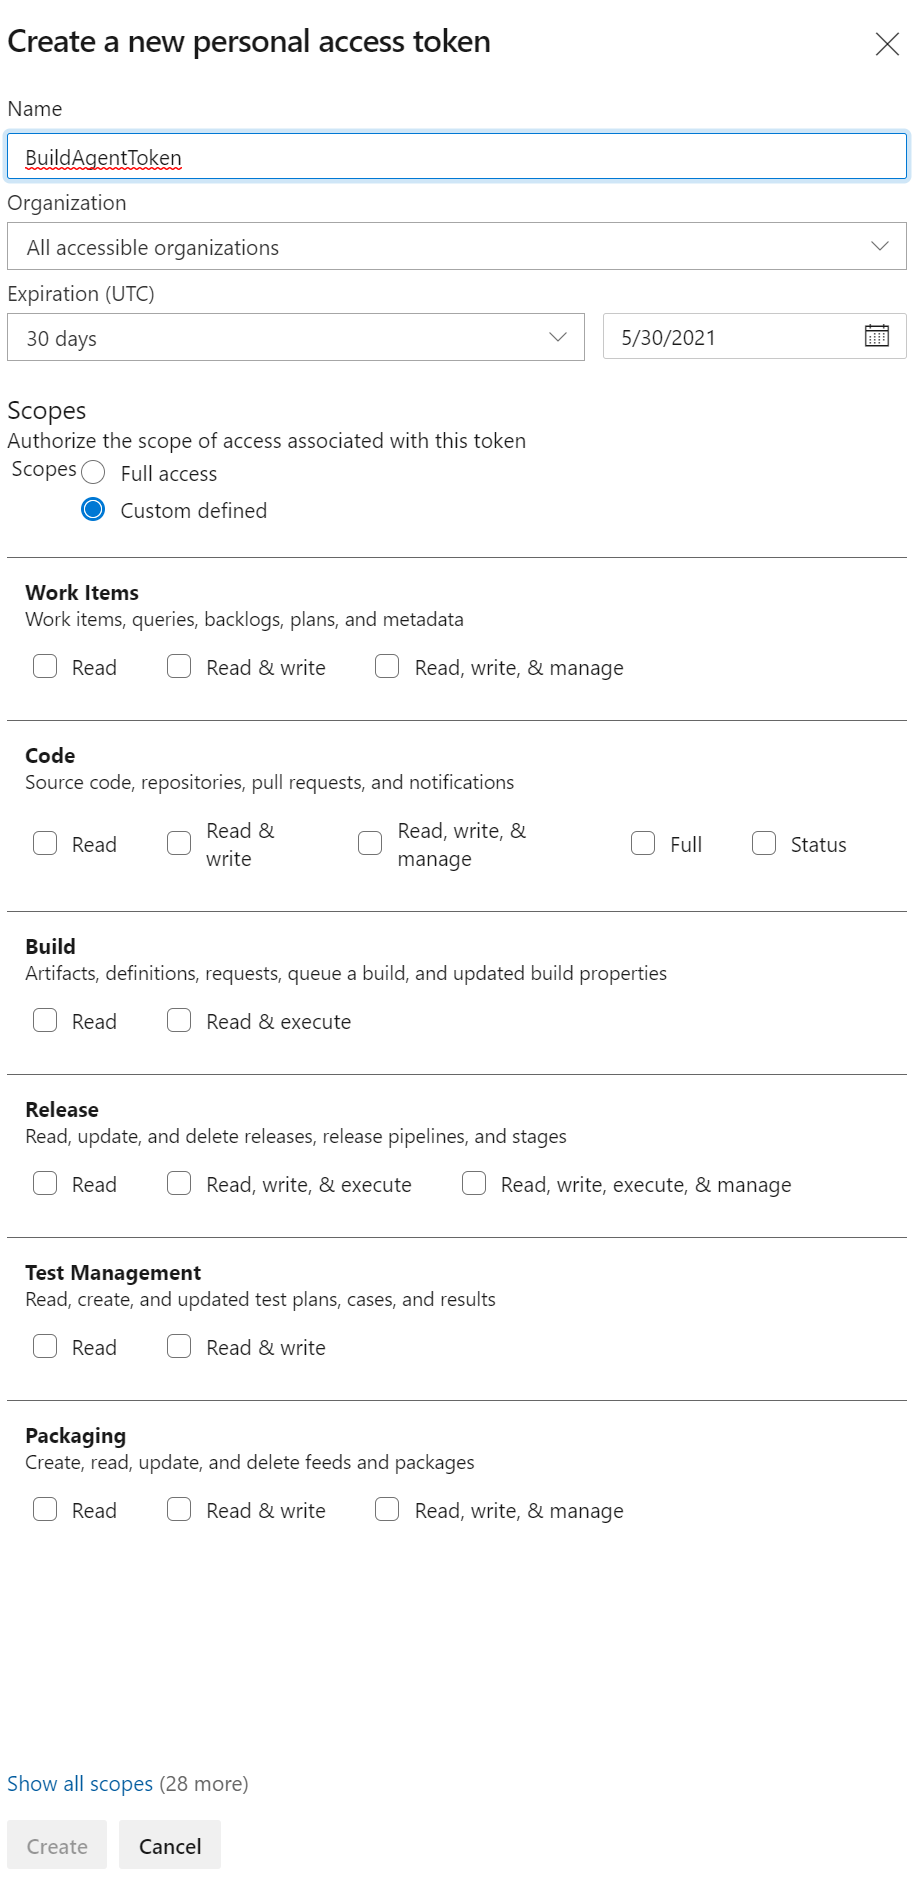
Then click on New Token to start creating a token

Then go to a page where you can configure your personal tokens. For the scope, select Agent Pools (read, manage) and make sure all the other boxes are cleared.
Now you can fill the values in variables. You can fill the AzureDevOpsToken with your token and AzureDevOpsURL with your Azure DevOps organization URL which should be something similar to http://dev.azure.com/{your Organization name }
Step 3: Add pipeline
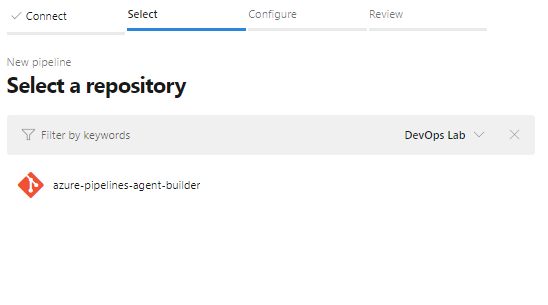
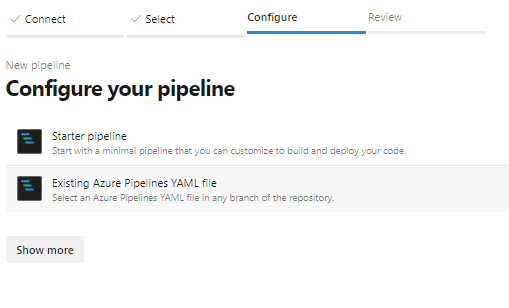
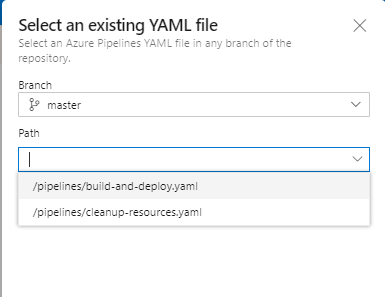
The next step is to create a new YAML pipeline and choose an existing option to add the pipeline from the repository.
Then Save your pipeline. For the next step, you need to assign your variable group to this pipeline.
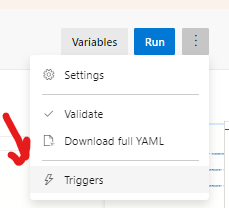
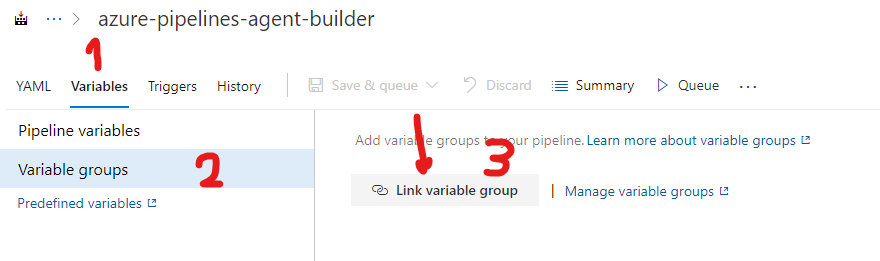
So when you click on "Link Variable Group", you should be able to see the variable group list and link to the one you defined earlier.
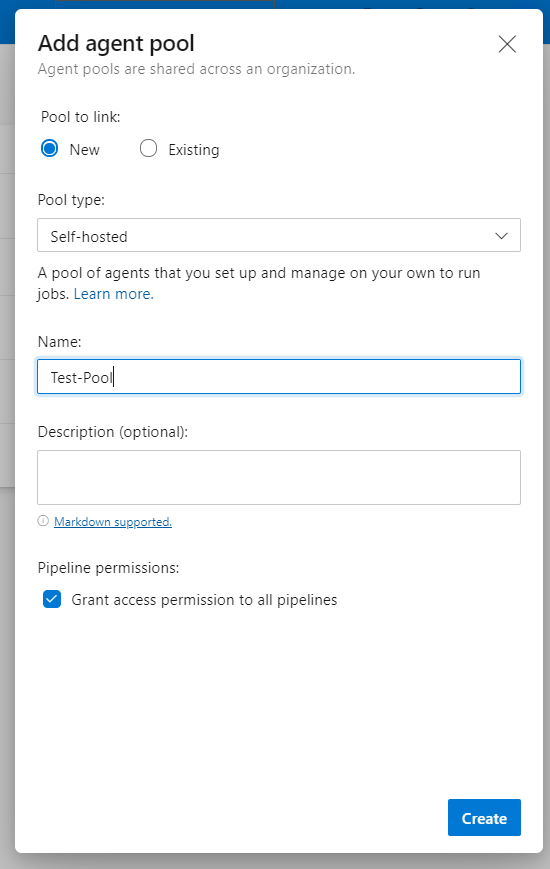
Step4: Define a new pool
You have to create an agent pool in Azure DevOps. Open the agent pools from the project settings menu and create a new agent pool. You need to choose "self-hosted" for the pool type and tick the checkbox to grant access to pipelines.
Don't forget to replace the value of the variable for the AgentPoolName in the variable group.
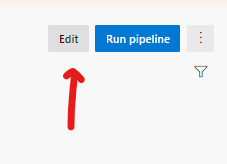
Step4: Run the pipeline
Now everything is ready to run the pipeline. You can run the pipeline and watch the process!
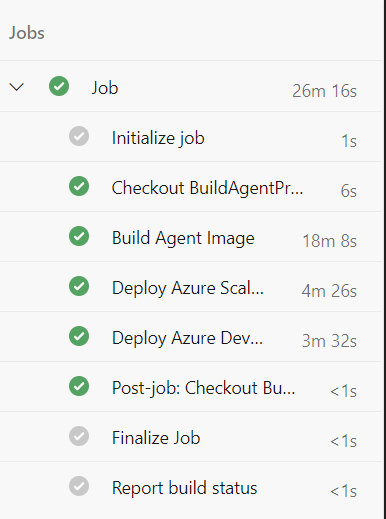
This process should take around 30 min to complete using Azure hosted agents. You might face some issues and probably, it will be the variables. So make sure you define all variables correctly and check the spelling as well.
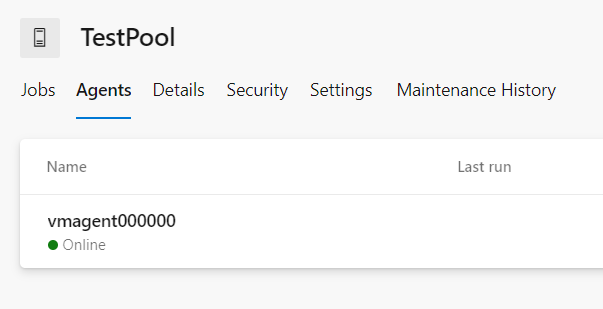
Step5: Check results
If everything goes well, you should be able to see the agents in your agent pool. I configured to have one agent to save cost during my test so if you want more, you can change it in the script.
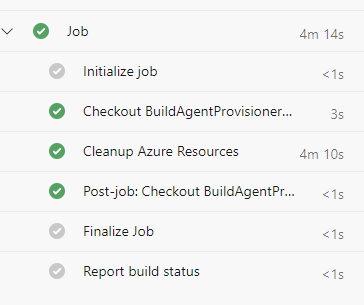
Step6: Cleanup
In order to clean up the resources, you can use the pipeline which is provided in the repository. You need to repeat steps 2 and 3 for this pipeline. So you create a new pipeline and then select the existing pipeline to add the cleanup pipeline from the repo. Then you need to link the variable group to this pipeline same as what you did for the previous pipeline. If you run the pipeline, you should get something like this. This solution will remove all the resources that are being created by this solution.
Contribute to this project
If you have any ideas to make this solution better, feel free to bring your ideas. You can make a pull request on the repo. I am excited to hear from you and your experiences with build agents.
Opinions expressed by DZone contributors are their own.
Comments