How to Make Your Own Web Spreadsheet App: Tools Review
Read on for a thorough review and comparison of the spreadsheet apps Webex, Kendo UI, and Handsontable.
Join the DZone community and get the full member experience.
Join For FreeIn this article, we’ll take a look at three components that you can use to create online office applications, specifically apps that work with the Excel tables. If you are interested in a credible SpreadSheet component for your enterprise web app take a look at these tools. We’ll try to overview three different types of solutions that will work for you whatever your goals are.
The List of Components
SpreadSheet by Webix is a widget that is available as a part of the Webix framework, which means that this time developers have something more to offer. Indeed, Webix includes a wide range of components. From a simple button to complex data components, Data Table, and Tree Table – you can combine them for creating something more multi-purpose than an online spreadsheet app. And you can get much more than just a spreadsheet widget: Webix SpreadSheet works only with the whole UI library that consists of 80 widgets and controls. Regarding cost, it’s a golden mean comparing to the other options.
Kendo UI SpreadSheet allows editing and visualizing tabular data with a variety of cell formatting options, styles, and themes. Kendo UI is probably one of the most popular JavaScript UI frameworks which you might have heard about if you have ever tried your hand at web development. If you choose Kendo, you get the spreadsheet widget with 70+ jQuery-based widgets. The professional edition offers you 70+ jQuery-based widgets along with the tech support. As you probably guessed, it's costly. Kendo UI SpreadSheet is the most expensive option of the three.
Handsontable is a spreadsheet component for web apps written in JavaScript and HTML. This one will be a pretty good option for those who wants to save money since it has the lowest price among the others. Looks like a pretty good choice, but besides the spreadsheet, there are no other components available.
We defined what we want to build and have a list of tools that can help us with our task. Now, let’s make a small comparison. We’ll check the documentation pages to make sure that there will be no trouble for those who are only going to start working with these components. We’ll create a spreadsheet to see how much efforts are required and how they’ll be rewarded.
Webix Spreadsheet
Webix provides you with a way wider range of possibilities than just building a spreadsheet app. This framework allows creating responsive user interfaces using a minimum amount of code and then adding a more complex functionality. For example, you can quickly create a prototype of your future application and then, after you make sure that each component is in its place, start configuring everything. Webix released updates for the SpreadSheet ion September 2016. Let's have a look inside.
The documentation page has everything you need to know. The getting started guide, guides for every available widget along with the demos do their thing. Each page is marked with the required level of knowledge (such as “beginner,” “intermediate,” etc.), which can be pretty handy for beginners.
Let’s continue with the coding process. To install the required files, you can use a preferable package manager, such as npm or Bower. And, of course, it’s always possible to include the files from the downloaded package:
<link rel="stylesheet" href="codebase/webix.css" type="text/css">
<script src="codebase/webix.js" type="text/javascript"></script>
To work with spreadsheet you have to include two extra files:
<script src="codebase/spreadsheet.js" type="text/javascript"></script>
<link rel="stylesheet" type="text/css" href="codebase/spreadsheet.css">
After that, you can initialize Webix and create a spreadsheet on the page. For creating components, Webix uses a view the value of which defines what widget you want to use.
For example, view: "button" will add a button to your app. Besides the type of widget, we can define the source of data. Here’s how the required code looks like:
/* we use webix.ready() function to execute the code after the page is loaded */
webix.ready(function(){
    /* object constructor */
    webix.ui({
        /* create a spreadsheet */
        view:"spreadsheet",
        /* loaded data object */
        data: base_data
    });
});
That’s it. Besides the initialization that is required in any case, all we need to do, is to define the type of the widget and the data it’ll use.
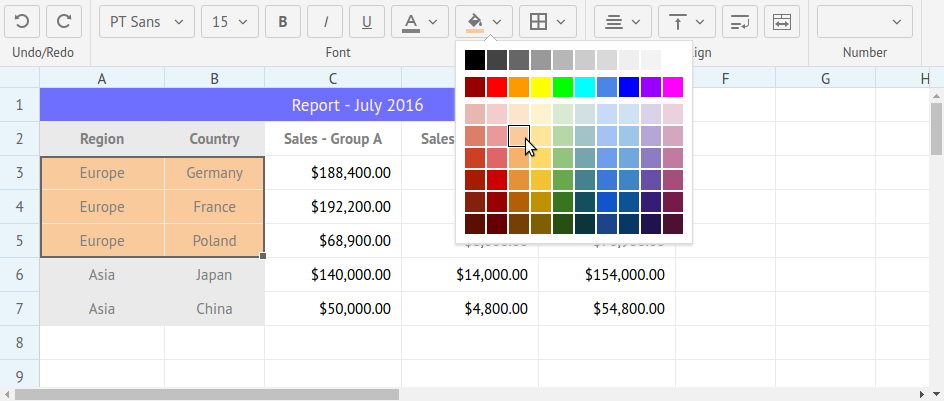
Here’s the result:

We can edit tables, change the font and its size, select the text color and background color, adjust horizontal align, apply the desired number format, etc. To cut it short, we can do almost everything that a normal online office app allows us to do.
In most cases, Webix allows you to configure your apps using a single line of code. For example, you can set the number of columns using this code line:
columnCount:10Surely, more complex customizations require more work. But still, fast developing speed is one of the distinctive features of this framework.
Kendo UI Spreadsheet
It will be the shortest part of our “contest” since there’s no need to introduce Kendo UI to you. This framework made by the Telerik company became a true classic. The range of solutions that Kendo developers can offer to you is pretty impressive. There are .NET UI controls, reporting and developer productivity tools, cross-platform tools to design, build, deploy, manage and measure all your mobile apps, JavaScript/HTML5 UI widgets for responsive web visualization and tons of other handy stuff.
The documentation page contains all required info about the existing components. There’s even a bunch of video tutorials for those who is tired of reading. Let’s take a look at how the process of spreadsheet creation looks like.
To install the required files, you can use Bower, npm, or NuGet package managers, or include the files in the <head> tag of your page.
After that, you will only have two steps to complete to achieve your goal: create an empty <div> element and initialize the spreadsheet.
<div id="spreadsheet"></div>

<script>
    $("#spreadsheet").kendoSpreadsheet();
</script>
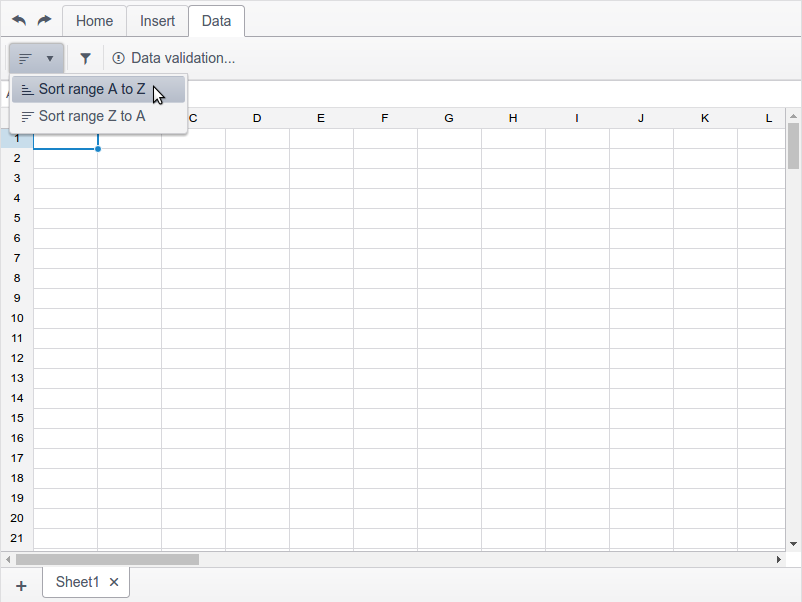
And here’s the result:

With minimum effort, you’ll get a fully-functional JavaScript spreadsheet. Further configuration will depend on your needs.
For example, if you want to create a document with multiple sheets, initialization can look like this:
$("#spreadsheet").kendoSpreadsheet({
    sheets: [
        {
             name:"Orders",
             /*other preferences*/
        },
        {
            name:"Contacts",
            /*other prefs*/
        }
    ]
});
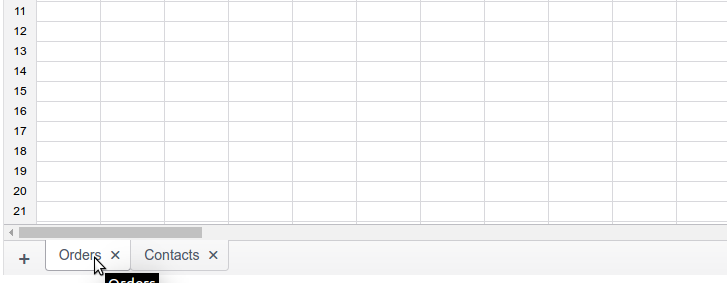
This code will create two tabs, one for each sheet:

If you’re curious about the Kendo UI Spreadsheet look and feel, you can check this demo.
Handsontable
List of features looks promising: data binding, sorting data, data validation, searching, context menu, and so on. Moreover, basic functionality can be extended by using one of the many available plugins. At first glance, the documentation page may seem a little bit humble, but it contains all the useful information you may wish to find: from the 5-minute jump start guide to the detailed API reference.
One of the main concepts of Handsontable is the brick-by-brick structure, which means that you can add the features you want and leave out the rest. So, you should clearly understand what features you want to get and prepare yourself to spend some time reading documentation.
Well, let’s check how the process of a widget creation looks like. You can install Handsontable using Bower:
$ bower install https://my.handsontable.com/handsontable/handsontable-pro.gitOr npm:
npm install git+https://{username}:{password}@my.handsontable.com/handsontable/handsontable-pro.gitAlso, you can prefer the installation that implies using SSH keys or a custom build containing only the core engine and selected plugins. And, of course, there’s always a possibility to add the required JavaScript and CSS files to the page:
<script src="/dist/handsontable.full.js"></script>
<link rel="stylesheet" media="screen" href="/dist/handsontable.full.css">
When you finish the preparations, you’ll be able to initialize the spreadsheet. First of all, you’ll need to create a <div> container that will be turned into a spreadsheet:
<div id="spreadsheet"></div>Then you need to pass a reference to the created container into the spreadsheet constructor, and define the configuration: specify the data source, enable headers, and optionally add the drop down menus:
/*  data that we're going to use */
var data = [
  ["", "Ford", "Volvo", "Toyota", "Honda"],
  ["2016", 10, 11, 12, 13],
  ["2017", 20, 11, 14, 13],
  ["2018", 30, 15, 12, 13]
];
/* our DIV container */
var container = document.getElementById('spreadsheet');
/* spreadsheet initialization */
var hot = new Handsontable(container, {
  data: data,
  rowHeaders: true,
  colHeaders: true,
  dropdownMenu: true
});
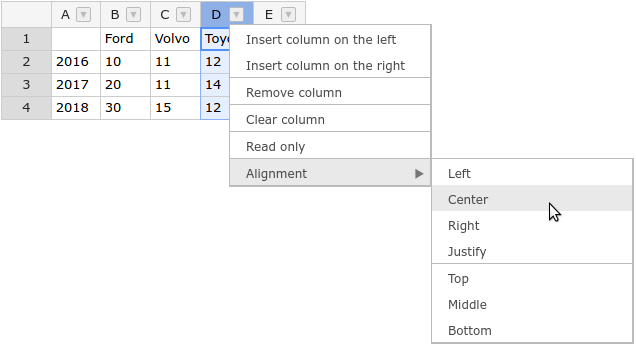
The result is shown below:

Looks neat, but still pretty far from the working spreadsheet software. We can render the data that we have on the screen and configure the columns according to our needs. Styling, saving, and loading – these and other useful features require additional coding, which goes beyond this brief review. To see how possible results can look like, check this demo page.
Conclusion
Let’s summarize the acquired experience.
Webix SpreadSheet has a lot to offer. Besides the fully configurable SpreadSheet, you’ll get 80 JavaScript/HTML5 widgets. Fast development, high functionality out-of-the-box, and acceptable price make this option the golden mean.
Kendo UI Spreadsheet is the well-proven framework that offers you 70+ jQuery-based widgets along with the tech support. Developers do care of their customers and provide them with the high-performance components, well-written documentation, and even video tutorials. But everything has its price. And, we must say, it’s quite high in this case.
Handsontable is an awesome tool for those who don’t want any unclaimed functionality in their apps. Very functional, the cheapest of those we chose for our review, it can be a pretty reasonable choice.
Opinions expressed by DZone contributors are their own.

Comments