How to Migrate a Server To AWS
Migrating a server to cloud always sounds great. But we know it's a hassle. Therefore I wrote a step-by-step guide to make migration simple and repeatable.
Join the DZone community and get the full member experience.
Join For FreeMigrating a server to the cloud always sounds great. But we know it's a hassle. Especially for servers in production. We want a new server, but keeping current data. And we need to migrate it fast with minimum service disruption.
It takes some time to understand how to do it. Therefore I wrote a step-by-step guide to make migration simple and repeatable. Here is how I did it.

1. Creating a CloudEndure Account
The tool I used is CloudEndure. This is a free tool that orchestrates migration tasks. To get started, I created a CloudEndure account. I received a confirmation email. And afterward, I was able to log in to CloudEndure console.
2. Granting Access to AWS Account
The first step in the console was creating a new project.
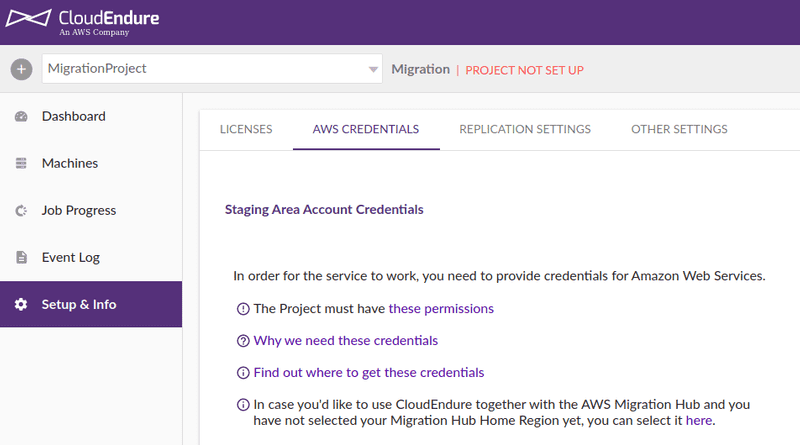
Note that the CloudEndure account is different from the AWS account. So I needed to create a user that gives CloudEndure access to my AWS account. I followed the steps described in Generating the Required AWS Credentials. The result was an access key ID and a secret access key.
Then I added these credentials in CloudEndure console and click Save. This verified that CloudEndure got access to my AWS account. And the project changed from Project not setup to Project not fully setup status.
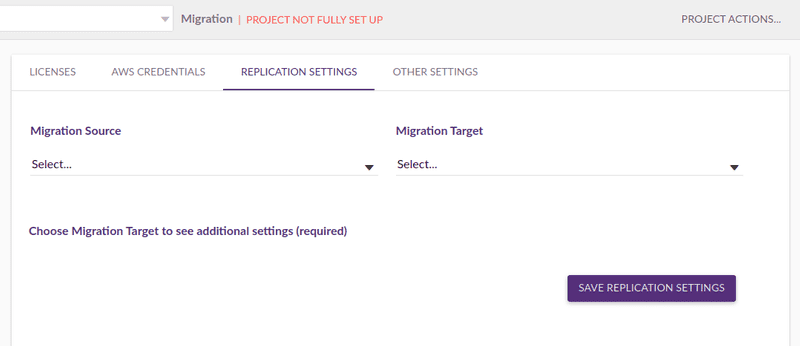
3. Defining Replication Settings
Once communication with AWS is enabled, the next step was configuring the migration project details. I set the migration source to Other Infrastructure (because the server to migrate was located on-premises). And I set the target to AWS US East (Northern Virginia). That was the region chosen to migrate the server.
That project tab also had these settings:
- Replication instance type
- Converter instance type
- Disks types (SSD or standard)
- Subnet (where Replication Servers will be launched)
- Security Groups (for Replication servers)
- Network Bandwith Throttling
Note that the replication instances are used to continuously sync your source disks to the cloud. CloudEndure completely manages them.
Apart from these, CloudEndure uses temporary converter instances. They adapt the source disks just before launching the target machine, so they can boot and run in the cloud. This might include changing the bootloader and adding drivers for the new HW.
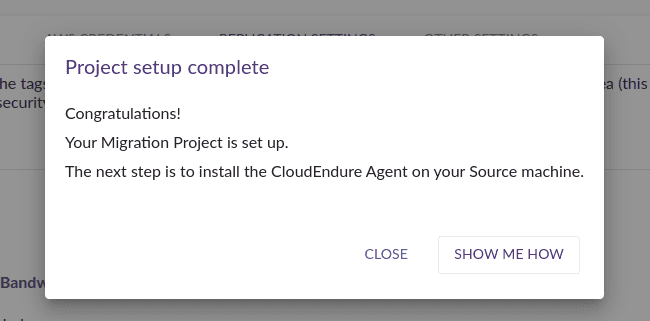
In my case, I just used default settings, and click Save replication Settings. And I got a Project setup complete message.
4. Verifying Agent Requirements
The Cloudendure agent is a small program to install on the source machine. It connects to CloudEndure and sends the disks data to replication servers on the AWS account. The replication is continuous. So any change in the source is automatically sent to the cloud.
First, I checked CloudEndure supported operating systems. Ubuntu is supported from version 12.04. So my OS was supported.
I also checked the other agent installation prerequisites. All these verifications makes sure that the agent works correctly in the source machine.
5. Installing the Agent
Then I installed the CloudEndure agent on the source server. The Machine window on CloudEndure console showed how to install the agent.
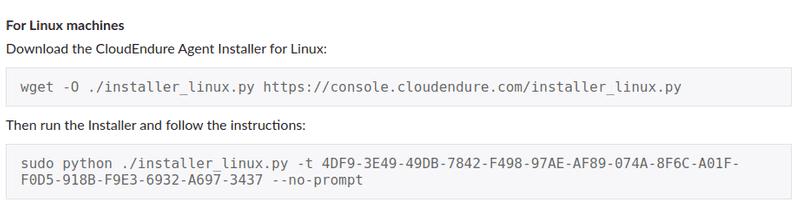
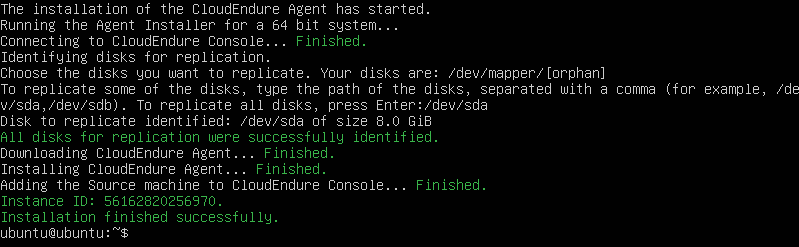
For Linux source machines, there are 2 commands. The first one downloads the agent. And the second one installs it. This command also has a code (the Agent Installation Code) that links the agent to a particular CloudEndure account.
The installation wasn't as simple as it appeared. I had to use python3 command (instead of python). The first installation also failed. The agent didn't detect the root disk correctly. But I removed the --no-promptargument from the second installation command. That allowed me to specify the correct device /dev/sda during the installation process.
The second installation had issues also. CloudEndure agent couldn't establish a connection to the console. In order to solve this, I installed some packages ( make, openssl, wget, curl, gcc, and build-essential). This solved the problem and the agent was finally installed. Both product documentation and ~/cloudendure.log were useful for troubleshooting.
6. Replicating Disk
After installing the agent, a row appeared in the “Machines” tab of CloudEndure console, and it showed the source server’s name (“ubuntu”).

That row also showed the status of the replication. For example, at the moment of the screenshot, replication was 3.78% complete. And the ETA to get full replication was "An hour". This indicator is very useful when you need to sync lots of data (or your upload bandwidth is limited).
I also noticed that CloudEndure launched a t3.small machine on the target region.

That instance was used as the Replication instance. It runs when there is any replication in progress. And it replicates up to 15 source volumes simultaneously.
I also noticed that CloudEndure created 2 EBS volumes:

Both volumes were attached to the replication server. The first one was intended to store the replicated data. And the volume size was the same as the source disk (in this case 8 GiB). And the second volume was for the replication server software.
I also found that CloudEndure created snapshots of these volumes. I found multiple snapshots of my disc, as shown below.

7. Completing Replication
After some time, the sync finished. It took me around 2 hours to sync an 8 Gb disk. Here is a screenshot of the console at that moment:

Note that the Data Replication Progress changed to Continuous Data Replication. That means there was an EBS volume with a complete replica of my source volume. And that any changes were replicated instantly to AWS.
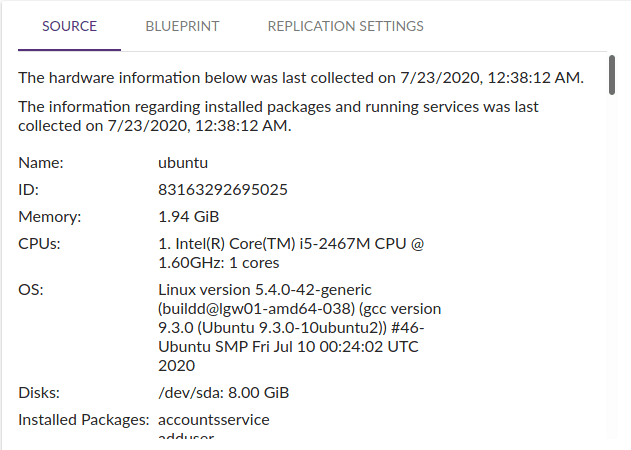
By clicking in the target machine row, I was able to see the details of the machine in CloudEndure. And the main characteristics of the source server were also described there (e.g. CPUs, Memory, OS, Disks, and installed packages).
The Blueprint tab described the Target configuration. These are the settings of the target server to launch in AWS.
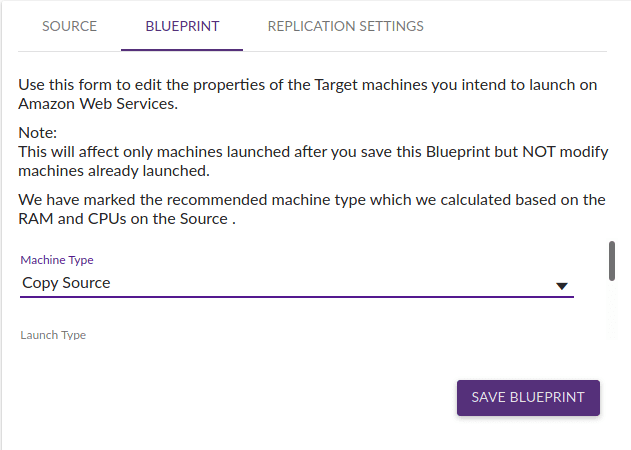
CloudEndure automatically defines the settings of the target machine (for example machine type, subnets, IP, Security Group, and Disk Type). These settings are very important because they define the new EC2 instance characteristics. It’s important to review these settings and adjust default values if necessary.
In my case, I just adjusted a few parameters. First, I changed the machine type to t3.medium. I also set the “Private IP” to “Create new”. This assigns the target machine an IP in the target subnet. And also changed the disk type to SDD. That was all I needed to fine-tune my new server.
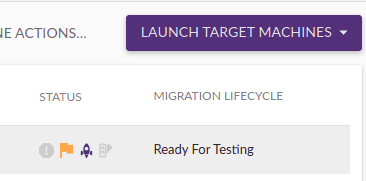
8. Testing the Launch
The next step was making sure that the server migration would be successful. So I made a test launch before final migration. This is started with the Launch Target Machines button.
This process creates the new EC2 instance with the migrated volume. That was completed in 7 minutes. And I found the new EC2 instance in the AWS Console. That was very fast.

I noticed that there was an instance in Terminated state. That's normal. That's the temporary converter instance. The conversion time was below 2 minutes. And that conversion instance was terminated afterward.
I wrote down the public IP address of the new instance just launched in the Virginia region. And I was able to login to the instance without any issue. That means that the migration test was successful.

9. Removing Unused Test Resources
After all tests on the instance were completed, I still had the target instance running on AWS. And it wasn't useful anymore. So I decided to remove its resources from AWS. This was done by selecting the instance in CloudEndure console and choosing Delete Target Machine.
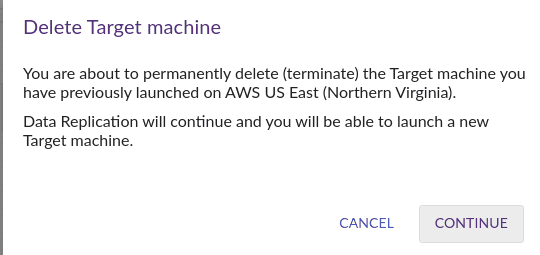
Then, the target instance was terminated in AWS as expected.
Note that the replication instance was still active. It was still used to sync the source machine.

But I noticed that the Volume previously used by the Target instance wasn't removed from AWS. So deleted it on my own.
10. Cutover
Then the last step was the final migration. I launched a new machine. But this time I used Cutover Mode instead of Test Mode.
The process was the same as in the Test Mode. A new machine was launched in 7 minutes. And I was able to log into the migrated server successfully. So the migration completed successfully again.
11. Cleaning Up
I still had lots of unused resources on my AWS account. These are the steps I took to clean everything up:
- I completed a Remove Machine from this console on CloudEndure Console. This removes the agent from the source server and stops replication. Note that the target machine isn't modified. We don't want the migrated server to be terminated.
- I terminated the Replication Server instance in AWS (because I had no other replication in progress). This has to be done manually because it isn't done by CloudEndure.
- I removed the EBS volumes previously used by Replication Server.
- I also removed all unused snapshots.
Conclusion
This process allowed me to lift-and-shift the server. Lift-and-shift is always the first step in the cloud journey. And this tool allowed to complete it efficiently.
I want to mention that the process had many advantages. For example, I used the same tool for uploading the data to the cloud and orchestrate the migration. I was also able to test the process before the cutover. That’s very important because it eliminates possible migration mistakes. The unavailability period was very short. Additionally, I didn’t have to adapt the disk to boot in the cloud, because that was managed by the tool. And this process allows me to automate the migration of several servers at once.
On the other side, I had some issues with the agent. And the whole migration process takes many steps. But that became my motivation to write and share this article. Hopefully, it will help you to migrate your servers predictably. In the end, cloud migration shouldn’t be a hassle.
Published at DZone with permission of Paul Cas. See the original article here.
Opinions expressed by DZone contributors are their own.
Comments