How to Perform Object Level Recovery in SQL Server
This article will show how to recover SQL server objects that are corrupted in SQL Server and how to restore the information in case of disaster in SQL Server.
Join the DZone community and get the full member experience.
Join For FreeWhen a SQL Server database turns corrupt and cannot be repaired, you can restore it from a recent backup to recover objects and data. However, the problem arises when you need to perform object level recovery instead of performing a full database backup.
In other words, there may arise a need to restore a specific table or any other object from the database backup, rather than the complete database. But, there is no direct method to perform object level recovery.
This article discusses some methods to recover specific tables or views in SQL. Also, it talks about using SQL Repair software for the secure recovery of selective database objects.
Methods to Perform Object Level Recovery in SQL
Here we will discuss the two manual approaches and an automated solution to recover objects in SQL Server.
Manual Methods
Method 1: Restore Backup to a Different Database and Import Data
Note: It will only work if you have taken a full backup of your SQL Server database.
In SQL Server, you can perform selective recovery of individual database objects by following these steps:
- Restore the Backup to a Different Database.
- Import Data by using SQL Server Import and Export Wizard.
Let’s go through each step in detail:
Step 1: Restore the Backup to a Different Database
In this step, we will restore a backup of ‘DBLogTest’ and save it as a new database named ‘TestDB.’
- In SQL Server Management Studio (SSMS), connect to an instance of your SQL Server.
- Under Object Explorer, hover over Databases and right-click on it, and then click the Restore Database.

Figure 1: Restore SQL Database
- From the ‘Restore Database’ window, select the Device option under Database, and then click the Browse (…) button.

Figure 2: Select the 'From Device' Option
- From the ‘Specify Backup’ dialog box, click on the Add button.

Figure 3: Click Add to Select Database Backup File
- From the ‘Locate Backup File’ dialog box, click on the backup file of the database you want to restore. In our example, select DBLogTest.bak file. Click OK.

Figure 4: Select Backup File
- The location of the selected backup file will be added under Backup location: in the ‘Specify Backup’ box. Click OK.

Figure 5: Select Database Backup Location
- The selected backup file (.bak) details will be added in the ‘Restore Database’ wizard. In the wizard, type the name of the new database ‘TestDB’ in the Database textbox under Destination.

Figure 6: Restore Database Backup to a New Database
- Now click on Options under ‘Select a page,’ and select the ‘Take tail-log backup before restore’ checkbox, and then click OK.
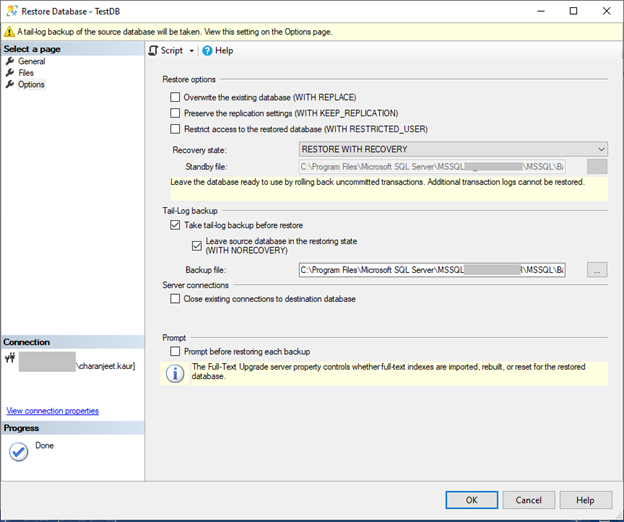
Figure 7: Take Tail-Log Backup
- Click OK when a message “The restore of database ‘TestDB’ completed successfully” appears.
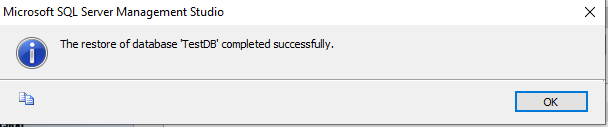
Figure 8: Restore of Database Completed Message
Executing these steps will restore your database to SQL Server with a different name.
Step 2: Import Data Using SQL Server Import and Export Wizard
In this step, we will be using the ‘SQL Server Import and Export Wizard.’ The Wizard helps import and export specific objects between popular data formats, such as databases (SQL Server & Access), Excel spreadsheets, and text files.
To import data using the SQL Server Import and Export Wizard, follow these steps:
- Right-click on the new database ‘TestDB’, click Tasks, and then click Import Data.

Figure 9: Select the Import Data Option
- Click on Next.

Figure 10: SQL Server Import and Export Wizard
- From the ‘Data source’ drop-down list, choose the data provider that helps connect to the data source, and then click Next.

Figure 11: Choose a Data Source
- Select server name and the database (in our case TestDB) from which you need to import data, and then click Next.
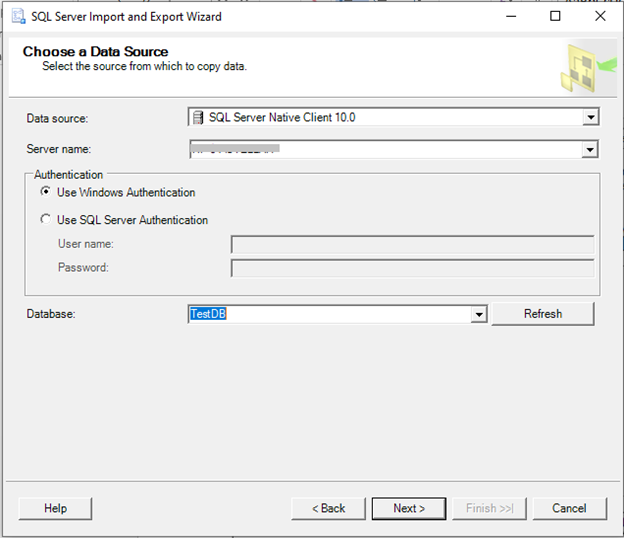
Figure 12: Enter Server and Database Details
- When prompted to choose a destination to copy data, select your data source from the drop-down list. This will select the destination where you want to save the objects (tables or views).

Figure 13: Select Destination Where Data Will be Saved
- Click on New to create a DB where you would want to place the selected database object (tables or views), and then choose Next.

Figure 14: Specify Details of the Destination
- In ‘Specify Table Copy or Query’ dialog box, select any of the following options, and hit Next.
- Copy data from one or more tables or views: This option copies all the data from existing tables or views.
- Write a query to specify the data to transfer: This option requires you to write a query to import specific data from the source database.
Note: Use Copy Database Wizard for copying more than one SQL database or object (except for tables and views).

Figure 15: Copy Data from Tables or Writer a Query
In this example, we’ve selected the ‘Copy data from one or more tables or views’ option.
- A window with all the tables of ‘TestDB’ database are listed. Select a single or more tables that you want to copy from the source to the destination. Also, double-click on the table added under Destination and rename it. For instance, we renamed the ‘dbo.Details’ table to ‘dbo.NewDetails’.

Figure 16: Select Table(s) You Want to Restore
- In ‘Save and Run Package’ window, select any of the options:
- Run immediately
- Save SSIS Package

Figure 17: Save and Run Package Window
- To proceed, hit the Next button.
- Click Finish to import data from the selected table to the specified destination.

Figure 18: Complete the Import Process
- The selected table and its data will be copied to the destination.

Figure 19: Selected Table Data Copied to Destination
Note: This method has a downside. Using this method, you will need to restore full database backup instead of directly selecting the objects that you want to restore.
Method 2: Restore Transaction Log (T-Log) Backup and Import Data
Another method is to perform point-in-time recovery of specific objects. For this, use the RESTORE LOG command with a STOPAT clause that helps restore the T-Log backup to the specific time when your object was dropped or data was deleted.
RESTORE LOG TestDB FROM DBLogTest WITH FILE=4, NORECOVERY, STOPAT = 'march 19, 2021 02:00 PM'; |
Caution! This command will roll back all open transactions to a specific time.
Once you’ve restored the transaction log backup to the point in time, when you lost your data, import the data to a new database.
Method 3: Use SQL Recovery Tool
You can save a lot of your time and efforts by performing object level recovery in SQL Server using Stellar Repair for MS SQL software. Here’s how:
- Launch the software. Click ‘Browse’ or ‘Search’ to select the corrupt SQL database MDF file you want to repair.

Figure 20: Select Corrupt SQL Database File
- Click Repair to start repairing the file.

Figure 21: Repair SQL Database File
- The software previews all recoverable database objects, including tables, views, stored procedures, triggers, etc. Select the object that you want to recover and click on Save on the File menu.

Figure 22: Preview Recoverable Database Objects
- A ‘Save Database’ window opens with options to save the selected objects in MDF, CSV, HTML, and XLS file formats. Further, you can choose to save the recovered data in a new or existing database.

Figure 23: File Saving Options
Conclusion
When database tables or other SQL Server objects get corrupt or are accidentally deleted, you can save your time and efforts by performing object level recovery instead of restoring the database. Unfortunately, there is no direct way to perform object level recovery in SQL Server. However, using the manual methods discussed in this post can help you recover a specific table or other objects. But, these methods have certain limitations. A better alternative is to use a 3rd party SQL recovery tool that can help you in selectively restoring specific database objects without the need to restore a full or transaction log backup.
Opinions expressed by DZone contributors are their own.
Comments