How to Reuse Your JMeter Code With JAR Files and Save Time
The code in your tests probably repeats itself quite often. Learn how to save time by reusing your JMeter code with JAR files.
Join the DZone community and get the full member experience.
Join For FreeWhen developing tests, it is often necessary to write code in the tests themselves. This code might be long, it might be repeated in several tests, or might be written only for a specific test. Also, the code written in the tests might have to change or be supplemented if the requirements change.
This can take a long time and is prone to errors. Suppose that we have 20 Apache JMeter™ tests in which the same code is written and at some point in time we decide to make changes to this code for all 20 tests. Changes must be made in each JMeter test. To get rid of such routine work, we can call codes to tests from a JAR file (a JAR file is Java Archive).
The code that will be used in the tests that describe the test methods is written in the development environment (for example, IntelliJ IDEA) only once, a JAR file is created and only the call of the required code and the test request is performed in the tests themselves. We do not need to write the code directly in the test, and if for some reason we need to change the code, we change it only in one place.
The previous article, "Sending HTTP and HTTPS Requests Using Groovy in JMeter," showed how to create methods for sending HTTP/HTTPS requests using Groovy. Based on these methods, this article will show how to create a JAR file and use such methods from a JAR file, in your tests.
In order to create such a JAR file, you must do the following:
1. Download and install Groovy and IntelliJ IDEA
2. Download the following JAR files:
The JAR files are required to create a method to send HTTP / HTTPS requests.
Run IntelliJ IDEA and create the project, as shown below.
Create New Project -> Groovy -> Next -> Set Project Name -> Set Project Location -> Finish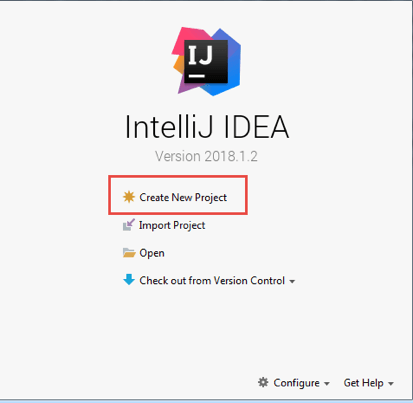
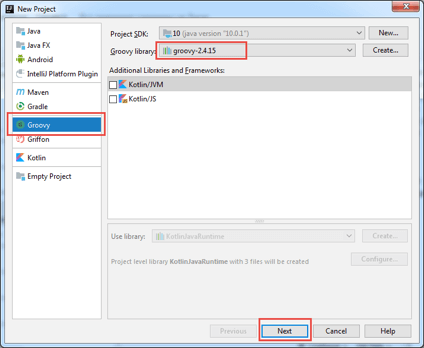
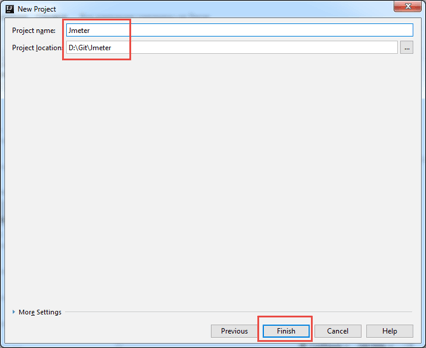
- Project Name - any arbitrary name. I gave the name "Jmeter."
- Project Location - the directory where the project will be located
After clicking the "Finish" button, the created project will look like it is shown in the image below.
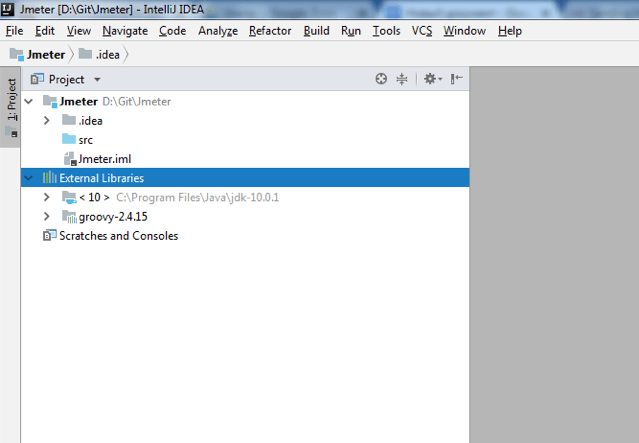
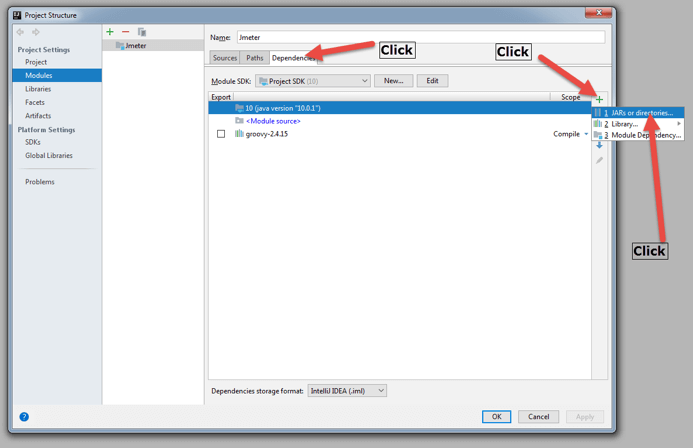
Add the downloaded JAR files to the project.
File -> Project Structure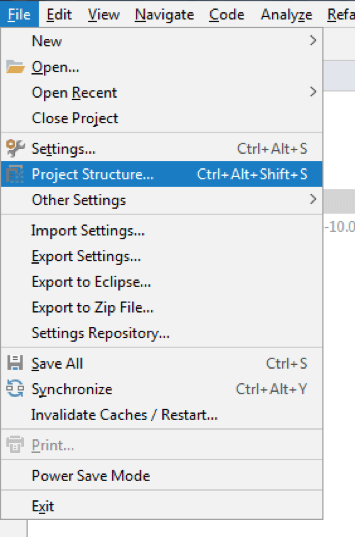 Modules -> Dependencies -> "+" -> JARs or directories
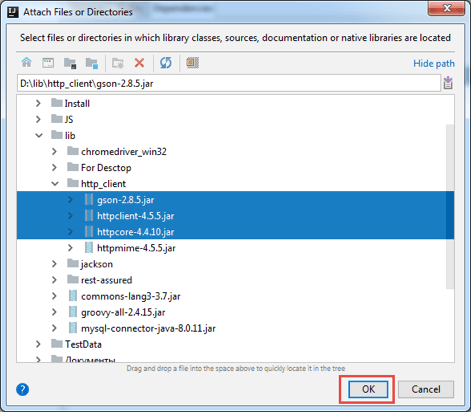
From the opened list, select the JAR files that were previously downloaded and click "OK."
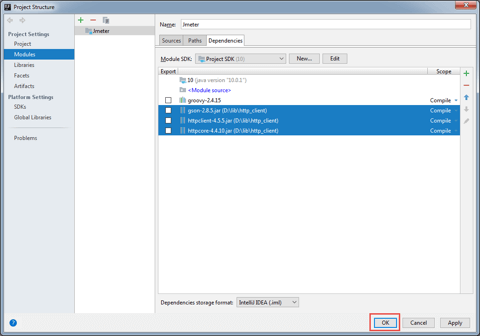
Click "OK" again.
Create a Groovy Class
src -> Right click -> New -> Groovy Class - Set name -> Set Kind -> Click "Ok"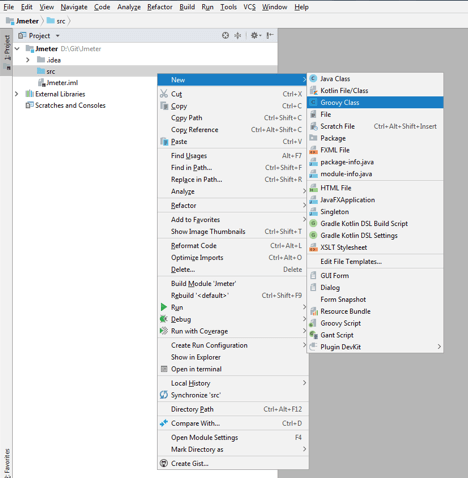
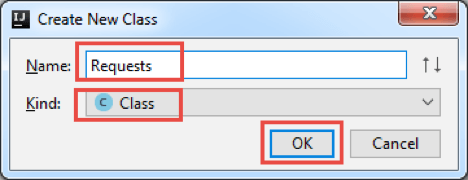
Add the code you want to reuse, to the created class. In this case:
static List<String> sendRequest(String url, String method, Map<String,Object> body) {
   RequestConfig requestConfig = RequestConfig.custom()
           .setConnectTimeout(2000)
           .setSocketTimeout(3000)
           .build();

   StringEntity entity = new StringEntity(new Gson().toJson(body), "UTF-8");


   HttpUriRequest request = RequestBuilder.create(method)
           .setConfig(requestConfig)
           .setUri(url)
           .setHeader(HttpHeaders.CONTENT_TYPE, "application/json;charset=UTF-8")
           .setEntity(entity)
           .build();

   String req = "REQUEST:" + "\n" + request.getRequestLine() + "\n" + "Headers: " +
           request.getAllHeaders() + "\n" + EntityUtils.toString(entity) + "\n";


   HttpClientBuilder.create().build().withCloseable { httpClient ->

       httpClient.execute(request).withCloseable { response ->

           String res = "RESPONSE:" + "\n" + response.getStatusLine() + "\n" + "Headers: " +
                   response.getAllHeaders() + "\n" +
                   (response.getEntity() != null ? EntityUtils.toString(response.getEntity()) : "") + "\n";

           System.out.println(req + "\n" + res);

           return Arrays.asList(req, res);
       }
   }
}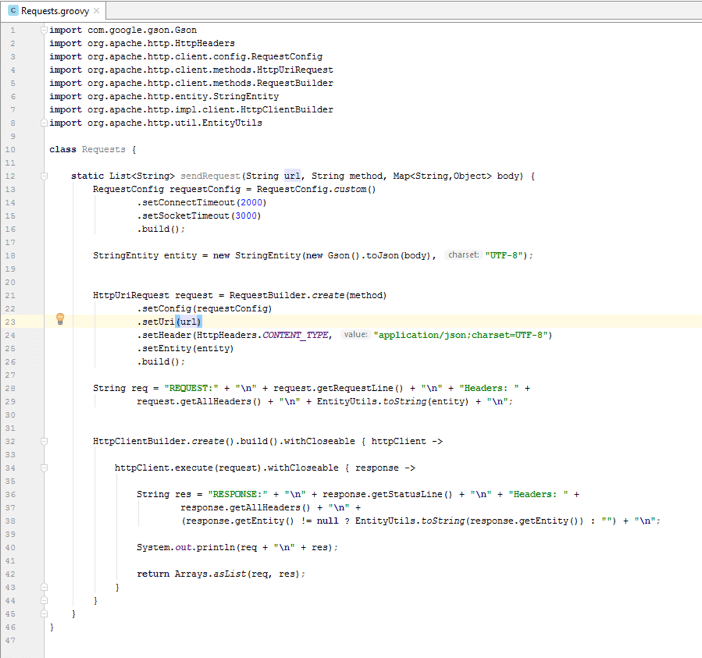
The description of this code is given in "Sending HTTP and HTTPS Requests Using Groovy in JMeter." The only difference is the "static" access modifier. Its description will be given later in the article. When you add your own code, make sure to add it as well.
Create another JAR file. This file will be added to JMeter.
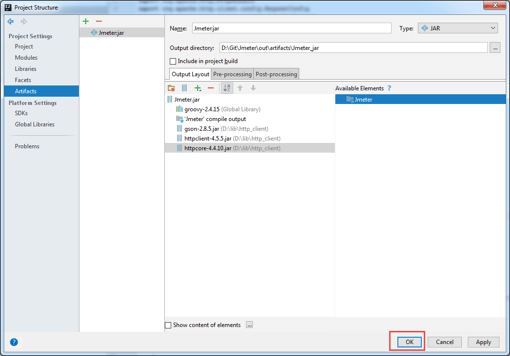
File -> Project Structure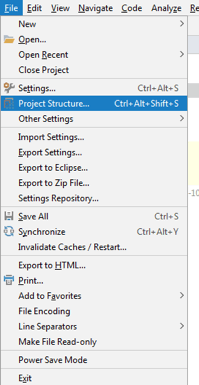 Artifacts -> Click "+" -> JAR -> From module with dependencies -> OK
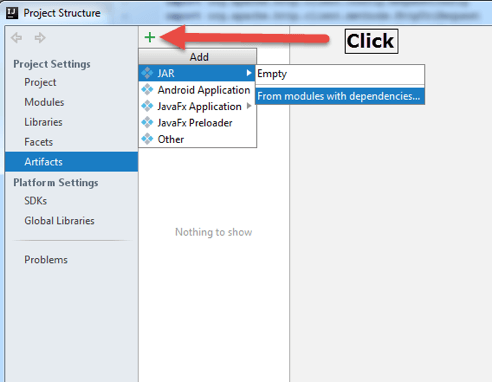
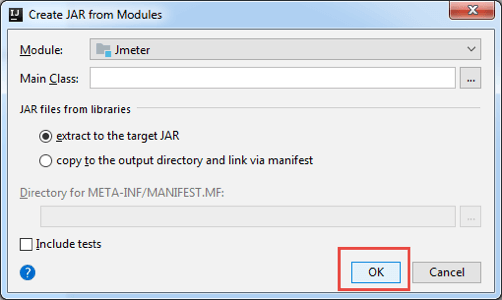
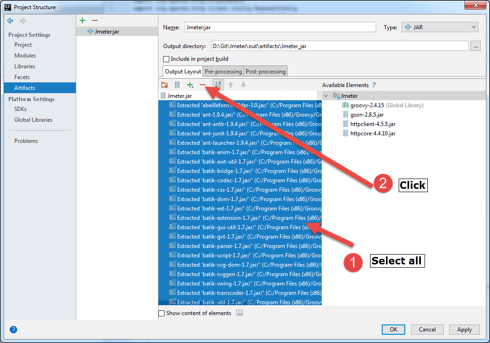
Select and delete all files except Jmeter.jar, as shown in the image below. This name is generated according to the Project Name.
Add files from the "Available elements" section by double-clicking on each file, as shown in the image below. IntelliJ will show you the files. These are the JAR files from the beginning of the article.
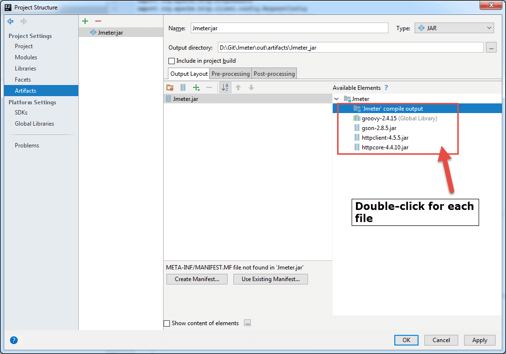
After the addition, the files will be displayed, as shown in the image below. Click "OK."
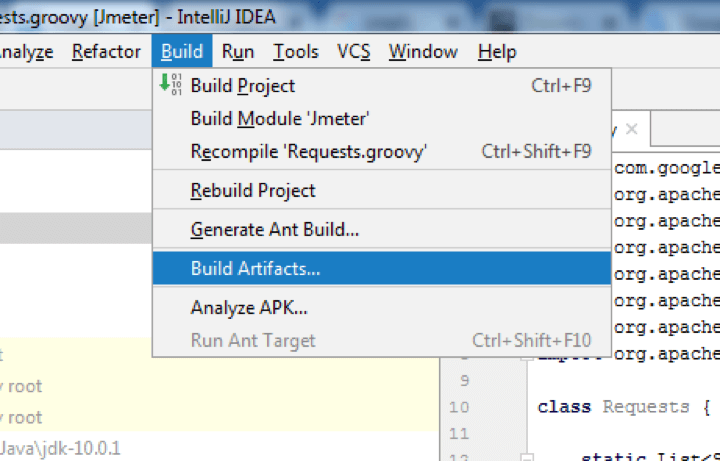
Build -> Build Artifacts... -> Build
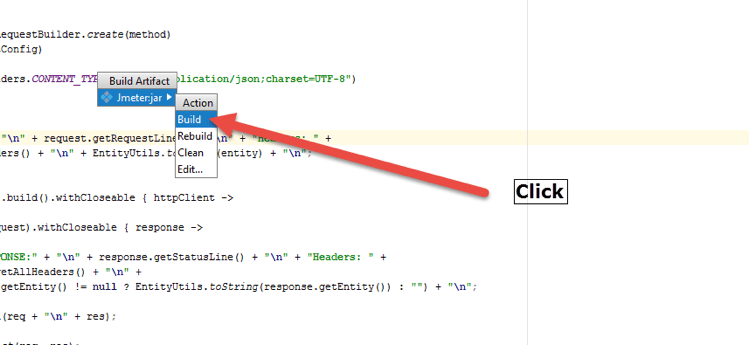
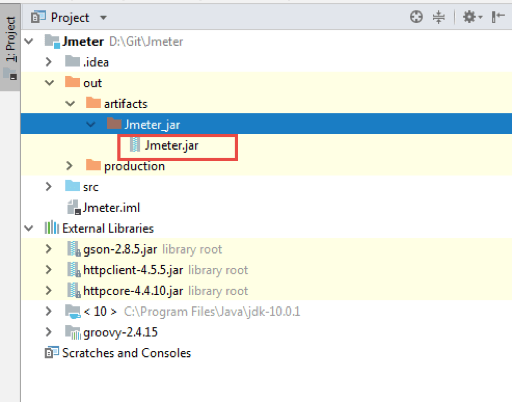
After clicking "Build," a JAR file will be created in the directory ...\Jmeter\out\artifacts\Jmeter_jar, as shown in the image below.
Adding the JAR file to JMeter
Copy the JAR file that was created to the JMeter directory ... \apache-jmeter-4.0\lib
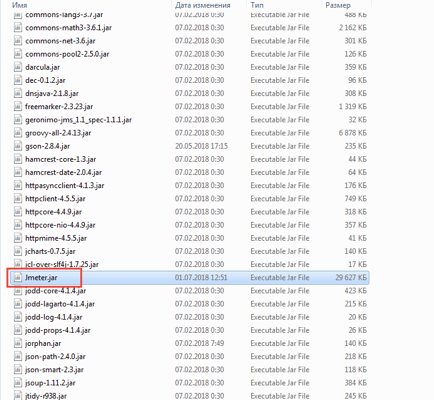
After the JAR file is created and added to JMeter, you can call the List <String> sendRequest (String URL, String method, Map <String, Object> body) method in JMeter itself. This calls the code from the JAR file.
To do this, you need to do the following in JMeter:
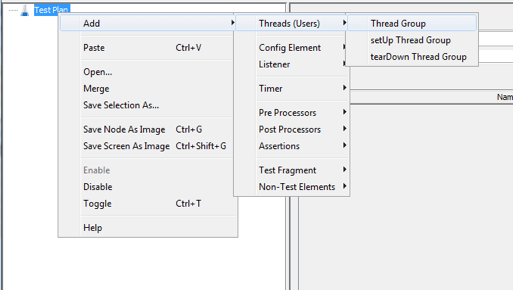
Add a Thread Group. Right Click -> Add -> Threads(Users) -> Thread Group
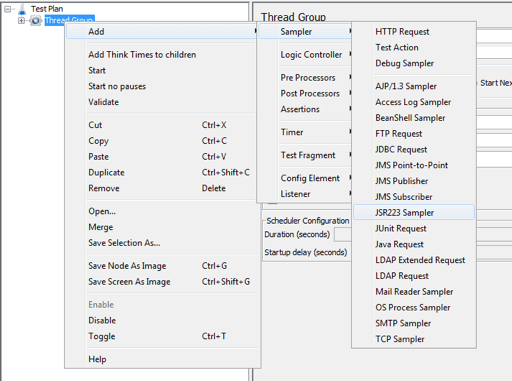
Add a JSR223 Sampler. Thread Group -> Right Click -> Add -> Sampler -> JSR223 SamplerJSR223 Sampler -> Language Groovy
In the JSR223 Sampler, add the following code example.
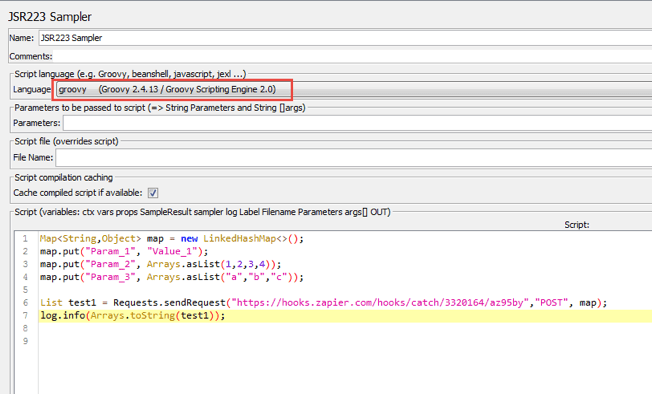
Update the test parameters according to your scenario. In this case, "https://hooks.zapier.com/hooks/catch/3320164/az95by","POST", map.
When calling the sendRequest () method, we do not need to import the Requests class (for example, import Requests;) to access the class and there is no need to create a class object (for example, Requests requests = new Requests ()) to access the method.
We only need to specify the name of the class (in our case, Requests) and specify the name of the method through the point with the corresponding parameter values. This form of method invocation became available because we created a static method in IntelliJ IDEA. A static method is a method before which the access modifier is "static"
After running the code for execution, we get the following result in the JMeter console:

The image above shows the request being sent and the response received. The cmd will also display the sent request and the received response, as shown in the image below.

That's it! Now you don't need to change your entire code every time you update a test. If you do change your test methods, make sure you update the correct JAR file in JMeter.
After creating your JMeter script, upload it to BlazeMeter and run it. You will be able to massively scale, share your tests and results, get advanced reports and add to continuous integration cycles.
Published at DZone with permission of Sergey Horban, DZone MVB. See the original article here.
Opinions expressed by DZone contributors are their own.

Comments