How to Run a Simple Load Test With Gatling
Learn how to get started running simple load tests with BlazeMeter's Gatling tool to ensure great web performance.
Join the DZone community and get the full member experience.
Join For FreeGatling is a load and stress testing tool based on Scala and built for high performance. This blog post will explain how to run a simple load test in Gatling. We will load test the following test case:
- Open the Browser and go to the site http://www.demoblaze.com.
- Click on the text "Cart".

We will record the scenario we want to test. To do that, we need to configure our browser proxy settings at first. The following steps will show you how to configure the Chrome browser for a Gatling recording.
Open the Chrome Browser.
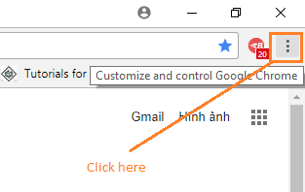
Click on the Customize and control Google Chrome button located at the top right corner. A drop-down menu will be displayed.
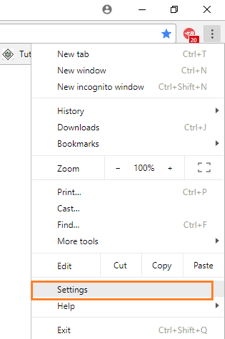
Click on the Settings option.
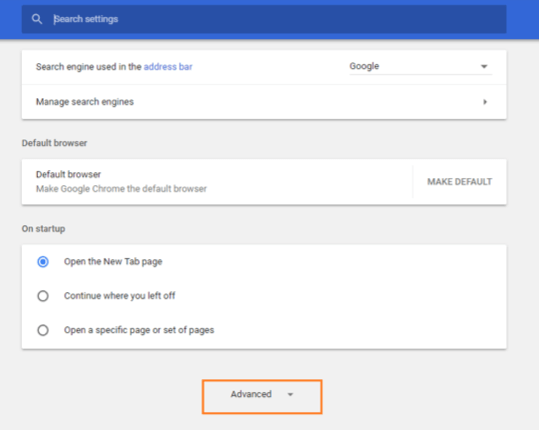
Scroll down to the bottom of the page and click on Advanced to expand the page.
Click on Open proxy settings.

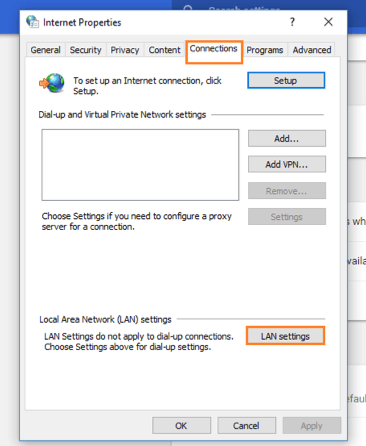
In the Internet Properties window, click on the Connections tab.
Click on the LAN Settings button.
In the LAN Settings window:
- Uncheck Automatically detect settings.
- Check Use as the proxy server for your LAN.
- Type the address 127.0.0.1 and the port 8080.
- Click OK.
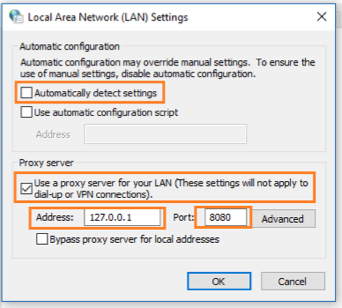
Click the OK button in the Internet Options window.
Close the browser window.
In other browsers, similar steps can be followed.
Make sure you have Gatling installed on your computer.
Go to the bin folder (in my case: C:\gatling-charts-highcharts-bundle-2.3.1\bin) of the Gatling bundle.
Double click on the recorder.bat file.

A command prompt window will be displayed.

A recorder window will be automatically displayed. This is the default:
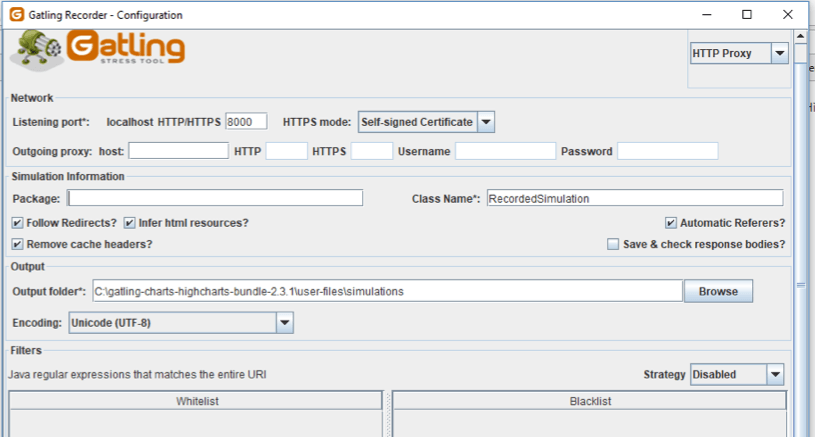
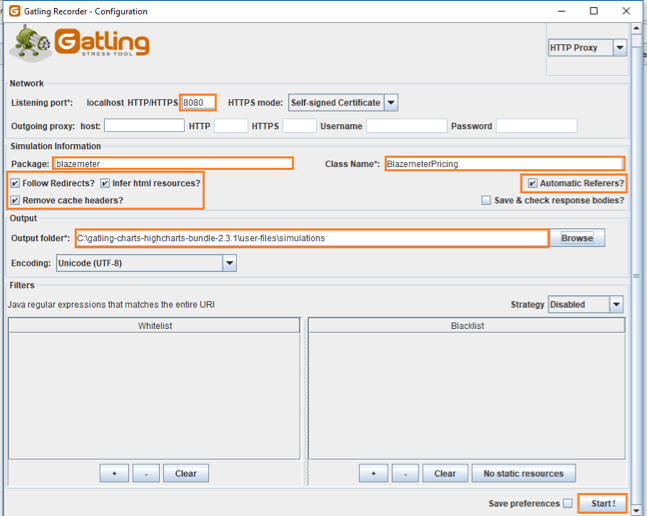
In the recorder window change the settings:
- Enter the port number in the local host box (In my case 8080).
- Enter the Package name as blazemeter. You can choose the name you prefer.
- Enter class name as BlazemeterPricing. You can choose the name you prefer.
- Check the Follow Redirects?, Infer HTML resources?, Remove cache Headers? and Automatic Referers? options.
- Select the output files path. In my case (C:\gatling-charts-highcharts-bundle-2.3.1\user-files\simulations). This path is where the script will be stored after recording. You can change the location but if you do, don't forget to copy it to the Gatling simulations folder. To make things easy, it's recommended to leave the path as default.
- Keep all the other options the same. Don't change any existing options.
- Click on the Start button.
Open the Google Chrome browser.
Go to the URL: http://www.demoblaze.com.

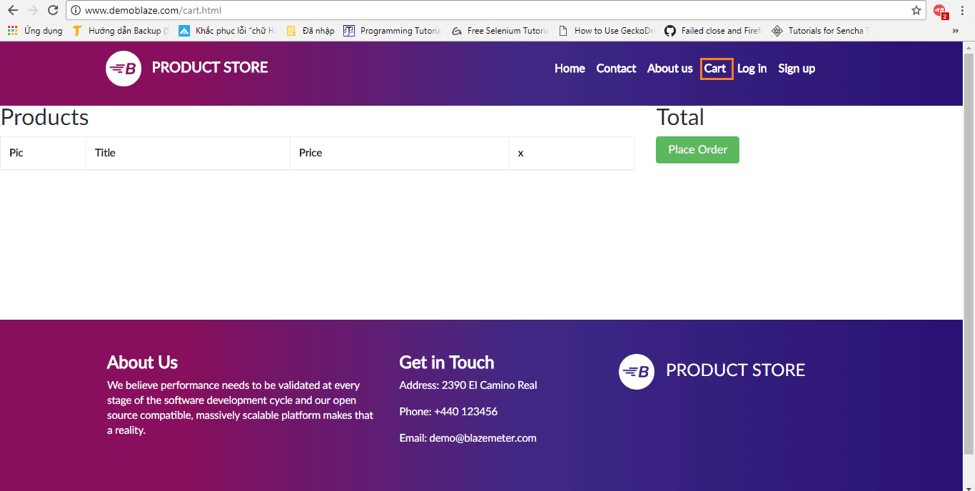
In the DemoBlaze page, click on the link text "Cart".
Close the browser.
Click on the Stop & Save button in the Gatling recorder window and it will close.
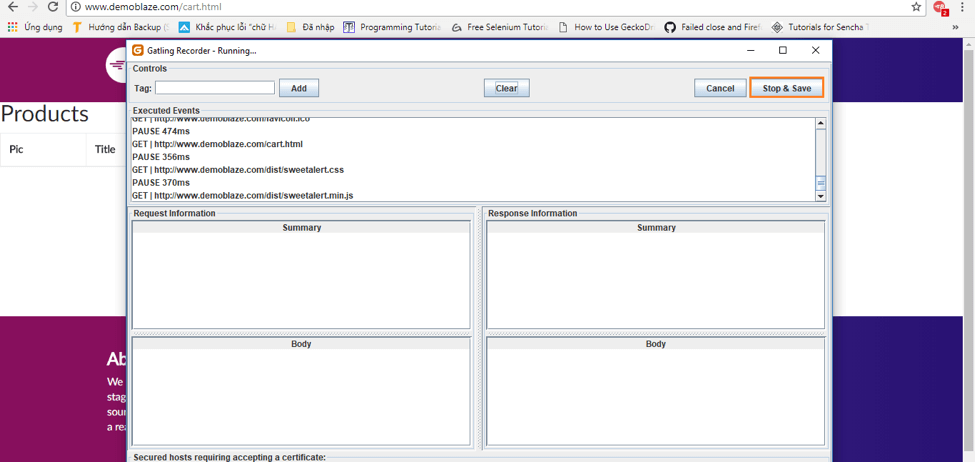
A recorder file named BlazemeterPricing.scala is created and saved to the "C:\gatling-charts-highcharts-bundle-2.3.1\user-files\simulations\blazemeter" directory. This scala script is automatically created after recording.
Note that the file name is the class name with the extension .scala and it is located in a folder named "blazemeter" that is the same as the package name that we entered in the recorder window. This folder structure should be followed for load testing.

Below is the script file written in the Scala programming language. We can configure the number of users and how they are run in the script. We can also add a global pause, add assertions and configure HTTP or HTTPS protocols through this script. We will not go into great detail about script configuration here, only provide a few examples. To learn about script configuration, go here.
The setUp() method is used to configure the user. In the example below it is configured for 1 user and use the HTTP protocol for load testing: setUp(scn.inject(atOnceUsers(1))).protocols(httpProtocol)
Go to the bin folder (in my case: C:\gatling-charts-highcharts-bundle-2.3.1\bin).
Double click on the gatling.bat file. This is the Gatling execution file, which runs the test, in this case: BlazemeterPricing.scala.

A command prompt window is displayed and then load testing information is displayed on the command prompt window such as: GATLING_HOME variable, Java execution file, Scripts in simulations directory.
The Command prompt window will look like this:

Since there is only one simulation file the default simulation id is "BlazemeterPricing". So enter this name and press the Enter key.

After pressing the Enter key from the keyboard, the window will look like the following. It asks for an optional run description.

In most cases the run description will be the objective or title of the test cases, and also the number of users and load description. The description is intended to explain the goal of the load test to anyone reading this description. This is an optional step, you can skip it by pressing "Enter".
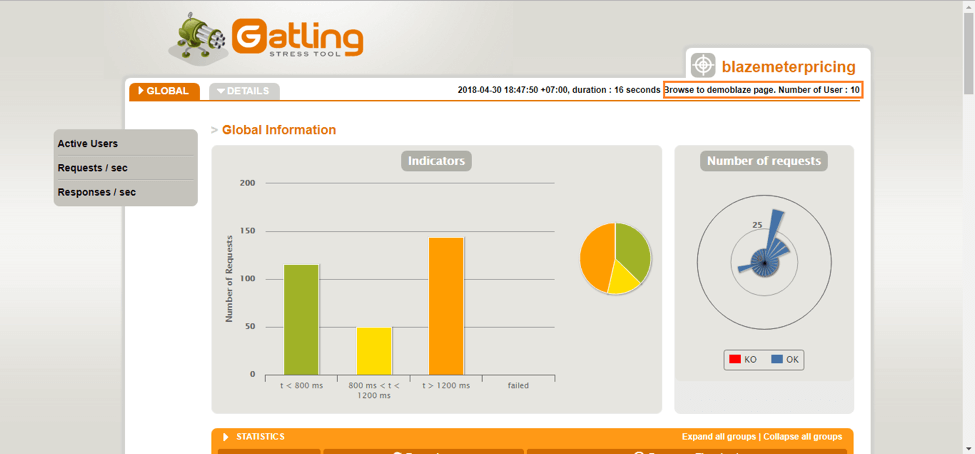
In my case, "Browse to demoblaze page. Number of User : 1". Now, press the Enter key.

After pressing the Enter key the simulation starts.

When the simulation is complete you will see a link that generates the report in HTML format.
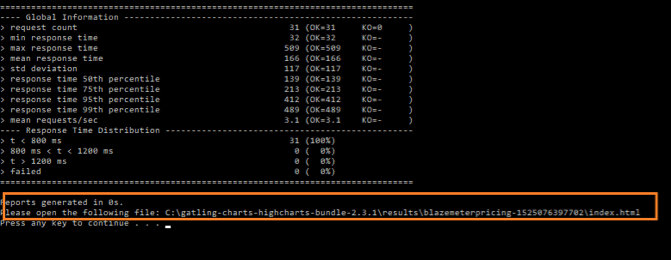
Copy the report path and press the Enter key to close the command prompt window.
Go to the result path (In my case: C:\gatling-charts-highcharts-bundle-2.3.1\results\blazemeterpricing-1525076397702) and you will see the HTML file.

Double click the index.html file to open the report in a chrome browser.
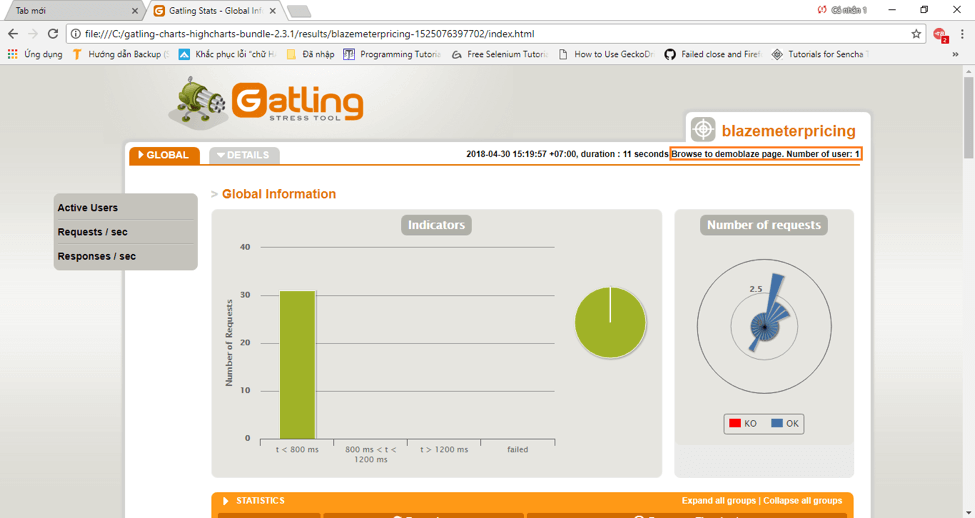

Load testing with 10 users added over 5 seconds (1 extra user every 500 ms)
go to the setUp() method and customize it: setUp(scn.inject(rampUsers(10) over (5 seconds))).protocols(httpProtocol).
This defines load testing with 10 users added over 5 seconds (1 extra user every 500 ms) with the http protocol.
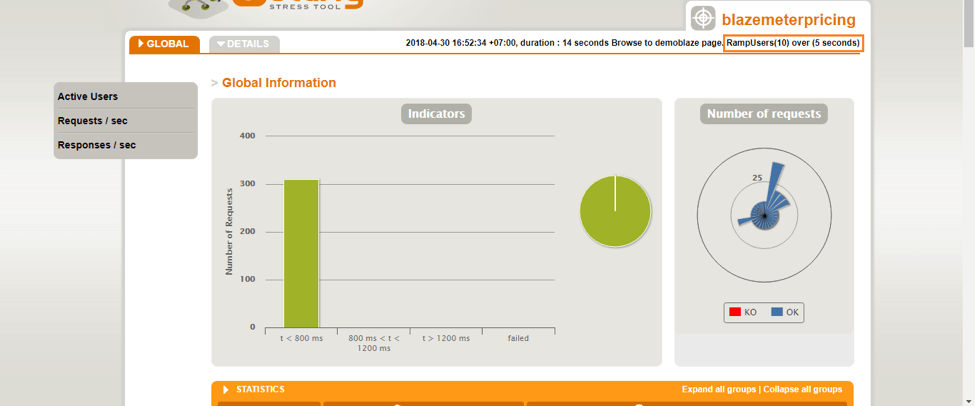

Load testing with 10 concurrent users
Got to the setUp() method and configure it: setUp(scn.inject(atOnceUsers(10))).protocols(httpProtocol).
This defines load testing with 10 concurrent users with the http protocol.

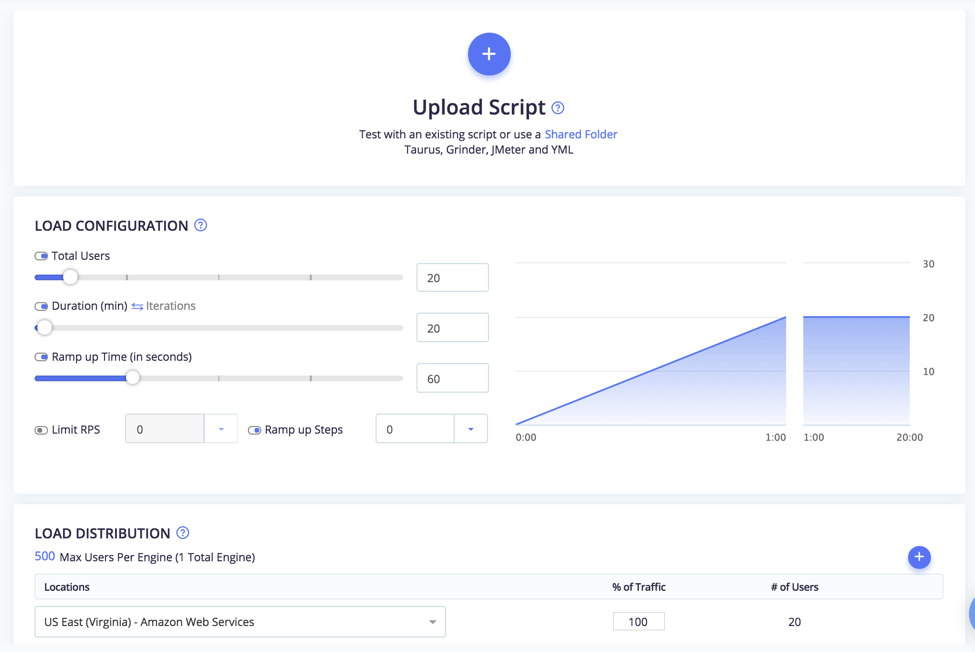
After recording you Gatling file, you can also run it through BlazeMeter. Just go to BlazeMeter and choose "Taurus Test". In BlazeMeter you will be able to scale your tests for as many users as you need, and run it from all over the world through the cloud.
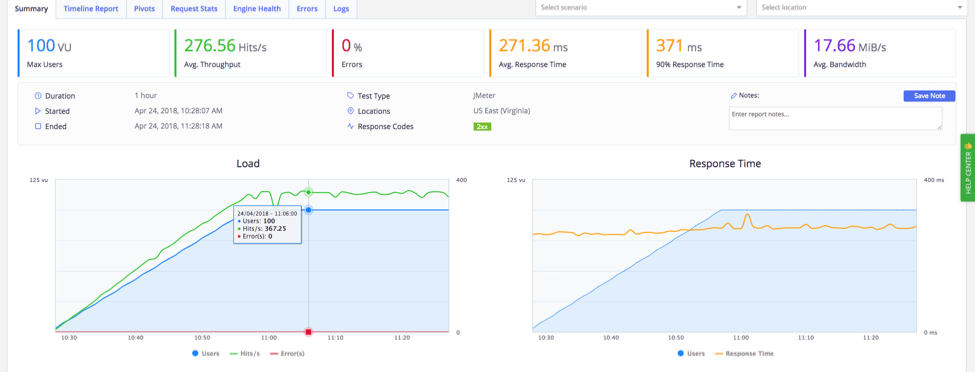
In BlazeMeter you will also be able to share your tests and results with co-workers and managers, and analyse results in real-time or over time in insightful reports.
Enjoy your load testing with Gatling! To get started with BlazeMeter, request a demo, or put your URL in the box below and your test will start in minutes.
Published at DZone with permission of Phi Nguyen, DZone MVB. See the original article here.
Opinions expressed by DZone contributors are their own.

Comments