How to Run HA PostgreSQL on Amazon EKS
This tutorial is a walk-through of the steps involved in deploying and managing a highly available PostgreSQL cluster on Amazon EKS.
Join the DZone community and get the full member experience.
Join For FreeAmazon EKS is a fully managed Kubernetes environment running in AWS. With Amazon EKS customers get a highly-available, secure Kubernetes control plane without needing to worry about provisioning, upgrades, or patching. Amazon EKS is certified by the Cloud Native Computing Foundation (CNCF) as Kubernetes conformant, which means it supports all existing plugins and tooling from the Kubernetes community, including Portworx.
Portworx, an EKS launch partner, is a cloud-native storage platform to run persistent workloads deployed on a variety of orchestration engines including Kubernetes. With Portworx, customers can manage the database of their choice on any infrastructure using any container scheduler. It provides a single data management layer for all stateful services, no matter where they run.
This tutorial is a walk-through of the steps involved in deploying and managing a highly available PostgreSQL cluster on Amazon EKS.
In summary, to run HA PostgreSQL on Amazon you need to:
- Install an EKS cluster by following instructions in the Amazon docs
- Install a cloud-native storage solution like Portworx as a daemon set on EKS
- Create a storage class defining your storage requirements like replication factor, snapshot policy, and performance profile
- Deploy Postgres using Kubernetes
- Test failover by killing or cordoning nodes in your cluster
- Optionally — dynamically resize a Postgres volume, snapshot and backup Postgres to S3
How to Set up an EKS Cluster
Portworx is fully supported on Amazon EKS. Please follow the instructions to configure an Amazon EKS cluster.
Installing Portworx in EKS
Installing Portworx on Amazon EKS is not very different from installing it on a Kubernetes cluster setup through Kops. Portworx EKS documentation has the steps involved in running the Portworx cluster in a Kubernetes environment deployed in AWS.
Creating a Postgres Storage Class
Once the EKS cluster is up and running and Portworx is installed and configured, we will deploy a highly available PostgreSQL database.
Through Storage Class objects, an admin can define different classes of Portworx volumes that are offered in a cluster. These classes will be used during the dynamic provisioning of volumes. The Storage Class defines the replication factor, I/O profile (e.g., for a database or a CMS), and priority (e.g., SSD or HDD). These parameters impact the availability and throughput of workloads and can be specified for each volume. This is important because a production database will have different requirements than a development Jenkins cluster.
In this example, the Storage Class that we deploy has a replication factor of 3 with I/O profile set to "db" and priority set to "high." This means that the storage will be optimized for low latency database workloads like Postgres and automatically placed on the highest performance storage available in the cluster.
$ kubectl create -f https://raw.githubusercontent.com/fmrtl73/katacoda-scenarios-1/master/px-k8s-postgres-all-in-one/assets/px-repl3-sc.yaml
storageclass "px-repl3-sc" created
Creating a Postgres PVC on Kubernetes
We can now create a Persistent Volume Claim (PVC) based on the Storage Class. Thanks to dynamic provisioning, the claims will be created without explicitly provisioning Persistent Volume (PV).
$ kubectl create -f https://raw.githubusercontent.com/fmrtl73/katacoda-scenarios-1/master/px-k8s-postgres-all-in-one/assets/px-postgres-pvc.yaml
persistentvolumeclaim "px-postgres-pvc" created
The password for PostgreSQL will be created as a secret. Run the following commands to create the secret in the correct format:
$ echo postgres123 > password.txt
$ tr -d '\n' .strippedpassword.txt && mv .strippedpassword.txt password.txt
$ kubectl create secret generic postgres-pass --from-file=password.txt
secret "postgres-pass" created
Deploying Postgres on EKS
Finally, let's create a PostgreSQL instance as a Kubernetes deployment object. For simplicity's sake, we will just be deploying a single Postgres pod. Because Portworx provides synchronous replication for High Availability, a single Postgres instance might be the best deployment option for your Postgres database. Portworx can also provide backing volumes for multi-node Postgres deployments. The choice is yours.
$ kubectl create -f https://raw.githubusercontent.com/fmrtl73/katacoda-scenarios-1/master/px-k8s-postgres-all-in-one/assets/postgres-app.yaml
deployment "postgres" created
Make sure that the Postgres pods are in running state.
$ kubectl get pods -l app=postgres -o wide --watch
Wait till the Postgres pod is in running state.
 We can inspect the Portworx volume by accessing the pxctl tool running with the Postgres pod.
$ VOL=`kubectl get pvc | grep px-postgres-pvc | awk '{print $3}'`
$ PX_POD=$(kubectl get pods -l name=portworx -n kube-system -o jsonpath='{.items[0].metadata.name}')
$ kubectl exec -it $PX_POD -n kube-system -- /opt/pwx/bin/pxctl volume inspect ${VOL}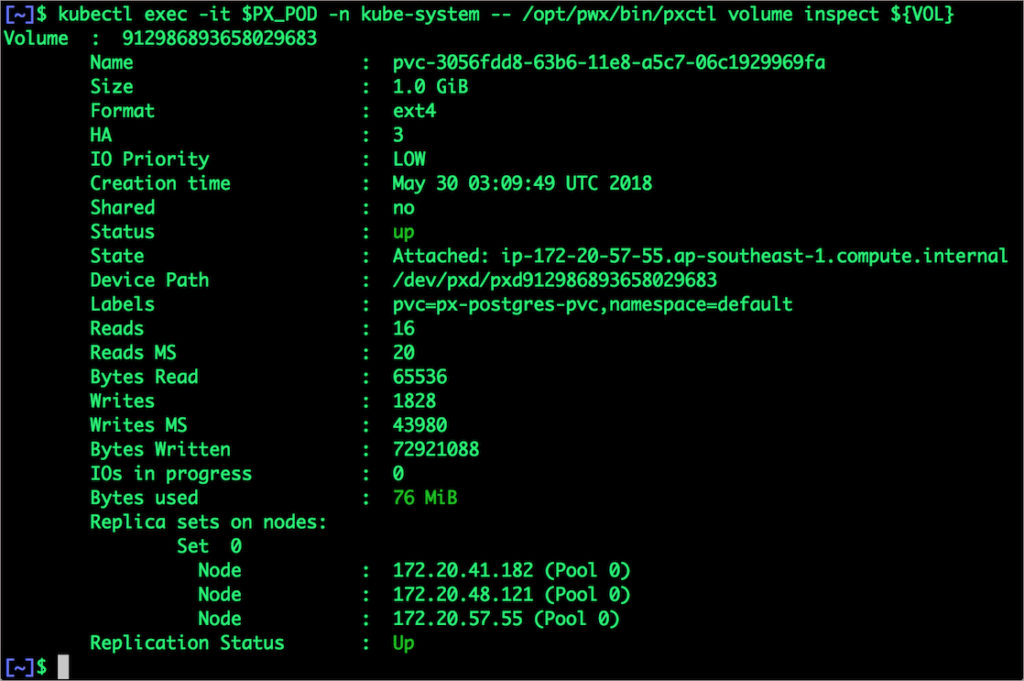
The output from the above command confirms the creation of volumes that are backing PostgreSQL database instance.
Failing Over PostgreSQL Pod on Kubernetes
Let's populate the database with 5 million rows of sample data.
We will first find the pod that's running PostgreSQL to access the shell.
$ POD=`kubectl get pods -l app=postgres | grep Running | grep 1/1 | awk '{print $1}'`
$ kubectl exec -it $POD bash
Now that we are inside the pod, we can connect to Postgres and create a database.
# psql
pgbench=# create database pxdemo;
pgbench=# \l
pgbench=# \q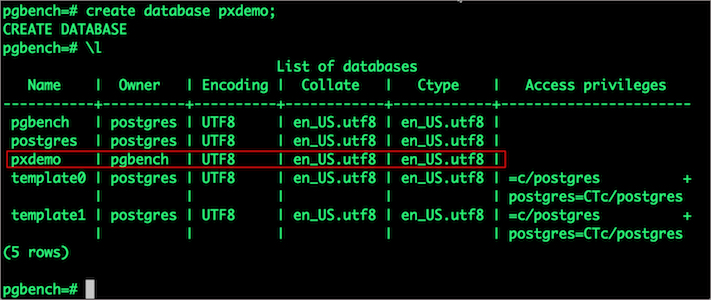
By default, pgbench will create 4 tables (pgbench_branches, pgbench_tellers, pgbench_accounts, and pgbench_history) with 100,000 rows in the main pgbench_accounts table. This creates a simple 16MB database.
The -s option is used for multiplying the number of rows entered into each table. In the command below, we enter a "scaling" option of 50. This tells pgbench to create a database with 50 times the default size.
What this means is our pgbench_accounts table now has 5,000,000 records. It also means our database size is now 800MB (50 x 16MB).
# pgbench -i -s 50 pxdemo;
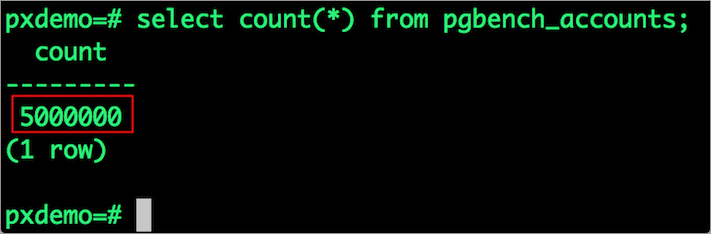
Wait for pgbench to finish populating the table. After that's done, let's verify that the pgbench_accounts is populated by 5 million rows.
# psql pxdemo
\dt
select count(*) from pgbench_accounts;
\q
exit

Now, let's simulate the node failure by cordoning off the node on which PostgreSQL is running.
$ NODE=`kubectl get pods -l app=postgres -o wide | grep -v NAME | awk '{print $7}'`
$ kubectl cordon ${NODE}
node "ip-172-20-57-55.ap-southeast-1.compute.internal" cordoned
Executing kubectl get nodes confirms that scheduling is disabled for one of the nodes.
$ kubectl get nodes

We will now go ahead and delete the PostgreSQL pod.
$ POD=`kubectl get pods -l app=postgres -o wide | grep -v NAME | awk '{print $1}'`
$ kubectl delete pod ${POD}
pod "postgres-556994cbd4-b6ghn" deleted
As soon as the pod is deleted, it is relocated to the node with the replicated data. STorage ORchestrator for Kubernetes (STORK), a Portworx-contributed open source storage scheduler, co-locates the pod on the exact node where the data is stored. It ensures that an appropriate node is selected for scheduling the pod.
Let's verify this by running the below command. We will notice that a new pod has been created and scheduled in a different node.
$ kubectl get pods -l app=postgres
Let's uncordon the node to bring it back to action.
$ kubectl uncordon ${NODE}
node "ip-172-20-57-55.ap-southeast-1.compute.internal" uncordoned
Finally, let's verify that the data is still available.
Let's find the pod name and run the 'exec' command.
$ POD=`kubectl get pods -l app=postgres | grep Running | grep 1/1 | awk '{print $1}'`
$ kubectl exec -it $POD bash
Now use the Postgres command line to make sure our data is still there.
# psql pxdemo
pxdemo=# \dt
pxdemo=# select count(*) from pgbench_accounts;
pxdemo=# \q
pxdemo=# exit
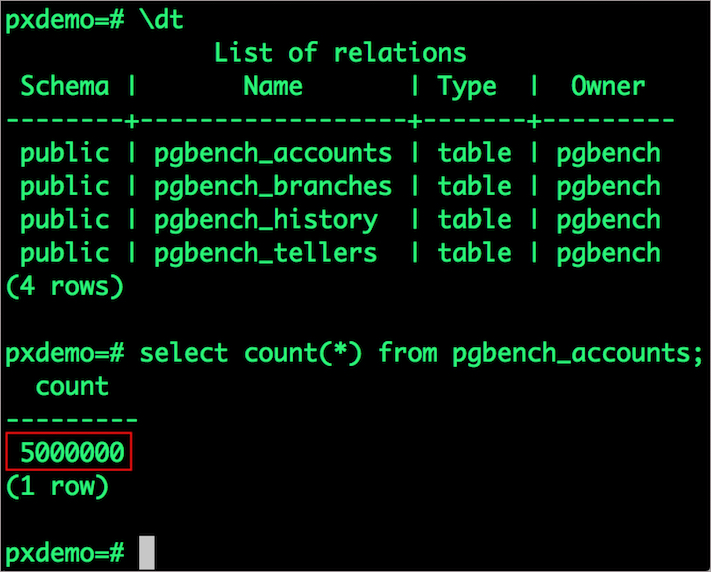
Observe that the database table is still there and all the content is intact!
Performing Storage Operations on Postgres
After testing end-to-end failover of the database, let's perform StorageOps on our EKS cluster.
Expanding the Kubernetes Volume with no downtime
We will now run a bigger benchmark that runs out of space to show how easy it is to add space to a volume dynamically.
Open a shell inside the container.
$ POD=`kubectl get pods -l app=postgres | grep Running | awk '{print $1}'`
$ kubectl exec -it $POD bash
Let's use pgbench to run a baseline transaction benchmark which will try to grow the volume to more than 1 Gib and fail.
$ pgbench -c 10 -j 2 -t 10000 pxdemo
$ exit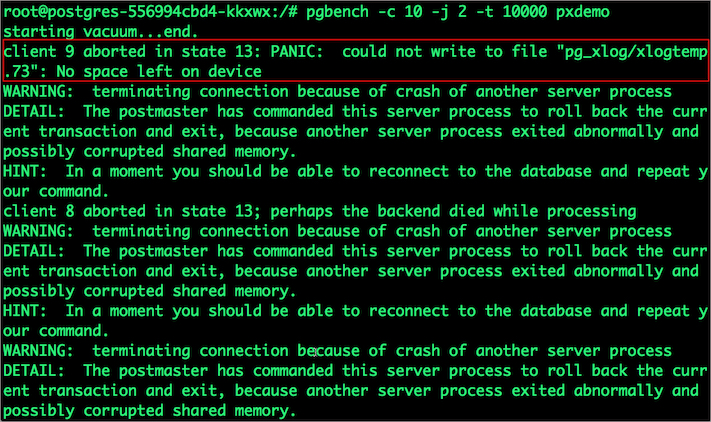
There may be multiple errors during the execution of the above command. The first error indicates that the pod is running out of space.
PANIC: could not write to file "pg_xlog/xlogtemp.73": No space left on device
Since Kubernetes doesn't support modifying the PVC after creation, we perform this operation directly on Portworx with the pxctl CLI tool.
Let's get the volume name and inspect it through the pxctl tool.
If you have access, SSH into one of the nodes and run the following command.
POD=`/opt/pwx/bin/pxctl volume list --label pvc=px-postgres-pvc | grep -v ID | awk '{print $1}'`
$ /opt/pwx/bin/pxctl v i $POD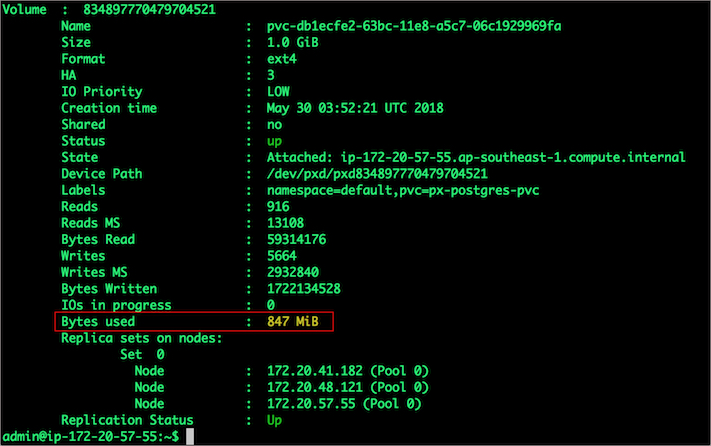
Notice that the volume is within 10% of being full. Let's expand it using the following command.
$ /opt/pwx/bin/pxctl volume update $POD --size=2
Update Volume: Volume update successful for volume 834897770479704521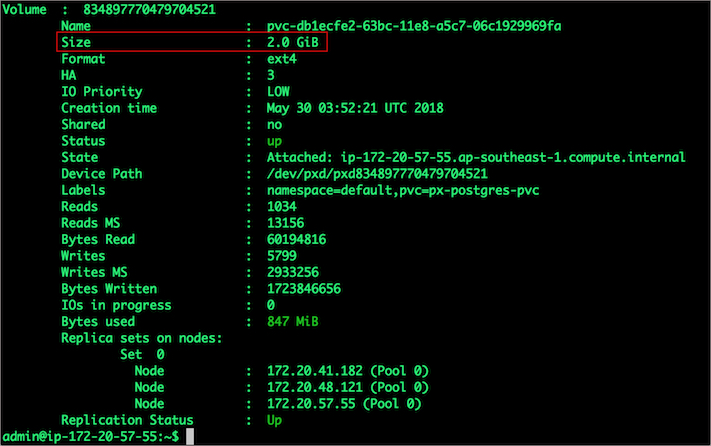
Taking Snapshots of a Kubernetes Volume and Restoring the Database
Portworx supports creating snapshots for Kubernetes PVCs.
Let's create a snapshot for the PVC we created for Postgres.
$ kubectl create -f https://github.com/fmrtl73/katacoda-scenarios-1/raw/master/px-k8s-postgres-all-in-one/assets/px-snap.yaml
volumesnapshot "px-postgres-snapshot" created
You can see all the snapshots using the below command.
$ kubectl get volumesnapshot,volumesnapshotdatas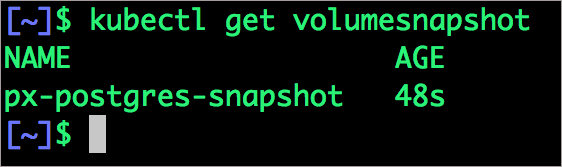
With the snapshot in place, let's go ahead and delete the database.
$ POD=`kubectl get pods -l app=postgres | grep Running | grep 1/1 | awk '{print $1}'`
$ kubectl exec -it $POD bash
$ psql
drop database pxdemo;
\l
\q
exit
Since snapshots are just like volumes, we can use it to start a new instance of PostgreSQL. Let's create a new instance of PostgreSQL by restoring the snapshot data.
$ kubectl create -f https://raw.githubusercontent.com/fmrtl73/katacoda-scenarios-1/master/px-k8s-postgres-all-in-one/assets/px-snap-pvc.yaml
persistentvolumeclaim "px-postgres-snap-clone" created
From the new PVC, we will create a PostgreSQL pod.
$ kubectl create -f https://raw.githubusercontent.com/fmrtl73/katacoda-scenarios-1/master/px-k8s-postgres-all-in-one/assets/postgres-app-restore.yaml
deployment "postgres-snap" created
Verify that the new pod is in running state
$ kubectl get pods -l app=postgres-snap
Finally, let's access the data created by the benchmark tool earlier in the walkthrough.
$ POD=`kubectl get pods -l app=postgres-snap | grep Running | grep 1/1 | awk '{print $1}'`
$ kubectl exec -it $POD bash

$ psql pxdemo
\dt
select count(*) from pgbench_accounts;
\q
exit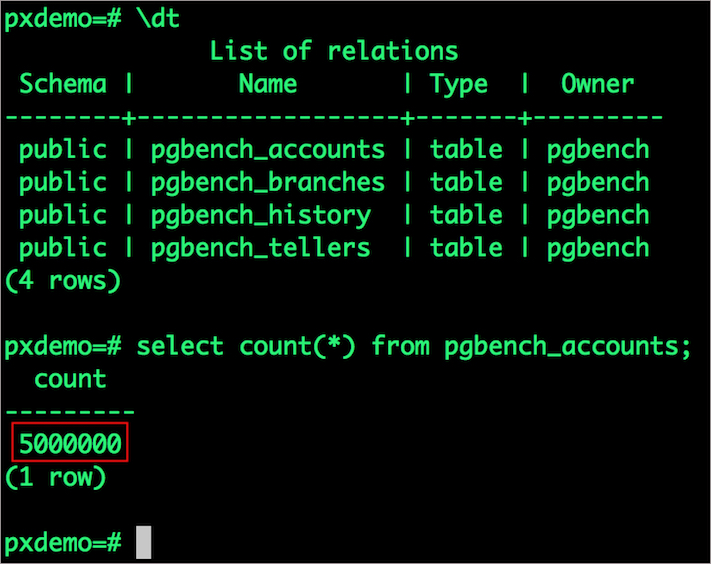
Notice that the table is still there with the data intact. We can also push the snapshot to Amazon S3 if we want to create a Disaster Recovery backup in another Amazon region. Portworx snapshots also work with any S3 compatible object storage, so the backup can go to a different cloud or even an on-premises data center.
Summary
Portworx can easily be deployed on Amazon EKS to run stateful workloads in production. Through the integration of STORK, DevOps, and StorageOps, teams can seamlessly run highly-available database clusters in EKS. They can perform traditional operations such as volume expansion, snapshots, backup, and recovery for the cloud-native applications.
Published at DZone with permission of Michael Ferranti. See the original article here.
Opinions expressed by DZone contributors are their own.
Comments