How to Set Up the Raspberry Pi 7 Touchscreen
Did you get the new Pi Touchscreen for Christmas? Here's how to set it up.
Join the DZone community and get the full member experience.
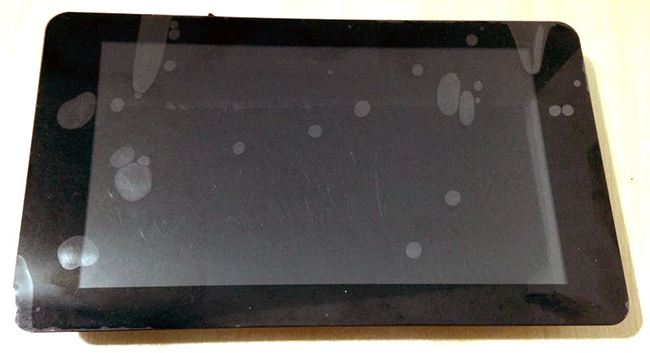
Join For FreeI recently purchased the 7” touch screen for the Raspberry Pi and thought I’d put something together to show how it’s set up, sharing my thoughts on it so far. This has been a really popular item and I had to check it out.
The Kit
The Raspberry Pi 7” Touchscreen kit came from Newark element14 , and it’s boxed with everything you need (except of course a Raspberry Pi). It comes with an interface board and everything to mount a pi to the back of it, which can be pretty nice.

Tip: Leave the plastic coating on the touchscreen while assembling it so you don’t damage anything.
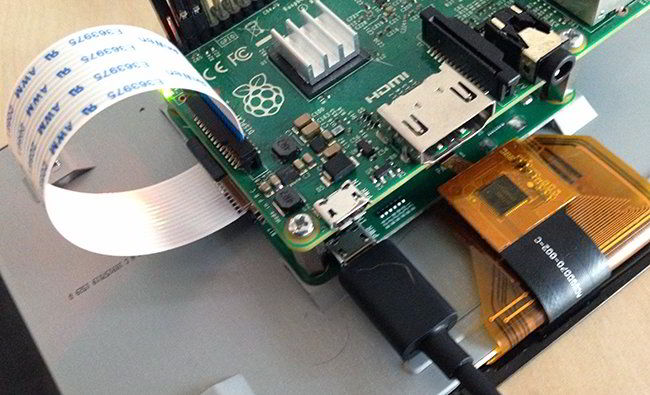
Video Interface Cables
These are delicate pieces so you should be careful hooking these up.

These connections work by sliding out the black piece, then pushing the ribbon inside and pushing the black piece back in. Start by applying pressure in the middle of the black piece first, and if you encounter resistance, try resetting the ribbon in it. Don’t try to ram it in, if it breaks it won’t work at all.
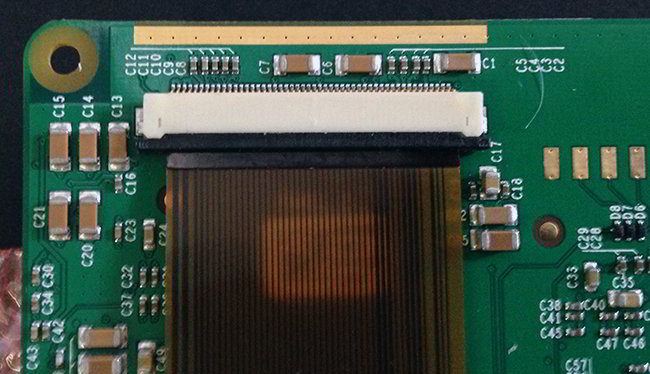
Set this large connection first, then turn the board over to insert the smaller one, and connect it in the same fashion.
Now that it’s turned over, it’s ready to mount using the supplied standoff screws:
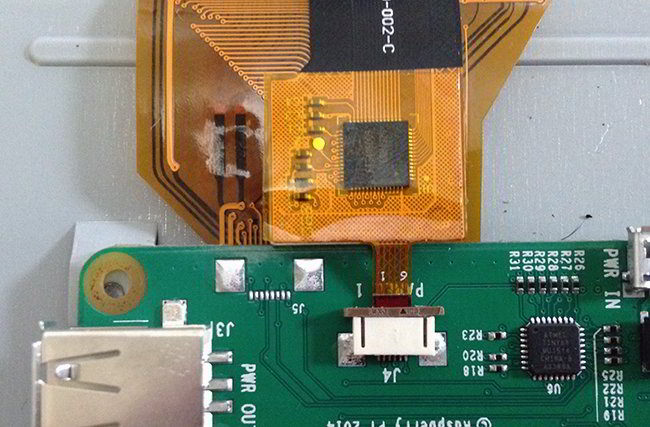
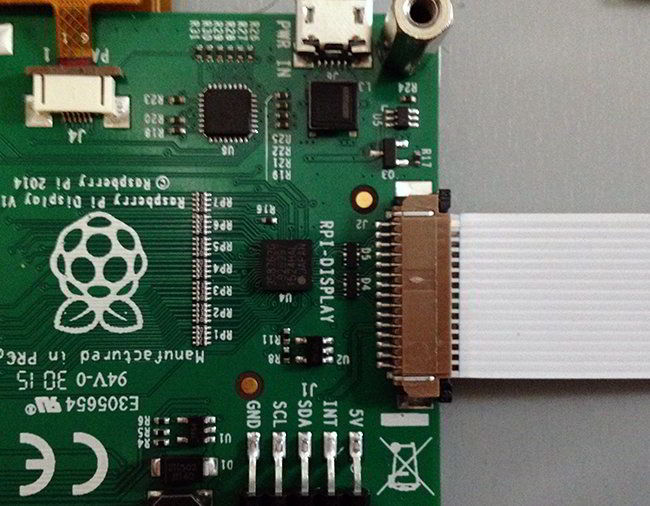
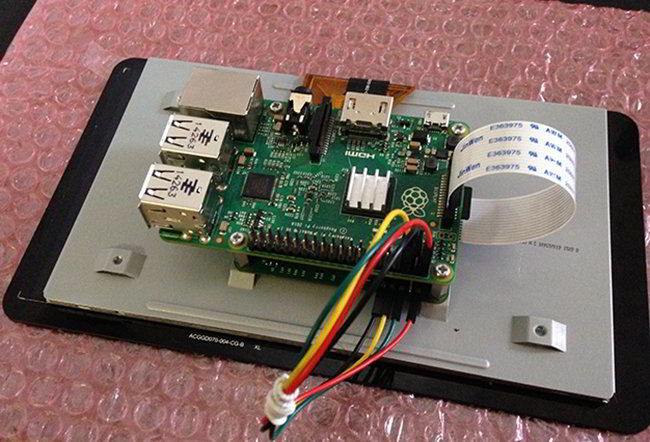
Connecting to the Pi
Now is a good time to hook up the RPI-Display ribbon:
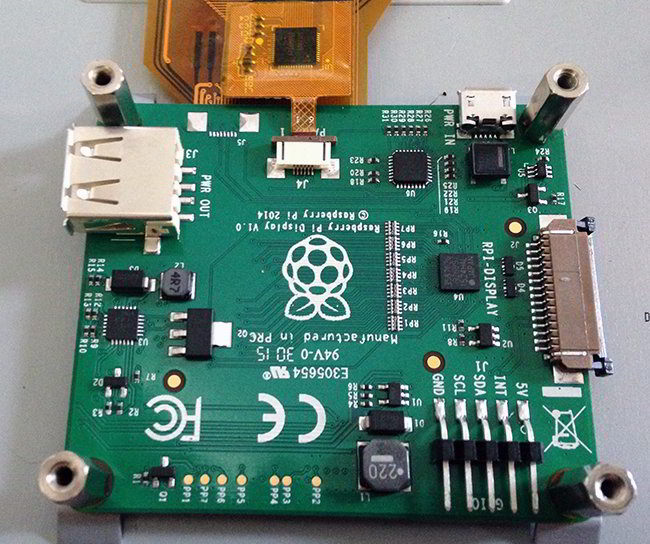
And, hook up the GPIO as follows:
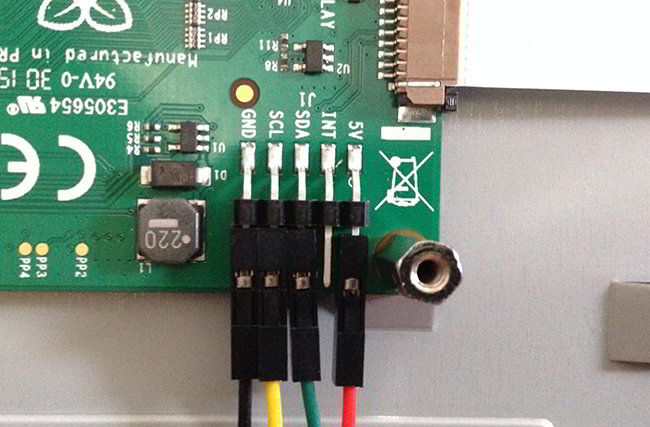
- Red to 5v
- Green to SDA
- Yellow to SDL
- Black to Ground
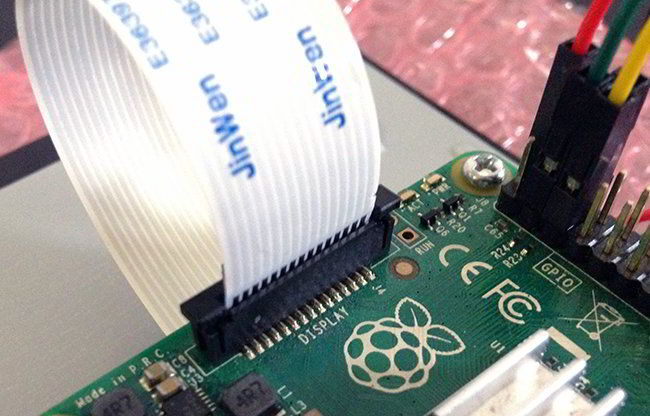
Now mount the Raspberry Pi to the standoffs. Plug in the RPI-Display cable:
And, wire the GPIO as follows:
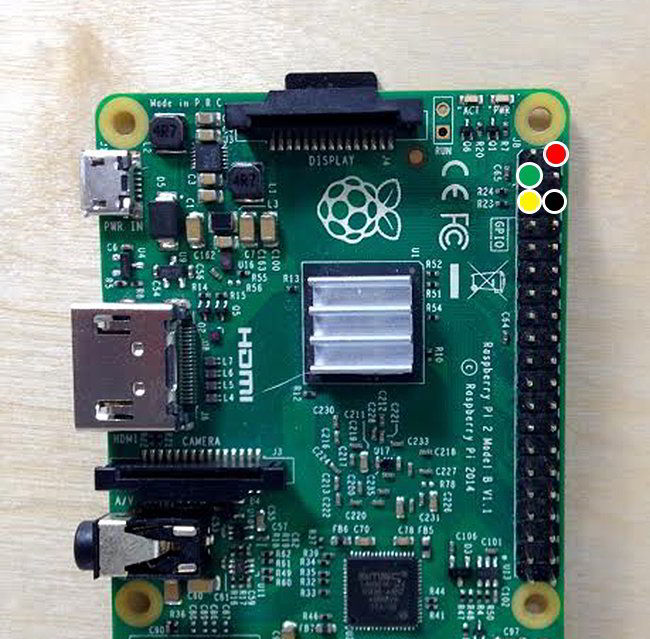
- Red to 5v (Pin 2)
- Green to GPIO2 SDA (Pin 3)
- Yellow to GPIO3 SCL (Pin 5)
- Black to Ground (Pin 6)
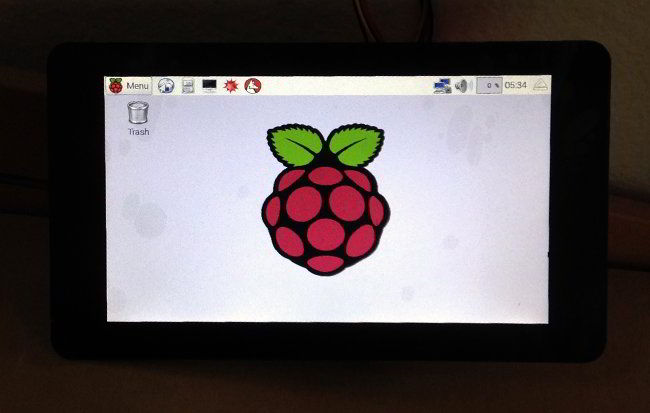
Power up and Install Software
Now, you can power up the screen. If you have a good power supply, you can just put the power into the outlet on the display board, and it will power both the Pi and the screen. Alternatively, you can power both independently if needed.
You will need to install some software to get it running:
sudo apt-get update
sudo apt-get upgrade
To install the virtual keyboard:
sudo apt-get install matchbox-keyboardYou’re ready to go!
My Thoughts
Honestly, I was a bit skeptical when ordering this thing. I was wondering how good the quality would be at $60. I was pleasantly surprised right away. Here are some of the features I noticed:
Sturdy and Strong - Just feeling it in your hands tells you the kind of quality it has. It does not feel like a cheap or flimsy screen. You can actually use it for stuff.
Picture Quality is Amazing - The colors and clarity of this screen are great. It looks like a high quality tablet.
Responsive Touch - It has ten finger touch though I never pushed it to that limit. It’s definitely responsive and works great at popping through windows. It’s also great for drawing things. It’s very reactive and impressive.
Overall, I was very pleased with it and think it’s well worth the money. I plan on getting a few and doing some cool projects with them. I would definitely recommend getting one. You can get this touchscreen for $60 here.
Why Not Just Get a Tablet?
This was the question posed to me on Twitter, and I’ve seen the comment elsewhere. And realistically, if you buy this screen plus a Raspberry Pi, Power Supply, and Wifi Dongle, you’re looking at spending over $100. And, the profile isn’t very thin plus you’d need an additional case to make it truly like a tablet. Considering you can pick up a cheap Android tablet for under $100, this doesn’t seem like the greatest replacement for a tablet.
I think the overall purpose of this goes beyond a tablet though. For one, Raspian is far more powerful and advanced than Android, and arguably more hackable. I would see this as being great for:
Kiosks - Under $100 is a steal for POS interfaces and customer info Kiosks of all types.
In Dash Car Computer - You could control a sound system with your Pi, do GPS, engine monitoring etc.
Wall Mounted Awesomeness - Get the weather, latest news, control your thermostat, open garage door, etc.
The possibilities are endless here. I don’t think folks buying this will be looking for a tablet, the projects will likely be more complex than that. If you make a cool project shoot me an email or let me know in the comments!
I have recently completed a course called "Hands on Internet of Things" that takes you step by step through actual projects with a Raspberry Pi. I am offering a special code for DZone readers to get the full 3 course for only $10!! Click here to redeem it!
Published at DZone with permission of Jeremy Morgan. See the original article here.
Opinions expressed by DZone contributors are their own.
Comments