How to Use APIkit Router in Mule 4
Learn the 7 steps to using APIkit Router in Mule 4 through a basic example for a quick head start in API development.
Join the DZone community and get the full member experience.
Join For FreeThe APIkit Router element allows you to define an API. It helps developers generate whole code from the API specification (RAML file) itself. But apart from generating flows from the API specification, it also helps in routing the incoming requests to specific flows of the API.
Steps to Use APIkit Router
1. Create an API specification (RAML). You can create an API specification from the Design Center or you can create it manually in any of the text editors. (The creating or editing API specification feature is also available in Anypoint Studio 7.x.) You can use the below RAML API specification for this demo.
#%RAML 1.0
titleTest
baseUriplaceholder.example.com
descriptionAPI kit router Test
mediaType
application/json
version"1"
/test
get
displayNameGET Test
descriptionAPI kit get test
post
displayNamePOST Test
descriptionAPI kit post test
put
displayNamePUT Test
descriptionAPI kit put test
delete
displayNameDELETE Test
descriptionAPI kit delete test
2. Create a new project in Mule.
3. Import or copy the API specification in "src/main/resources/api" folder.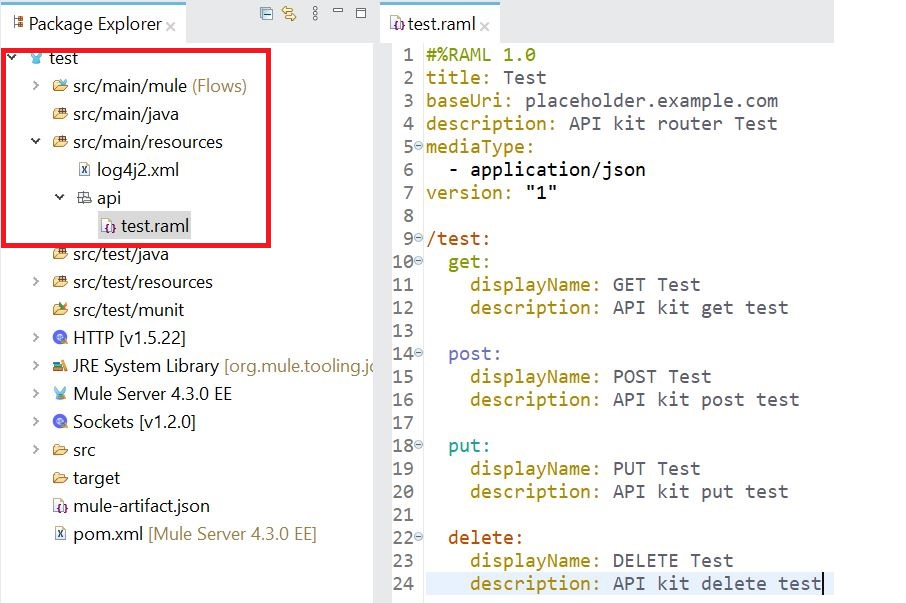
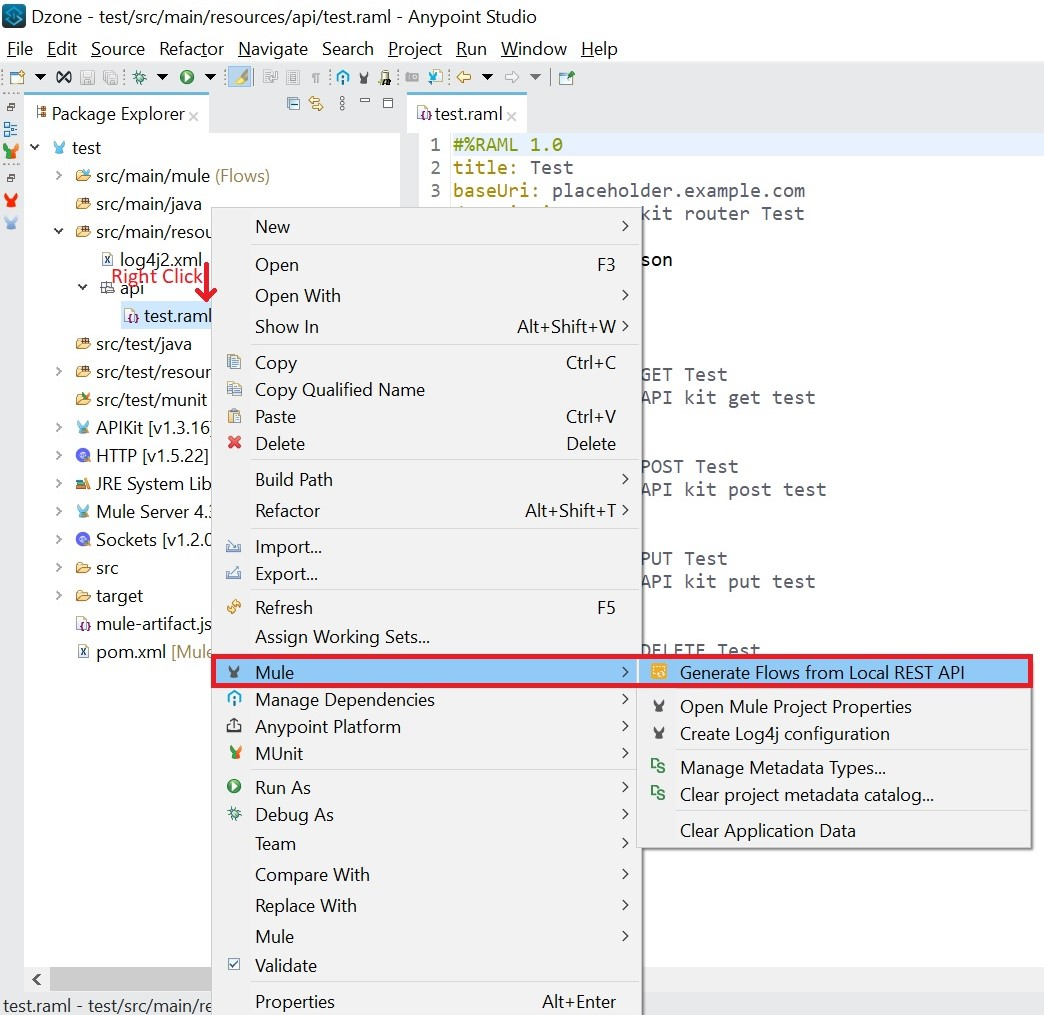
4. Generate flows from the API specification file.
- Right-click API Specification.
- Select Mule.
- Select Generate Flows from Local REST API.
![]()
5. Flows from the API specification will be generated, which you can check once the above step is done.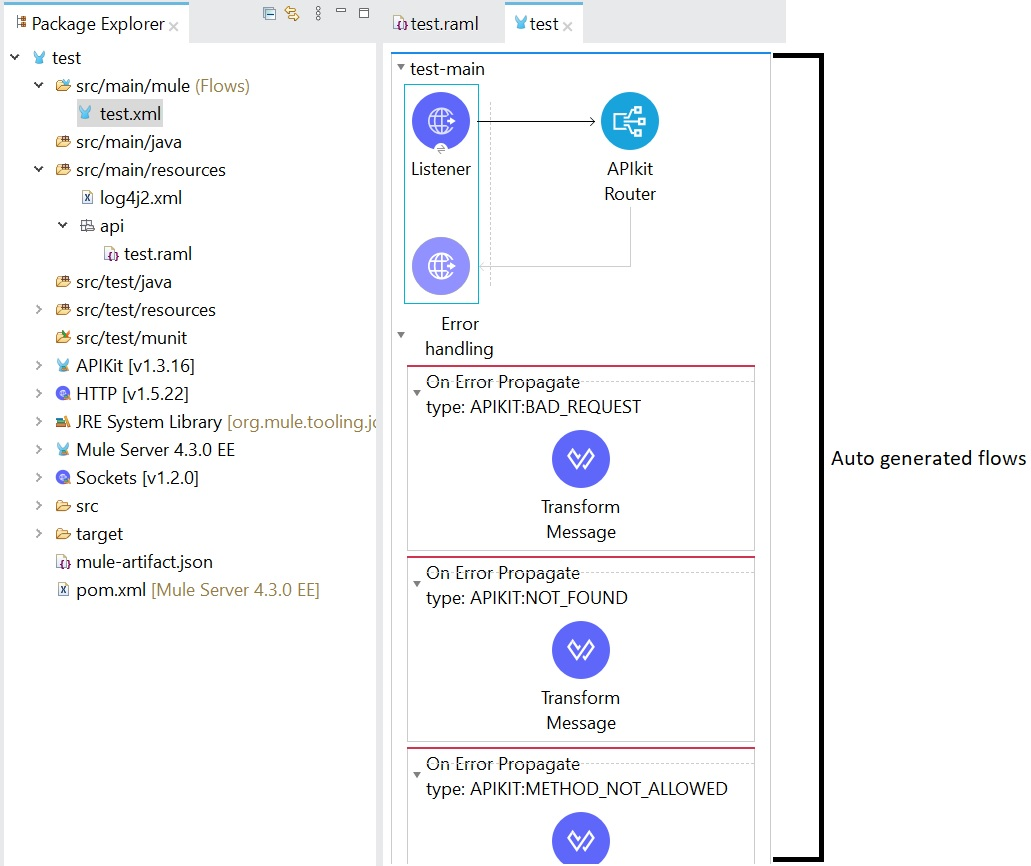
6. Configure HTTP listener.
7. Configure all flows unique to each HTTP method and URI. In this demo, I have configured the set payload for each unique HTTP method and URI combination.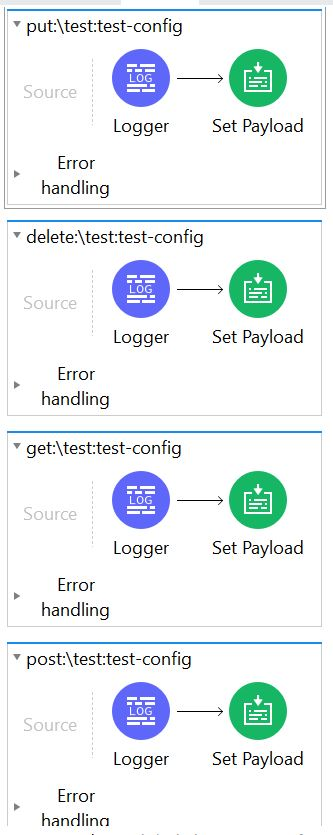
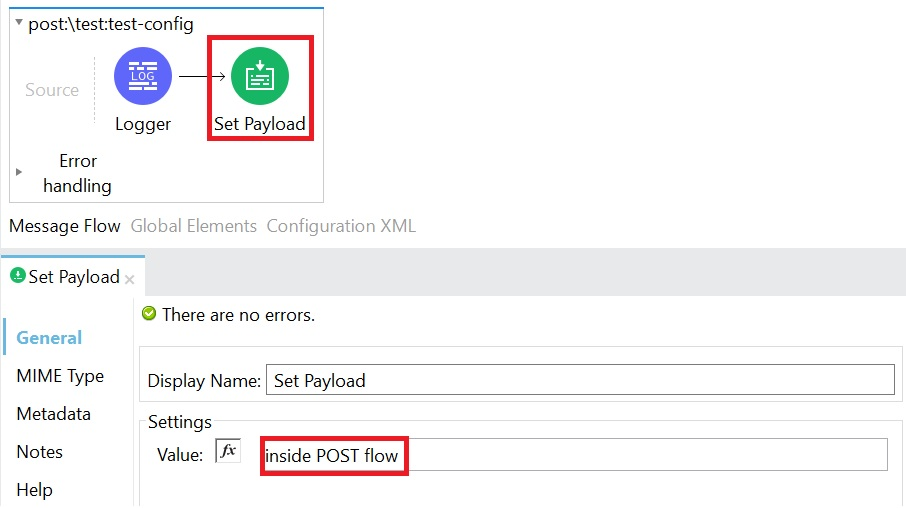
8. Your API is ready to be tested now.
GET method HIT:
POST method HIT:
PUT method HIT:
DELETE method HIT:
Conclusion
The above illustrated example is very basic but gives a quick head start in API development.
Opinions expressed by DZone contributors are their own.

Comments