How To Use TrackBy With *ngFor in Angular 8
Join the DZone community and get the full member experience.
Join For FreeIntroduction
In this article, we are going to learn how to use TrackBy in Angular applications.
In every application, to run the application faster, we need to check the performance of our application. Angular provides a method called trackBy, which is used to track our incoming data every time we get a request from an API.
Suppose we have some data coming from an API request into the collection, and we need to change the data over the web page using the ngFor directive. In this case, Angular will remove all the DOM elements that are associated with the data and will create them again in the DOM tree. That means a lot of DOM manipulations will happen if a large amount of data is coming from the API.
Prerequisites
- Basic knowledge of Angular.
- Visual Studio Code must be installed.
- Angular CLI must be installed.
- Node JS must be installed.
Step 1
Let's create a new Angular project using the following NPM command:
xxxxxxxxxx
ng new trackBy
Step 2
Now, let's create a new component by using the following command:
xxxxxxxxxx
ng g c trackBy-example
Step 3
Now, open the trackBy-example.component.html file and add the following code in the file:
xxxxxxxxxx
<h4 style="text-align: center;">{{SampleMessage}}</h4>
<div class="row">
<div class="col-12 col-md-12">
<div class="card">
<div class="card-body position-relative">
<div class="table-responsive cnstr-record product-tbl">
<table class="table table-bordered heading-hvr">
<thead>
<tr>
<th width="50">Art.No </th>
<th>Brand</th>
<th>Price/Unit</th>
<th>Provider</th>
<th>P. Art. N</th>
<th>S. A/C</th>
</tr>
</thead>
<tbody>
<tr *ngFor="let product of companyProduct;">
<td align="center">{{product.ArtNo}}</td>
<td>{{product.Brand}}</td>
<td>{{product.Price }}</td>
<td>{{product.Provider}}</td>
<td>{{product.ProviderArtNo}}</td>
<td>{{product.SalesAccount}}</td>
</tr>
</tbody>
</table>
<button (click)='getNewCompanies()'>New Companies</button>
</div>
</div>
</div>
</div>
</div>
Here, we are not using the trackBy function yet.
In the below code, we can check how to apply trackBy with our structural directive, *ngFor:
xxxxxxxxxx
<tr *ngFor="let product of companyProduct; trackBy:trackByArtNo">
Step 4
Now, open the trackBy-example.component.ts file and add the following code in this file:
xxxxxxxxxx
import { Component, OnInit } from '@angular/core';
import { ProductsService } from '../product.service';
@Component({
selector: 'app-trackby',
templateUrl: './trackby.component.html'
})
export class TrackbyComponent implements OnInit {
companyProduct: any[];
SampleMessage="Example of Angular Fetching records using TrackBy";
constructor(private productService: ProductsService) {
}
ngOnInit() {
this.companyProduct = this.productService.getAllProductsUsingTrackBy();
}
getNewCompanies(): void {
this.companyProduct = this.productService.getAllProductsUsingTrackByExample();
}
trackByArtNo(index: number, companyProduct: any): string {
return companyProduct.ArtNo;
}
}
The trackBy function will take two arguments. The first is the index, and the second is the current item. We can return the unique identifier as a return argument.
xxxxxxxxxx
trackByArtNo(index: number, companyProduct: any): string {
return companyProduct.ArtNo;
}
Step 5
Now, open the product.service.ts file and add the following code:
import { Injectable } from '@angular/core';
@Injectable()
export class ProductsService {
employees: any[];
constructor() {
}
getAllProductsUsingTrackBy() {
return this.employees = [
{
ProductId: 1,
ArtNo: "100",
Provider: "OppoProvider",
ProviderArtNo: "1Yu",
Brand: "Oppo",
Price: 7810.23,
BuyAccount: "123",
SalesAccount: "321"
},
{
ProductId: 1,
ArtNo: "101",
Provider: "OppoProvider",
ProviderArtNo: "1Yu",
Brand: "Oppo",
Price: 2310.23,
BuyAccount: "123",
SalesAccount: "321"
},
{
ProductId: 1,
ArtNo: "102",
Provider: "OppoProvider",
ProviderArtNo: "1Yu",
Brand: "Oppo",
Price: 7810.23,
BuyAccount: "123",
SalesAccount: "321"
},
{
ProductId: 1,
ArtNo: "103",
Provider: "OppoProvider",
ProviderArtNo: "1Yu",
Brand: "Oppo",
Price: 5810.23,
BuyAccount: "123",
SalesAccount: "321"
}
];
}
getAllProductsUsingTrackByExample() {
return this.employees = [
{
ProductId: 1,
ArtNo: "100",
Provider: "OppoProvider",
ProviderArtNo: "1Yu",
Brand: "Oppo",
Price: 7810.23,
BuyAccount: "123",
SalesAccount: "321"
},
{
ProductId: 1,
ArtNo: "101",
Provider: "OppoProvider",
ProviderArtNo: "1Yu",
Brand: "Oppo",
Price: 2310.23,
BuyAccount: "123",
SalesAccount: "321"
},
{
ProductId: 1,
ArtNo: "102",
Provider: "OppoProvider",
ProviderArtNo: "1Yu",
Brand: "Oppo",
Price: 7810.23,
BuyAccount: "123",
SalesAccount: "321"
},
{
ProductId: 1,
ArtNo: "103",
Provider: "OppoProvider",
ProviderArtNo: "1Yu",
Brand: "Oppo",
Price: 5810.23,
BuyAccount: "123",
SalesAccount: "321"
},
{
ProductId: 1,
ArtNo: "104",
Provider: "OppoProvider",
ProviderArtNo: "1Yu",
Brand: "Oppo",
Price: 4770.23,
BuyAccount: "143",
SalesAccount: "211"
},
];
}
}
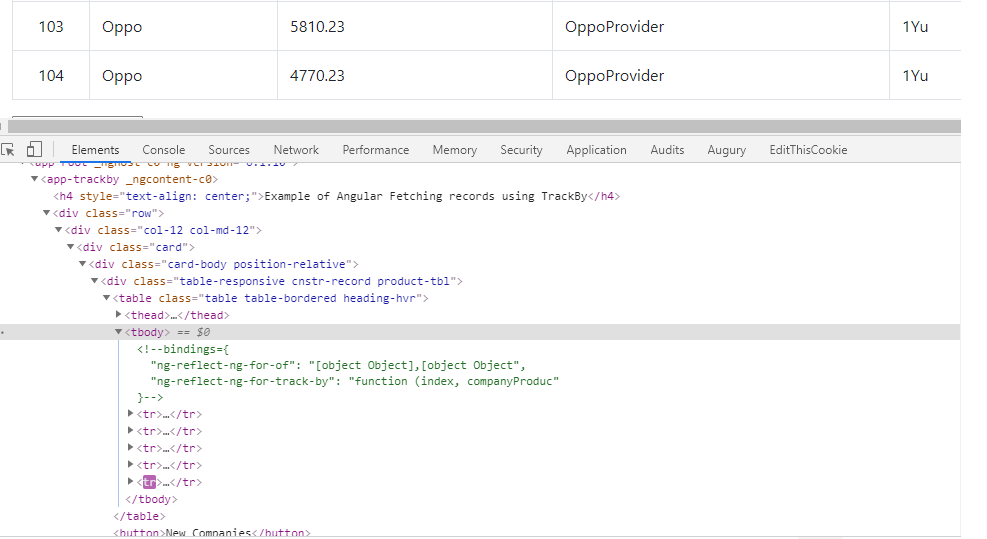
Now, it's time to run the project by using npm start or ng serve command and check the output. As in the below image, when we click on "New Companies" it will add one new entry in the table.
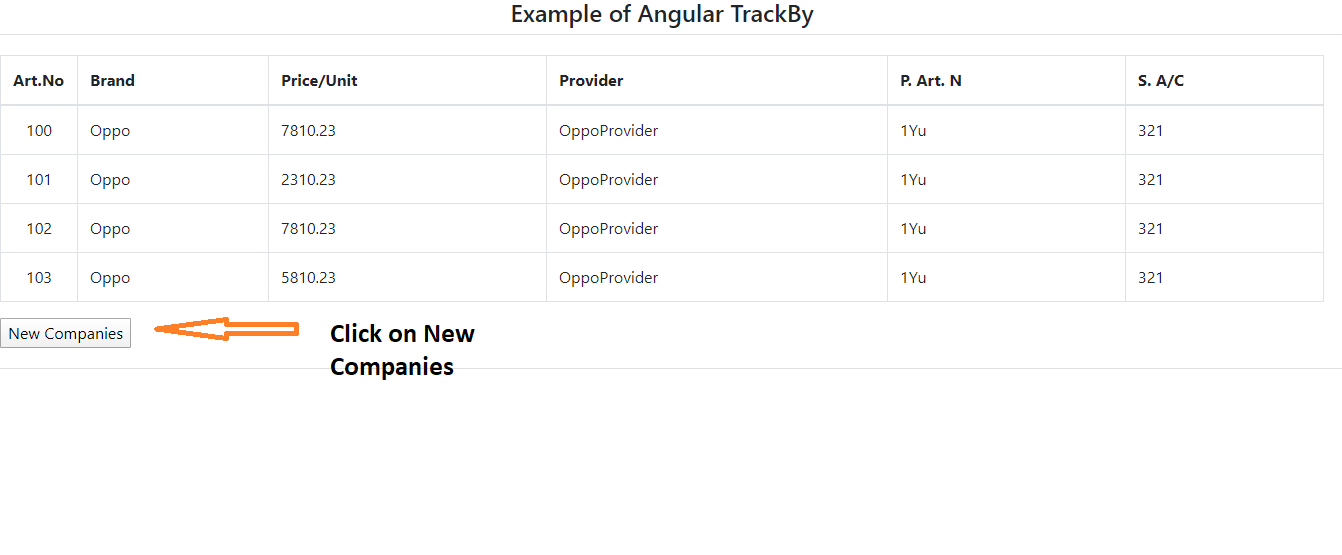
If we use the normal *ngFor directive without using the trackBy function, the Angular application will remove all the DOM elements and will recreate them again in the DOM tree, even if the same data is coming. This can slow down our application performance if there's a lot of data.

But, with the help of trackBy, it will not create a new DOM, as we can see in the below image. Only the new data in the DOM will be added, which will increase the application performance.
Conclusion
In this article, we have seen how to use trackBy with NgFor in an Angular 8 Application.
Please give your valuable feedback/comments/questions about this article. Please let me know if you liked and understood this article, and how I could improve it.
Opinions expressed by DZone contributors are their own.
Comments