How to Use Xively Platform in an IoT Project
This tutorial explores how to use Xively and how to connect a “smart object” to Xively platform.
Join the DZone community and get the full member experience.
Join For FreeThis tutorial explores how to use Xively and how to connect a “smart object” to Xively platform. In our example, we will connect Arduino to Xively platform sending sensor data. At the end, we will explore how to use the information stored in Xively to create dashboard.
Before starting it is useful to look at Xively IoT platform.
Xively is an IoT cloud platform that is “an enterprise platform for building, managing, and deriving business value from connected products”. Moreover, it provides a cloud-based API with an SDK that simplifies the development process. It supports several platforms and technologies:
- Android
- Arduino
- Arm mbed
- C
- Java
and much more. Please, refer to their library website to find more information. Xively is a Paas (Platform As a Service) that exposes its services via RESTful APIs.
Moreover, Xively supports messaging service based on MQTT protocol.If you want to have more information about this IoT platform read Xively Architecture. In this IoT project tutorial, we will use the free Xively account.
Now we know a bit more about Xively and the services it provides, it is useful to start the IoT project. As an example, we will build a simple system that monitors the plant status health using a set of sensors that help us to measure environment conditions and the soil moisture.
If you remember, we already explained this project in a previous post called “Smart plant system“. In this post, we will explore how we can achieve the same result using a different IoT cloud platform.
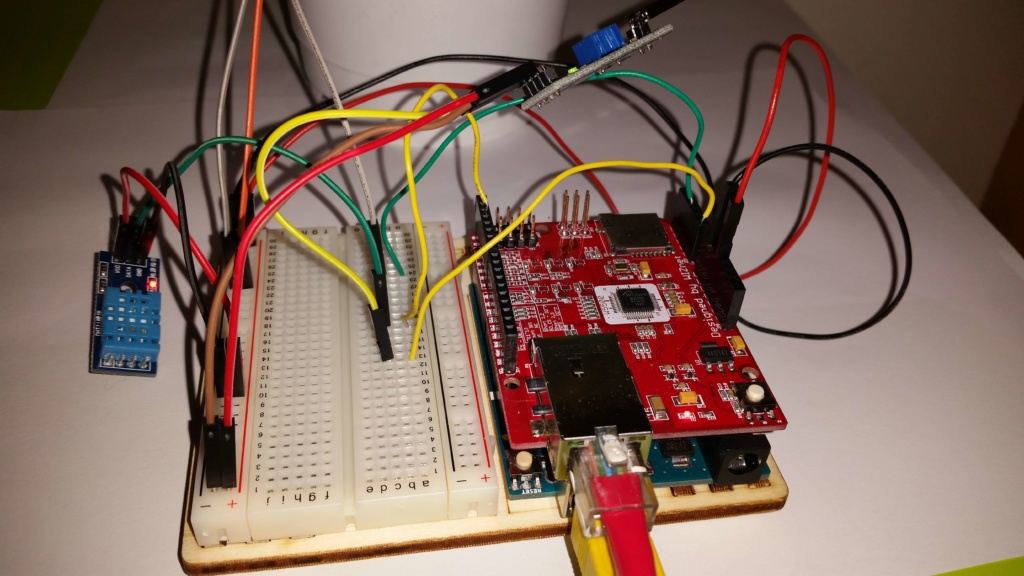
This IoT project uses Arduino Uno and a set of sensors:
- DHT11: Temperature and humidity sensor
- TEMT6000: Light intensity sensor
- YL-38 + YL-69: Soil moisture sensor
We want to send all values read from these sensors to Xively and create a dashboard so we can monitor these parameters.
I'm creating my IoT project with SwA tutorial (Click To Tweet)
Xively uses some basic concepts:
Xively device: It is your “device” or the IoT project you are building. Consider it as an envelope containing the data.
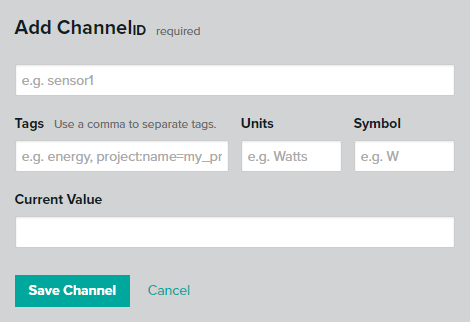
Channels: It is the streaming coming from your sensors. Usually, the channel number is equal to the sensor number (as long as you want to monitor them all).
So the first step is adding the “device” to our account: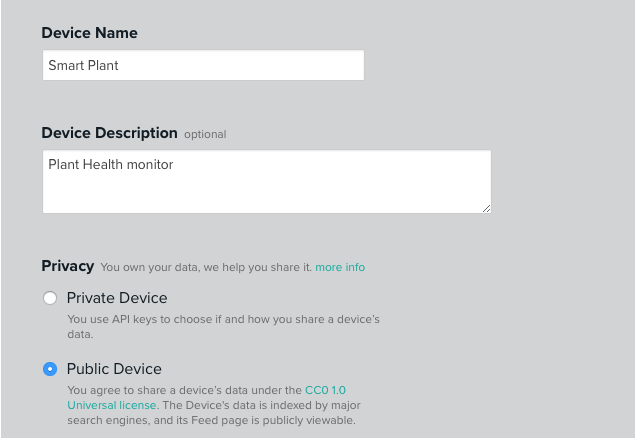
Then we define the channels. In this example we have 4 channels as it is clear in the picture below:
That’s all. Now you have to use the Xively library for your device (in our example Arduino Uno) and start sending data to the cloud.
The code is very simple:
#include <b64.h>
#include <HttpClient.h>
#include <SPI.h>
#include <Ethernet.h>
#include <HttpClient.h>
#include <Xively.h>
#include "DHT.h"


#define DHTPIN 2
#define DHTTYPE DHT11

byte mac[] = {  0xDE, 0xAD, 0xBE, 0xEF, 0xFE, 0xED };
EthernetClient client;
IPAddress ip(192, 168, 1, 40); // Arduino IP Add
IPAddress myDns(8,8,8,8);
IPAddress myGateway(192,168,1,1);

int moisturePin = 0;
int lightPin = 3;
DHT dht(DHTPIN, DHTTYPE);

// Xively setup
char xivelyKey[] = "your_Xively_key_here";
char lightId[] = "Light";
char tempId[] = "Temperature";
char pressId[] = "Humidity";
char moistId[] = "Moisture";

XivelyDatastream datastreams[] = {
    XivelyDatastream(lightId, strlen(lightId), DATASTREAM_FLOAT),
    XivelyDatastream(tempId, strlen(tempId), DATASTREAM_FLOAT),
    XivelyDatastream(pressId, strlen(pressId), DATASTREAM_FLOAT),
    XivelyDatastream(moistId, strlen(moistId), DATASTREAM_FLOAT)
};

XivelyFeed feed(739668463, datastreams, 4);
XivelyClient xivelyclient(client);

void setup() {
    Serial.begin(9600);
    Serial.print("Starting...");
    setupNet();
    dht.begin();

}

void loop() {
    float soilHum = analogRead(moisturePin);
    soilHum = (1023 - soilHum) * 100 /1023;
    Serial.println("Soil Humidty: " + String(soilHum));

    // Read light
    float volts = analogRead(lightPin) * 5.0 / 1024.0;
    float amps = volts /10000.0;
    float microamps = amps * 1000000;
    float lux = microamps * 2.0;

    Serial.println("Lux: " + String(lux));

    float h = dht.readHumidity();
    float temp = dht.readTemperature();


    Serial.println("Temp: " + String(temp,2));
    Serial.println("Hum: " + String(h,2));

    // Prepare to send data
    datastreams[0].setFloat(lux);
    datastreams[1].setFloat(temp);
    datastreams[2].setFloat(h);
    datastreams[3].setFloat(soilHum);
    int ret = xivelyclient.put(feed, xivelyKey);
    Serial.println("Client returns ["+String(ret)+"]");
    delay(5000);
}

void setupNet() {
    Serial.println("Set up network access.....");
    if (Ethernet.begin(mac) == 0) {
        Serial.println("Failed to configure Ethernet using DHCP");
        // try to congifure using IP address instead of DHCP:
        Ethernet.begin(mac,ip,myDns,myGateway);
    }

}
Please notice that the sketch defines a XivelyDatastream that holds the four stream we send to Xively platform.
Each channel defined previously using Xively interface corresponds to a XivelyDatastream. Remember to use in the data stream the same name used in the Xively interface.
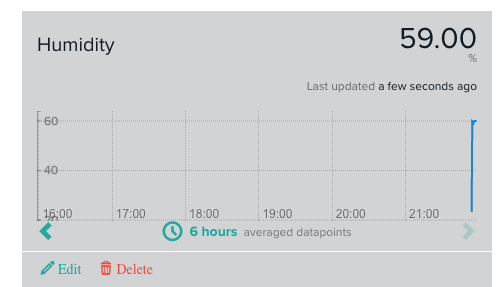
Now if we upload the sketch to Arduino and run it, we will notice that Xively receives the data:
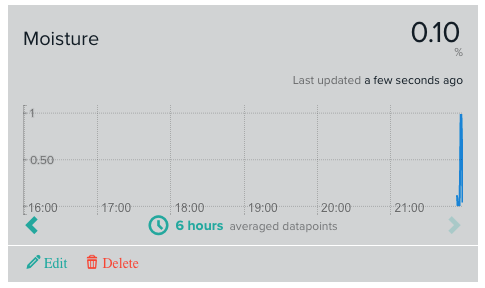
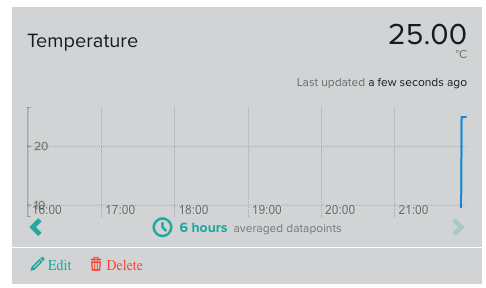
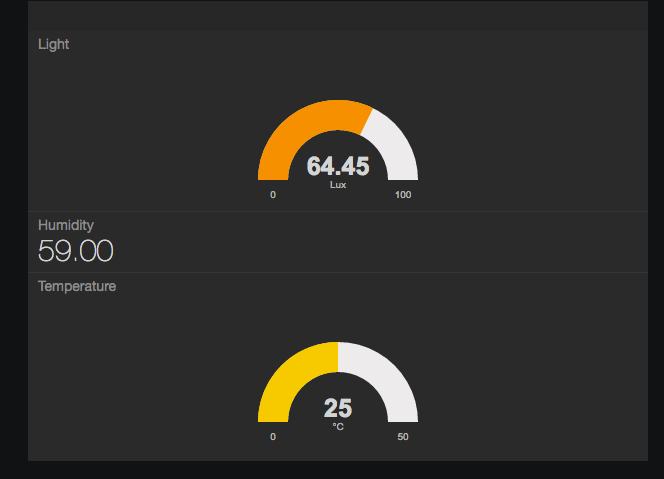
Once the software part is ready and working and the wiring aspects are defined the last step is analyzing how to create a dashboard using the data stored in Xively.
To this purpose, we will use Freeboard.io. This is a free IoT dashboard tool that can be integrated with Xively easily.
It helps us to represent the information stored in Xively using charts.
The first step is connecting Freeboard.io to Xively. This can be done easily using API Key provided by Xively.
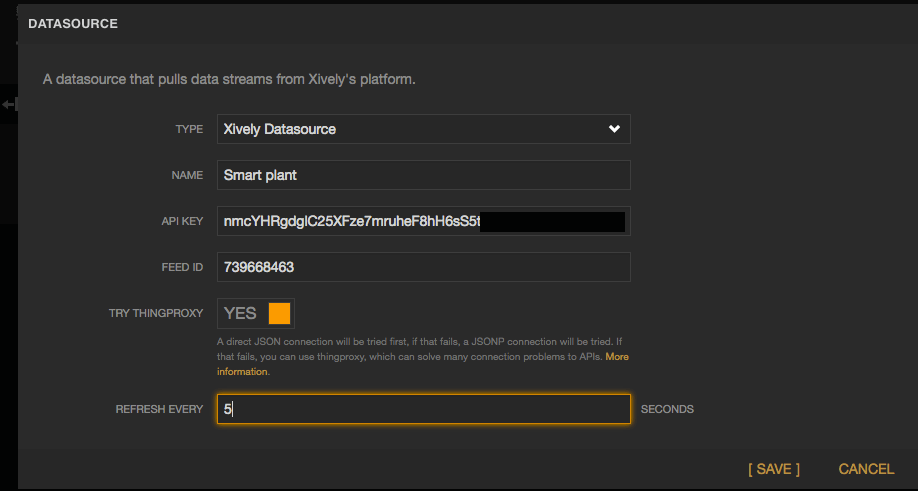
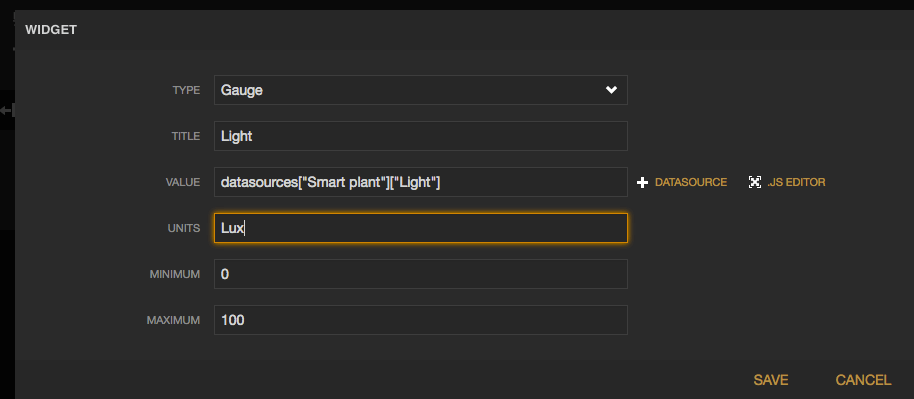
Now it is very simple to create charts connecting them to the Xively channels covered before.
At the end, you can create your dashboard:
At the end of this post, hopefully, you gained the knowledge about using Xively platform in an IoT project.
Published at DZone with permission of Francesco Azzola. See the original article here.
Opinions expressed by DZone contributors are their own.
Comments