Image Classification With DCNNs
We will break down the purpose behind image classification, give a definition for a convolutional neural network, discuss how these two can be used together, and briefly explain how to create a convolutional neural network architecture in Python.
Join the DZone community and get the full member experience.
Join For FreeImage Classification With Deep Convolutional Neural Networks
Image classification with deep convolutional neural networks (DCNN) is a mouthful of a phrase, but it is worth studying and understanding due to the number of projects and tasks that can be completed by using this method. Image classification is a powerful tool to take static images and extrapolate important data that might otherwise be missed.
In this article, we will break down the purpose behind image classification, give a definition for a CNN, discuss how these two can be used together, and briefly explain how to create a DCNN architecture.
What Is the Purpose of Image Classification?
As already mentioned, the predominant purpose of image classification is to be able to generate more data from images. These can be as simple as identifying color patterns and as complicated as generating new images based on data from other images. This is exactly why image classification, especially with convolutional neural networks, is so powerful.
With machine learning, there are two ways these image classification models can be trained: supervised or unsupervised learning. For a more in-depth discussion on the benefits of these options, make sure to read our article on Supervised vs. Unsupervised Learning.
Depending on the type of image classification model you are creating, you may find you want to supervise the learning of the model and control what data is being fed into it. However, you may also want to import as much raw data as possible to allow your model to generate conclusions on its own. Both are acceptable paths, depending on your goal.
Image classification is the process of simply generating data from images and being able to organize that data for some other use. When connected to a DCNN the true power of an image classification model can be unlocked.
What Is a Convolutional Neural Network?

A convolutional neural network is a specific type of neural network architecture designed to learn from large amounts of data, specifically for image, audio, time series, and signal data.
What makes a convolutional neural network any different from a deep learning algorithm, though? The keyword “convolutional” is what makes all the difference in the world when it comes to analyzing and interpreting datasets. A convolutional neural network is created with tens, if not hundreds, of layers of neural networks all working towards the same goal.
This means that a convolutional neural network can have layers stacked on top of each other that can pull different data from each image. This allows for one image input to be “studied” by each convolutional neural network layer quickly for a specific dataset and then move on to the next image.
Essentially, this allows for deep learning models that are incredibly efficient at being able to parse out tons of data without slowing down because each layer is only looking at a tightly focused piece of data for each image. The same process can be done for audio processing, signal data, and time-series datasets.
Can CNN Be Used for Image Classification?
It has already been confirmed that a convolutional neural network (CNN or ConvNet) can be used in image classification. However, image classification with deep convolutional neural networks hasn’t been addressed exactly.
As an example, focusing on image classification with convolutional neural networks allows users to input examples of images with vehicles in them and not overwhelm the neural network. In a standard neural network, the larger the image the more time it will take to process what we’re hoping to extrapolate from the data. Image classification using convolutional neural networks makes this faster as each layer is only looking for a specific set of data and then passing the data along to the next layer.
While a standard neural network is still going to be able to process the image dataset, it will take longer and may not create the desired results in a timely manner. Image classification with deep convoluted neural networks, though, will be able to handle more images in a shorter timeframe to be able to quickly identify the types of vehicles being shown in an image and classify them appropriately.
The applications for image classification with deep convolutional neural networks are endless once a model is properly trained, so let’s touch on what the best learning process is for image classification.
Which Learning Is Better for Image Classification?
Earlier in this article, we touched on supervised learning vs. unsupervised learning. Here we will discuss the best learning methods for convolutional neural network models just a step further.
Something that hasn’t been clearly stated up to this point is whether or not a convolutional neural network should be trained on machine learning models or deep learning models. The short answer is that it will almost certainly make more sense to go for image classification with deep convoluted neural networks.
Since many machine learning models are built around single-input testing, this means that the process is much slower and far less accurate than using the CNN image classification option based on deep learning neural networks.
How to Create Your Own Convolutional Neural Network Architecture

Now, one last step to better understand image classification with deep convolutional neural networks is to dive into the architecture behind them. Convolutional neural network architecture isn’t as complicated as one might think.
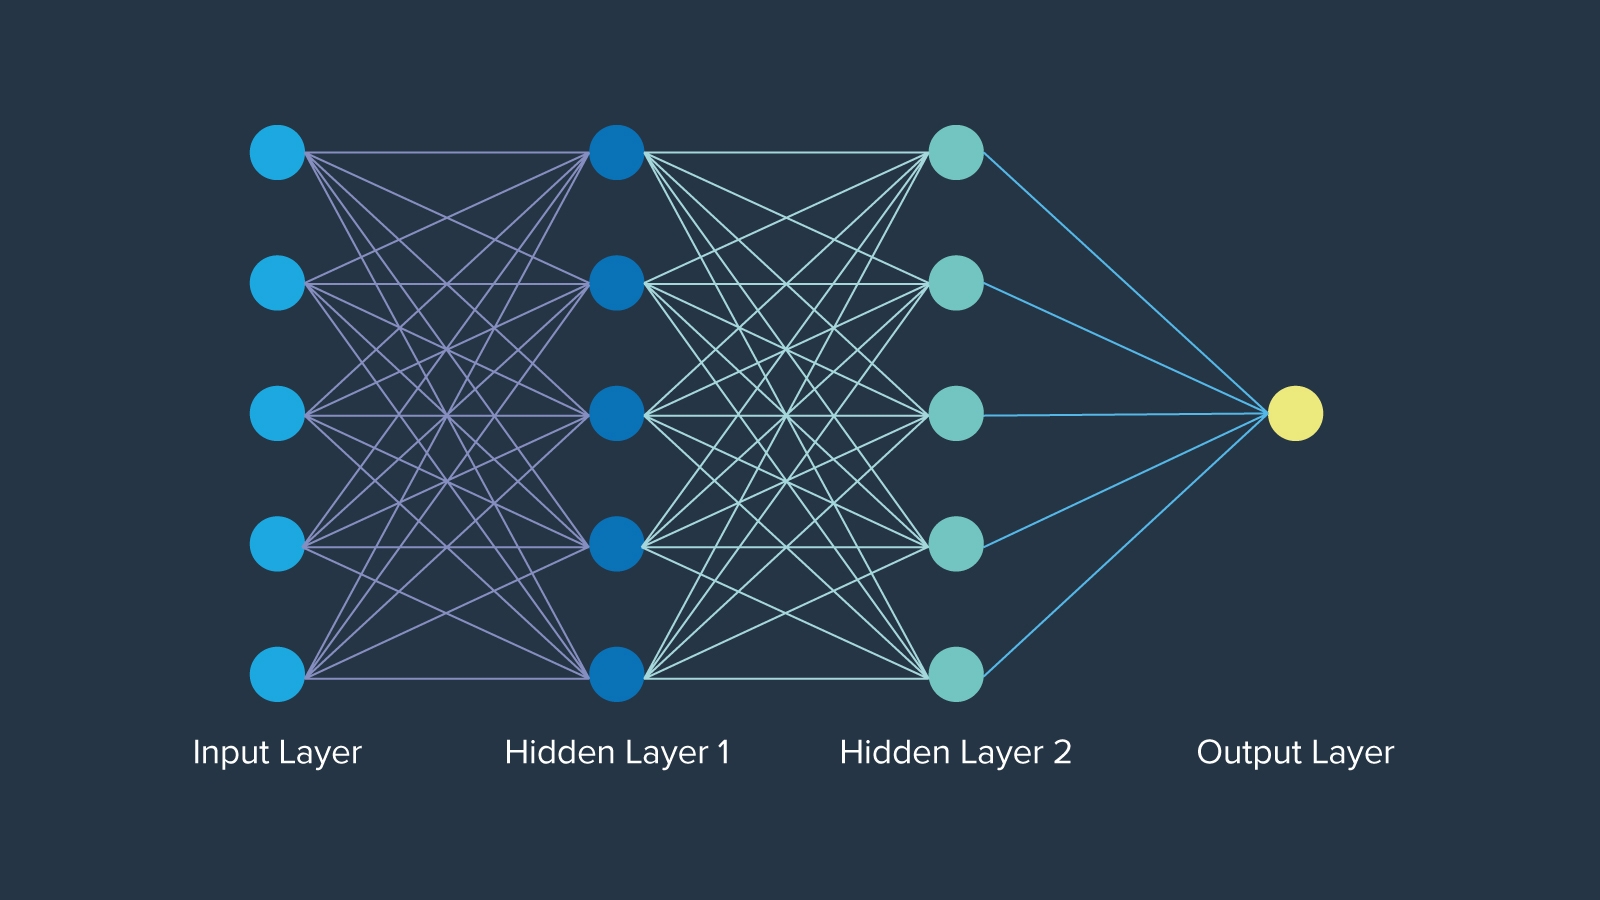
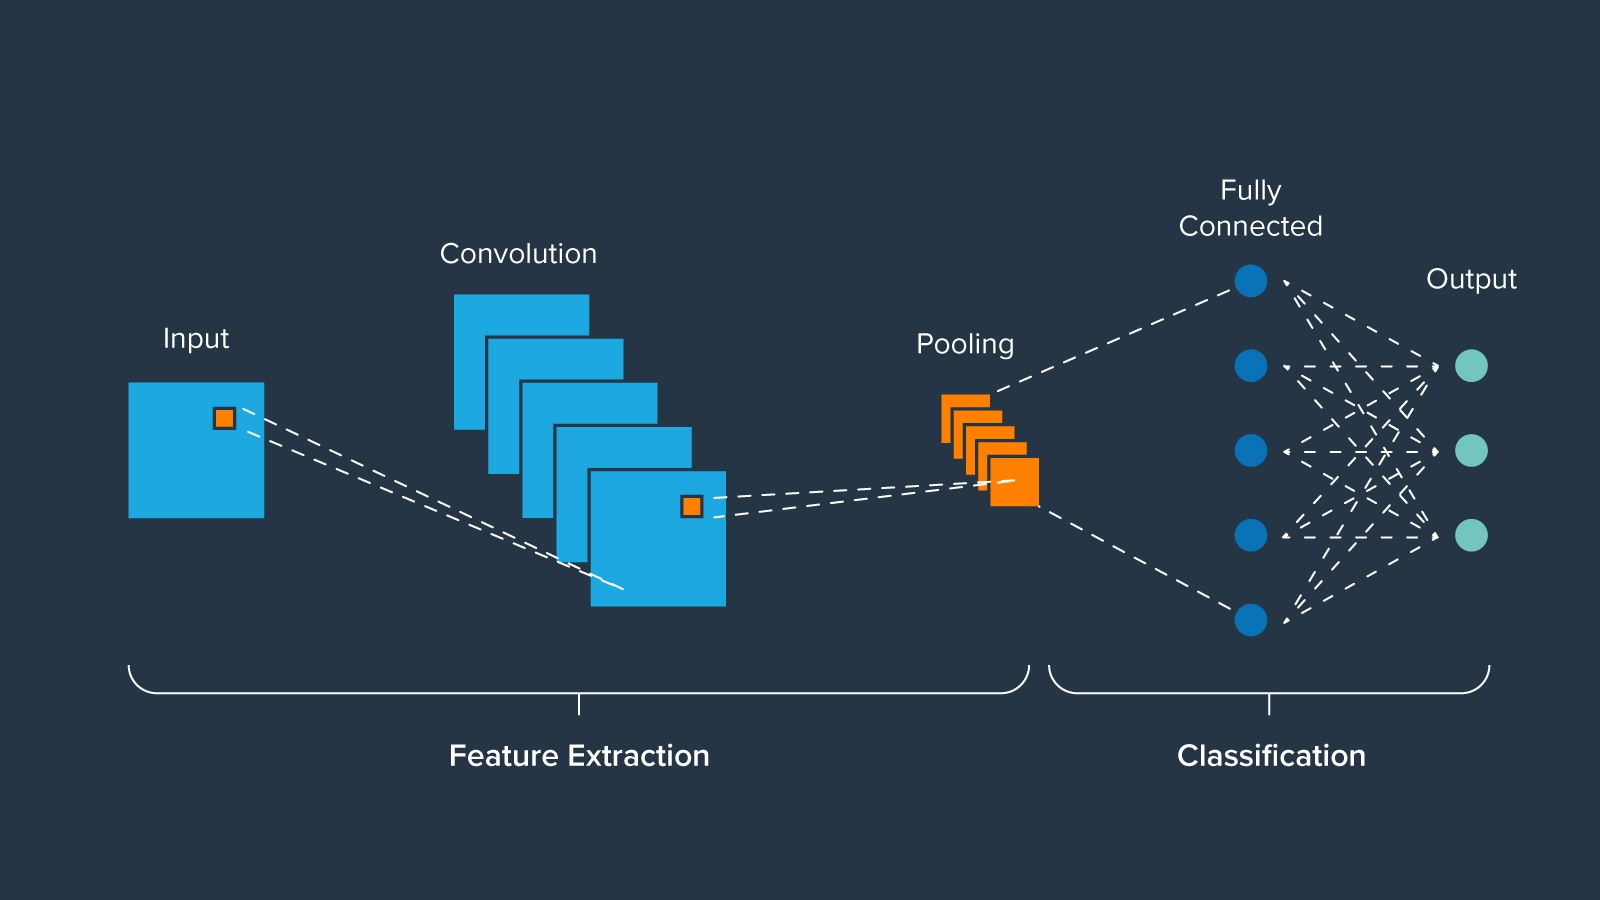
A CNN is essentially made up of three layers: input, convolutional, and output. There are different terms used for different convolutional neural network architectures, but these are the most basic ways to understand how these models are created.
- The input layer is the first step in the process, where all the images are first introduced into the model
- The convolutional layer consists of the multiple layers of the neural network that will work on the various classifications of the image, building one upon the other
- The output layer is the final step of the neural network where the images are actually classified based on set parameters
How exactly a user sets up each layer depends largely on what is being created, but all of them are fairly simple to understand in practice. The convolutional layers are going to be much of the same code, just tweaked for each piece of data to be extracted within each layer all the way through to the output layer.
While the total convolutional neural network architecture may seem intimidating with the tens or hundreds of layers that make up the convolutional layer, the structure of the model is actually fairly simple.
Convolutional Neural Network Code Example
Many hands-on code examples for building and training convolutional neural networks (focused on applications of image classification), can be found in this Deep Learning With Python GitHub repo.
One simple flow is as follows:
import tensorflow as tf


# Loading build-in MNIST dataset

mnist = tf.keras.datasets.fashion_mnist

(training_images, training_labels), (test_images, test_labels) = mnist.load_data()


# Showing example images

fig, axes = plt.subplots(nrows=2, ncols=6,figsize=(15,5))

ax = axes.ravel()

for i in range(12):

  ax[i].imshow(training_images[i].reshape(28,28))


plt.show()
The example images may look like the following:

Continuing with:
# Reshaping the images for feeding into the neural network

training_images=training_images / 255.0

test_images=test_images / 255.0


#Keras model definition

model = tf.keras.models.Sequential([

  tf.keras.layers.Flatten(),

  tf.keras.layers.Dense(256, activation=tf.nn.relu),

  tf.keras.layers.Dense(10, activation=tf.nn.softmax)])


# Compiling the model, Optimizer chosen is ‘adam’

# Loss function chosen is ‘sparse_categorical_crossentropy`

model.compile(optimizer='adam', loss='sparse_categorical_crossentropy', metrics=['accuracy'])


# Training/fitting the model for 10 epochs

model.fit(training_images, training_labels, epochs=10)
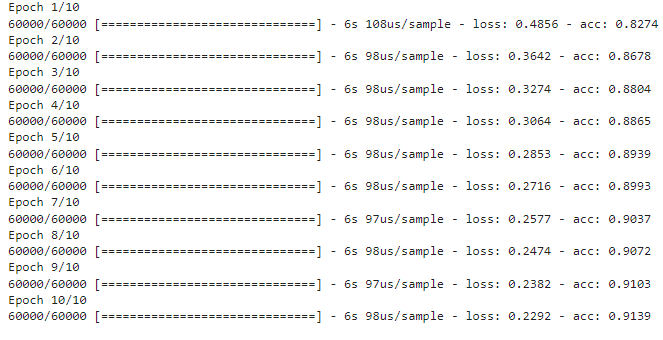
Training may produce epoch-by-epoch results (loss, accuracy, and so on) as follows:

Compute the accuracy of the trained model on test set predictions:
test_loss = model.evaluate(test_images, test_labels)

print("\nTest accuracy: ",test_loss[1])
Output:
10000/10000 [==============================] - 1s 67us/sample - loss: 0.3636 - acc: 0.8763
We encourage you to take a look at other examples from the same GitHub repo for more variety and optimization of code.
Published at DZone with permission of Kevin Vu. See the original article here.
Opinions expressed by DZone contributors are their own.

Comments