Input Alert in Objective-C
Allow for input alerts in your iOS applications.
Join the DZone community and get the full member experience.
Join For FreeIntroduction
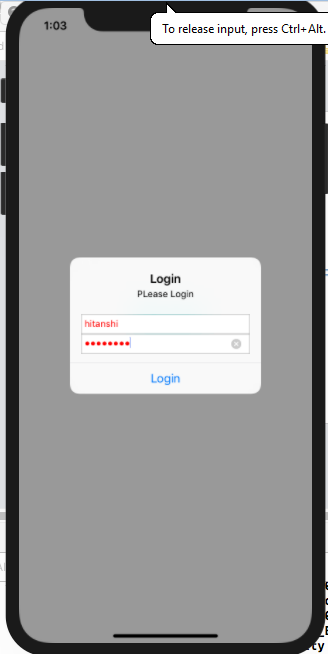
We have seen an input alert in iOS apps that look like this:
In this article, we will learn how to create an input alert in Objective-C using Xcode. I’ve written this article for beginners. If you are familiar with Xcode, then add one button, provide touch-up inside, and jump to step seven.
Step One

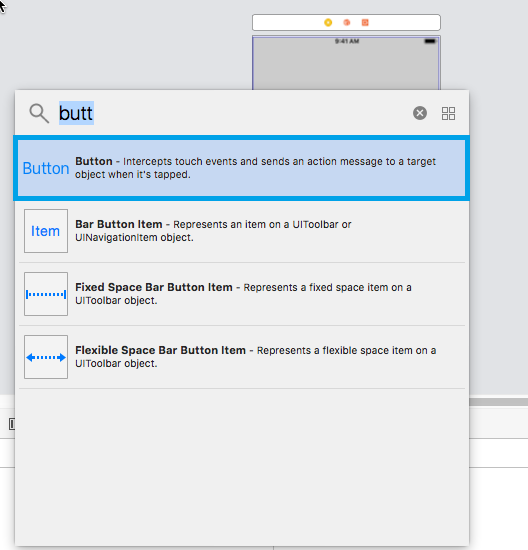
Open up the object library, find a button. We will show input alert on a button click, so drag the button to a storyboard.
Step Two

Step Three

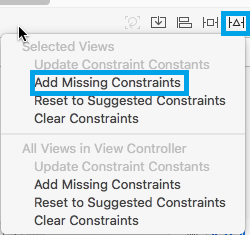
Provide constraints to resolve any layout issues.
If a warning is still present, then select update missing constraints.

Step Four

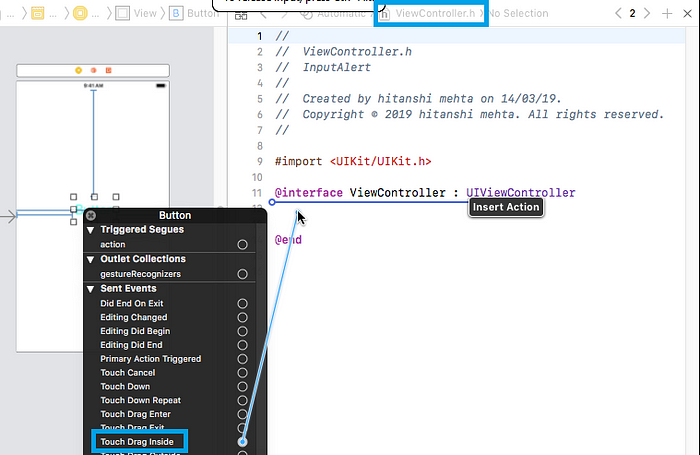
To uniquely identify any event on the component, we need to name the event. To provide a unique name to the event, open ViewController.h and Main.storyboard at the same time with the help of an assistant editor.
Step Five

Right-click on the button. Selecting touch up inside will allow you to perform any task on a button click.
Step Six

Once you release the cursor, the following pop-up will appear. Here, you can provide a unique name for the event. Then, click connect.
Our designing is done; now we will perform a coding task.
Step Seven

In the alert box, we need four things.
1. Alertbox With Heading
- (void)viewDidLoad {
  [super viewDidLoad];
}

-(void)ShowInputAlertWithMsg:(NSString *)msg
{
  UIAlertController *alertVC=[UIAlertController alertControllerWithTitle:@”Login” message:msg preferredStyle:UIAlertControllerStyleAlert];
}
First, create a method that takes one string parameter.
In that method, create an instance of UIAlertController, which provides a heading and displays a text message. You will pass this text message as an argument.
2. Textfield
[alertVC addTextFieldWithConfigurationHandler:^(UITextField * _Nonnull textField) {
  {
    textField.placeholder=@”UserName”;
    textField.textColor=[UIColor redColor];
    textField.clearButtonMode=UITextFieldViewModeWhileEditing;
  }
}];

[alertVC addTextFieldWithConfigurationHandler:^(UITextField * _Nonnull textField) {
  textField.placeholder=@”Password”;
  textField.textColor=[UIColor redColor];
  textField.clearButtonMode=UITextFieldViewModeWhileEditing;
  textField.secureTextEntry=true;
}];
}
In the alert box, we want to add two text fields — one for a username and another for a password. Double click on addTextFieldWithConfigurationHandler. This will allow you to set a property for a text field.
3. Dismiss Button
UIAlertAction *action=[UIAlertAction actionWithTitle:@”Login” style:UIAlertActionStyleDefault handler:^(UIAlertAction * _Nonnull action) {
  NSLog(@”Login Tapped”);
  NSString *username=alertVC.textFields[0].text;
  NSString *password=alertVC.textFields[1].text;
  NSLog(@”%@ %@”,username,password);
}];
Create an instance of UIAlertAction. This provides a title and default style.
Double click on the handler. In the handler, you can write code to ensure that an action is performed.
We have created an action and an alert, but they are not connected. We can connect them using addAction.
[alertVC addAction:action];
[self presentViewController:alertVC animated:true completion:nil];
}
We need to connect an action controller to the current view controller using presentViewController.
4. Information Message
- (IBAction)btnInputAlert:(id)sender {
  [self ShowInputAlertWithMsg:@”PLease Login”];
}
We have created an alert controller with an action (Dismiss button). Now we will provide an information message. To do so, call a method from a button touchup inside the event. While calling the method, provide an information message as an argument.
Output


Console output for simulated input alert
I hope that the concept is clear to you. If you have any questions, ask in the comment section!!
Opinions expressed by DZone contributors are their own.


Comments