Javac and Java Katas, Part 2: Module Path
In this article, look at some exercises dedicated to using JDK tools such as javac, java, and jar to build and run modular Java applications.
Join the DZone community and get the full member experience.
Join For FreeThis is Part 2, a continuation of Javac and Java Katas, Part 1: Class Path, where we will run through the same exercises (katas) but this time the main focus will be the usage of the Java Platform Module System.
Getting Started
As in Part 1, all commands in this article are executed inside a Docker container to make sure that they work and to mitigate any environment-specific setup.
So, let's clone the GitHub repository and run the command below from its java-javac-kata folder:
docker run --rm -it --name java_kata -v .:/java-javac-kata --entrypoint /bin/bash maven:3.9.6-amazoncorretto-17-debianKata 1: "Hello, World!" Warm Up
We will start with a primitive Java application, /module-path-part/kata-one-hello-world-warm-up, which does not have any third-party dependencies. The directory structure is as follows:
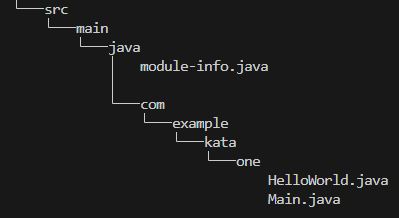
In the picture above, we can see the Java project package hierarchy with two classes in the com.example.kata.one package and the module-info.java file which is a module declaration.
Compilation
To compile our code, we are going to use javac in the single-module mode, which implies that the module-source-path option is not used:
javac -d ./target/classes $(find -name '*.java')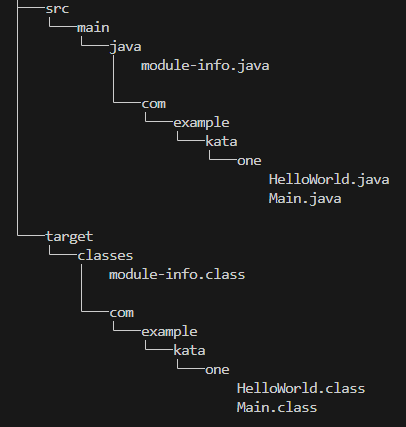
As a result, the compiled Java classes should appear in the target/classes folder. The verbose option can provide more details on the compilation process:
javac -verbose -d ./target/classes $(find -name '*.java')We can also obtain the compiled module description as follows:
java --describe-module com.example.kata.one --module-path target/classesExecution
java --module-path target/classes --module com.example.kata.one/com.example.kata.one.MainWhat should result in Hello World! in your console. Various verbose:[class|module|gc|jni] options can provide more details on the execution process:
java -verbose:module --module-path target/classes --module com.example.kata.one/com.example.kata.one.MainAlso, experimenting a bit during both the compilation and execution stages, by removing or changing classes and packages, should give you a good understanding of which issues lead to particular errors.
Packaging
Building Modular JAR
According to JEP 261: Module System, "A modular JAR file is like an ordinary JAR file in all possible ways, except that it also includes a module-info.class file in its root directory. " With that in mind, let's build one:
jar --create --file ./target/hello-world-warm-up.jar -C target/classes/ .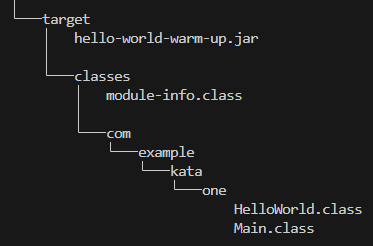
The jar file is placed in the target folder. Also, using the verbose option can give us more details:
jar --verbose --create --file ./target/hello-world-warm-up.jar -C target/classes/ .You can view the structure of the built jar by using the following command:
jar -tf ./target/hello-world-warm-up.jarAnd get a module description of the modular jar:
jar --describe-module --file ./target/hello-world-warm-up.jarAdditionally, we can launch the Java class dependency analyzer, jdeps, to gain even more insight:
jdeps ./target/hello-world-warm-up.jarAs usual, there is the verbose option, too:
jdeps -verbose ./target/hello-world-warm-up.jarWith that, let's proceed to run our modular jar:
java --module-path target/hello-world-warm-up.jar --module com.example.kata.one/com.example.kata.one.MainBuilding Modular Jar With the Main Class
jar --create --file ./target/hello-world-warm-up.jar --main-class=com.example.kata.one.Main -C target/classes/ .Having specified the main-class, we can run our app by omitting the <main-class> part in the module option:
java --module-path target/hello-world-warm-up.jar --module com.example.kata.oneKata 2: Third-Party Dependency
Let's navigate to the /module-path-part/kata-two-third-party-dependency project and examine its structure.
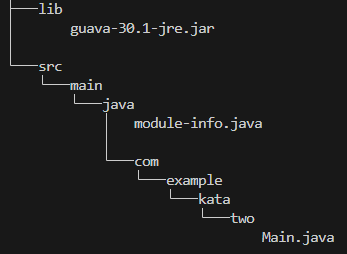
This kata is also a Hello World! application, but with a third-party dependency, guava-30.1-jre.jar, which has an automatic module name, com.google.common. You can check its name by using the describe-module option:
jar --describe-module --file lib/guava-30.1-jre.jarCompilation
javac --module-path lib -d ./target/classes $(find -name '*.java')The module-path option points to the lib folder that contains our dependency.
Execution
java --module-path "target/classes:lib" --module com.example.kata.two/com.example.kata.two.MainBuilding Modular Jar
jar --create --file ./target/third-party-dependency.jar --main-class=com.example.kata.two.Main -C target/classes/ .Now, we can run our application as follows:
java --module-path "lib:target/third-party-dependency.jar" --module com.example.kata.twoKata 3: Spring Boot Application Conquest
In the /module-path-part/kata-three-spring-boot-app-conquest folder, you will find a Maven project for a primitive Spring Boot application. To get started with this exercise, we need to execute the script below.
./kata-three-set-up.shThe main purpose of this script is to download all necessary dependencies into the ./target/lib folder and remove all other files in the ./target directory.
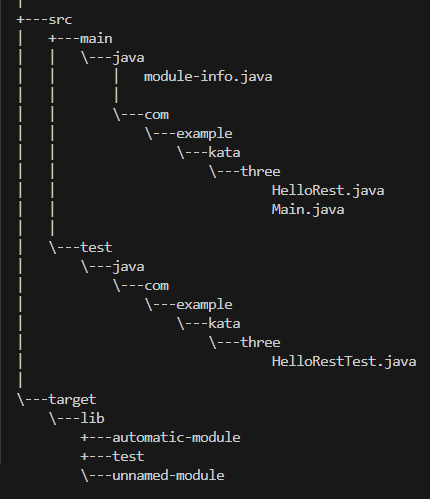
As seen in the picture above, the ./target/lib has three subdirectories. The test directory contains all test dependencies. The automatic-module stores dependencies used by the module declaration. The remaining dependencies used by the application are put into the unnamed-module directory. The intention of this separation will become clearer as we proceed.
Compilation
javac --module-path target/lib/automatic-module -d ./target/classes/ $(find -P ./src/main/ -name '*.java')Take notice that for complications, we only need the modules specified in the module-info.java, which are stored in the automatic-module directory.
Execution
java --module-path "target/classes:target/lib/automatic-module" \
     --class-path "target/lib/unnamed-module/*" \
     --add-modules java.instrument \
     --module com.example.kata.three/com.example.kata.three.Main
As a result, you should see the application running.
For a better understanding of how the class-path option works here together with the module-path, I recommend reading the 3.1: The unnamed module part of "The State of the Module System."
Building Modular Jar
Let's package our compiled code as a modular jar, with the main class specified:
jar --create --file ./target/spring-boot-app-conquest.jar --main-class=com.example.kata.three.Main -C target/classes/ .Now, we can run it:
java --module-path "target/spring-boot-app-conquest.jar:target/lib/automatic-module" \
     --class-path "target/lib/unnamed-module/*" \
     --add-modules java.instrument \
     --module com.example.kata.three
Test Compilation
For simplicity's sake, we will use the class path approach to run tests here. There's little benefit in struggling with tweaks to the module system and adding additional options to make the tests work. With that, let's compile our test code:
javac --class-path "./target/classes:./target/lib/automatic-module/*:./target/lib/test/*" -d ./target/test-classes/ $(find -P ./src/test/ -name '*.java')Test Execution
java --class-path "./target/classes:./target/test-classes:./target/lib/automatic-module/*:./target/lib/unnamed-module/*:./target/lib/test/*" \
     org.junit.platform.console.ConsoleLauncher execute --scan-classpath --disable-ansi-colors
For more details, you can have a look at Part 1 of this series (linked in the introduction), which elaborates on the theoretical aspect of this command.
Wrapping Up
That's it. I hope you found this useful, and that these exercises have provided you with some practical experience regarding the nuances of the Java Platform Module System.
Opinions expressed by DZone contributors are their own.
Comments