JPMS and JLink Example
Learn more about implementing JLink and JPMS in Java 9.
Join the DZone community and get the full member experience.
Join For FreeIn Java 9, JLink is a new Java command tool through which we can create our customized JRE with the most minimal dependencies. In this article, I will describe how to achieve this goal.
What's the Problem
Suppose that you are developing an application that only depends on classes in the 'java.lang' package. In legacy JRE versions, you had to install the whole JRE in target machine to run your application. But it has some drawbacks, such as:
- Waste of memory and a negative impact on performance
- Will not be able to develop microservices that contain very little memory
- Not suitable for IoT devices
As a result of the above reasons, it is highly recommended to customize and tune your specific JRE. An amazing tool is provided in Java 9 called JLink. I will describe how to use it in the coming sections.
Sample Project Description
A sample project called TestModuls is attached here. It contains two modules named Test and Utils. The package model of the Utils module is:
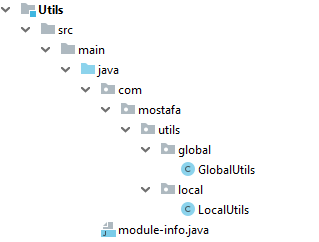
We are supposed to expose our GlobalUtils as a third party for other modules, but LocalUtils is just for internal usage. So, the module-info.java in the Utils module looks like this:
module Utils{
    exports com.mostafa.utils.global;
}
The test module has a dependency on the Utils module, and it only has a main class called Test to test GlobalUtils methods placed in the Utils module. So, the module-info.java in the test module is like this:
module test{
    requires Utils;
}
We can easily build the two modules separately using the Maven pom available in each module. Now, we are ready to build our custom JRE.
Use JLink
It, obviously, is clear that the TestModuls project just depends on classes in 'java.lang' package. So, it is necessary to install an JRE-based module in the target machine. The JRE modules are available in ${JAVA_HOME}/jmods and our considered module isjava.base.jmod.
For this approach, it is needed to consider the required modules while we are customizing the JRE. To do that, it is better to go to the root of the TestModuls directory. Then, we run the following command:
jlink --module-path Test/target/classes;Utils/target/classes;"${JAVA_HOME}/jmods" --add-modules Utils,test,java.base --output myjreWhere:
- --module-path implies the physical addresses of various modules separated by ';'
- --add-modules implies the module names which is required for this custom JRE seperated by ','
- --output implies the physical address which you would like to create your custom JRE
Afterward, we can see that a directory called myjre will be created in the TestModuls directory, which will be our custom JRE.
How to Run the Application With a Specific JRE
Go to myjre/bin directory; then run the following command:
java -m test/com.mostafa.test.TestFirst, we should determine which modules our main class is placed. Then, after '/,' we should mention the fully qualified main class name. Then, we can see that the output message will be displayed, which is 'dhis message text is roundeT.'
Conclusion
In this article, we learned how to make our project modular using modular feature available from Java 9. We can see that in the test module we cannot use the LocalUtils class methods and it provides us with the encapsulation feature. Moreover, we just build our custom JRE, which its size is less than 40 MB. We see that it has much lower volume than the default JRE, which is about 300 MB.
I hope you found this article helpful!
Opinions expressed by DZone contributors are their own.
Comments