Migrating Secrets Using HashiCorp Vault and Safe CLI
In this post, we will go through the steps of migrating secrets from one vault to another using Vault and Safe CLI.
Join the DZone community and get the full member experience.
Join For FreeVault and Safe
Vault is a secret management service by HashiCorp. It is a tool that will help you in storing secrets (API keys, passwords, etc.) and accessing them securely. You can use Vault with a user interface as well as through CLI.
In this post, we will not be going deep into what Vault is, but instead, will look at how we can migrate secrets from one Vault to another. We can migrate secrets from Vault using Vault CLI, but it can get a little complicated to do so. Therefore, to make things easy, we will use Safe CLI, which is a wrapper around Vault. It will help us in managing and migrating our secrets by using simple commands. It also helps us connect to different vault instances very quickly for migration purposes.
For more detailed information about Safe CLI, go through their README.
For this demo, we will migrate secrets from one Vault to another. I obviously will not be using a production-grade Vault, but spin up a local vault dev server provided by Vault itself for getting familiar with Vault. You can check out how to spin up a dev server here.
Getting Started
Before starting with Safe, we need to connect to Vault with secrets, the target vault, and retrieve tokens. These tokens will be used by Safe for authenticating.
Below is the method to login to Vault:
export VAULT_ADDR=<vault_url>
export VAULT_SKIP_VERIFY=<true/false>
export VAULT_CLIENT_CERT=<vault_client_cert_path>
export VAULT_CLIENT_KEY=<vault_client_key_path>
export VAULT_CA_CERT=<vault_ca_cert_path>
export VAULT_TOKEN=$(vault login -method=cert -token-only)
vault login -method=cert
Once you are logged in, the vault will return a token. Save this token, as it will be used by Safe to log in the vaults.
Install Safe CLI from here. You can get the safe binaries here. If you are on a Linux machine like me, you can use this command.
wget https://github.com/starkandwayne/safe/releases/tag/v1.6.1Once it is installed, give permission to the executable with the following:
chmod u+x <executable name>You can add an alias for Safe in .bashrc for easy use of CLI.
The first step towards migration through Safe will be to add vault instances in Safe. Safe adds Vault instances as targets.
We will first add the vault which contains our secret.
safe target <vault_adress> <vault_name>In case you want to skip this verification, pass -k:
safe target -k <vault_adress> <vault_name>To connect to this address, we need to authenticate. The most common way to authenticate is to use a token, but you can authenticate in different ways as well.
safe auth tokenOnce you have added the token you can check the env variables to make sure that added values are correct using:
safe env --bashFor more information on authentication and different commands please go through the Safe CLI README.
Repeat the same steps to connect to the target vault to which you want to migrate your secrets to.
Migrating Secrets
In case the paths for both vaults are the same, you can import the secrets with a single command:
safe -T <target> export <path> | safe -T <target_vault> import <path>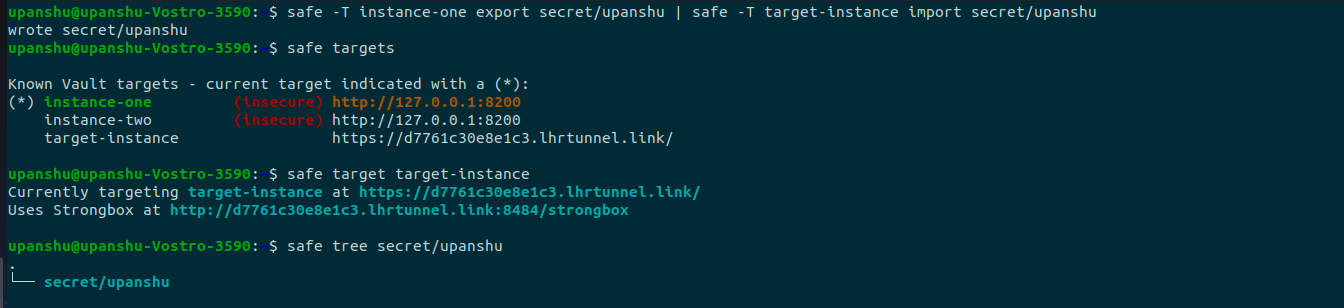
In case the paths for both vaults are different, you will need to do it manually using these steps:
safe -T <target> export <path>This will echo the secrets. Copy them into a file and change the key value to the new path.
Import the updated secrets with new paths using the command:
Safe import < ./<filename>You can check the secret tree by pointing to the wanted target.
Safe tree <path>These steps should help you complete your migration easily. You can check out my other posts here.
Opinions expressed by DZone contributors are their own.
Comments