Mule ESB 3.9: How to Upload a File via Web Form and Download File
This article will explain how to implement a File Upload via Web Form and Download File as the way of response from the HTTP POST request(Web Form).
Join the DZone community and get the full member experience.
Join For FreeThis article will explain how to implement a File Upload via Web Form and Download File as the way of response from the HTTP POST request(Web Form).

<?xml version="1.0" encoding="UTF-8"?>
<mule xmlns:dw="http://www.mulesoft.org/schema/mule/ee/dw"
xmlns="http://www.mulesoft.org/schema/mule/core" xmlns:doc="http://www.mulesoft.org/schema/mule/documentation"
xmlns:spring="http://www.springframework.org/schema/beans" version="EE-3.9.1"
xmlns:xsi="http://www.w3.org/2001/XMLSchema-instance"
xsi:schemaLocation="
http://www.mulesoft.org/schema/mule/ee/dw http://www.mulesoft.org/schema/mule/ee/dw/current/dw.xsd http://www.springframework.org/schema/beans http://www.springframework.org/schema/beans/spring-beans-current.xsd
http://www.mulesoft.org/schema/mule/core http://www.mulesoft.org/schema/mule/core/current/mule.xsd">
<flow name="pf-file-upload-download-service" processingStrategy="synchronous">
<logger message="#[message.rootId] - Start of the Service" level="INFO" doc:name="Logger"/>
<message-properties-transformer scope="invocation" doc:name="Message Properties Get HTML Form Data">
  <add-message-property key="fileContent"
  value="#[message.inboundAttachments.file.dataSource.part.inputStream]"/>
  <add-message-property key="filename"
  value="#[message.inboundAttachments.file.dataSource.part.fileName]"/>
</message-properties-transformer>
<dw:transform-message doc:name="Transform Message Edit File Content">
<dw:set-payload><![CDATA[%dw 1.0
%output application/java
---
"EDITED BY MULE: \n" ++ flowVars.fileContent]]></dw:set-payload>
</dw:transform-message>
<logger message="#["\nFILENAME: "+flowVars.filename+"\nFILE CONTENT:\n"+flowVars.fileContent]" level="INFO" doc:name="Logger File Details"/>
<set-property propertyName="Content-Disposition" value="#['attachment; filename=EDITED_BY_MULE_'+flowVars.filename]" doc:name="Property Set Content-Disposition"/>
<logger message="#[message.rootId] - End of the Service" level="INFO" doc:name="Logger"/>
</flow>
<sub-flow name="sf-response-web-page">
<parse-template location="\web\index.html" doc:name="Parse Template"/>
<logger message="#[message.rootId] - Response Web Page UI." level="INFO" doc:name="Logger"/>
</sub-flow>
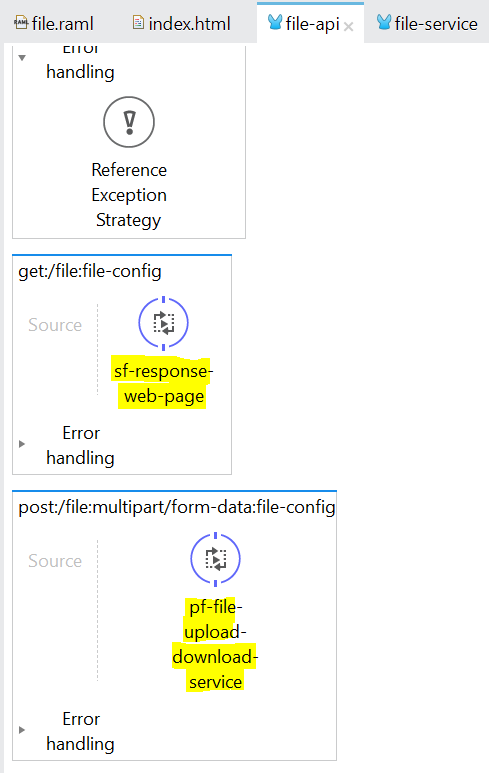
</mule>pf-file-upload-download-service
MESSAGE-PROPERTIES (Get HTML Form Data): This will get the data from the HTML Form and assign to the Variable. Also Note that the #[message.inboundAttachments.file.dataSource.part.inputStream] is the name attribute from the HTML <input type="file" required="required" class="input-block-level" name="file"> .
<message-properties-transformer scope="invocation" doc:name="Message Properties Get HTML Form Data">
<add-message-property key="fileContent"
value="#[message.inboundAttachments.file.dataSource.part.inputStream]"/>
<add-message-property key="filename"
value="#[message.inboundAttachments.file.dataSource.part.fileName]"/>
</message-properties-transformer>Transform Message (Edit File Content): This will just add a string EDITED BY MULE in the uploaded file content and make it as the payload.
<dw:transform-message doc:name="Transform Message Edit File Content">
  <dw:set-payload>
        <![CDATA[%dw 1.0
     %output application/java
     ---
     "EDITED BY MULE: \n" ++ flowVars.fileContent
]]>
  </dw:set-payload>
</dw:transform-message>
SET-PROPERTY (Set Content-Disposition): This indicates that the payload is an attachment(file) that can be downloaded and saved locally.
<set-property propertyName="Content-Disposition"
              value="#['attachment; filename=EDITED_BY_MULE_'+flowVars.filename]"
              doc:name="Property Set Content-Disposition"/>
sf-response-web-page
This will set the payload as HTML (Web Form) using parse-template. The actual HTML content is located in the resources\web\index.html
<sub-flow name="sf-response-web-page">
   <parse-template location="\web\index.html" doc:name="Parse Template"/>
   <logger message="#[message.rootId] - Response Web Page UI." level="INFO" doc:name="Logger"/>
</sub-flow>
RAML:
GET: /file — Resource that will render the Web Form.
POST: /file — Resource that handles the Web Form Submission.
#%RAML 0.8
title: FILE UPLOAD

/file:
    get:
      responses:
        200:
          body:
            text/html:
    post:
      body:
        multipart/form-data:
          formParameters:
            file:
              required: true
      responses:
         200:
           body:
             multipart/form-data:
RAML GENERATED FLOW: Reference the corresponding flow implementation in the generated RAML Private Flows get:/file:file-config and post:/file:file-config
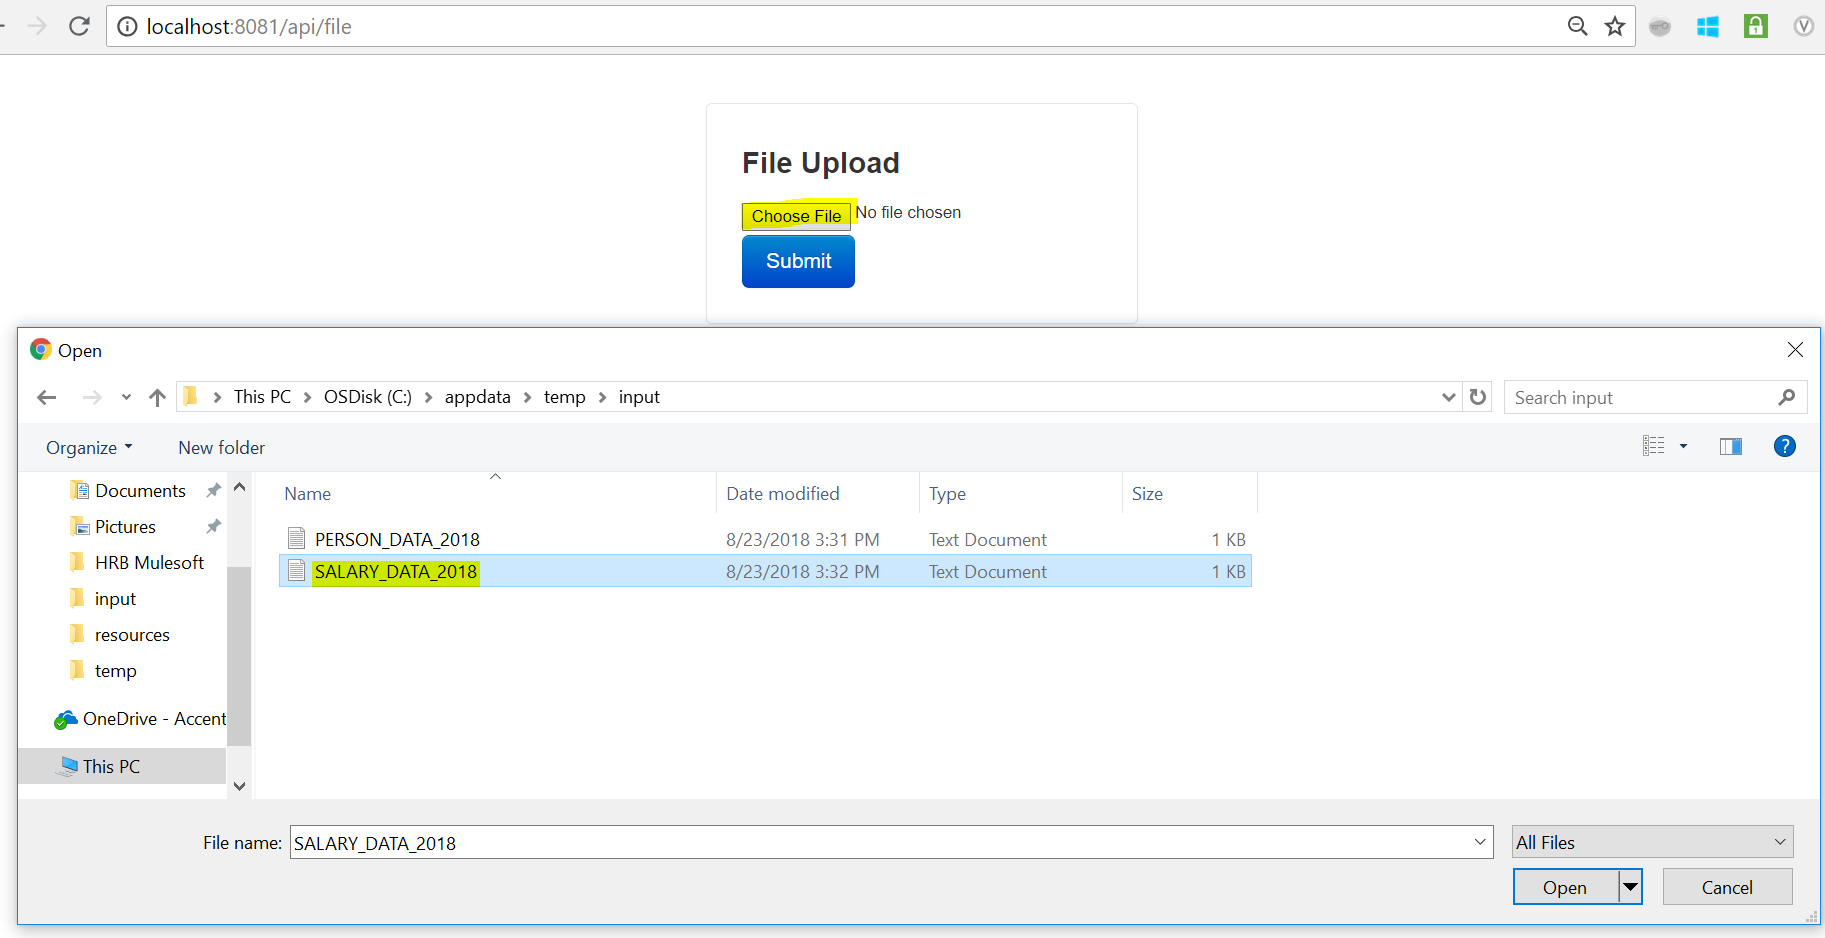
HTML FORM: HTML Form with method="POST" and action = "/api/file". This will redirect the user to the POST: /file resource flow after clicking the Submit button. Also, note that the enctype="multiple/form-data" should always be included in the HTML form attribute so that Mule will be aware what type of the POST request. (Which is a form-based data) and will able to handle it.
<!DOCTYPE html>
<html lang="en"><head><meta http-equiv="Content-Type" content="text/html; charset=UTF-8">
    <title>File Upload</title>
    <meta name="viewport" content="width=device-width, initial-scale=1.0">
    <meta name="description" content="">
    <meta name="author" content="">
  </head>
  <body>
    <div class="container">
      <form class="form-signin" method="POST" action="/api/file" enctype="multipart/form-data">
        <h3 class="form-signin-heading">File Upload</h3>
        <input type="file" required="required" class="input-block-level" name="file">
        <button class="btn btn-large btn-primary" type="submit">Submit</button>
      </form>
    </div> <!-- /container -->
</body></html>
Test Result:
Input File Content:
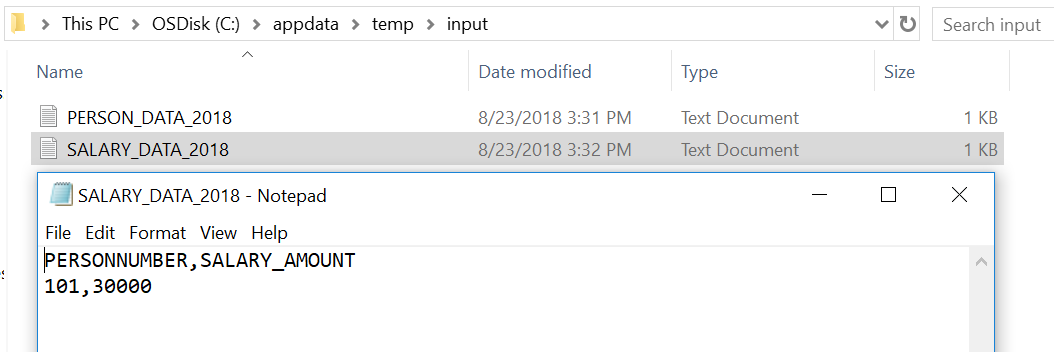
Upload the SALARY_DATA_2018.txt via Web Form.
After the form submission, Mule responses an edited file with filename: EDITED_BY_MULE_SALARY_DATA_2018.txt

The downloaded file contains EDITED BY MULE followed by the original uploaded file content.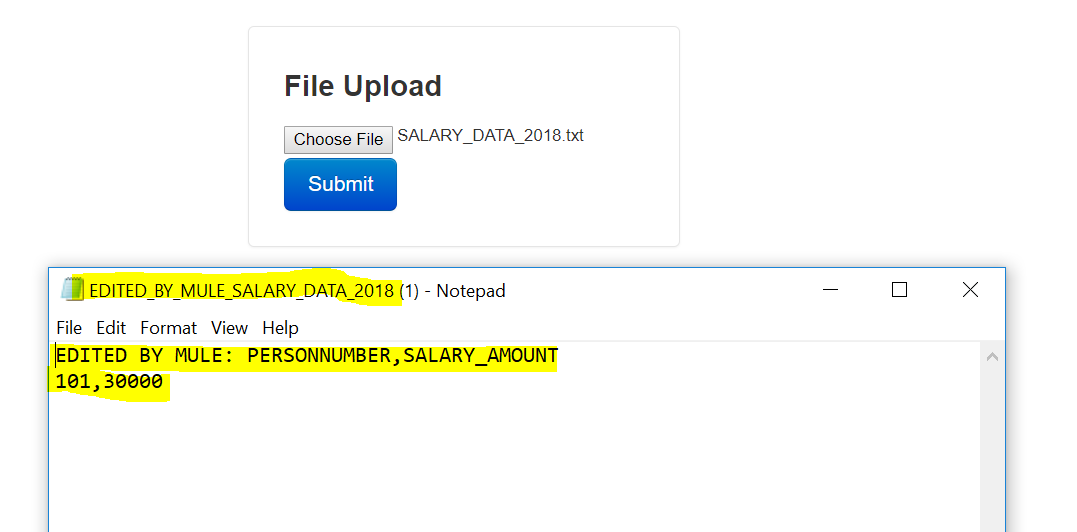
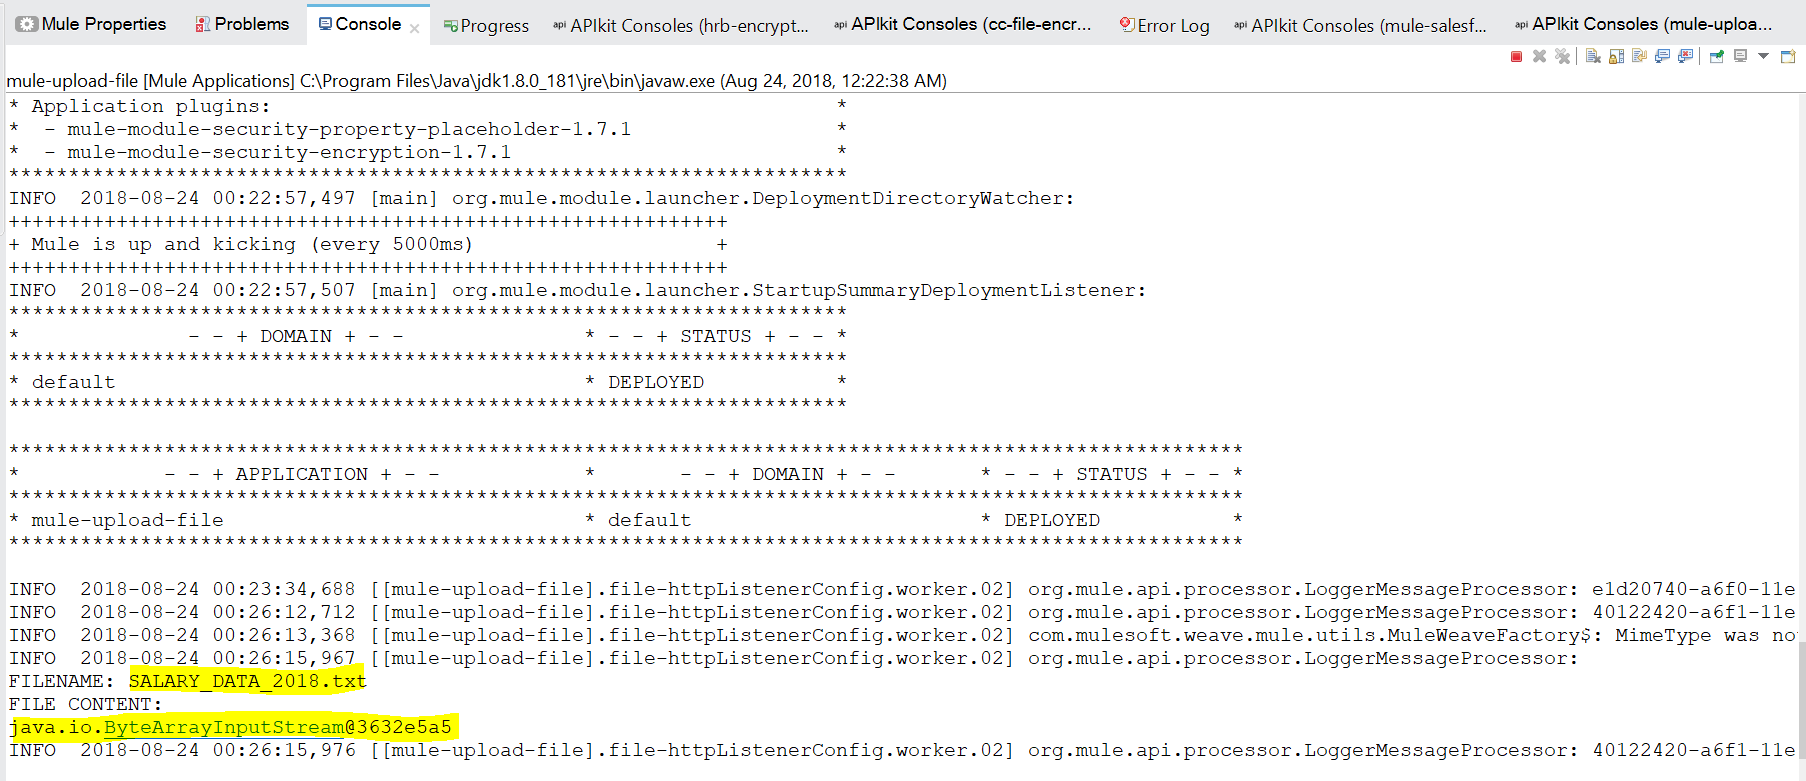
Mule logs show that the process was completed and Mule was able to get the data from the HTML Form.
Opinions expressed by DZone contributors are their own.
Comments