

Configuring a File Connector
Follow along to learn how to set up and configure a file connector within your Mule application so you can easily exchange files with a system.
 ·
·
Join the DZone community and get the full member experience.
Join For FreeIntroduction
A file connector allows your Mule application to exchange files with a file system. You can implement the connector as an inbound endpoint (such as a message source), or as an outbound endpoint. This endpoint implements a one-way exchange pattern only.
Installation and Configuration
Installation
You can install a connector in Anypoint Studio using the instructions within the program.
Configuration
File endpoint configuration consists of two stages:
1. Place the file endpoint within the Mule flow you are developing:
a) If you place the File endpoint at the beginning of the flow, it acts as an inbound endpoint (such as a message source), triggering the flow whenever it receives an incoming file.
b) If you place the File building block in the middle or at the end of the flow, it serves as an outbound endpoint, passing files to the connected file system.
2. Configure the file endpoint by providing values for the fields on the various tabs in the properties editor.
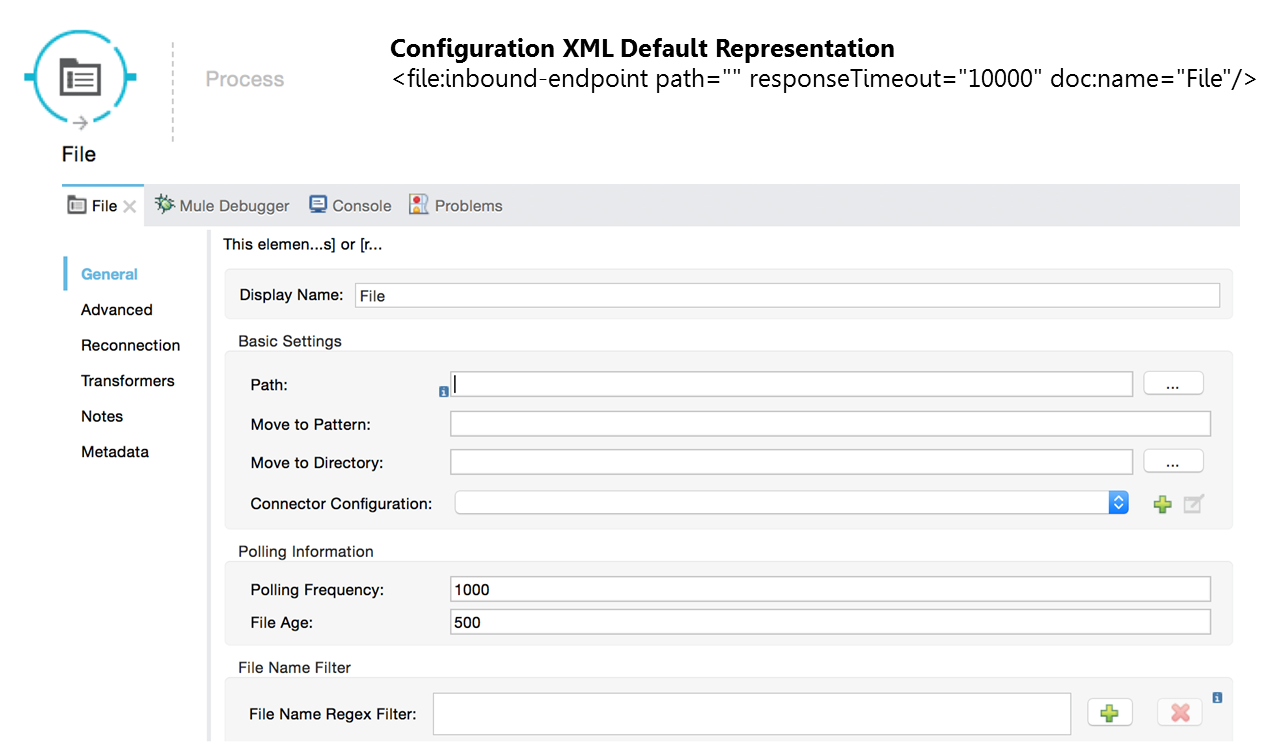
Inbound Endpoint
Let's see a quick snapshot:
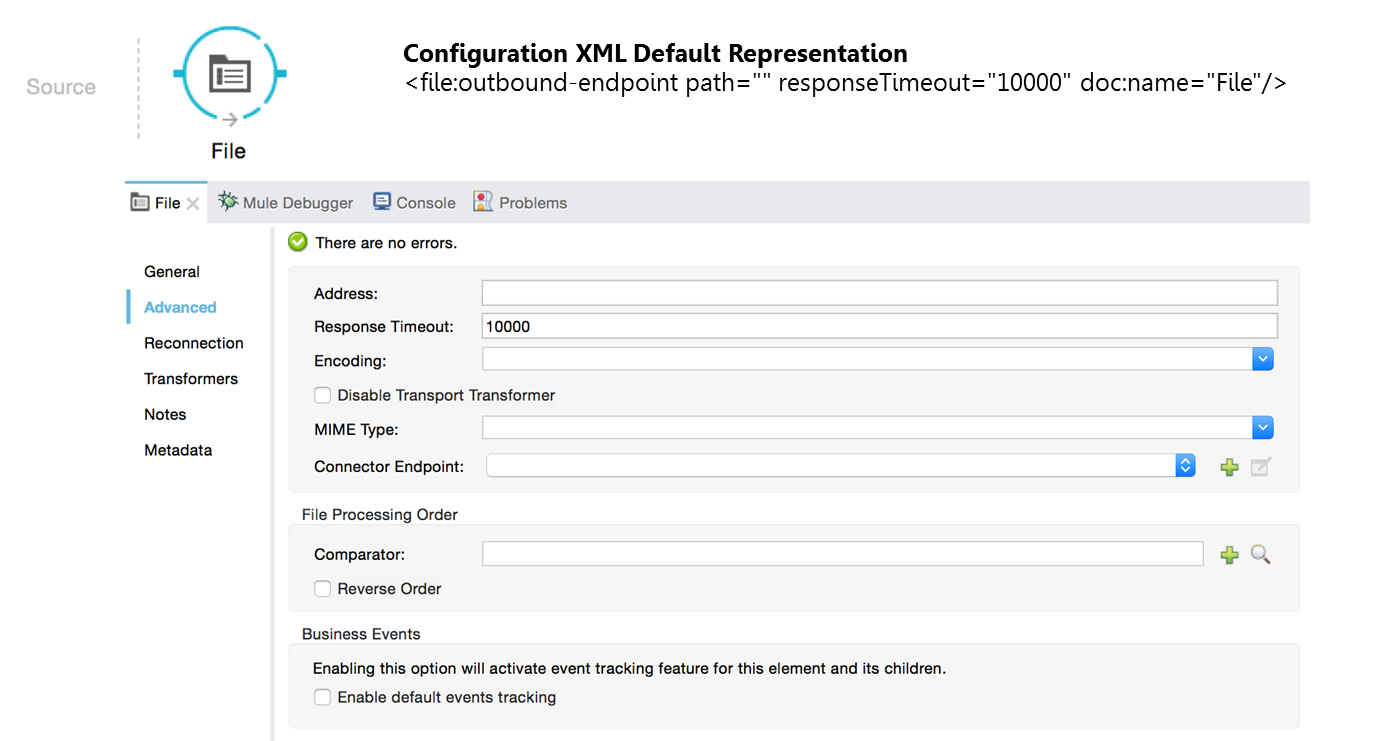
Outbound Endpoint
Now let's see the snapshot of outbound endpoint:
Reconnection Settings
By default, there is no reconnection strategy implemented for you, but you may choose to configure reconnection on a set frequency (standard reconnection) or via a custom reconnection strategy.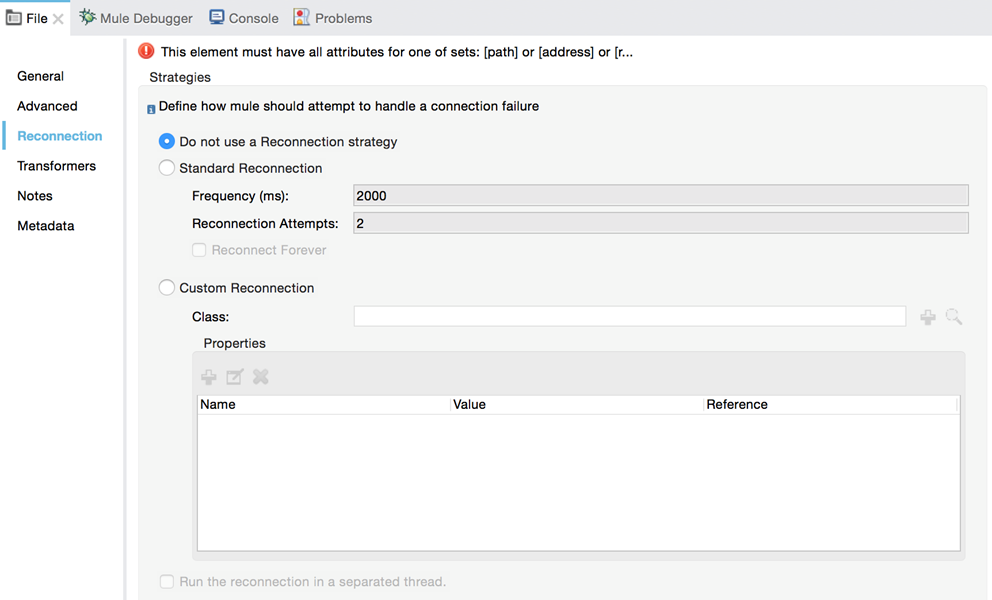
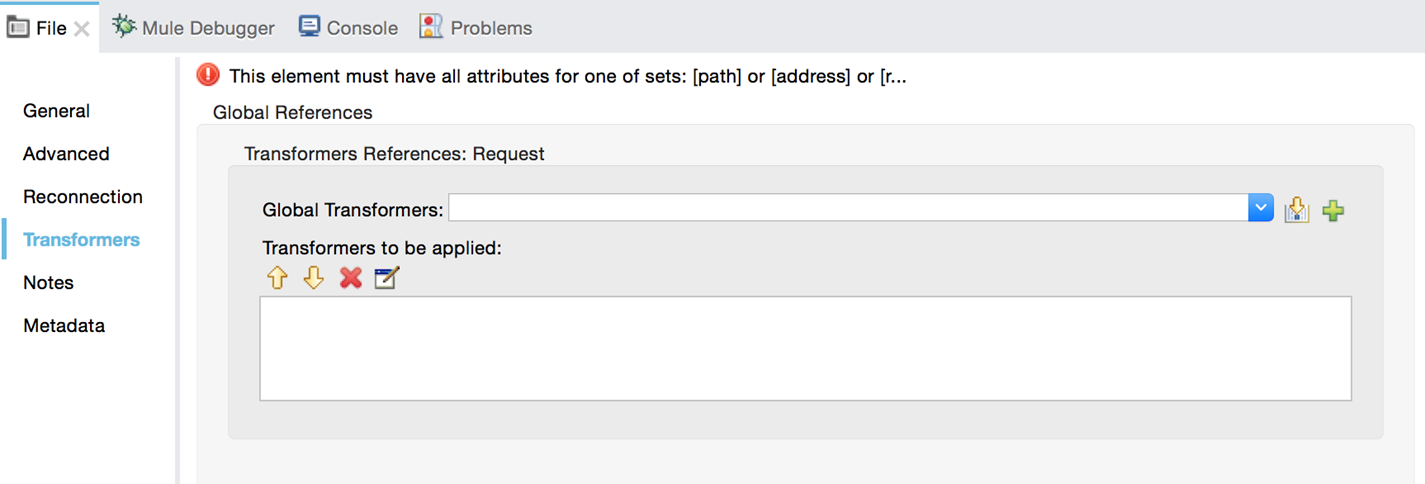
Transformers Settings
The following screengrab gives the brief idea about different settings for transformers:
Demonstration
Now we'll see how the file connector works.
Step 1: Create a new flow fileconnectordemoFlow as directed below: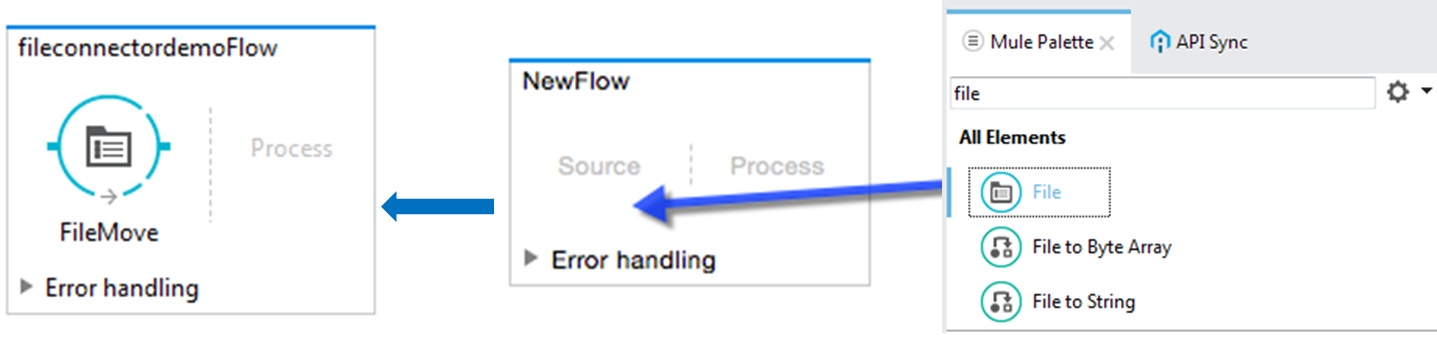
Step 2: Configure the file connector (FileMove) as directed below:
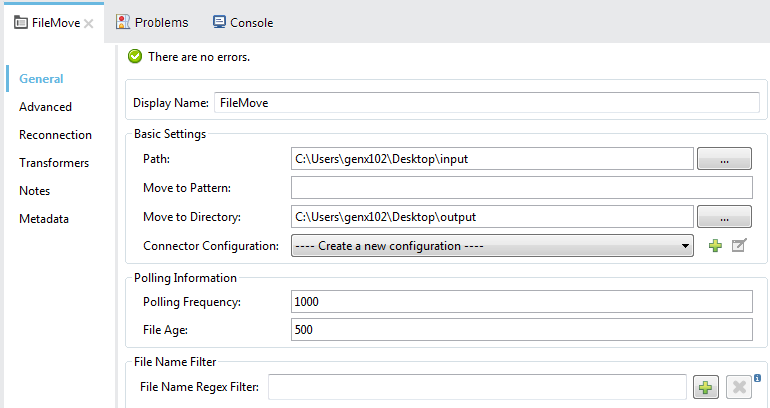
Step 3: Check the XML configuration file:
<?xml version="1.0" encoding="UTF-8"?>

<mule xmlns="http://www.mulesoft.org/schema/mule/core" version="EE-3.8.0">
    <flow name="fileconnectordemoFlow">
        <file:inbound-endpoint xmlns:file="http://www.mulesoft.org/schema/mule/file" xmlns:doc="http://www.mulesoft.org/schema/mule/documentation" path="C:\Users\genx102\Desktop\input" moveToDirectory="C:\Users\genx102\Desktop\output" responseTimeout="10000" doc:name="FileMove"> </file:inbound-endpoint>
        <logger xmlns:doc="http://www.mulesoft.org/schema/mule/documentation" message="#['FILE_NAME- '+message.inboundProperties.originalFilename],#['FILE_SIZE- '+((message.inboundProperties.fileSize)/1024)+'KB']" level="INFO" doc:name="Logger">   </logger>
    </flow>
</mule>
Step 4: Let's run our application to test the file connector functionality. However we'll be able to see the processing in a logger message processor as shown below:

Also, the files from source directory have been moved to the target location. We can verify the same by checking physical location specified in the file connector source/target.
Conclusion
And that's that. Now, you've seen how file connectors form powerful components within local systems and, more importantly, how to make one yourself.
Opinions expressed by DZone contributors are their own.
Comments