MuleSoft Integration Testing With Postman and Newman CLI
Learn how to execute integration testing in MuleSoft using Postman and Newman CLI in this detailed, step by step tutorial.
Join the DZone community and get the full member experience.
Join For Free1.0 Overview
There are two types of testing when it comes to integration software development: namely, unit testing and integration testing.
Unit testing in Mule can be realized by JUnit testing and MUnit testing. You could actually use MUnit to do integration testing to a certain degree. Integration testing could also be done by using SOAP UI and CURL.
In this article, we are going to talk about integration testing using Postman and Newman CLI. I will use the following sections as a step by step walk through to teach you how this can be done.
2.0 Creating the Mule Application
The Mule application we are going to create is a simple flow with an HTTP receive endpoint, as shown in Figure 2.0a
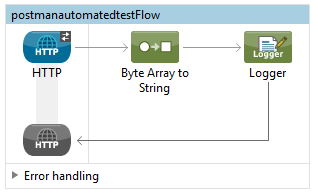
Figure 2.0a.
Figure 2.0b shows the content/configuration of the logger message processor.
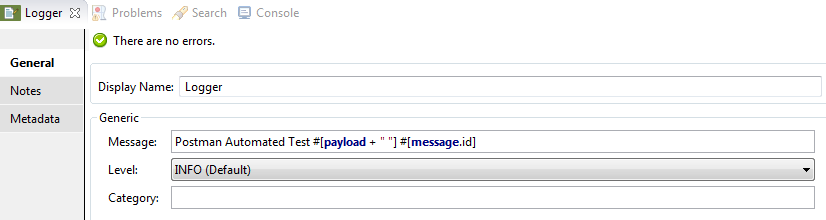
Figure 2.0b.
The following is the full Mule XML configuration for the application.
<?xml version="1.0" encoding="UTF-8"?>
<mule xmlns:http="http://www.mulesoft.org/schema/mule/http" xmlns="http://www.mulesoft.org/schema/mule/core" xmlns:doc="http://www.mulesoft.org/schema/mule/documentation"
xmlns:spring="http://www.springframework.org/schema/beans"
xmlns:xsi="http://www.w3.org/2001/XMLSchema-instance"
xsi:schemaLocation="http://www.springframework.org/schema/beans http://www.springframework.org/schema/beans/spring-beans-current.xsd
http://www.mulesoft.org/schema/mule/core http://www.mulesoft.org/schema/mule/core/current/mule.xsd
http://www.mulesoft.org/schema/mule/http http://www.mulesoft.org/schema/mule/http/current/mule-http.xsd">
<flow name="postmanautomatedtestFlow">
<http:listener config-ref="HTTP_Listener_Configuration" path="/postman" doc:name="HTTP"/>
<byte-array-to-string-transformer doc:name="Byte Array to String"/>
<logger message="Postman Automated Test #[payload + " "] #[message.id]" level="INFO" doc:name="Logger"/>
</flow>
</mule>The message.id is unique and it will be created for each new request. I have purposefully logged it to show you that each time you see a log in the console, it means that a new external request has been triggered.
Once you have created a similar HTTP receive endpoint flow like mine in Anypoint Studio, proceed to start the application.
3.0 Testing With Postman
I have created a Youtube video on testing Mule applications with Postman; you can view the video if you want to see it, otherwise just read my following instructions.
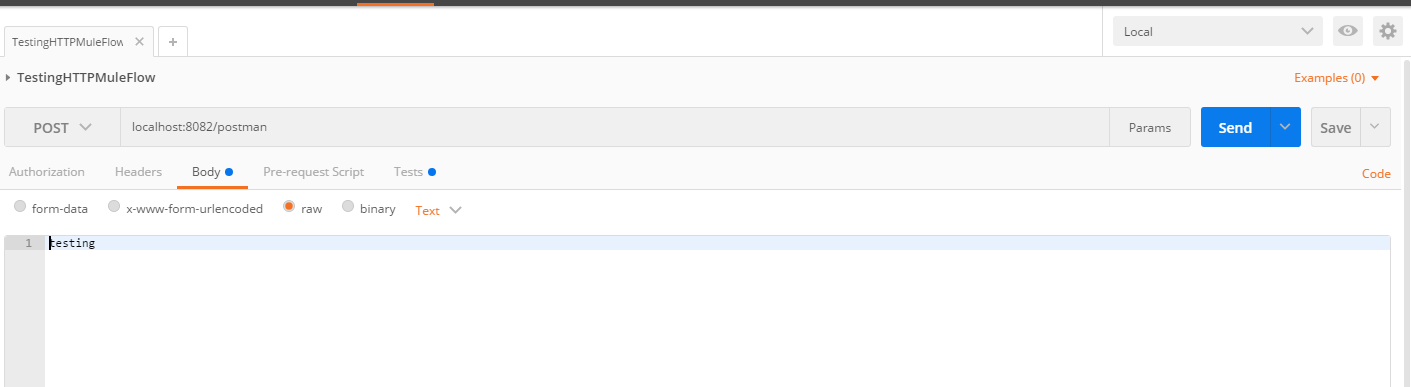
In order to test the Mule application, you need to start up Postman and point it to the following URL: http://localhost:8082/postman. Change from GET to POST and put the string literal “testing” in the payload text area.
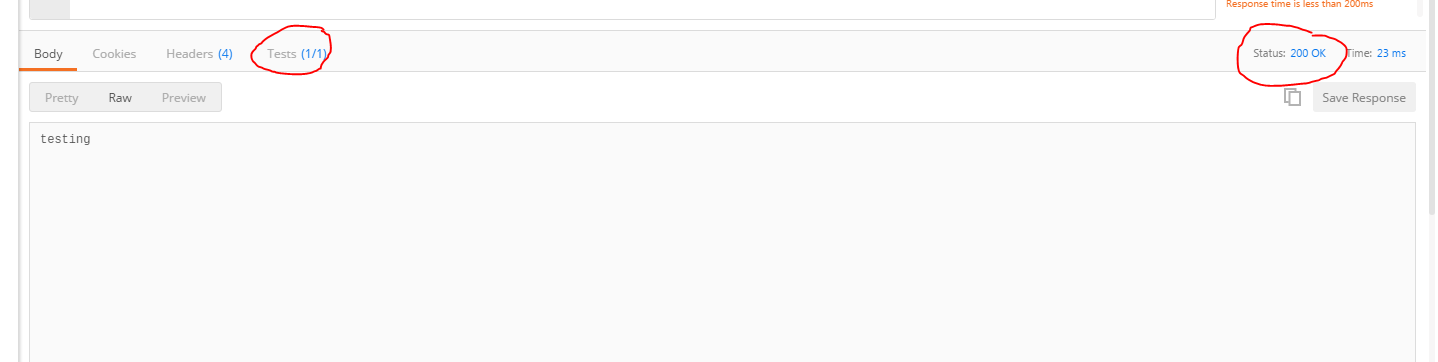
The next step is to click "send;" you will then get a 200 response with the same string literal that you have previously entered, because the Mule application does nothing but log your request to the Anypoint Studio console. Now notice that the status code that is returned is 200 OK.

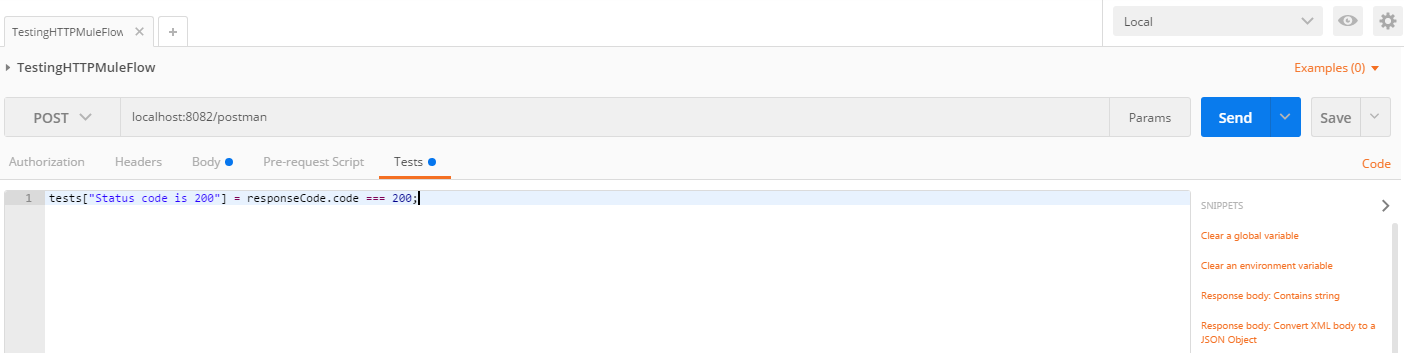
Next, we are going to the test at the top of the Postman screen, just below the address bar as shown in the following picture:
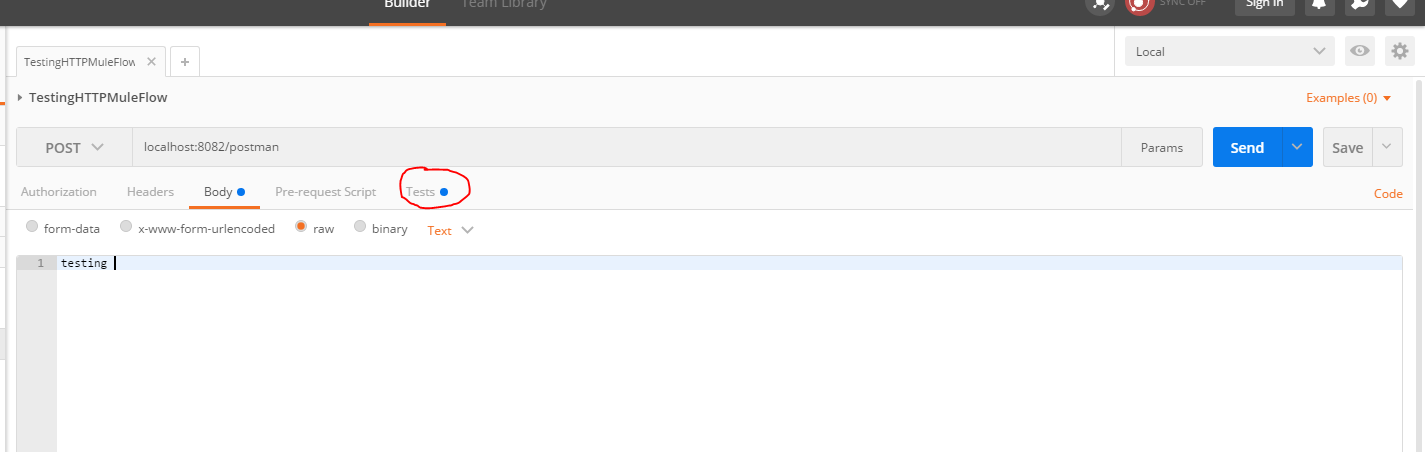
Once you are in the test text area, key in the following assert statements: tests["Status code is 200"] = responseCode.code === 200;
It will look like the following screen. There are a lot assert snippets you could explore on the right side of your screen.
Now, when you click on the send button again, notice that you will see "Test(1/1)" at the bottom of the result pane.
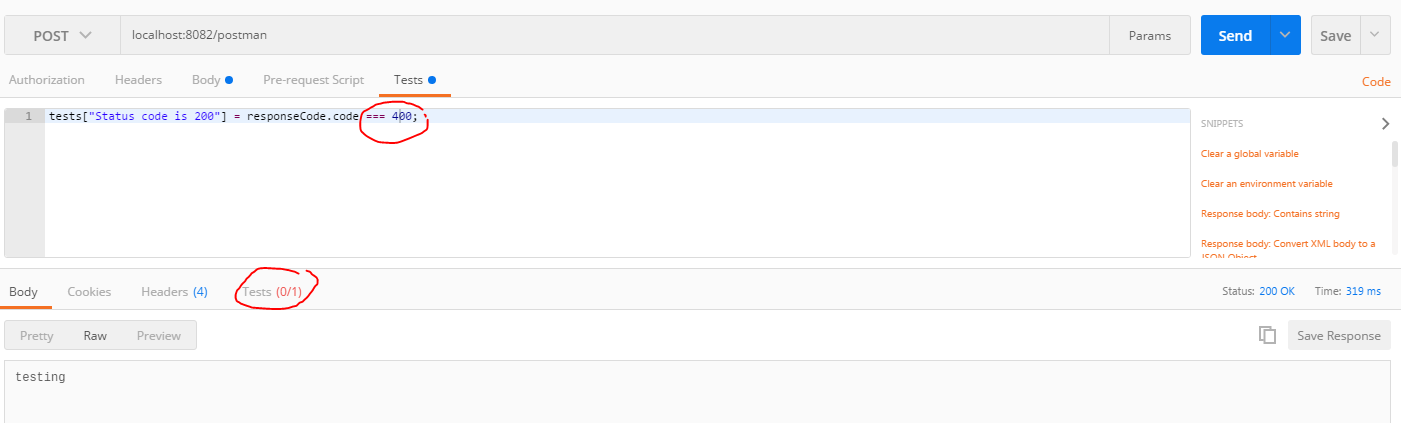
If you change your assert response code to 400 instead of 200 and click send again, you will notice the test is now Test(0/1), which means the test has failed. Change the assert back to 200 as stated above.
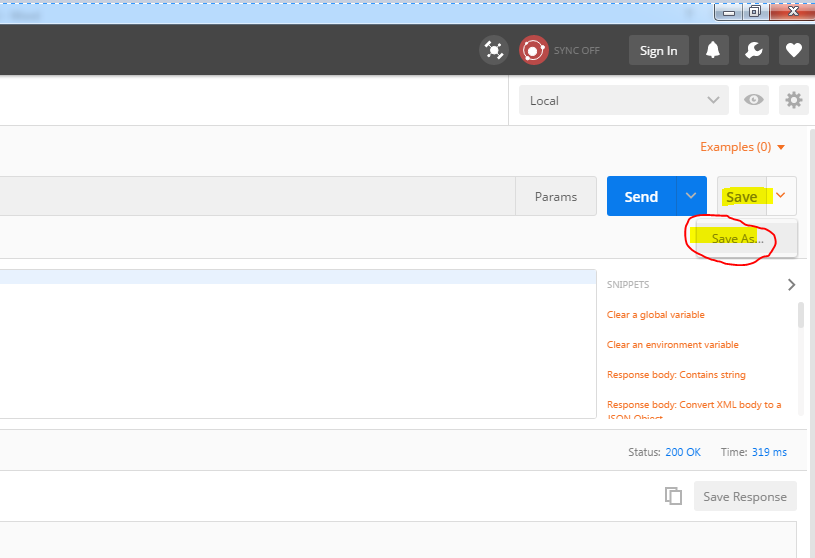
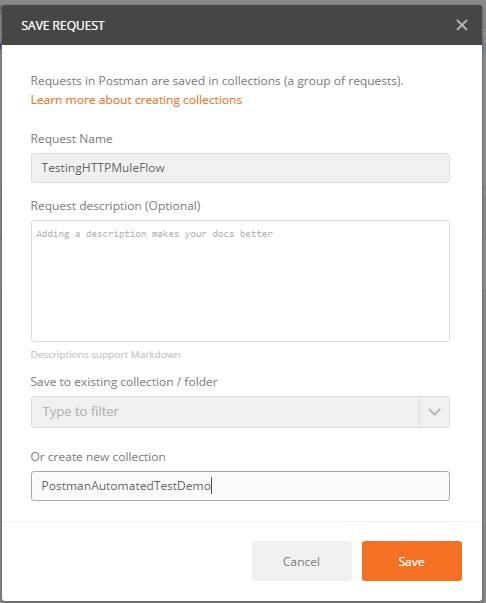
Now save the test into a collection. Go to the top right corner of the Postman screen and click on the save button and select the "save as" menu.
A save request pop-up dialog will appear- key in the following inputs and proceed to click save.
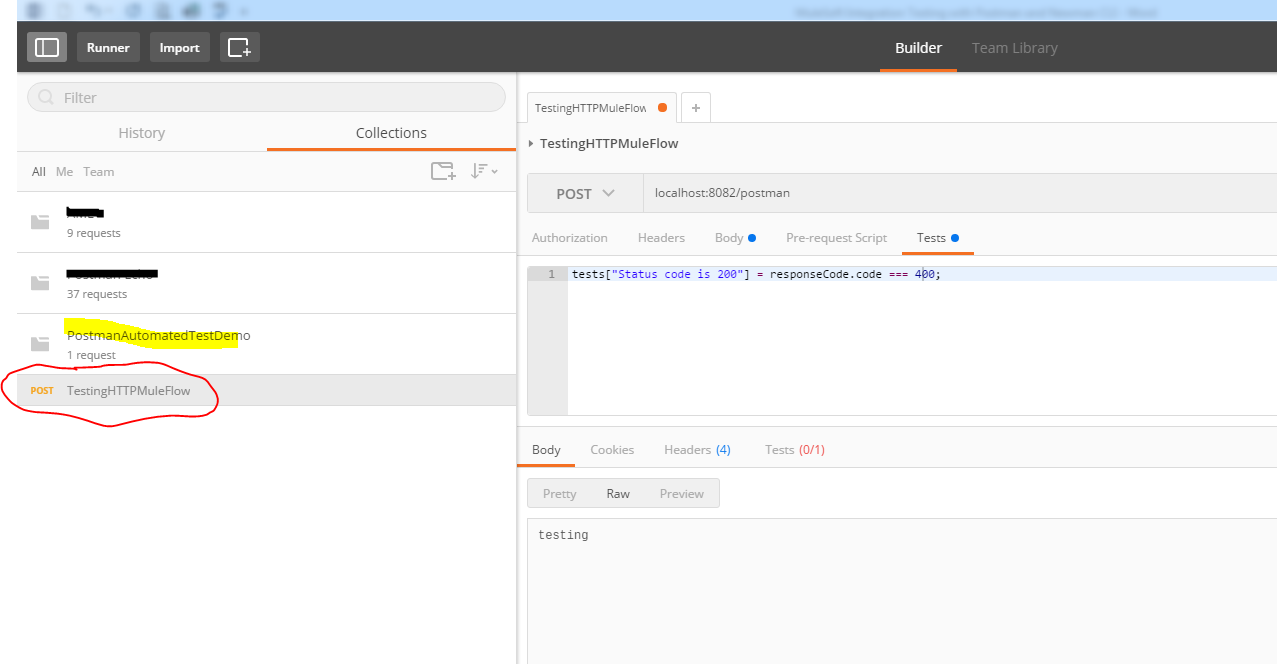
Once you have saved your test into a collection, notice that you will see the previously saved collection and the test on the far left, in the collections tab, as depicted in the following illustration.
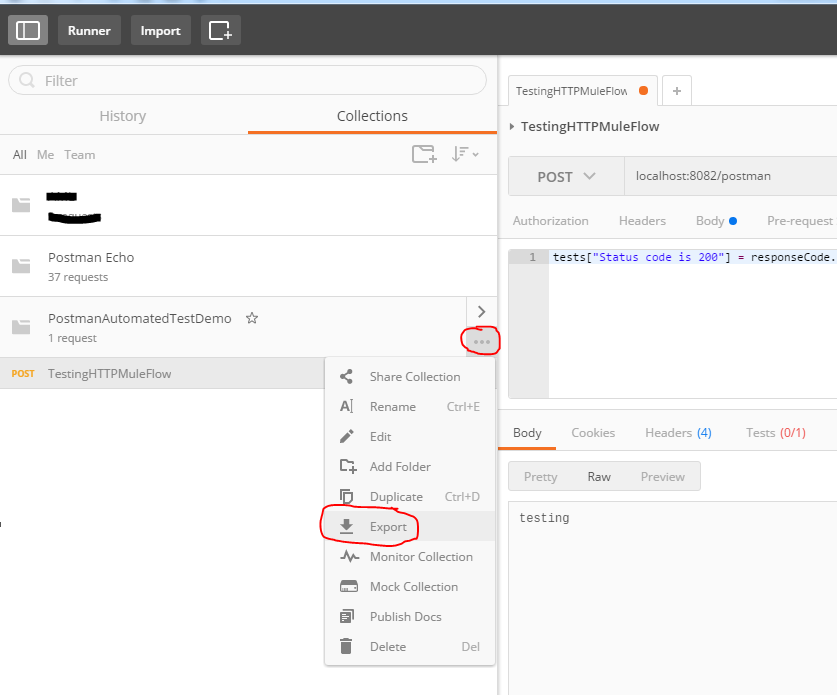
Now you need to export the saved collection into a JSON file so that we can use Newman Command Line Interface (CLI) to trigger it. I export the save test into JSON file, click on the ellipsis button, and select "export" from the menu.
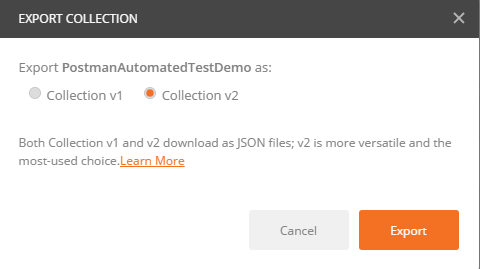
An Export Collection dialog box will pop-up; select the Collection V2 radio button and click the export button, and save to a folder that is easily accessible. We will use this file in the following section.
4.0 Newman CLI Testing Using Postman Collection Export
If you don’t have Newman installed, you need to install it via NPM. If you don’t have NPM installed, you need to install it first. I am using a Windows laptop, so I am going to launch the Windows command prompt to execute Neman CLI.
Navigate to the folder containing your exported JSON file. If you open the JSON file, you will see the following as the contents of the file.
{
	"variables": [],
	"info": {
		"name": "PostmanAutomatedTestDemo",
		"_postman_id": "75d716b9-e83b-ae2c-91dd-d5ae7ccf4327",
		"description": "",
		"schema": "https://schema.getpostman.com/json/collection/v2.0.0/collection.json"
	},
	"item": [
	{
		"name": "TestingHTTPMuleFlow",
		"event": [
		{
			"listen": "test",
			"script": {
				"type": "text/javascript",
				"exec": [
					"tests[\"Status code is 200\"] = responseCode.code === 200;"
				]
			}
		}
		],
		"request": {
			"url": "localhost:8082/postman",
			"method": "POST",
			"header": [],
			"body": {
				"mode": "raw",
				"raw": "testing "
			},
			"description": ""
		},
		"response": []
	}
	]
}
Launch the Windows command prompt and execute the following command:
newman run PostmanAutomatedTestDemo.postman_collection.json -n 10
Once Newman has finished running your test, the following result table will be printed in your command prompt.
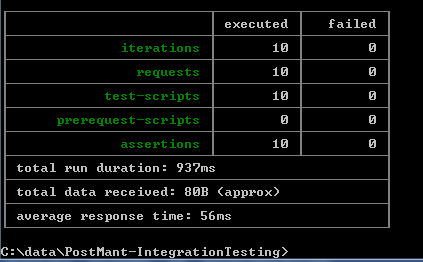
The “–n 10” option in the Newman CLI means "run this test 10 times." You will be able to see the same thing reflected in the Anypoint console, where 10 lines will be logged, and each line has a unique message id.

5.0 Conclusion
I have shown you in a few simple steps how you can set up automated integration testing. One practical thing you could do with this is load testing. If you have an API that is exposed via an HTTP receive endpoint, you could essentially simulate load testing by running few command prompts concurrently each with a few hundred or even thousand iterations.
Opinions expressed by DZone contributors are their own.
Comments