

Running an OpenStreetMap Tile Server for the Whole Planet on Modest Hardware
Learn how to build and optimize a planet-scale OpenStreetMap tile server using PostgreSQL, PostGIS, Mapnik, and renderd on limited hardware.
I built my own OpenStreetMap tile server, scaled it up to the entire planet on a box with 32GB of RAM, and it took weeks.
This is the write-up of what broke along the way — the five-day import, the OOM killer, the 1.7 TB database, the render jobs I had to run in chunks for days. If you're thinking about self-hosting maps at planet scale on hardware that isn't a monster, this is the article I wish I'd had. There's a companion demo repo: a minimal working build on a single region that spins up in a Docker container in about fifteen minutes with one command: make setup. You can poke at everything I describe here, in miniature.
Why Self-Host Maps at All
I'm a programmer, and maps aren't usually my problem. Then a request landed: we needed a mapping service for an internal project. Why not Google Maps or Mapbox? Three reasons:
- Air-gapped. A hard requirement from the client — no external API keys, no calls to anyone else's servers. Data and rendering entirely on our machines.
- Control over the data. Take a dump of whatever vintage you want, strip what you don't need (in our case, administrative borders, which only got in the way), keep exactly what the project calls for.
- Control over the look. Colors, fonts, which objects show up, and from which zoom level.
We didn't need "one more map provider" — we needed a platform we could bend to our own needs. The project was historical in nature, so the requirements were specific to it. The choice fell on the standard stack for this job: OpenStreetMap + PostGIS + renderd + osm-carto.
Why Not Vector Tiles?
If you're reading this in 2026, the fair question is: why stand up the classic OpenStreetMap + PostGIS + Mapnik + renderd stack at all, when vector tiles exist, and tools like Planetiler or Tilemaker will happily bake the planet into a set of static tiles?
It's a popular approach today, and a good one. The planet gets converted once into vector tiles (usually MBTiles or PMTiles), which you then serve as static files from plain nginx, with styling and rendering done client-side by MapLibre GL. That scales more easily, needs no server-side machinery, and often drops PostgreSQL and on-the-fly rendering entirely.
But my project started in early 2024. Back then I leaned on the classic OSM stack for two reasons: I hadn't done any serious cartography before and was learning as I went, and this stack had years of documentation and blog posts covering exactly the problems I kept hitting. On top of that, one of my tasks was customizing the standard osm-carto style — changing labels, hiding certain objects, getting a map as close as possible to the familiar OpenStreetMap render. So I went with the traditional PostGIS/Mapnik/renderd setup. If I were starting the same project from scratch today, I'd seriously weigh vector tiles as a primary option.
How the Stack Fits Together
Before the details, the shape of the thing. The server has two separate flows: preparing the data (done once) and serving tiles (on every browser request).
Preparation:
PBF dump ──► osm2pgsql ──► PostgreSQL + PostGIS
                                         │
                                 dump of chosen area
                                   + external data
                                 (coastlines, water)

Serving:
browser ──► (optional) nginx — can also serve other parts
                         │        of the site and pre-rendered PNGs
                         │
                   Apache + mod_tile
                         │
                       renderd
                         │
                       Mapnik ──► PNG tile
                         │
                       reads geodata from PostGIS
The dump is imported into the database once. After that, the browser requests a tile; Apache with mod_tile hands the request to the renderd daemon, which calls the Mapnik rendering engine. Mapnik pulls geodata from PostGIS (a PostgreSQL extension for spatial data — geometry types, spatial GiST indexes, functions like ST_Intersects), applies the style rules, and draws the image. The finished tile is cached to disk and served straight from cache next time.
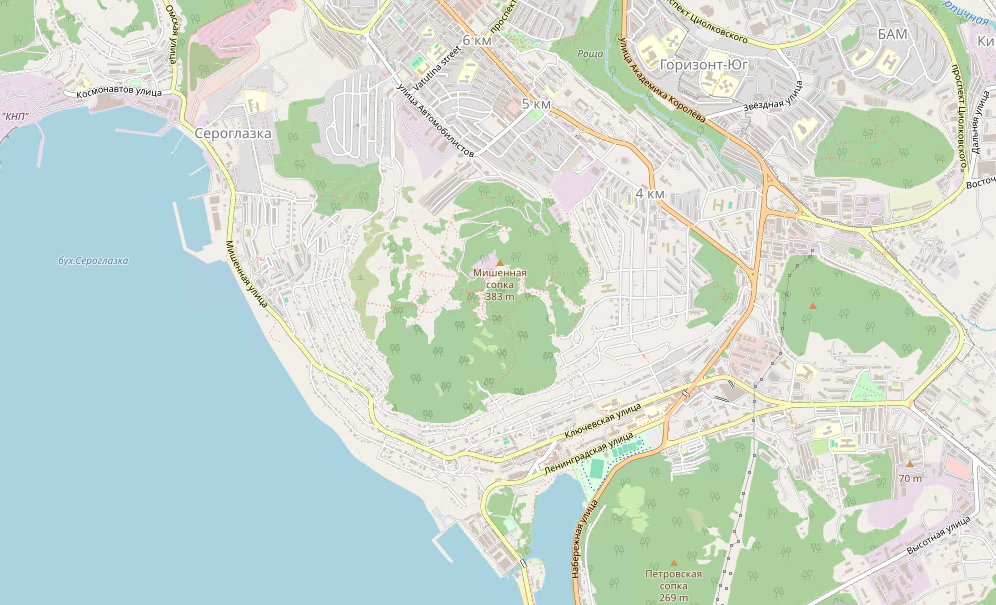
A few terms you'll meet along the way, defined once here so the rest reads cleanly:
- PBF – the binary format OSM dumps ship in. The whole planet (planet.osm.pbf) is~70 GB (early 2024; it's bigger now); individual countries and regions come from Geofabrik, updated daily.
- Tiles – a map in the browser isn't one big image. It's sliced into squares (usually256×256 px), each addressed by three numbers: /{zoom}/{x}/{y}.png. Zoom 0 is the whole planet in one tile; zoom 14 is individual streets, millions of tiles. The browser only requests what's visible.
- osm2pgsql – imports PBF into PostgreSQL, laying data out across planet_osm_point, planet_osm_line, planet_osm_polygon, planet_osm_roads.
- osm-carto – the standard set of render rules: road colors, when labels appear, what parks and water look like. Written in CartoCSS, compiled by the carto tool into the style.xml that Mapnik reads.
Mapnik reads its style rules from that style.xml file. It's not a link in the data flow — it's rendering configuration Mapnik loads on its own — so I've left it off the diagram.
Getting It Running On One Region
Before throwing the planet at it, it's worth walking through a single region — the steps are the same, just without the multi-day waits. This section is a working quickstart; the planet-specific pain starts in the next one.
1. Get the Data
Grab a dump from Geofabrik (countries and regions) or the OSM site (the whole planet). For a single region, it's handy to trim the dump to a bounding box with osmium, so you're not carrying dead weight:
sudo apt install osmium-tool   # if you don't have it
# bbox: left,bottom,right,top (minlon,minlat,maxlon,maxlat)
osmium extract -b 157.5,52.0,160.0,54.0 far-eastern.osm.pbf -o region.osm.pbf
If you want to go the other way and stitch several regions together, same tool:
osmium merge norway-latest.osm.pbf sweden-latest.osm.pbf denmark-latest.osm.pbf -o scandinavia.pbf2. Import Into the Database With osm2pgsql
osm2pgsql --slim -d gis --hstore --multi-geometry \
  --tag-transform-script openstreetmap-carto.lua \
  --style openstreetmap-carto.style \
  region.osm.pbf
The flags that matter:
--slim– keep intermediate data in the database rather than in RAM. Needed for later updates and for big dumps that won't fit in memory. Without it, the import is faster but hungrier.--hstore– add atagscolumn (of type hstore, PostgreSQL's key-value-in-a-column extension) holding every OSM tag. OSM leans hard on tags —name:en,amenity,highway— and hstore holds them without a hundred separate columns. You query them liketags->'name:en'.--multi-geometry– assemble multipolygons into single objects; skip it, and the geometry renders wrong.
3. Enrich With External Data
The step most guides mention in passing, even though rendering doesn't work without it. After the import, you have to pull in data that isn't in the PBF but that the map needs anyway: coastlines, seas, water polygons. An osm-carto script fetches them:
cd openstreetmap-carto/
scripts/get-external-data.py            # creates water_polygons and friends
carto project.mml > style.xml           # generate the Mapnik style
psql -d gis -c "GRANT ALL ON ALL TABLES IN SCHEMA public TO osm;"
Once the new tables appear, you have to re-grant permissions on them or renderd can't read them. Skip this whole step and the render dies on missing tables — and the error is unhelpful, because osm2pgsql finished cleanly and it looks like everything's ready.
4. Style: strip what you don't need, switch the label language
All display tuning happens in project.mml (the CartoCSS source that compiles to style.xml). This is also where per-project customization lives.
My first task was removing administrative borders. Find the layers with boundary ='administrative' in their queries and bolt on a deliberately false condition so the layer returns nothing:
-- before:
WHERE boundary = 'administrative' AND admin_level IN ('2', '4')
-- after:
WHERE boundary = 'administrative' AND admin_level IN ('2', '4') AND 1 > 2
It's a hack, not a solution, but it gets you a result fast without spelunking through the layer internals. (In the demo repo, the same change is done properly, via PostgreSQL views for the EN layer.)
My second task was switching the label language. In the queries, wrap the name field in COALESCE to fall back to the original name when there's no translation:
COALESCE(tags->'name:en', name, '') AS nameAfter edits, rebuild the style: carto project.mml > style.xml.
5. Configure renderd and Apache
renderd is configured in /etc/renderd.conf: where its socket lives, how many threads, which style, where to drop rendered tiles.
[renderd]
num_threads=8
tile_dir=/mnt/tiles
[mapnik]
plugins_dir=/usr/lib/mapnik/3.1/input
font_dir=/usr/share/fonts/truetype
font_dir_recurse=true
[default]
URI=/osm/
XML=/home/osm/openstreetmap-carto/style.xml
HOST=tile.example.com
MAXZOOM=14MAXZOOM=14 here is a per-project choice. The standard OSM stack renders up to zoom 20, so a request like /osm/15/17571/11355.png would need that limit raised.
In the mod_tile config, it's worth bumping the timeouts: ModTileRequestTimeout defaults to 3 seconds and ModTileMissingRequestTimeout to 10, which assumes fast renders — whereas a heavy tile takes several seconds to draw.
ModTileRequestTimeout 10
ModTileMissingRequestTimeout 60
6. Fonts
On your first render you'll almost certainly find errors in the renderd log about missing fonts, and the map will come out with no labels. Fix it by installing the Noto fonts and refreshing the font cache:
sudo apt-get install -y fonts-noto-cjk fonts-noto-hinted fonts-noto-unhinted fonts-hanazono ttf-unifont fontconfig
sudo fc-cache -fv
The renderd log (journalctl -eu renderd) is the first place to look for any render trouble. One non-obvious error, Failed to send render cmd ... Inappropriate ioctl for device, almost always means a renderd socket problem: the socket path in the mod_tile config doesn't match the one in renderd.conf, or the Apache user (www-data) can't write to it. Check the paths in both configs and the permissions on the socket directory (usually /run/renderd). Forums often suggest export GPG_TTY=$(tty) for this error, but that variable has nothing to do with renderd — if it "helped," what actually helped was the service restart that came with it.
The One Thing to Keep in Mind From the Region Build
Here's a takeaway worth carrying into the planet section: the database size is set by the region, not by the render zoom. Capping the zoom only saves space on tiles; the database is fixed at import time. And a big chunk of it isn't your region at all — it's the global coastlines and water polygons, which get-external-data pulls in identically whether you're mapping a city or the planet. Kamchatka (I chose my home region as an example) is an 8 MB dump but a ~3 GB database, and almost all of that is water.
***
Everything above works on a region in a day, missing fonts and permissions and timeouts aside. When "region" becomes "the whole planet," it turns into a different story: five-day imports, the OOM killer, a 1.7 TB database, renders you run in chunks for weeks. That's the rest of this article.
Hardware: How Much You Actually Need
The machine I was first handed: 4 cores, 16 GB RAM, 500 GB disk. Trial and error established fast that this was catastrophically short — the planet wouldn't even import. I asked for more; they bumped it a little. On the second attempt, I had 32 GB RAM and 500 + 2000 GB of disk. That's what I worked with: slowly, but the planet eventually loaded and ran.
The planet database after import and all indexes weighed in at around 1728 GB (early 2024 — OSM keeps growing, it's more now), and that's before tiles. Take the disk with headroom: the import burns extra space on temporary data on top of the final size.
A separate disk gotcha, and a myth worth killing while I'm here: Postgres doesn't preallocate anything and happily uses a filesystem that grew under it. My problem was simpler — the database lived on a separate mounted volume that I just hadn't expanded when the disk was added, so there was nowhere for the space to come from. Nothing needed reformatting, but I did have to move the database to the bigger volume by hand:
# rough copy, database still running
sudo rsync -av /var/lib/postgresql /mnt/tiles/db
sudo systemctl stop postgresql
# copy over what changed since
sudo rsync -av /var/lib/postgresql /mnt/tiles/db
sudo mv /var/lib/postgresql/14/main /var/lib/postgresql/14/main.bak
# then point data_directory in postgresql.conf at the new path
Tuning PostgreSQL for the Load
The default Postgres config is wholly unfit for this. Most parameters scale off the amount of RAM, so it's easier to hold the rules in your head than the absolute numbers:
| Parameter              | Rule of thumb                          | Why                                                                                          |
|------------------------|----------------------------------------|----------------------------------------------------------------------------------------------|
| shared_buffers         | ~25% of RAM                            | in-memory cache of data pages (8 KB each); fewer trips to disk                               |
| effective_cache_size   | ~50–75% of RAM                         | a hint to the planner (allocates nothing): lots of cache picks an index scan over a seq scan |
| maintenance_work_mem   | from 5% of RAM                         | speeds up `CREATE INDEX` and `VACUUM`; critical when building GiST indexes                   |
| work_mem               | ~25% of RAM / max connections          | allocated per sort or hash, not per connection: 100 queries at 1 GB can reach 100 GB         |
| max_wal_size           | larger is recommended, from 4 GB       | fewer checkpoints during bulk inserts — but also disk space for the journal                  |
Working values for a 32 GB server:
shared_buffers       = 8GB
work_mem             = 256MB
maintenance_work_mem = 4GB
effective_cache_size = 20GB
max_wal_size         = 10GB
hash_mem_multiplier  = 4.0   # multiplier on work_mem for hash operations
I added hash_mem_multiplier later, while tuning the render: spatial queries lean heavily on hash joins. But let me own a mistake here. My first version had work_mem = 1GB with hash_mem_multiplier = 8.0. The important caveat: work_mem is allocated per sort or hash in each query, and hash_mem_multiplier multiplies it — with my values, a single hash operation could grab up to 8 GB. On 32 GB with eight renderd threads, that's right on the edge of OOM, and the render hangs at high zooms I'll get to below are almost certainly tied to it. If memory is tight, you're safer keeping work_mem around 256–512 MB and the multiplier in the 2.0–4.0 range.
Importing the Planet
Download the planet dump (~70 GB at the time of my work, 88 GB now) with resume enabled, so a dropped connection doesn't cost you the whole thing:
wget -c https://planet.openstreetmap.org/pbf/planet-latest.osm.pbfThe import command:
osm2pgsql --slim -d gis --hstore --multi-geometry \
  --number-processes 1 \
  --tag-transform-script openstreetmap-carto.lua \
  --style openstreetmap-carto.style \
  -C 14000 \
  planet-latest.osm.pbf
What's missing from this command, which I only learned afterward: --flat-nodes /path/nodes.cache. The flag moves the node cache out of the database into a separate file (on the order of 90 GB for the planet), which slims the slim-tables by hundreds of gigabytes and speeds the import up noticeably. For the planet it's considered all but mandatory; for small regions, the opposite — you don't want it. Part of my five-day import and 1.7 TB database was the price of leaving it out.
Why --number-processes 1? Because with 2 and 4 processes the import died with a segmentation fault. I never nailed down the exact cause — no time to dig; single-process worked, so I stopped there. What follows isn't a verdict but hypotheses, in descending order of plausibility:
- The OOM killer takes out a child process. Under memory pressure, Linux picks the fattest process and kills it. If that's an osm2pgsql worker, the parent gets an unexpected child exit and falls over. Given the context — memory was chronically short — this is my bet.
- A shared-memory conflict. In multi-process mode, the workers coordinate through shared memory, and with too little RAM or a bad shmmax, that can corrupt data and produce a segfault.
- A version-specific osm2pgsql bug on parallel import with hstore and multi-geometry both active. Cured by checking the changelog and updating.
If you want to get to the bottom of it: dmesg -T | grep -i "killed process" right after the crash, and coredumpctl for a trace, will give you a definitive answer. And note: I was under hard budget constraints; on modern hardware with 64+ GB of RAM, parallel import may well work without any of this.
If you hit a memory wall during import, lowering -C (osm2pgsql's cache size in MB) and shared_buffers in the Postgres config helps: less pressure on RAM, a slower but steadier import.
Single-process, the planet imported in roughly five days (primary storage was an HDD — an SSD will be faster). Almost all of that is osm2pgsql itself, parsing 70 GB of dump and assembling geometry.
Indexes: A 150× Speedup
The single biggest win came from indexes. Before them, rendering a tile at zoom 8–9 could take minutes: Mapnik would send a query to PostGIS, which did a sequential scan — walking every row in the table. For a planet_osm_polygon weighing hundreds of gigabytes, that's a disaster.
GiST spatial indexes search space by tree rather than by brute force. And partial indexes with a condition pull only the rows the render needs into the index, so it stays smaller and faster:
-- rivers
CREATE INDEX planet_osm_line_river ON planet_osm_line
  USING GIST (way) WHERE waterway = 'river';

-- named places (for labels)
CREATE INDEX planet_osm_point_place ON planet_osm_point
  USING GIST (way) WHERE place IS NOT NULL AND name IS NOT NULL;

-- large polygons for low zooms
CREATE INDEX planet_osm_polygon_way_area_z6 ON planet_osm_polygon
  USING GIST (way) WHERE way_area > 5980000;

-- ... about 15 indexes in total
The detail I didn't clock at first: these indexes aren't hand-crafted magic you have to reason out yourself — they're a ready-made indexes.sql file in osm-carto. On a bare server you run it by hand after the import (psql -d gis -f indexes.sql), and it's an easy step to miss: after osm2pgsql it's not obvious there's anything left to do, and the map "sort of works," it just draws each tile in minutes. That knowledge came to me a lot later than it should have.
After all the indexes, the database grew from ~1728 to ~1770 GB, and the render sped up roughly 150× — not one query, but rendering a whole tile, which needs dozens of queries across different layers. The difference between "a tile draws in almost three minutes" and "a tile draws in a second." These aren't a rigorous benchmark: I compared rendering the same set of tiles before and after creating the indexes (after clearing the cache, of course).
Pre-Rendering the High Zooms
Low zooms pre-render in minutes; high zooms run into days. Here are the real total render times for the planet — divide by your thread count for wall-clock time:
| Zoom | Total time                                            |
|------|-------------------------------------------------------|
| 0–3  | seconds                                               |
| 4    | ~596 s                                                |
| 5    | ~2,183 s                                              |
| 6    | ~9,109 s                                              |
| 7    | ~68,325 s                                             |
| 8    | ~273,380 s (~76 h total, ~9.5 h across 8 threads)     |
At high zooms the render hung regularly — most likely from memory starvation on individual heavy queries: eight renderd threads, several joins per query, and the generous work_mem and hash_mem_multiplier from the Postgres section together easily ate all the RAM. At the time, I went with a chunked strategy, offsetting along the X axis (rendering the full vertical run of metatiles but bounded horizontally), and eyeballing random tiles in the browser after each chunk:
render_list --all -f -x 0   -X 100 -n 8 -t /mnt/tiles -s /run/renderd/renderd.sock -z 9 -Z 9
render_list --all -f -x 100 -X 200 -n 8 -t /mnt/tiles -s /run/renderd/renderd.sock -z 9 -Z 9
# ... easy to wrap in a bash loop
Hung — stop, restart the services, resume from the chunk where it died. Ran out of disk in the middle of the night — clean up, request a bigger volume, resume. This is the normal working loop, not a fire drill, even if it did wear me down at times. And that loop — not any single command — is the real cost of a project like this. The commands are worth automating with bash scripts or a Makefile, because they're what you end up doing over and over.
Filesystem: You Run Out of Inodes Before You Run Out of Space
renderd stores tiles as metatiles — 8×8 tiles per file plus metadata — partly for the filesystem's sake, and it's worth spelling out why. On ext4, the number of inodes (one per file) is fixed when the filesystem is created and never changes afterward. By default, mkfs.ext4 lays down one inode per 16 KB of space — on a 2 TB volume that's about 134 million inodes. Sounds like a lot, but zoom 16 alone is over 4 billion tiles: without metatiles cutting the file count 64×, you'd run out of inodes on the planet long before you ran out of disk.
Watching for it is easy: df -i shows inode usage per volume the same way df -h shows space (and the flags combine — df -ih gives the same in human-readable form). If you're creating a tile volume from scratch, you can build in headroom up front: mkfs.ext4 -i 4096 sets one inode per 4 KB of space instead of the default 16 KB, giving four times as many inodes at the cost of a little usable capacity. And XFS allocates inodes dynamically, so the problem doesn't exist there at all.
Operations: Where to Dig Next
I've covered building the server and getting it production-ready. A few big topics remain — here are short starting points:
- Updates and expiry. I didn't run updates, given the project's historical bent — current data and keeping it fresh didn't matter to us. If your data does change, osm2pgsql-replication applies diffs to the database, but tiles already rendered to disk won't update themselves — the map slowly goes stale. Expiry solves it:
osm2pgsql --expire-tiles 12-14emits the coordinates of affected tiles on each diff, a script flags them (deletes the metatiles), and renderd redraws only the changed squares on next request rather than the whole planet. Irrelevant for static maps, mandatory for a live service. - Security. A default Postgres install from packages listens only on local connections, but plenty of tutorials and Docker images set
host all all 0.0.0.0/0in pg_hba.conf — meaning the database is open to everyone. Replace that with a specific subnet, or hide it behind an SSH tunnel, or proxy to a specific container; and gate the tiles themselves with auth at the Apache or nginx layer in front. - Monitoring. The minimum worth watching:
df -h(disk fills first during pre-render),df -i(inodes),htop/free -h(memory), the renderd log (journalctl -u renderd), and mod_tile's stats — the module can serve request and render counters on a status URL.
What It Comes Down To
The OSM + PostGIS + renderd stack works, but it takes patience, resources, and an understanding of how the services connect. In short:
- Three non-negotiables: indexes, Postgres tuning, and external data. Each looks optional on its own, but without them the render either falls over or draws a tile in minutes and times out.
- The biggest non-obvious space cost is the global water polygons, not the region you import.
- Budget for the non-linearity. Crashes, restarts, a disk that fills at 3 a.m., moving a volume — this isn't force majeure; it's the reality of the process, and it's where most of the effort actually goes.
And the main lesson, which isn't about the technology. Most of the problems I've described turned out to be less about OSM itself than about trying to fit a planet-scale dataset into limited resources. The server's memory was later doubled — working on it got markedly more pleasant — but I handed the project off to a successor, so all I can say for sure is that 64 GB is a sane minimum if you're taking something like this on. So the main advice is simple: if you're going to work with the whole planet, put enough memory and disk headroom in place first, and only then start optimizing.
You can feel out the tuning and indexes on a small region in the demo repo — make index-benchmark and make render-benchmark shows the effect of a GiST index and the difference between a cold and a warm tile.
Opinions expressed by DZone contributors are their own.