Optimizing Cost and Carbon Footprint With Smart Scaling Using SQS Queue Triggers: Part 1
Dynamic scaling with Amazon SQS and AWS Auto Scaling optimizes costs and energy use, enhancing sustainability and efficiency in cloud environments.
Join the DZone community and get the full member experience.
Join For FreeThe rising demand for sustainable and eco-friendly computing solutions has given rise to the area of green computing. According to Wikipedia, Green computing, green IT (Information Technology), or ICT sustainability, is the study and practice of environmentally sustainable computing or IT. With the rise of cloud computing in the last few decades, green computing has become a big focus in the design and architecture of software systems in the cloud. This focus on optimizing the resources for energy efficiency allows us to focus on cost optimization in addition to reducing the carbon footprint. AWS is one of the cloud providers leading the movement from the front. AWS is investing heavily in renewable energy and designing its data centers with efficiency in mind.
According to the Amazon Climate Pledge, Amazon aims to achieve net-zero carbon emissions by 2040 and has already made significant strides, including powering its operations with 100% renewable energy by 2025. Additionally, AWS provides tools like the AWS Carbon Footprint Calculator, enabling customers to monitor and reduce their carbon emissions, thereby fostering a more sustainable digital ecosystem.
In this article, we will explore a common approach for reducing carbon emissions: exploiting the temporal flexibility inherent to many cloud workloads by executing them in periods with the greenest energy and suspending them at other times. We will explore how we can use AWS SQS and AWS Autoscaling to optimize the use of EC2 compute capacity to reduce carbon emissions.
What Is AWS Autoscaling?
According to AWS, AWS Auto Scaling monitors your applications and automatically adjusts capacity to maintain steady, predictable performance at the lowest possible cost. Using AWS Auto Scaling, it’s easy to set up application scaling for multiple resources across multiple services in minutes.

Figure 1: Illustration of Auto Scaling in AWS
What Is Amazon SQS?
Amazon Simple Queue Service (Amazon SQS) is a fully managed message queuing service offered by AWS. It enables the decoupling and scaling of microservices, distributed systems, and serverless applications. SQS allows you to send, store, and receive messages between software components without losing messages or requiring other services to be available. This decoupled architecture is excellent for the use case for event-based services or task queuing kind of workloads where one service sends a task to be executed to the queue and other services trigger some action based upon the message received from the queue.
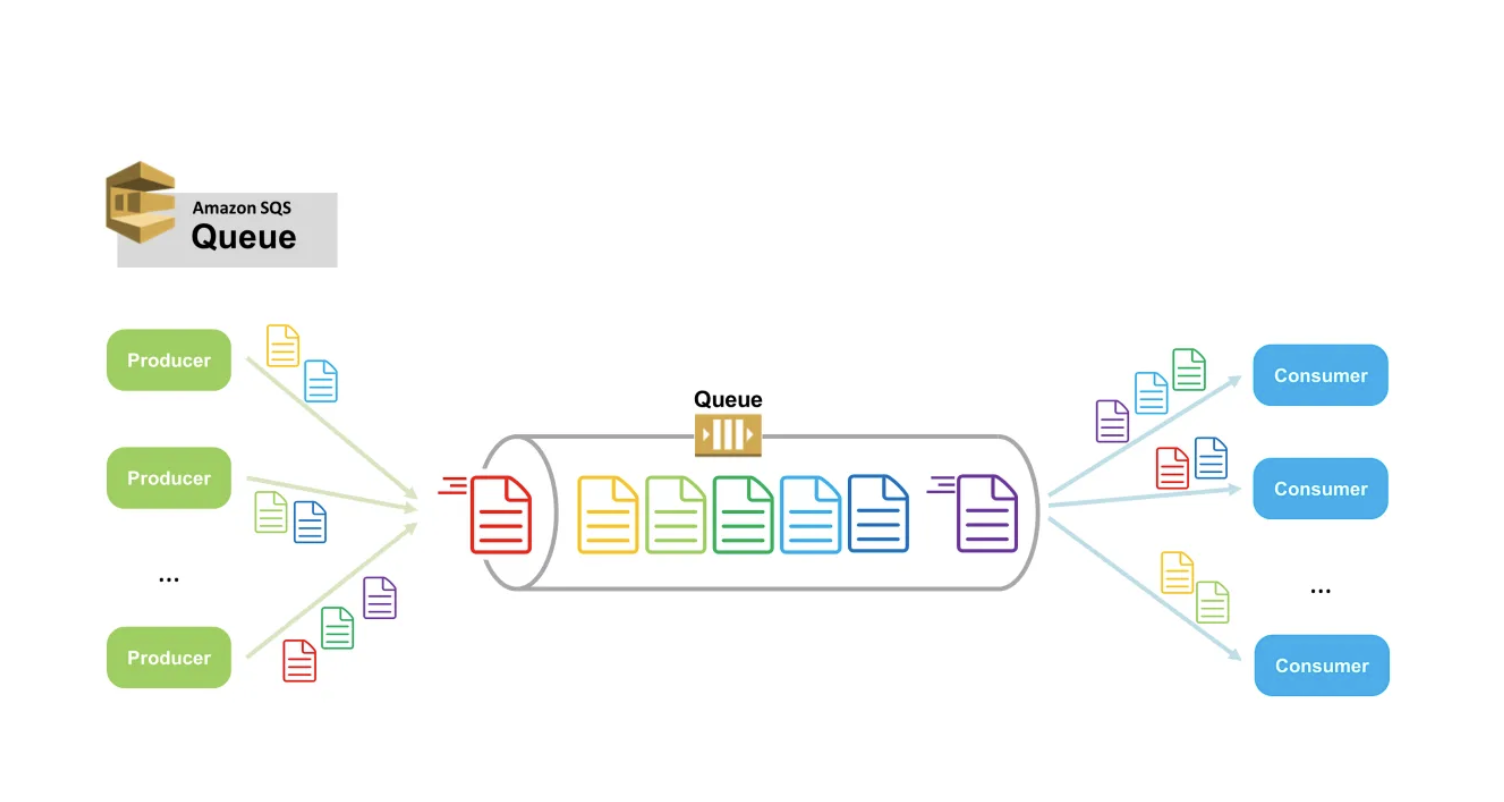
Figure 2: SQS Use case Illustration
Creating SQS Metrics-Based Auto Scaling Policies in AWS
Using Amazon EC2 with Amazon SQS for dynamic scaling not only optimizes cost and resource utilization but also contributes to reducing carbon emissions. By automatically scaling up only when demand increases and scaling down when it's low, the system ensures that you're not running more instances than necessary. This efficient use of resources minimizes the energy consumption associated with over-provisioned infrastructure.
Additionally, by reducing the number of idle or underutilized servers, you lower the overall energy footprint of your application. In essence, this intelligent scaling approach not only supports a cost-effective and flexible application architecture but also aligns with sustainability goals by reducing unnecessary energy use and associated carbon emissions.
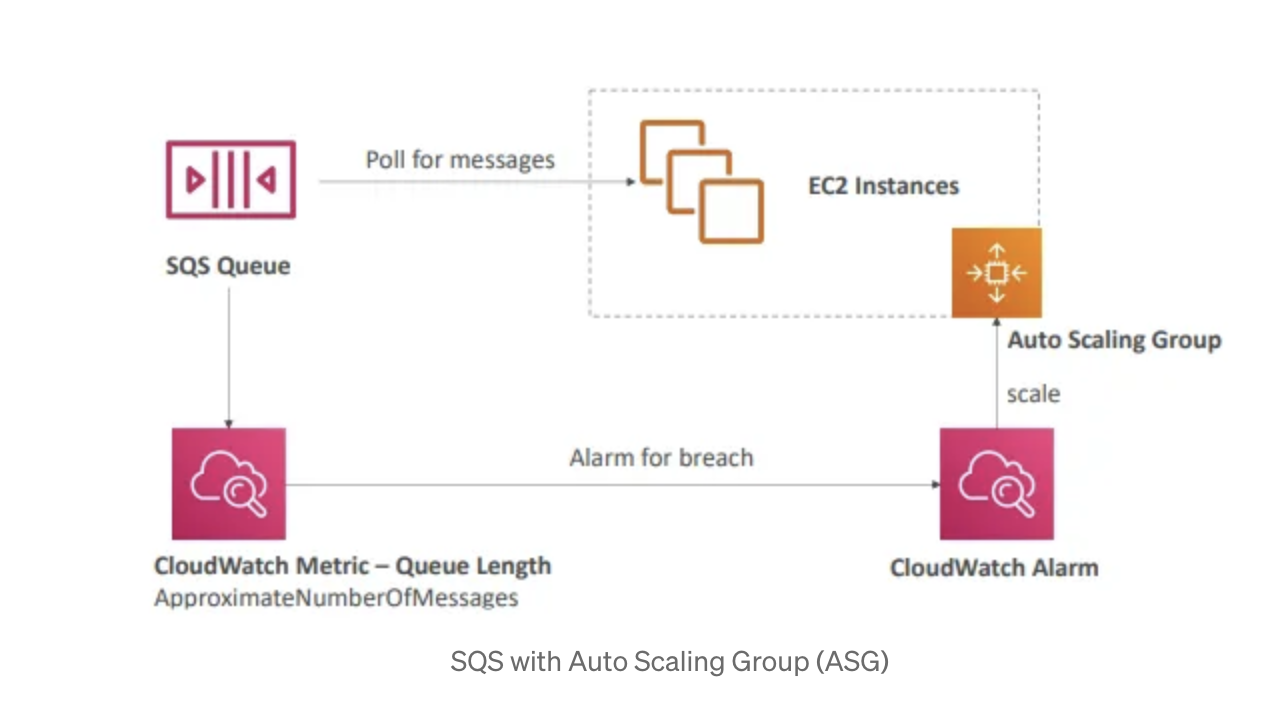
Figure 3: Auto scaling with SQS
Setup
Step 1: Create an Amazon SQS Queue
- Sign in to AWS Management Console: Go to the Amazon SQS service.
- Create a New Queue:
- Click "Create queue."
- Choose between a Standard or FIFO queue based on your needs.
- Configure the queue name, settings (visibility timeout, message retention, etc.), and click "Create Queue."
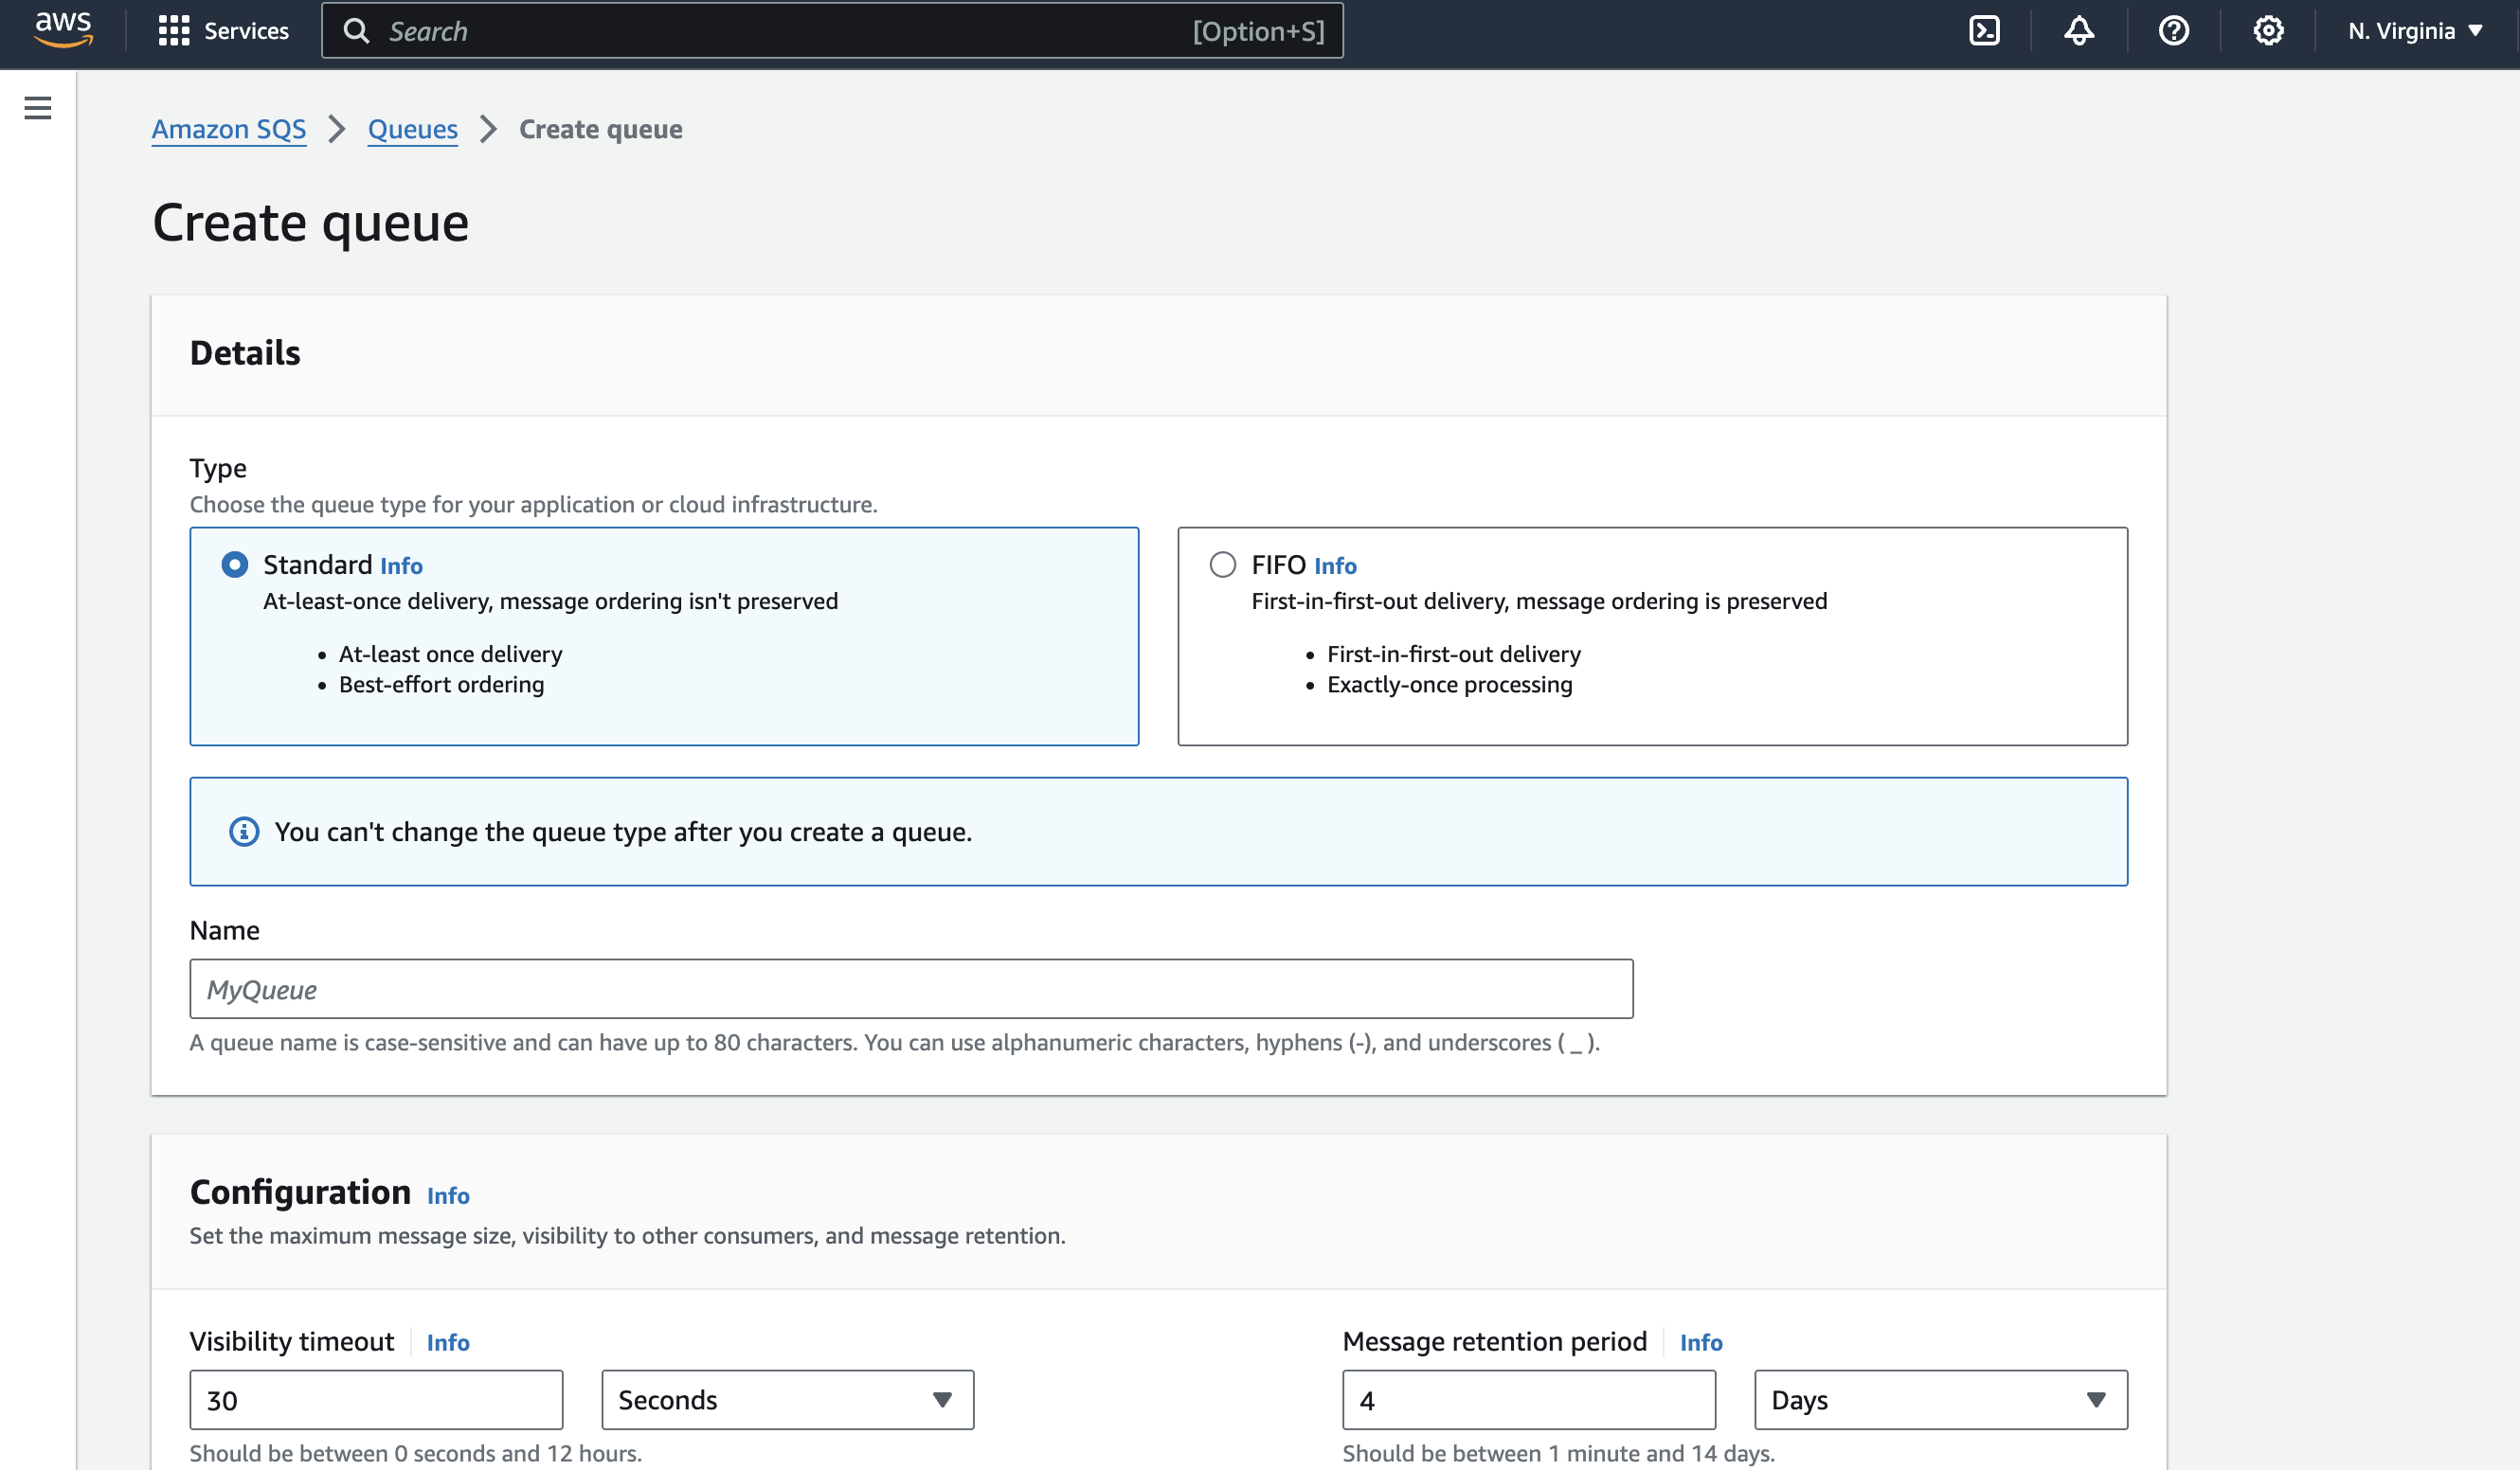
Figure 4: SQS creation pop-up
Step 2: Create a Launch Template or Configuration
- Navigate to EC2 in the console:
- Go to the "Launch Templates" section or "Launch Configurations" (if using Launch Configurations).
- Create a new launch template/configuration:
- Click "Create Launch Template/Configuration."
- Configure the instance details (AMI, instance type, key pair, security groups, etc.).
- Save the launch template/configuration.
![Launch template creation page]()
Figure 5: Launch template creation page
Step 3: Set Up a CloudWatch Alarm Based on SQS Metrics
Alarm 1: Scaling Up
- Go to CloudWatch console:
- Navigate to the "Alarms" section.
- Create a new alarm:
- Click "Create alarm."
- Choose SQS as the metric source and select the metric "
ApproximateNumberOfMessagesVisible." - Set the condition for scaling up (e.g., when the number of messages exceeds a high threshold).
- Configure the alarm to trigger a scaling action to add instances to the Auto Scaling Group.
Alarm 2: Scaling Down
Create a second alarm:
- Repeat the steps to create another alarm.
- Choose the same SQS metric ("
ApproximateNumberOfMessagesVisible"). - Set a lower threshold for scaling down (e.g., when the number of messages drops below a certain level).
- Configure the alarm to trigger a scaling action to remove instances from the Auto Scaling Group.
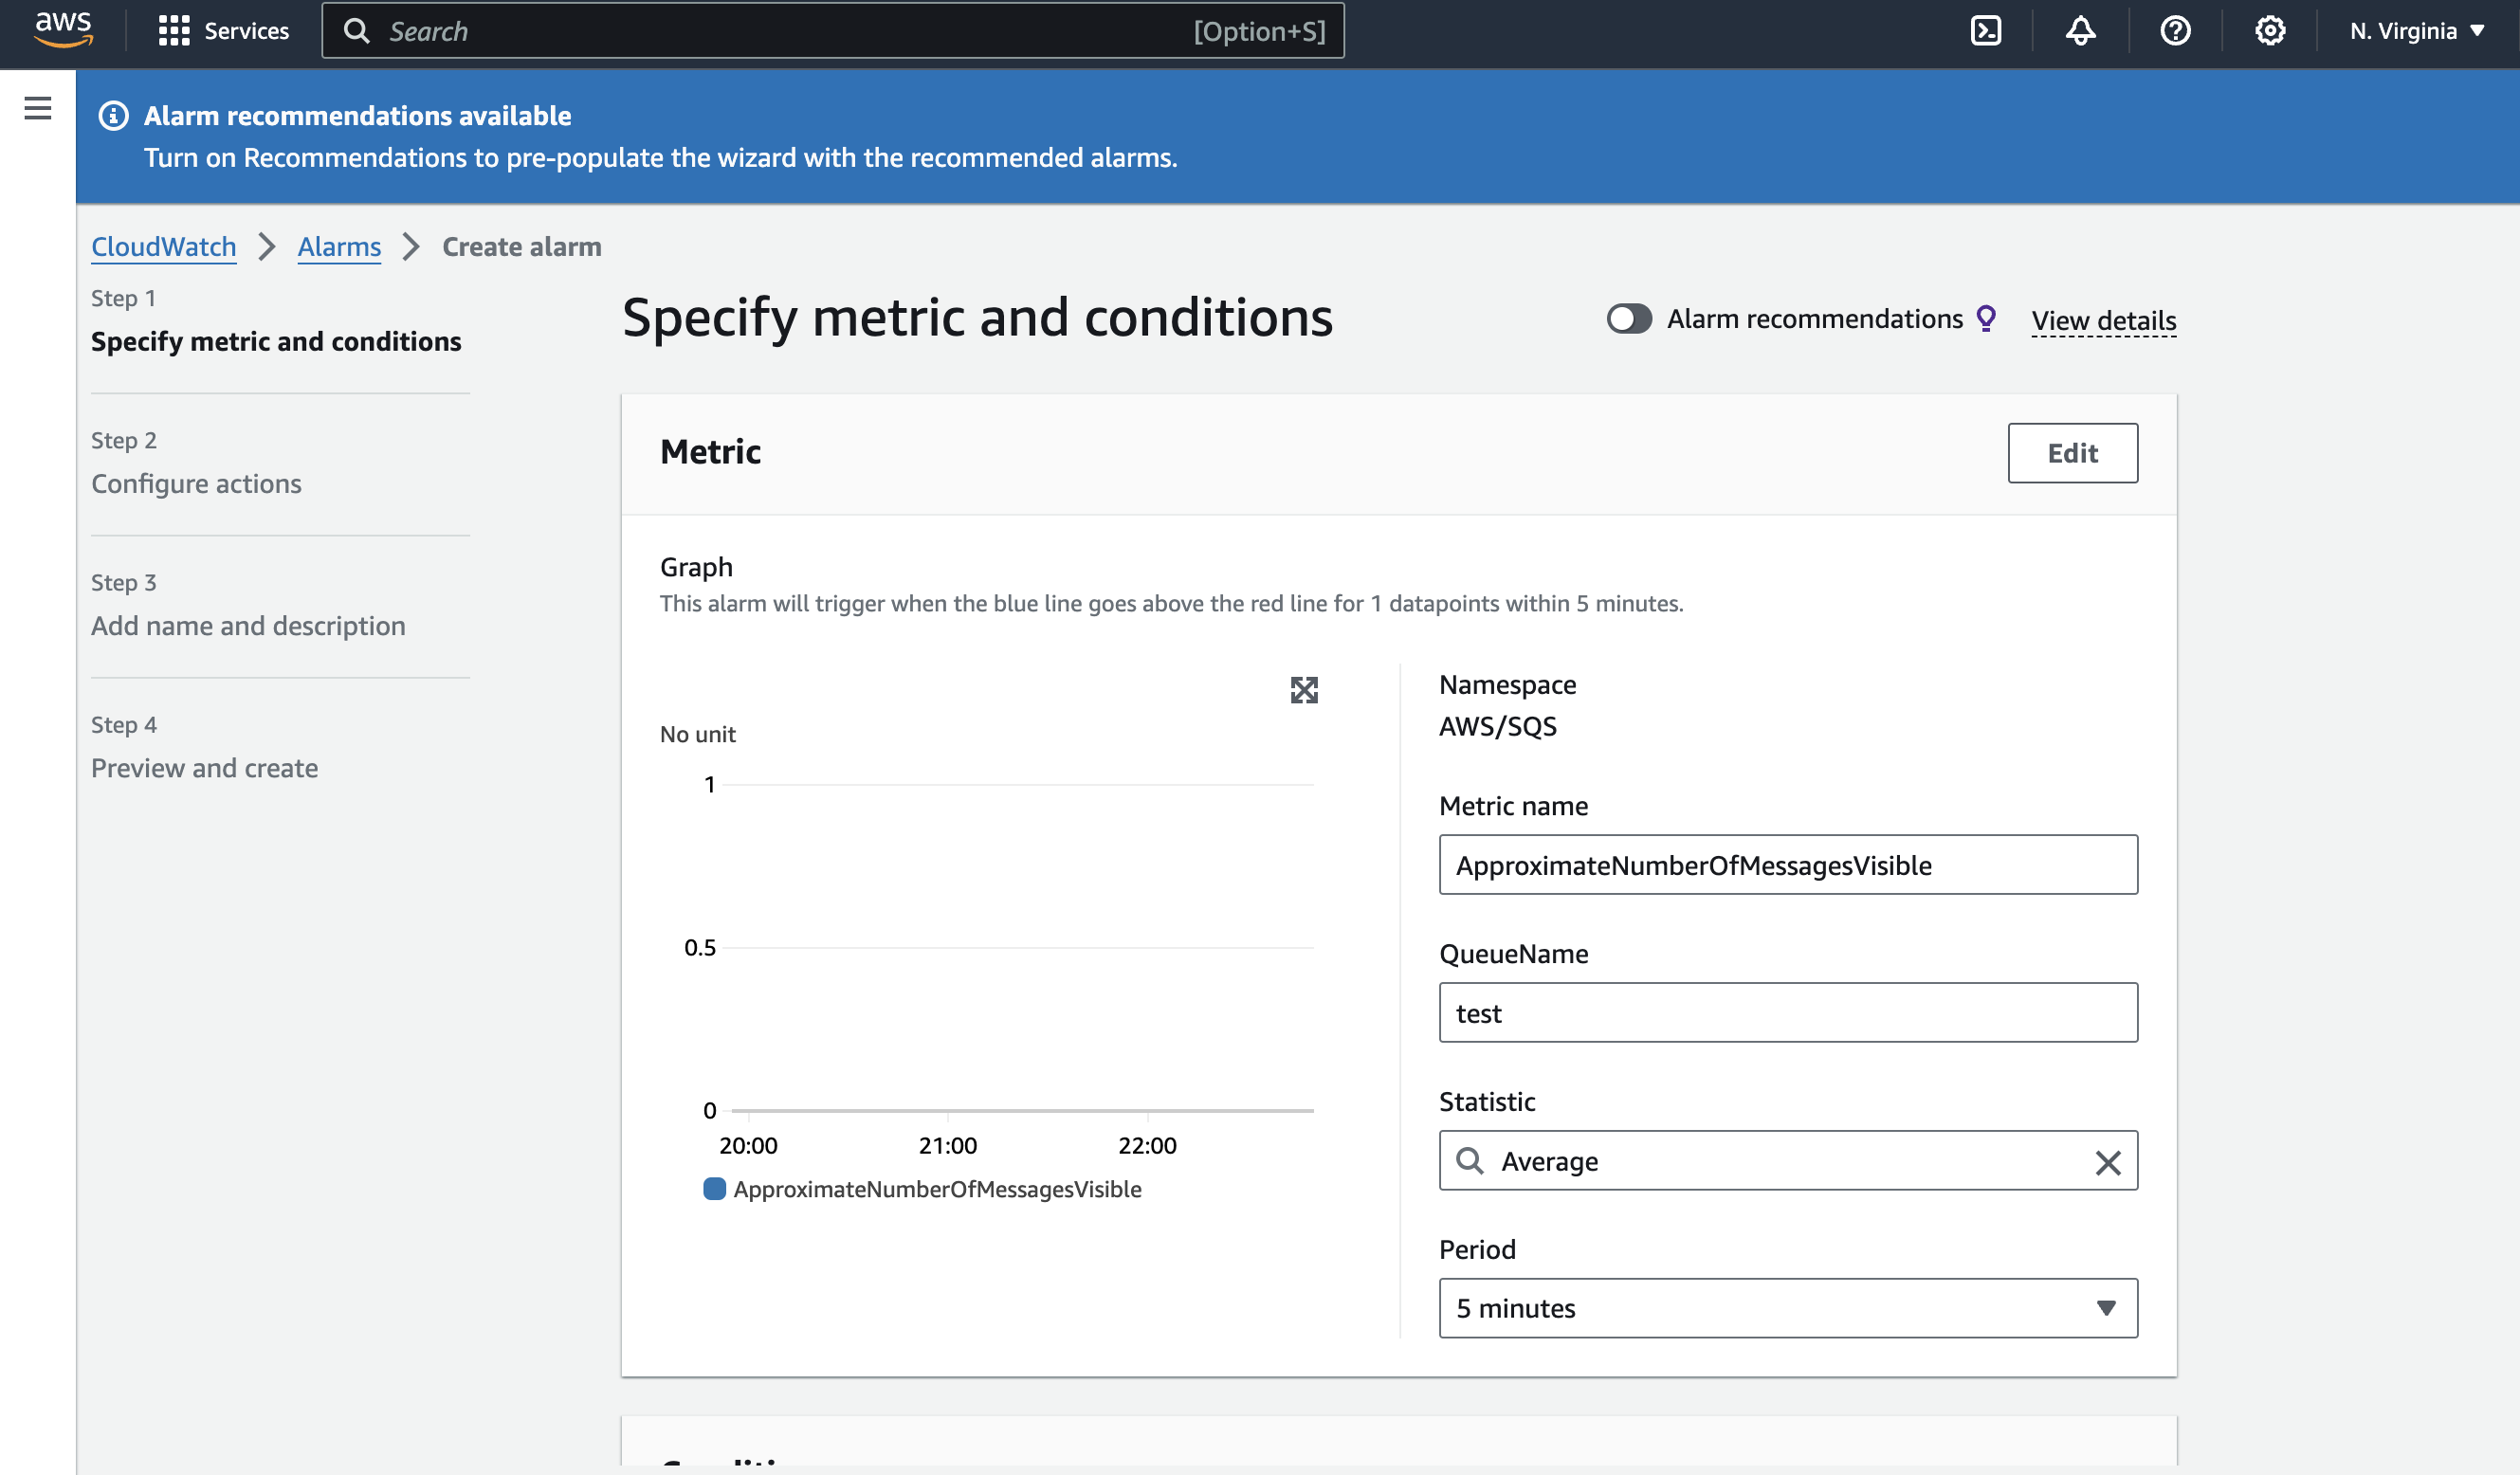
Figure 6: CloudWatch alarm creation page
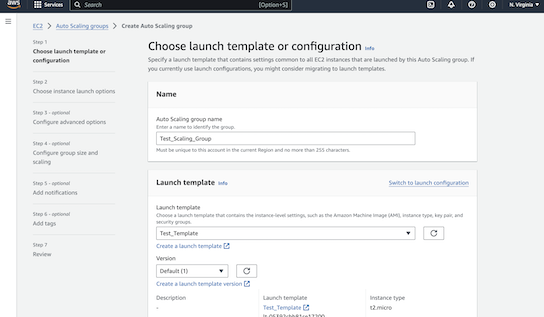
Step 4: Create an Auto Scaling Group
1. Go to the auto-scaling console:
- Navigate to "Auto Scaling Groups" under the EC2 service.
2. Create a new auto-scaling group:
- Click "Create Auto Scaling group."
- Select the launch template or configuration created in Step 2.
- Specify the Auto Scaling Group name and the VPC/subnet.
- Set the desired capacity, minimum, and maximum number of instances.
- Click "Next" to configure scaling policies.
3. Configure auto-scaling policies:
- In the Auto Scaling Group creation process, attach both CloudWatch alarms you created.
- Define the scaling actions:
- Scaling Up: Add instances when the first alarm triggers.
- Scaling Down: Remove instances when the second alarm triggers.
- Ensure that the scaling actions are set to match your desired thresholds for cost-effectiveness and performance.
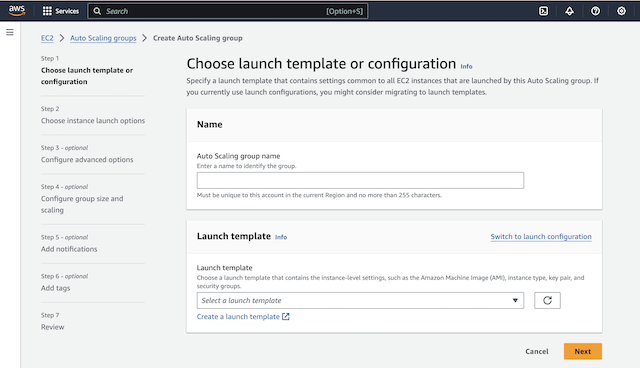
Figure 7: Auto Scaling Group Creation Page
Step 6: Test the Auto Scaling Group
- Send messages to the SQS Queue:
- Manually send a few messages to the SQS queue to simulate a workload.
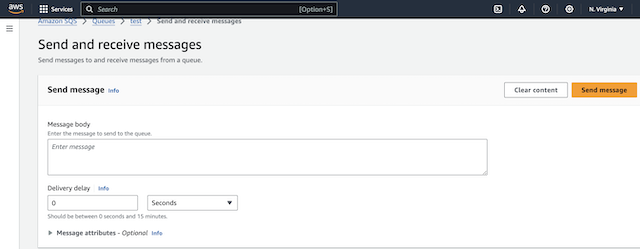
Figure 8: Send SQS message page
- Monitor the scaling:
- Check the Auto Scaling Group to see if it adds instances as the queue size increases.
- Observe if the system scales down correctly when the number of messages decreases.
Conclusion
Implementing dynamic scaling based on Amazon SQS messages greatly improves the reliability, scalability, and cost-effectiveness of your AWS environment. By adjusting resources automatically according to real-time demand, you ensure that your infrastructure is always appropriately sized, avoiding both excessive and insufficient resource allocation. This approach not only enhances user experience but also supports business growth by adapting seamlessly to changing workloads.
A major benefit of this strategy is its positive impact on energy efficiency and sustainability. As companies increasingly prioritize reducing their carbon footprint, focusing on energy efficiency becomes essential. By scaling resources up only when needed and scaling down during quieter periods, you cut down on unnecessary energy use. This not only helps lower costs but also reduces your environmental impact, aligning with broader goals of sustainability.
In today's world, where being environmentally conscious is crucial, adopting energy-efficient practices is key. Dynamic scaling based on SQS messages helps your AWS environment run more sustainably by matching energy use closely with actual demand. This careful management of resources leads to reduced carbon emissions and supports the global effort toward greener technology solutions.
Looking ahead to Part 2, we’ll tackle the challenges of using basic SQS metrics for dynamic scaling. Simple metrics, like the number of messages in the queue, often don’t fully capture the complexities of your workload. We’ll explore these limitations and discuss how to create more effective dynamic metrics. This involves using custom CloudWatch metrics, integrating multiple data sources, and applying advanced analytics to gain a clearer picture of your system's needs. By improving these metrics, you can refine your scaling strategies, optimize resource use, and enhance both cost efficiency and energy conservation.
Opinions expressed by DZone contributors are their own.

Comments