Oracle ERP Cloud ESS Jobs
This article discusses the steps to register an Oracle Cloud BI report as an ESS (Enterprise Schedule Service Jobs) and the various options available during registration.
Join the DZone community and get the full member experience.
Join For FreeIn this previous article, we learned how to design and Develop an Oracle Cloud BI Report. In this article, we will use a simple BI report to show AP invoices for a vendor. We will register this BI report as an Enterprise Schedule Service Job.
Log in to Oracle Cloud Applications and Go to Tools in the Navigator and click on Reports and Analytics. Click on Browse Catalog to launch the BI workspace.
Review Data Model:
Click on the data model and review the SQL statement as below.
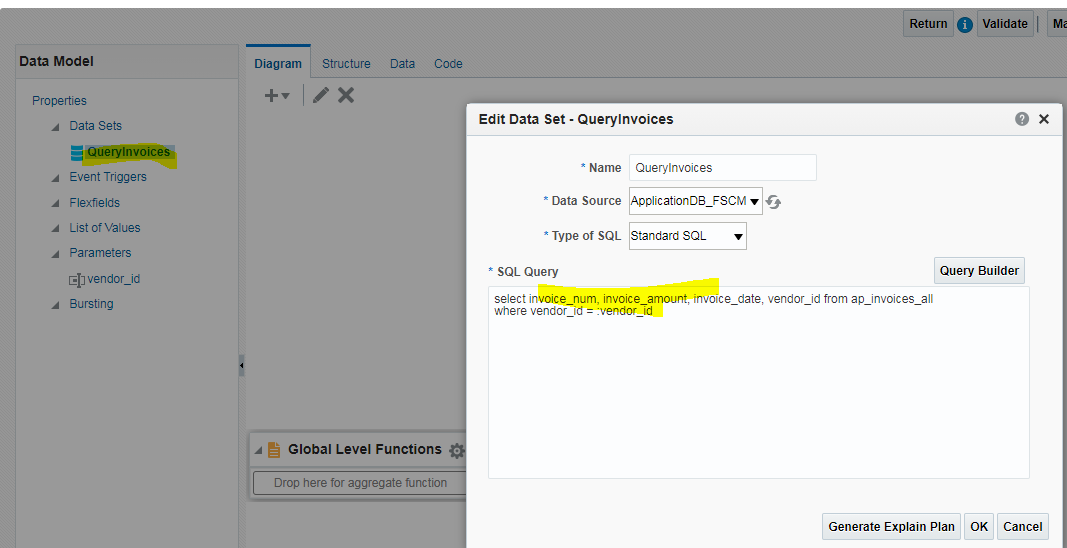
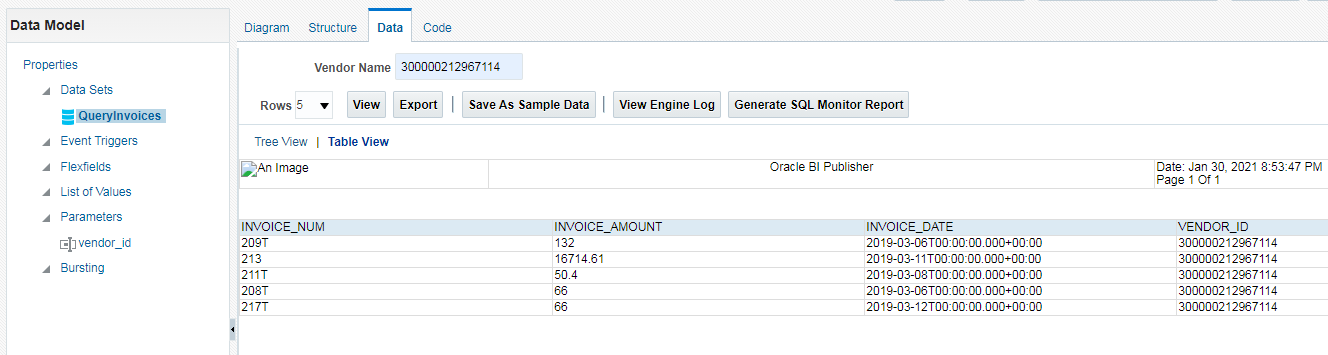
This SQL statement takes Vendor Id as input parameter to show the related AP invoices. When you click on view data - below results are displayed
Enterprise Scheduler Service (ESS) Job:
What is an ESS Job? Oracle Enterprise Scheduler Service and jobs provides a means to run and schedule a BIP/Binary script or plsql jobs in Oracle cloud environment. Once a Report is developed in OTBI (Oracle Transactional Business Intelligence), it can be set up as an ESS job and associated with a role in cloud, so that only authorized users can access it. For example, a Quarterly input and output tax report can be developed in OTBI and associated with a role, so only Tax manager can run the job and see the output. Additionally, ESS job can be included in a job Set, so that multiple reports can be executed on same time.
ESS Job Setup:
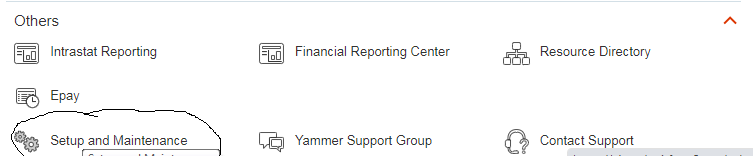
Login to Oracle Applications cloud and assign a role "Applications Implementation Consultant" to your profile. Once LDAP sync processes are completed, you should be able to see the below menu "Setup and Maintenance" under navigator in Others tab.
Click Setup and Maintenance to launch setup workbench. This workbench consists of all the configurations that can be performed in Oracle ERP cloud.
Click on the taskbar on the right side to search a task. Type "Manage Enterprise Schedule%" to find the below tasks.
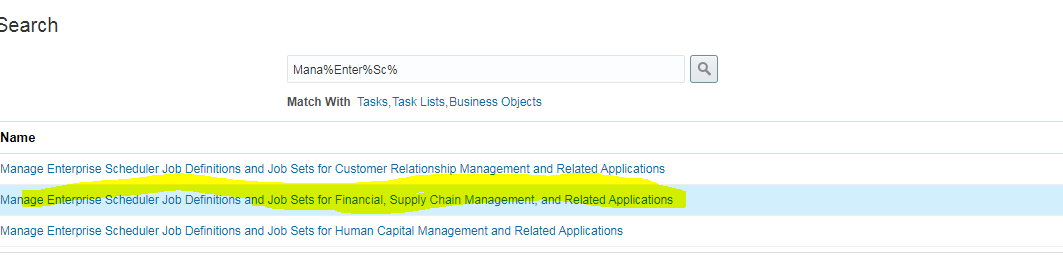
Click on Manage Enterprise Scheduler Job Definitions and Job Sets for Financial, Supply Chain Management, and Related Applications task to launch the Job definition screen.
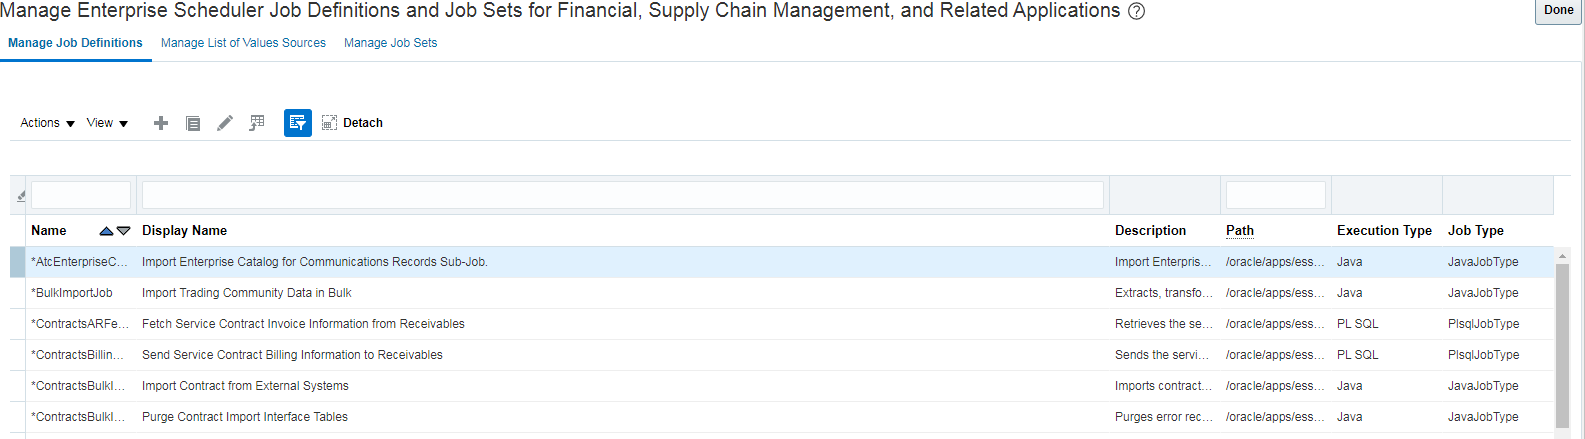
From this screen- you can search any of the seeded and custom jobs available in your environment.
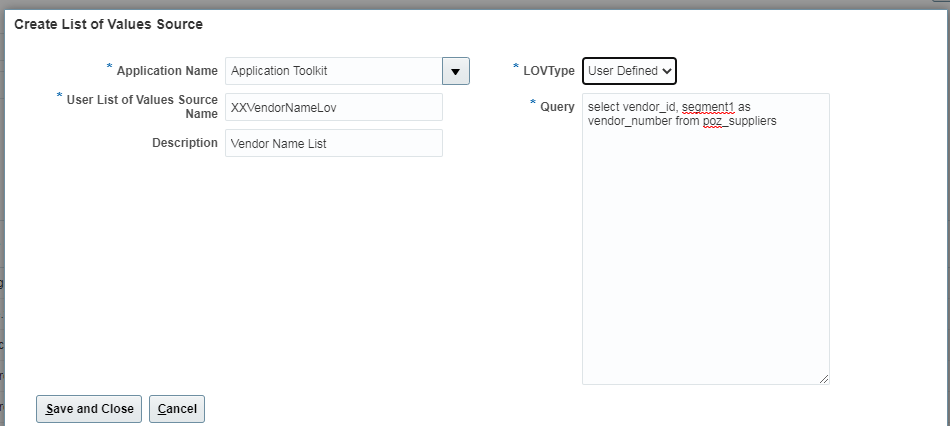
In our ESS job- we want to setup an input parameter to accept vendor ID. Vendor ID will be setup as a List of values (LOV), so only valid vendor can be selected.
Click on Manage List of Values Sources to setup a new List of values.

Click on + icon to add a new List of Value as below. Use below query to display vendor Id and Vendor Number in the list. You can also use predefined List of values provided by oracle.
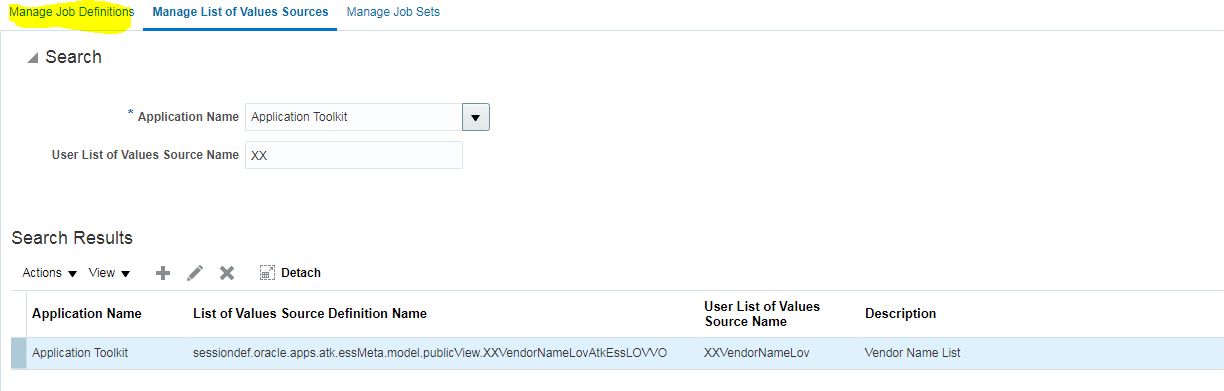
Click on Save and close to save the changes. You should be able to search the LOV in the screen by providing the name (XXVendorNameLov) as below:
Click on manage Job Definitions tab to create a new ESS job. Click on + icon to launch "Create Job Definition" window as below:
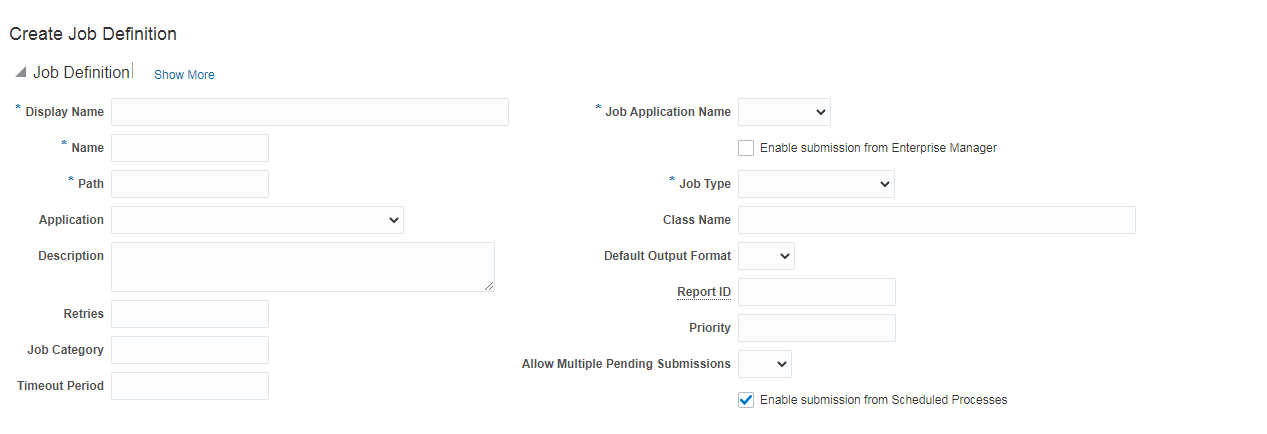
You can fill in the ESS job details as below:
- Report ID: /Custom/Demo1/Report.xdo (Path to your custom report)
- Job Type: BIPJobType (BI Publisher report)
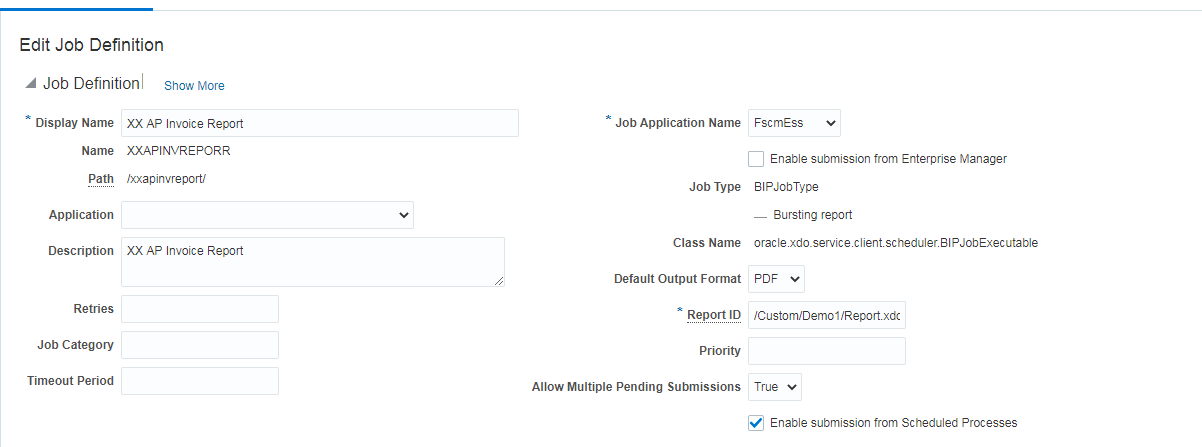
Make sue, "Enable submission from Scheduled Processes" is checked, so that this ESS job can be submitted from the "Scheduled Processes" menu (we will see in the next section).
Next step, is to add a parameter for this job. Click on + icon on the parameter tab to launch

Select the XXVendorNameLOV created in prior step and enter the details as below. In Attribute- select VENDOR_ID, so that ID is passed to the report.
Setup the parameter as Required. You can also setup a default value if required.
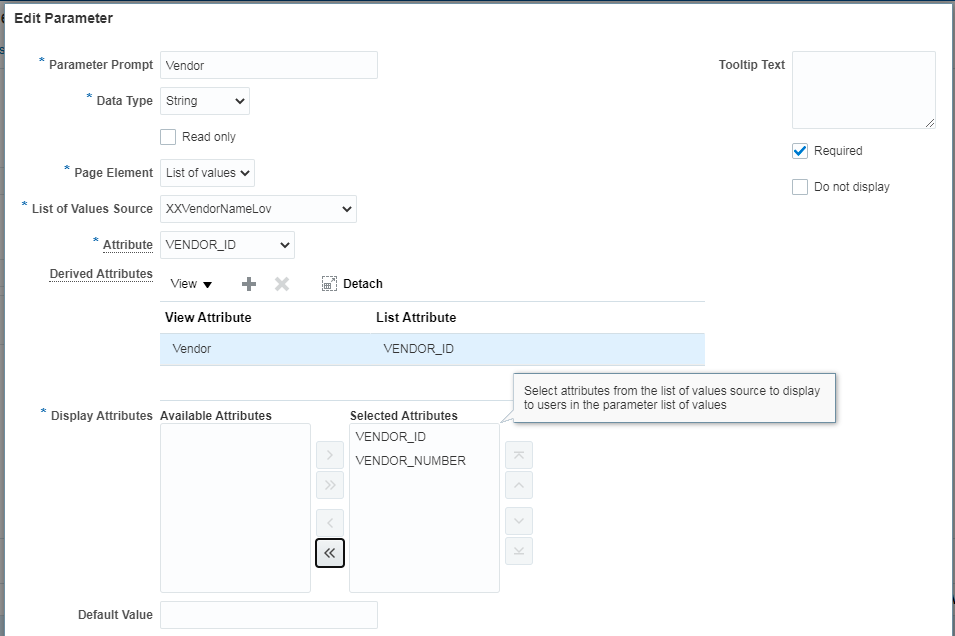
Click on Save and Close to save the parameter changes.
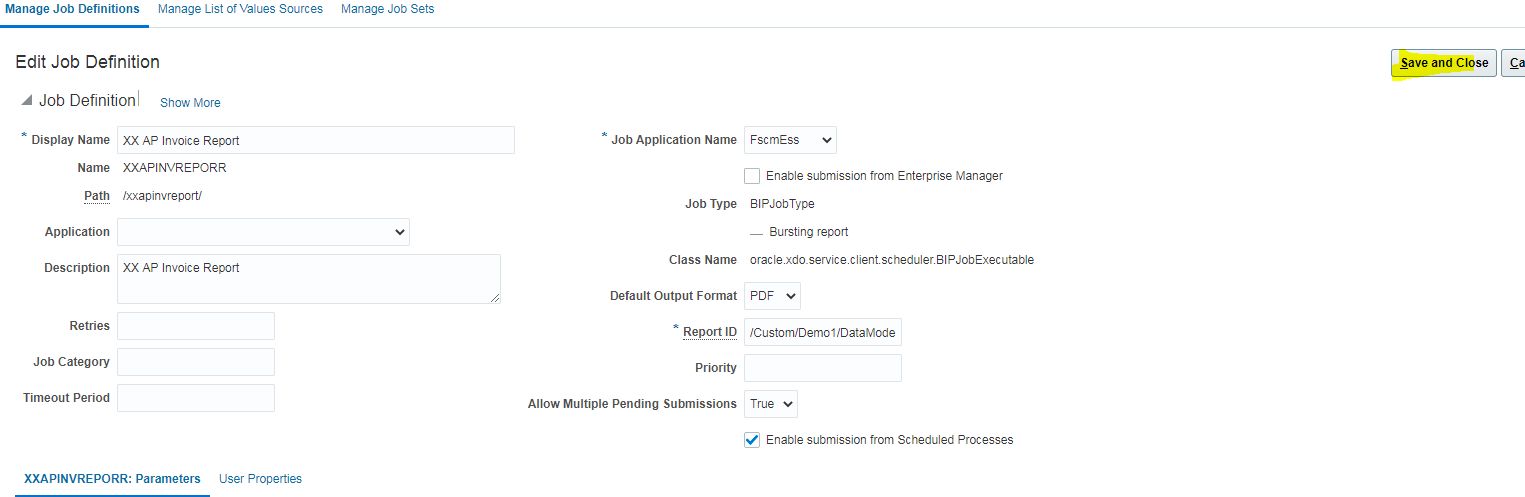
Review your report and click on "Save and Close" to close the ESS job window.
ESS Job Execution:
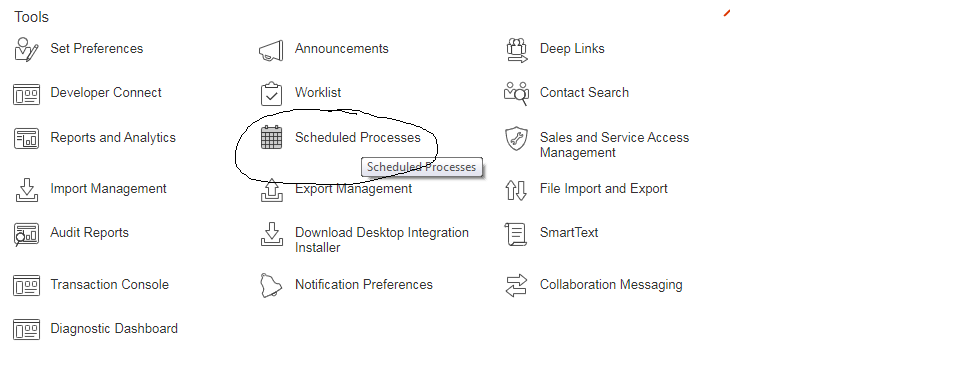
Now, we have setup the ESS job and next step is to test the ESS job. Click on Navigator-> Tools-> Scheduled Processes to submit ESS job.
Click on "Schedule New Process" to submit a job. Enter your report Name or select from the list.
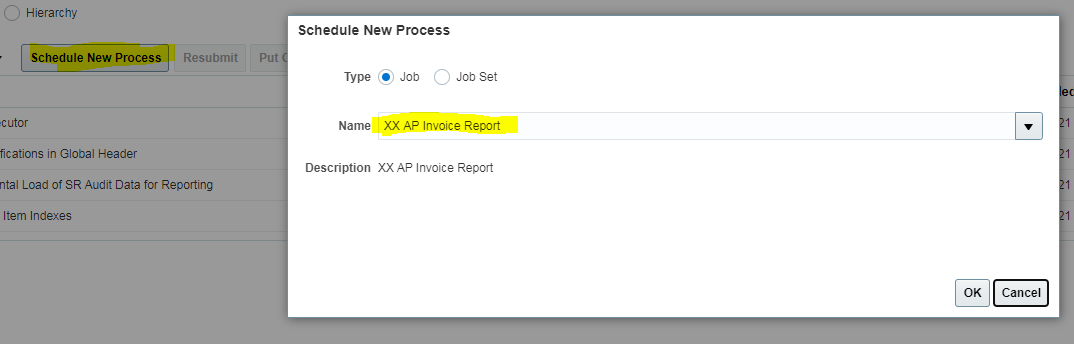
Click OK and you should be able to see the list of vendors.
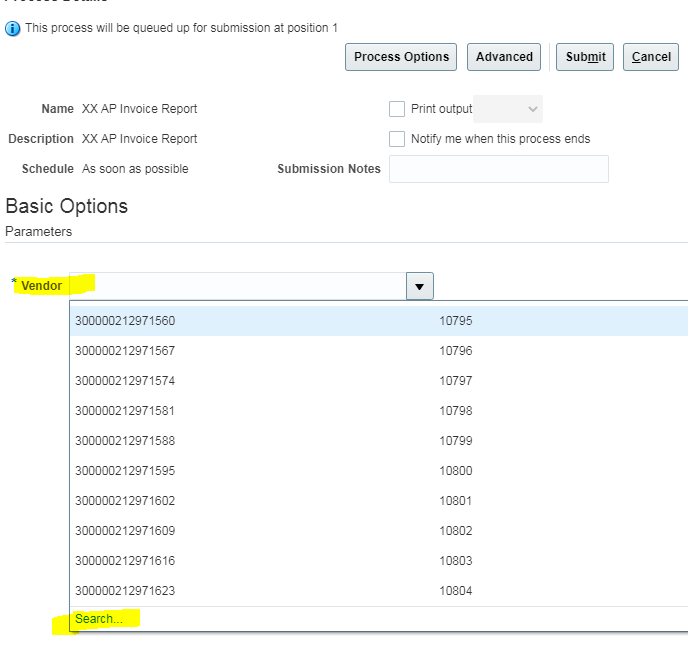
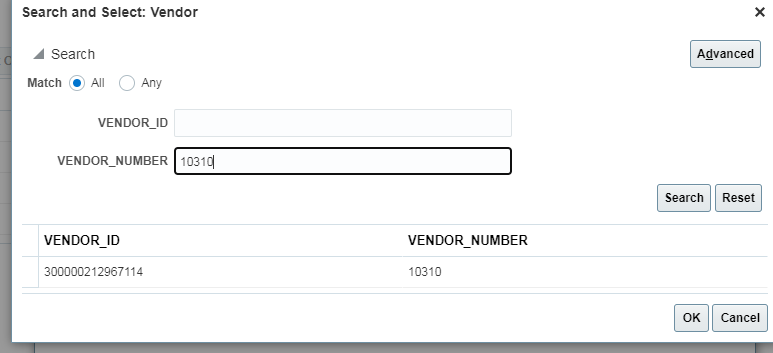
You can optionally use "Search" button to find a particular vendor as below:
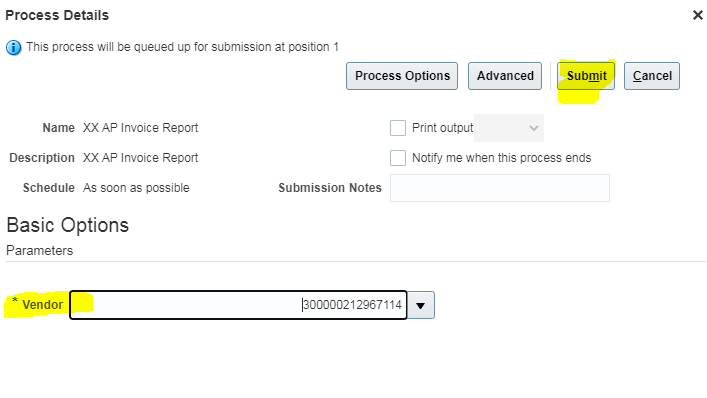
Notice the * (Asterisk) to show, its a required field. Click submit button to initiate the job. Once submitted, you should get a process ID to monitor the job.
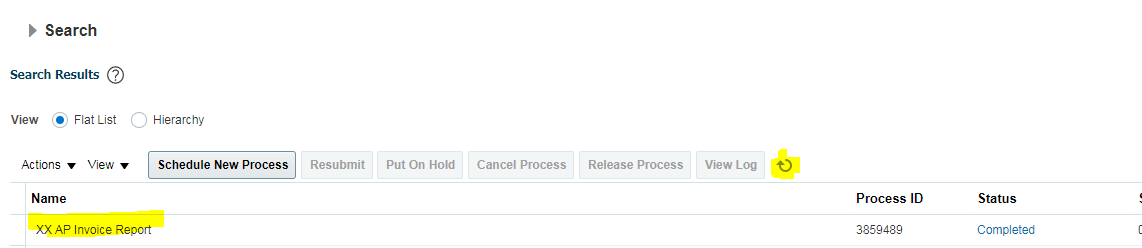
Click on refresh icon to check the status of job.
Once the job is completed, click on the record and see the output as below

You should be able to see the output in PDF format as below:

As you can see, we are able to successfully register Enterprise Scheduler Service job in Oracle ERP cloud so that any report can be exposed. In the next article, we will see how it can be associated to a role and various bursting options available.
I hope you will find it useful.
Opinions expressed by DZone contributors are their own.
Comments