Python OpenTelemetry Project Setup on Windows Platform Using WSL
OpenTelemetry is a collection of APIs, SDKs, and tools. Use it to instrument, generate, collect, and export telemetry data.
Join the DZone community and get the full member experience.
Join For FreeOpenTelemetry is a collection of APIs, SDKs, and tools. Use it to instrument, generate, collect, and export telemetry data (metrics, logs, and traces) to help you analyze your software’s performance and behavior.
OpenTelemetry code is supported by many popular programming languages like C++, C#/.NET, Erlang/Elixir, Go, Java, JavaScript, PHP, Python, Ruby, Rust, Swift, and Other languages.
This is the OpenTelemetry Python project setup documentation. This documentation is designed to help you understand how to get started using OpenTelemetry Python.
This doc/guide is for a Linux environment (WSL2) running on the Windows platform. For more information about WSL2, refer to the below URL:
Windows Subsystem for Linux Documentation | Microsoft Learn
Step 1: Install WSL2 or WSL2+ Rancher Desktop
Installation steps are given in the Appendix. You must refer to them. Once installation is done, go to the next steps.
Step 2: Open Ubuntu on Your Machine and Set the Local Port
Open Ubuntu on your machine and set the local port as below process:
Inside Ubuntu, run the command:
sudo nano /etc/resolv.conf
Then, set the WSL configuration servers as below:
nameserver 8.8.8.8 nameserver 4.4.4.4
After that, save this modified buffer.
Step 3: Running Backstage Application in WSL2
Fork the below git repository in your personal git account.
Then, cloning the backstage project:
Run git clone.
The cloned code will be available in the Linux (WSL2) platform.
Step 4: Create a Virtual Environment
First, create a virtual environment for the project.
Virtualenv is a tool to set up Python environments. Since python3.xx, a subset of it has been integrated into the standard library under the venv module. To install Venv to host Python, run this command in the terminal:
pip install virtualenv
For more step-by-step details, refer to the below article:
How to Set Up a Virtual Environment in Python – And Why It's Useful (freecodecamp.org)
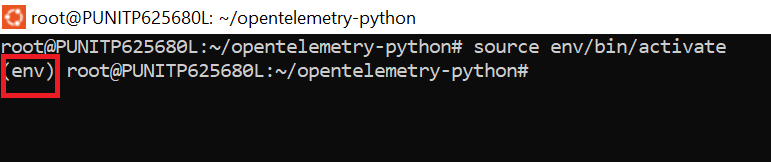
Note: Never forget to activate the virtual environment using the command below.
source env/bin/activate
After activating the environment, the Ubuntu terminal looks like the one below, in which the env has been mentioned.
Step 5: Open Project in Editor and Connect VS Code Editor to WSL
If we must see the project coding part, then we need a Python editor. You can use any editor like PyCharm Visual Studio as per your comfort.
Here, we are going through Visual Studio. You can download Visual Studio's latest version .exe file and install it.
Once successfully done, the visual studio is installed, and then the project is opened inside it.
Once this has been opened, then have to connect the WSL remote in the VS code editor and click on Open a Remote Window option as per below:

First, click on the Windows remote button, then click on the connect to WSL option as shown in the above fig. Once the VS code editor connects to WSL, open a project folder using the project path:
\\wsl.localhost\Ubuntu\root\opentelemetry-python
As shown in the figure below.

After that, run the project using the VS code editor terminal or Ubuntu terminal.
Before running the code, never forget to activate the virtual environment using the below command-
source env/bin/activate
Then set path in the terminal and activate the virtual environment like the below: 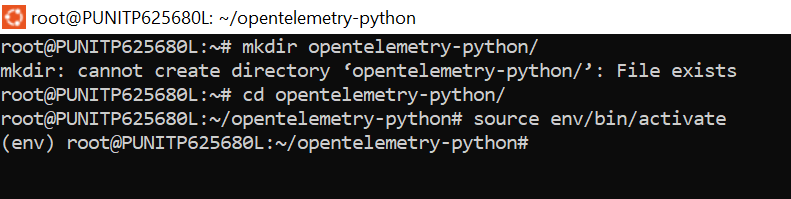
Step 6: Run Code in VS Editor
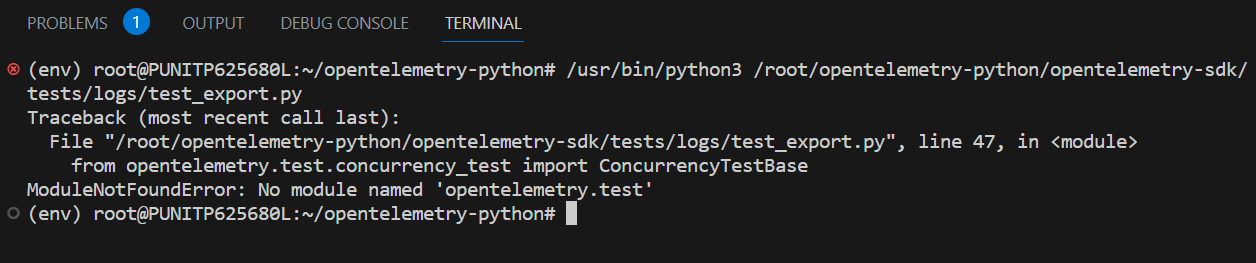
When trying to run any file, then facing some error in the initial phase like ModuleNotFoundErroras below:

Then, as per the git repository README.md file, you have installed all packages and modules.
First, check and install requirements.txt file modules, which are already available in the repository, using the below commands:
pip freeze > dev-requirements.txt
pip install -r dev-requirements.txt
pip install -r docs-requirements.txt
pip freeze > docs-requirements.txt
After that, if you face the same issue, then install as per the error or required module.
e.g., If facing issues like:
Then use the below command:
sudo apt-get install python3-opentelemetry
OR
pip3 install opentelemetry --force-reinstall --upgrade
If that issue is not resolved, then you must purge the cache using:
pip cache purge
Again, go through step 6.
As per the project requirements, we must install many modules one by one.
Once you complete that installation, you can check your installed environment using:
pip list
Finally, use any test case file from the project and try to run it, as shown in the figure below. If it runs successfully without generating any error, that means the code setup in a local machine is successfully done.

Appendix
Install WSL Command
Now, you have everything you need to run WSL with a single command. Open PowerShell or Windows Command Prompt in administrator mode by right-clicking and selecting "Run as administrator," enter the WSL —install command, then restart the machine.
wsl --install
For more steps to install LINUX on Windows with WSL, refer to the URL: Install WSL | Microsoft Learn.
After successfully installing WSL2, go to the Turn Windows feature on or off and select the following checkbox to be enabled.

wsl –set-default-version-2
Step To Installing Ubuntu
Run the following command in PowerShell to check Ubuntu is available in WSL2.
wsl –install -d Ubuntu-22.04 to install the latest version of Ubuntu on your machine.
Run Ubuntu once it’s installed, then set up the Unix name and password to create an account.
To enable Ubuntu to access the internet, edit the following file using the below command:sudo nano /etc/resolv.conf
Add Google DNS to the file to resolve the connectivity issue.

Now Ubuntu will have access to the internet that can install software like yarn, node, git, etc.
Installing Rancher Desktop and Setting It to Ubuntu
Rancher Desktop is delivered as a desktop application. You can download it from the releases page on GitHub and install it as per the instructions given on Installation | Rancher Desktop Docs.
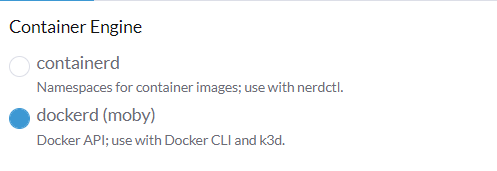
While installing the Rancher desktop, it will ask for the two options contained and docked; choose docked to access docker API and images.
It will automatically install the Kubernetes cluster and configurations.
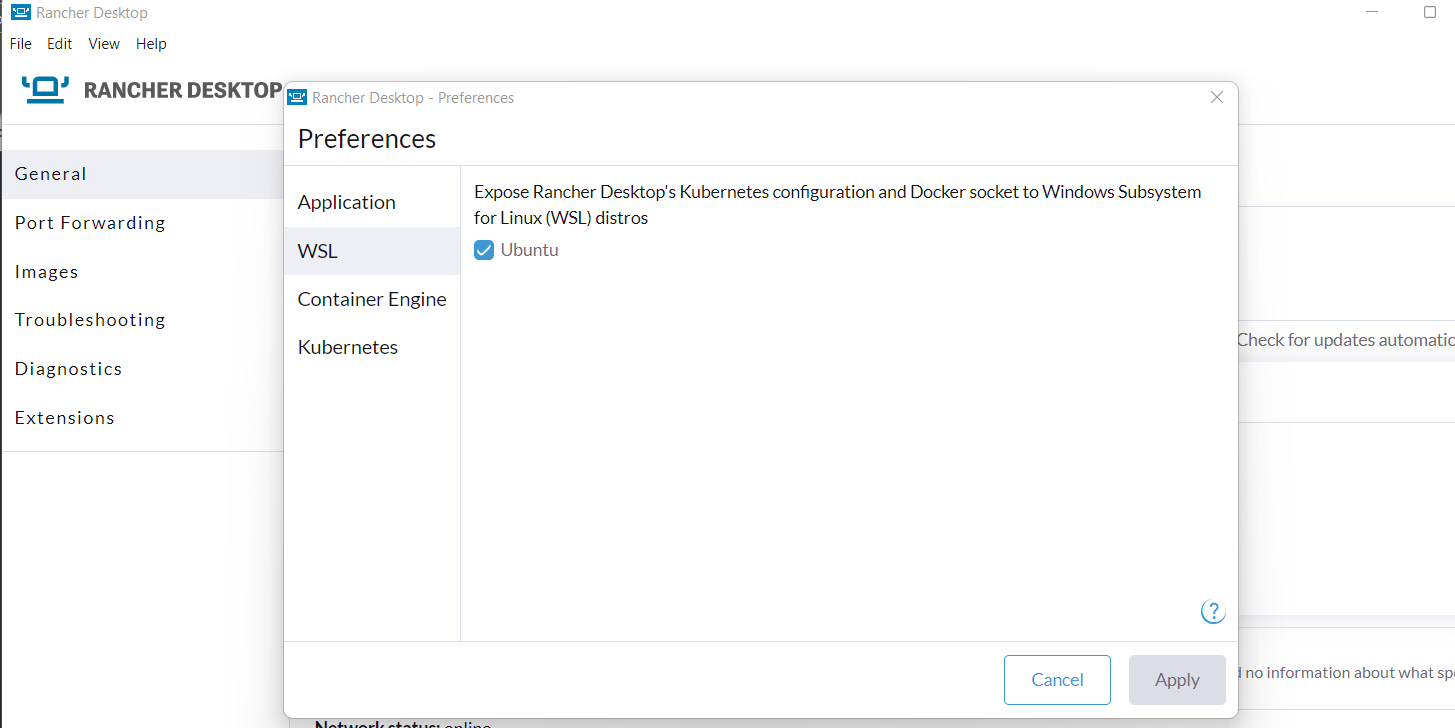
Go to settings in Rancher Desktop and enable the following option to set Ubuntu access with Rancher Desktop.
After that, run the Open Telemetry Application in WSL2.
Opinions expressed by DZone contributors are their own.
Comments