Creating an Algorithm That Eliminates Red-Eye
Using machine learning, you can create an algorithm that automatically fixes red eyes and restores colors in your photos.
Join the DZone community and get the full member experience.
Join For FreeA few months ago, Epson’s new scanner FastFoto FF-640 (positioned as “the first professional photo scanner for non-professionals”) hit the market. We talked to an expert from the team who delivered desktop software for the scanner to find out what stands behind this tagline.
Cross-device department specialists at Softeq, a software development company in Texas, were working on software for Windows and macOS supplied along with the scanner for almost a year. Automatically installed upon device connection with a computer, the app enables fast batch scanning of analog photos, automatic scan processing, and convenient image storage and sharing in digital galleries under the user’s account in Facebook, Dropbox, and Google Drive.
This is the story of digital imaging R&D with a focus on algorithm development for photo enhancement, color restoration, and red-eye reduction and different approaches to automate image processing to perform its magic with zero user involvement.
Color Restoration Algorithm
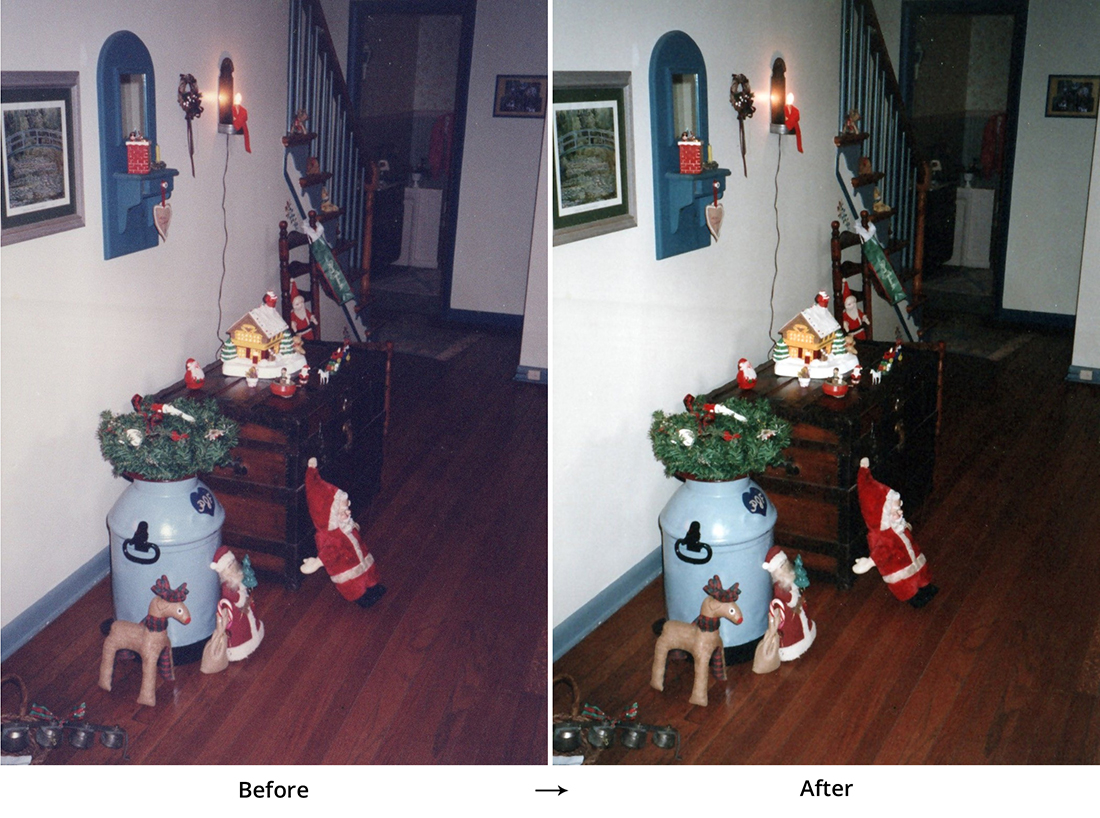
The problems of photo paper discoloration, yellowing, and fogging are the most common headaches of old pictures. The algorithm we developed restores the colors of the photo fully as if it were freshly printed.
Auto-Enhancement Algorithm
This technology is intended to make the photos more contrasting and colorful. Its functionality is analogous, to some extent, to Adobe Photoshop’s Retouch tool. Unlike Photoshop, the user does nothing manually.
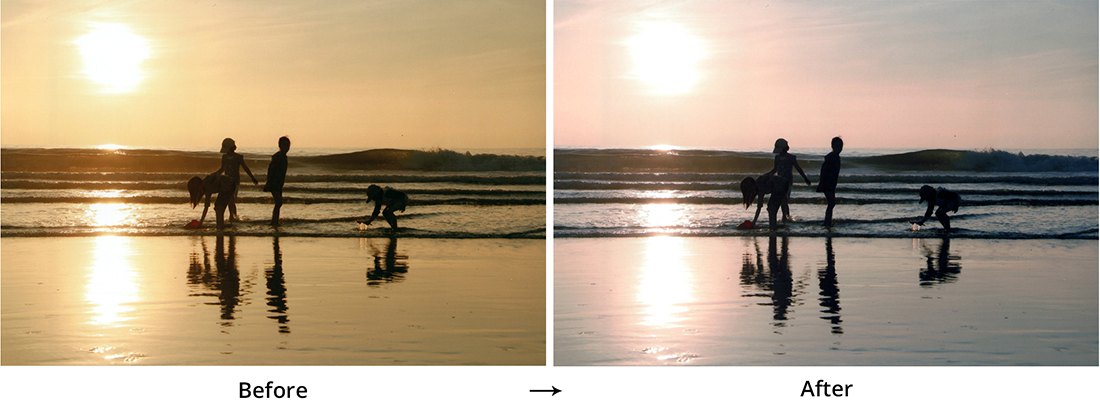
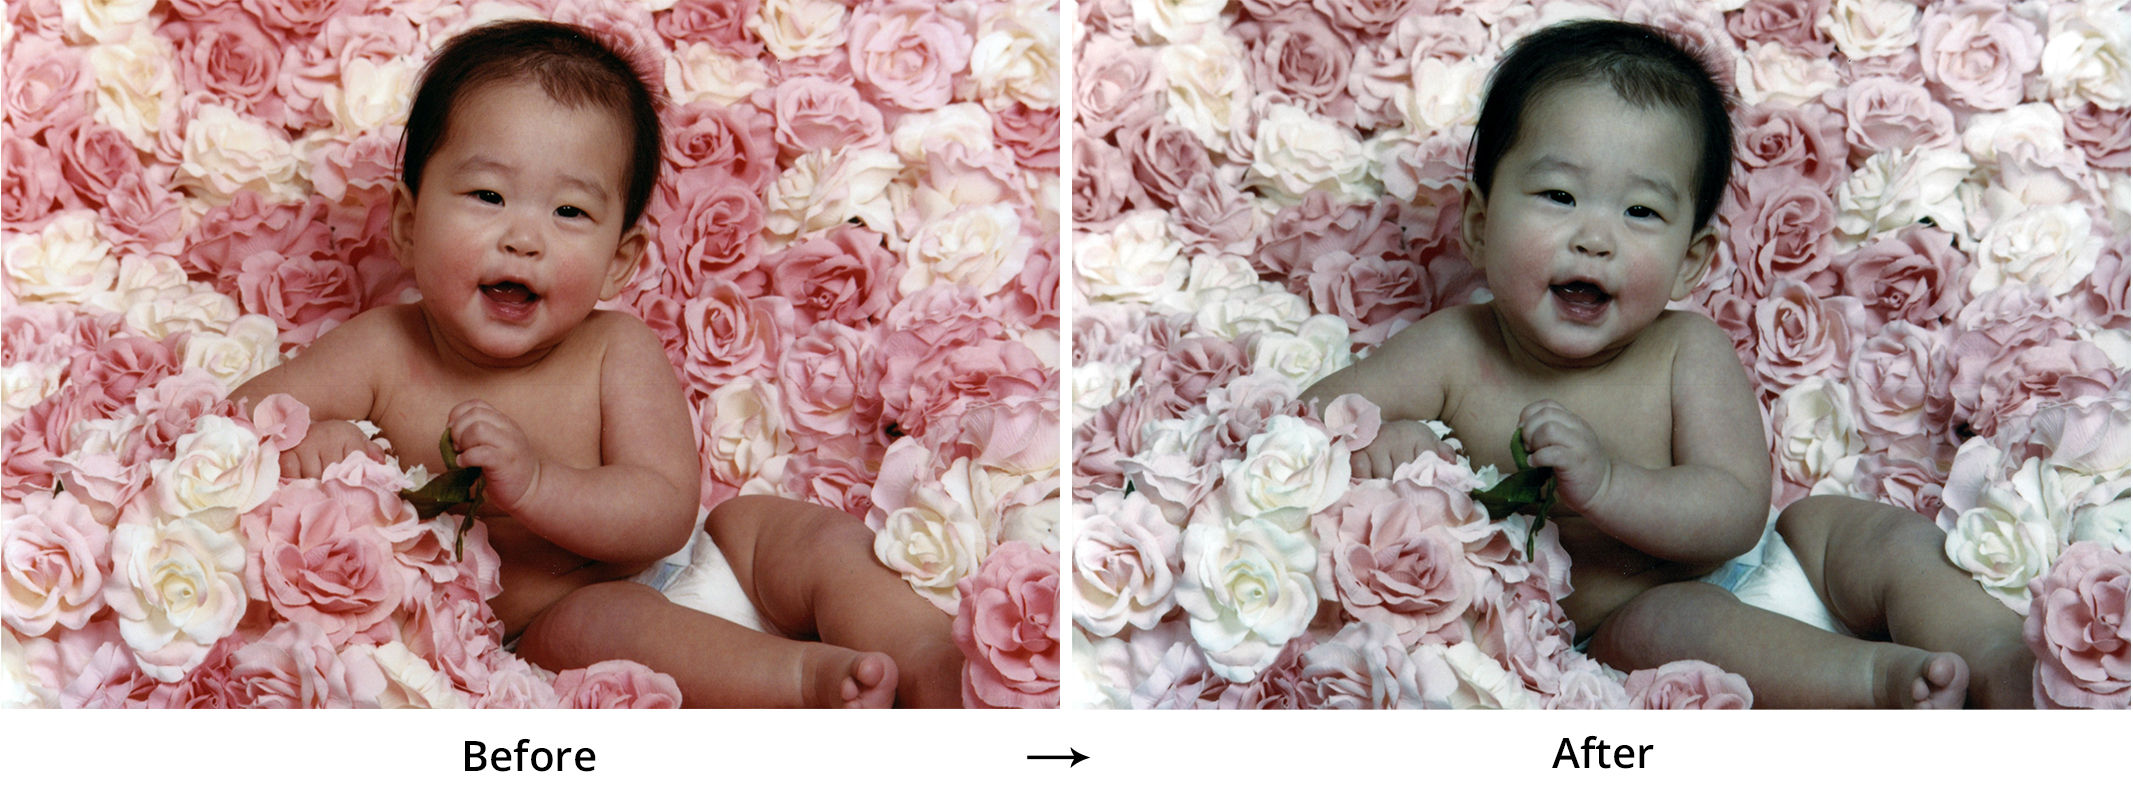
Both of these algorithms are effective in the majority of cases. Still, when it comes to specific scene types or special occasion lighting conditions, the algorithm may fail you. For example, in the improved “technically perfect” sunset photo below, we see all in blue, unnatural colors. According to color histograms, the new (after) image is ideal, but human eyes and brains see it differently. And the lively photo of the Asian baby on the bed of flowers was treated by the algorithm as “too red,” which spoiled the cuteness of the photo.
However, in the majority of cases, both algorithms work properly. If you don’t like the corrected results, there is the undo button. Use it to cancel all the corrections made and just have a “bare” scan.
Red-Eye Reduction
It sounds surprising, but there are no fully functional red-eye reduction services that are fully automated on the market. At least, we'd never found them at the moment before the scanner hit the shelves. One can recall some names, but all of them demand active user involvement. You have to mark the eyes on the face manually and then click right in the center of the red pupil to make the algorithm start processing the image. If you have thousands of photos for scanning, it would be too tedious. Moreover, these products work properly only for high-res "en face" photos with vampire red eyes. An unlikely combo, huh?
Let’s think of someone with four big boxes of old photos for digitizing and no clue about graphic design and the like. She just wants to place photos into a feeder and leave the rest to “sophisticated machinery.” Her reasonable desire makes the developers’ task much more complicated.
We developed fully automated scanning and image processing technology based on custom algorithms for very effective red pupil retouch. To put it simply, the algorithm involves the following stages:
Face recognition > eyes detection > pupil detection > pupil retouch.
Step 1: Find the Face
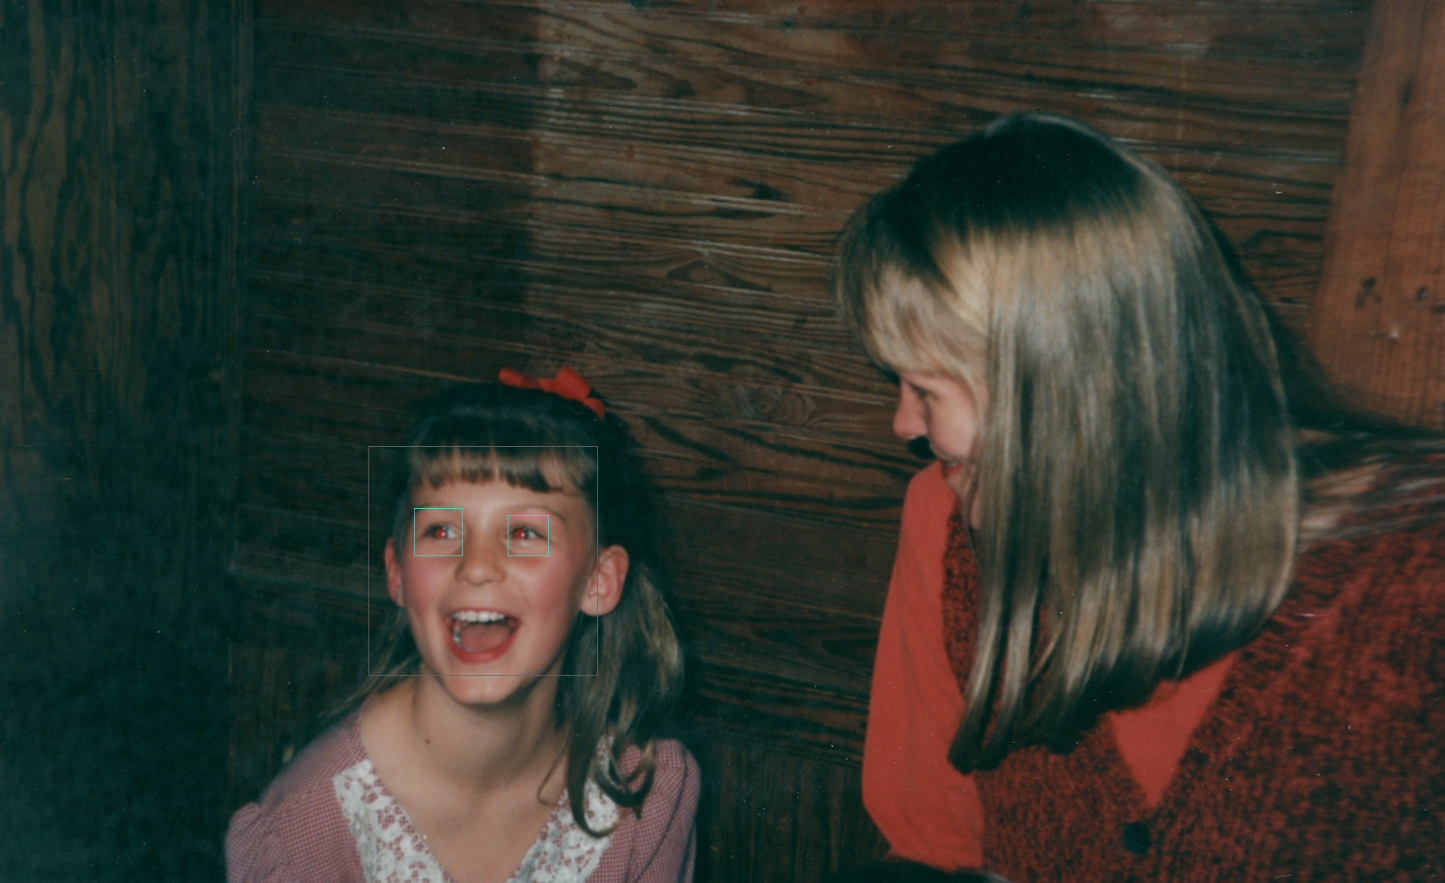
It appeared that the algorithm’s efficiency was vulnerable to photo orientation. To ensure flawless detection of faces in photos, at first, we had to identify the ideal photo positioning. We rotated each scan three times and chose the best one — the one in which the algorithm found the largest number of correct faces with two eyes.
Step 2: Find the Eyes
For face recognition and pupil detection, we use OpenCV library, but its pattern recognition algorithm has certain limitations. If the head of the person in the photo is tilted or turned, then the face becomes unrecognizable. At the same time, OpenCV easily recognizes and skips the eyes of animals and toys. For example, we experimented with a photo of a person hugging a six-foot puppet of Goofy. In OpenCV’s opinion, Goofy had no eyes. Quite good news! (Bot for Goofy, apparently.)
On the other hand, the configuration of OpenCV’s eyes detection algorithm is painful. Originally, this algorithm implies that the programmer can adjust accuracy range for pattern recognition. We faced a dilemma — depending on the preset accuracy levels, the algorithm found either only the most “obvious” eyes (high level of recognition accuracy) or, on the contrary, anything vaguely resembling real eyes, even Goofy’s plastic buttons (low level of accuracy).
Our recognition model is based on the following principle: Every face has two eyes — one on the left and the other on the right. Sounds obvious, even ridiculous, to a person, but not evident to a computer. This rule proved itself as a universal compass for eyes detection purposes. Because of the “accuracy range dilemma,” we had to use an additional rule: Divide the face vertically into two and look for an eye on each half. If there were more than one “eye” on the side (say, five), we compared their size and positioning. If four of them were situated close to each other and the fifth was miles from nowhere, then we suggested that the latter was an outsider and our “true eye” was the one in the cluster.
Despite the fact that our team has machine learning expertise, we didn’t train a neural network for pattern recognition in this project. Instead, we used OpenCV cascades that proved to be most effective in this particular case:
haarcascade_frontalface_alt.xmlfor face recognitionaarcascade_eye_tree_eyeglasses.xmlfor eyes detection
Among the OpenCV’s pattern recognition cascades, you can find Cuda supporting ones. Keep in mind that some devices may have no video card drivers for Cuda; therefore, consider using Cascades without Cuda support.
Steps 3 and 4: Find and Retouch the Pupil
The task looked simple. We already knew where the eye was and needed only to find a round spot in the center of it. However, the devil is in the details. In old analog, photo pupils appeared to be square or triangular — anything but round. This fact made us add the Color factor.
RGB vs. HSL and Histograms Equalization
Our immediate decision was to use the RGB color model. It seemed ideal because it compares three main color channels: red, green, and blue. If the prevailing tone is Red, it means you’ve found your red pupil. Early tests again ruined our game. On the scanned photos, pupil colors turned out to vary from orange to pink, what made pupil retouch very sporadic. The eyes looked like they had been bombarded with black paintball bullets. In fact, processed photos looked even worse than the originals.
Through trial and error, we finally came to the HSL (HSV) color model. This model enabled us to measure three basic characteristics of each color — hue, saturation, and luminosity. Due to the whole picture’s color pattern analysis, we found the Red color sector, measured its saturation and brightness, and compared the results to the averaged HSL metrics of the whole photo. As a result, we compiled the statistical cartogram, illustrating the difference between the red pupil and the rest of the picture.

To detect the red pupil accurately, we cropped the eye, analyzed it, and transformed the color pattern of the image in the following way. The more color of each pixel differed from the “ideal red,” the darker we painted it, and vice versa. Consequently, we got the “ideal red” distribution pattern for the eye and came over to the next stage: histogram equalization (to learn more, follow this link).
In short, histogram equalization is the analysis of the diagram, illustrating the picture’s color pattern. X-axis stands for all colors that exist numbered from zero (pitch black) to 255 (absolutely white) and Y-axis — for the density of each color in the picture. If the diagram is plain, even and “calm,” then the picture is very colorful and contrasting. On the contrary, if there are some spikes — few colors prevail over the others. In this case, the histogram equalization helped us find a spike of the red color.
Then, at the threshold stage, we were analyzing the gradients of the photo and iteratively getting rid of all the values, not exceeding the minimum threshold. It led to the introduction of the additional factor: dimness. We covered all the pixels dimmer than the threshold value with the white color. Then, gradually lifting up the threshold, we completed the black-and-white picture. Afterward, we updated this picture with outlines of the eye, found the round areas of the outlines and overlaid them on the threshold picture. Next, we analyzed the density of white pixels inside and around the circles and chose the one with the highest density value.

Visualization of thresholding stages
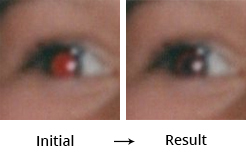
Finally, we used this circle to create a mask for pupil retouch. The result looks quite natural — see below.
Algorithm Fine-Tuning
The most challenging issues of this project concerned processing of images with people of different ethnicity. We tested our detection algorithm on photos of African-American and Indian people. The color of their skin naturally has quite a lot of red pigment making the process of red pupil detection more difficult. The HSL analysis of the whole photo helped us a lot in this case. We measured the average value of Red channel in the photo and then lifted up the threshold level — to find the pupil.
In fact, there are some eyes and pupil detection algorithms based on the skin color analysis. At the first stage, one can use skin detection algorithms, instead of face recognition technology — to narrow the eye search area. (To get acquainted with this algorithm, follow this link.)
This algorithm is the classics of computer vision. It implies that you need to train a convolutional neural network to recognize eye/red-eye visual patterns using the eye plus the skin images sample. The skin detection algorithm helps you find an area of skin where the eyes may be situated. After that, the neural network analyzes all the images of skin areas collected in the previous stage and detects the eyes on them (or not, if there are no eyes in the picture). This algorithm has a very strong advantage: It isn’t pegged to the whole face image. Even if part of the face is not visible, the eye detection algorithm remains fully operative.
Still, every medal has its reverse. Since this method is based on the whole picture’s color pattern, it’s very sensible to such image characteristics as color temperature and lighting quality. Bearing in mind that we speak about the processing of old photos’ scans — we couldn’t rely on such unpredictable factors because old photos may differ quite a lot in the same metrics from freshly printed originals.
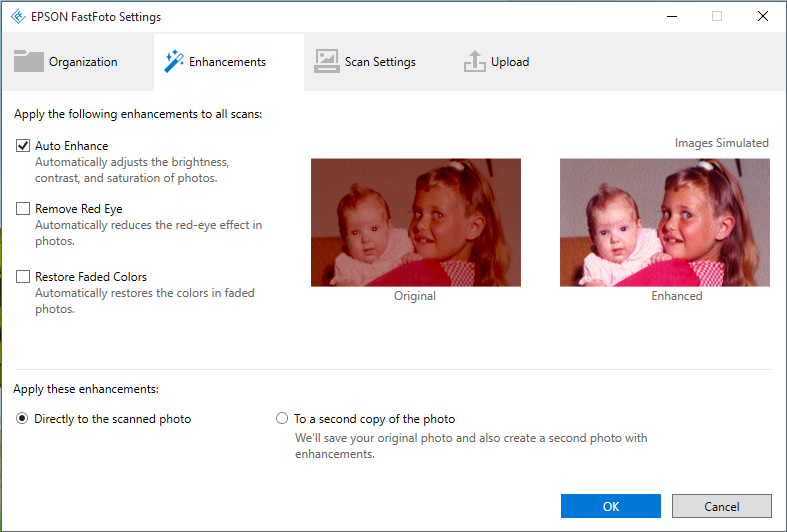
While developing the fully functional red-eye removal algorithm, we tested many different approaches (more than 20, in fact) and eventually improved the basic algorithm in many ways. Still, there is no faultless method, especially for the processing of low-quality photos. The resulting solution has 70% accuracy for 300dpi photo scans. If you increase the scan resolution to 600dpi, the accuracy automatically goes up, too. This result satisfied both software engineers at Softeq and product managers at EPSON.
Desktop Application Technology Stack
Programmed in .NET for Windows and Mono/Xamarin.Mac for Mac
WPF and Cocoa/Interface Builder for native UI
OpenCV- and ImageMagick-based image processing services programmed in C++
Connection with scanner via TWAIN-framework, using custom protocol
Windows Installer designed in Wix Toolset
Application is integrable with Facebook and Google Drive via REST API
Scripts for digital signature, components build automation, etc. programmed in Python, AppleScript, and Shell
And that's it!
Opinions expressed by DZone contributors are their own.

Comments