Running Selenium Tests in Jenkins
Wondering how to integrate Jenkins with Selenium WebDriver? This guide will help you run Selenium tests in Jenkins. Learn more.
Join the DZone community and get the full member experience.
Join For FreeDevOps, an organizational approach that has been used immensely for quicker development and deployment of applications, has been the latest technical buzz. Today organizations are adopting DevOps, as it promises to provide best practices starting right from planning and testing to deployment and monitoring. CI/CD tools like Jenkins play an integral role in allowing organizations to implement DevOps, and Jenkins integration with Selenium makes the entire process of Selenium test automation so much easier.
In this article, I will take you through a quick introduction to Jenkins & Selenium, followed by the method to integrate Jenkins with Selenium WebDriver. If you are already familiar with the concepts, you can jump to the section explaining Jenkins integration with Selenium directly.
What Is Jenkins?
Jenkins is an open-source DevOps tool that has been popularly used for continuous integration and continuous delivery processes. It is a Java-based application and platform-independent. It is a build tool; used for running builds from the source code repository, running unit tests, and sending the build reports to the respective member or team.
You can refer to our detailed guide on ‘What is Jenkins?’ for more information.
What Is Selenium?
Selenium is an open-source automation tool that has been widely used for testing web applications. It is easy to use, and it provides support forums, which makes it popular among the testing community. Selenium has four main components: Selenium IDE, Selenium RC, Selenium WebDriver, and Selenium Grid, designed and used for different purposes. Selenium provides cross-browser testing and parallel testing features, which allows the testers to execute their test cases in different operating systems and browsers, which ensures browser compatibility of the web application.
You can refer to our detailed guide on ‘What is Selenium?’ for more information.
How to Integrate Jenkins With Selenium WebDriver?
Now that I have introduced Jenkins & Selenium briefly, it is time to dive right into the integration. But, do you have it all set up in your system? Before we look into Jenkins integration with Selenium, let us quickly dive into Jenkins and Selenium’s installation and setup.
Steps to Download Jenkins
Step 1: To download Jenkins, you can click the download link on the Jenkins official website. The installation process is explained in detail here.
Step 2: Download this Jenkins.war file and place it in the desired path.
Step 3: Open the command prompt and navigate to the folder containing the war file.
Step 4: Enter the command java -jar Jenkins.war. This would start the Jenkins server.
Step 5: Jenkins would usually start in port 8080 by default. In case if the port is being used by any other service, an alternate port can be defined by using the below command
java -jar jenkins.war --httpPort=8081
Any available ports can be defined in the above command and can be used to start the Jenkins server.
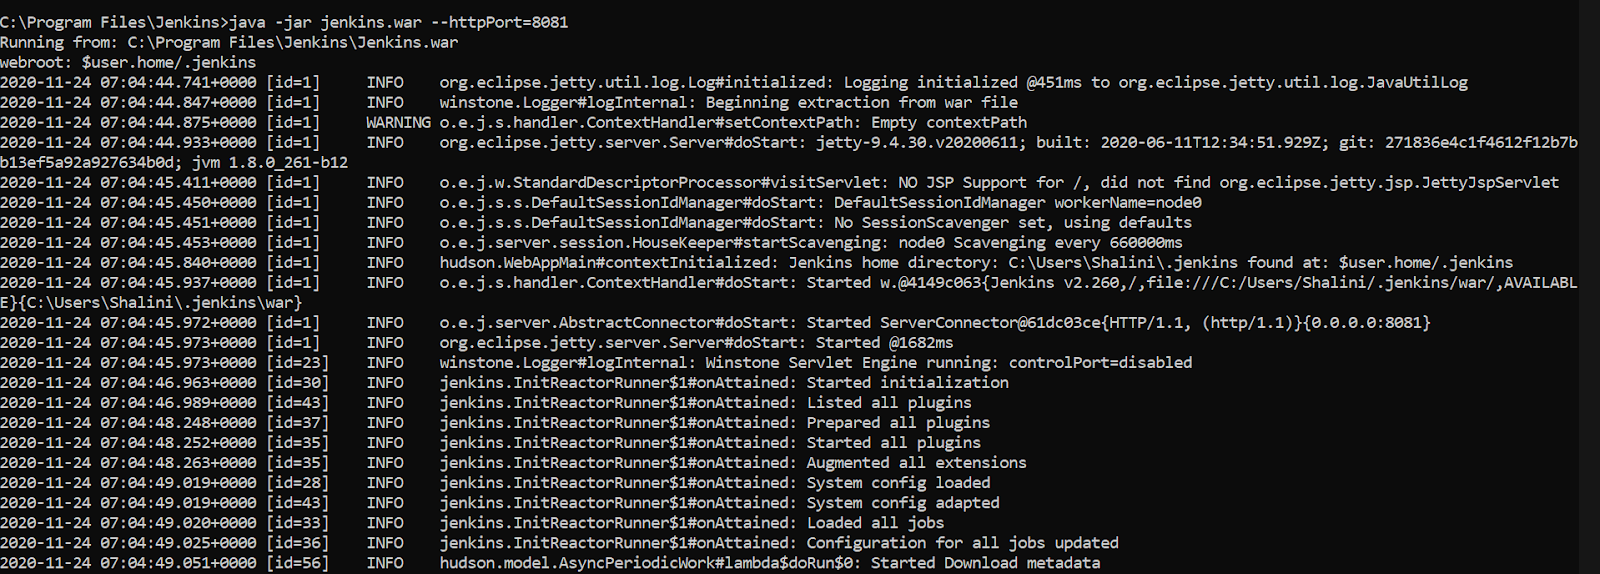
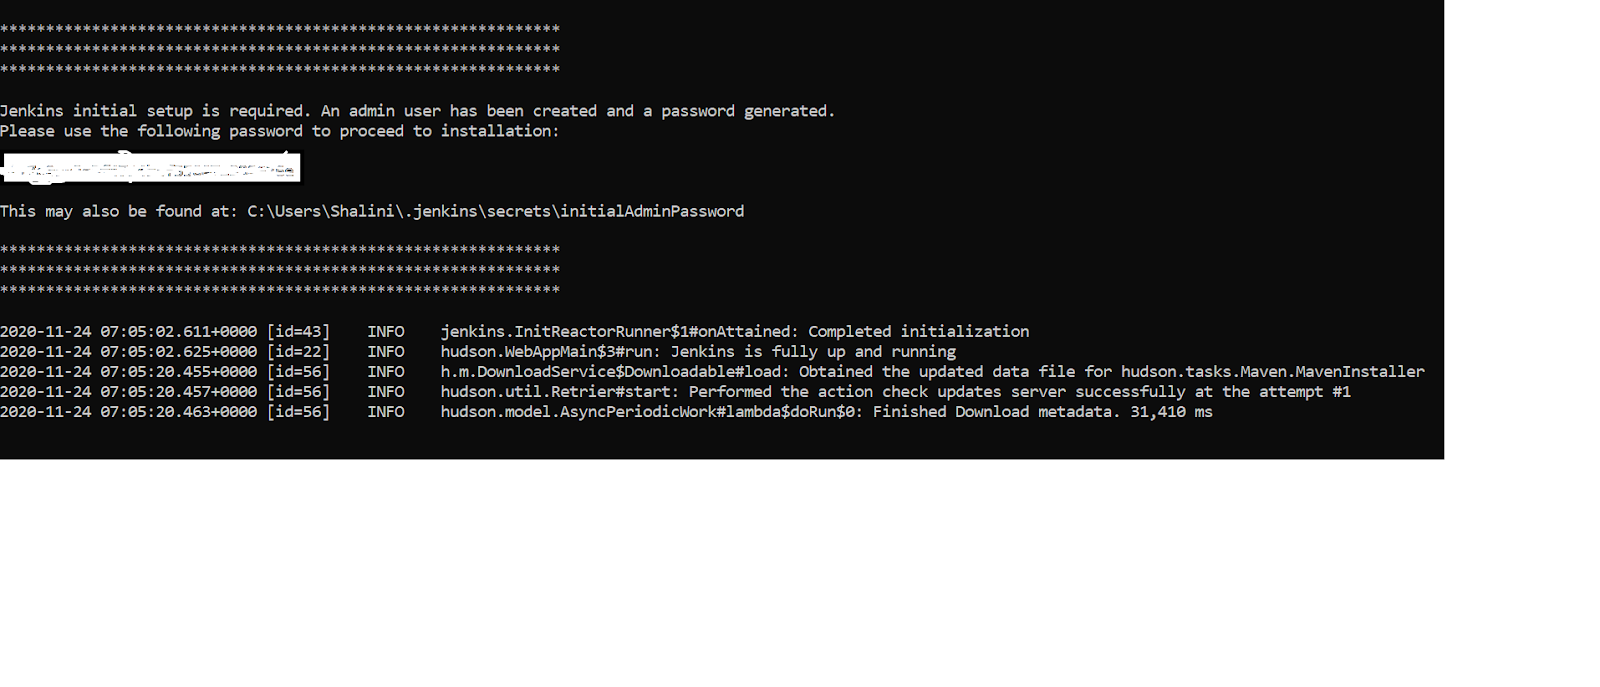
While starting Jenkins for the first time, a secret password will be generated, which will be printed at the end of the console.
The white shaded part contains the secret password for setting up Jenkins in your machine. When the installation is done successfully, you might see the “Jenkins is fully up and running” message in the console.
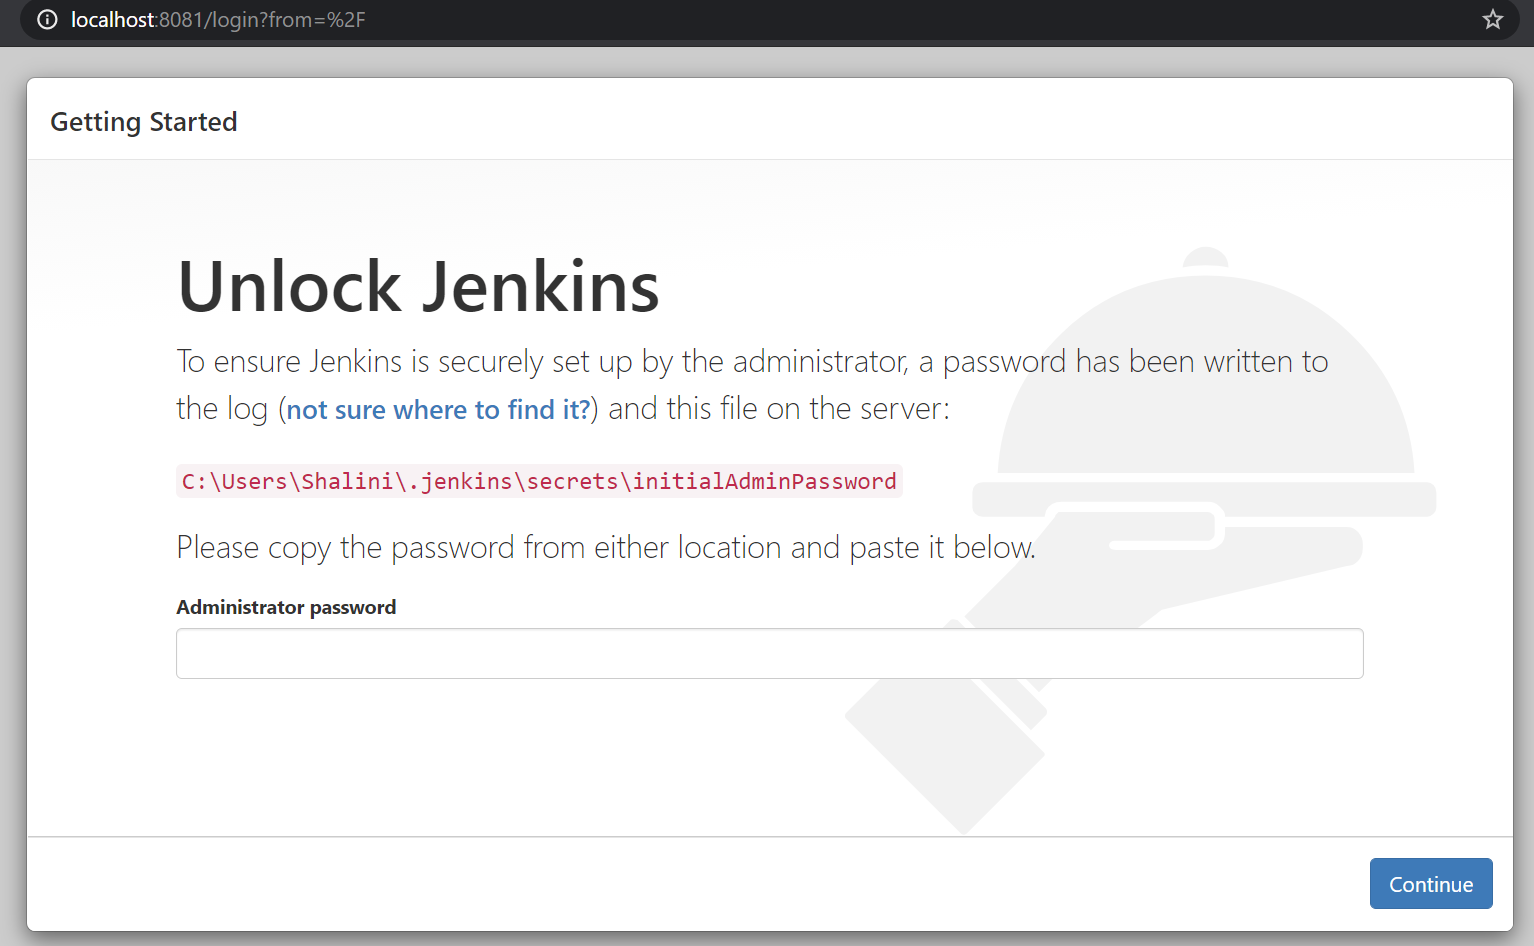
Step 6: Launch your browser and navigate to the localhost. By default, the port number would be 8080. In my case, I have defined the port as 8081 and hence use that port while navigating to the localhost.
Now the Jenkins setup page will be launched, which is used for creating the admin account for Jenkins.
Step 7: Enter the secret password that was generated and displayed in the console earlier in the setup page and click Continue.
Step 8: After entering the secret password, you will be asked to install plugins.

If you are not sure of the plugins you want, you can select “Install suggested plugins,” which would install a list of commonly used plugins. But if you know the plugins based on the requirement, you can select the plugins to install option and click the required plugins.
Now the plugins would be downloaded and installed.
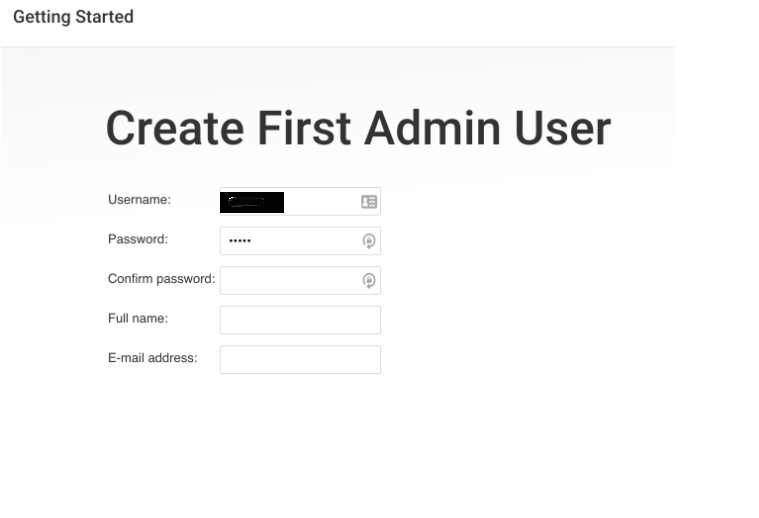
Step 9: Once the plugins are installed successfully, you will be asked to create an administrator account by providing a username, password, and email address. Once the admin profile is created, you will be navigated to the Jenkins dashboard.
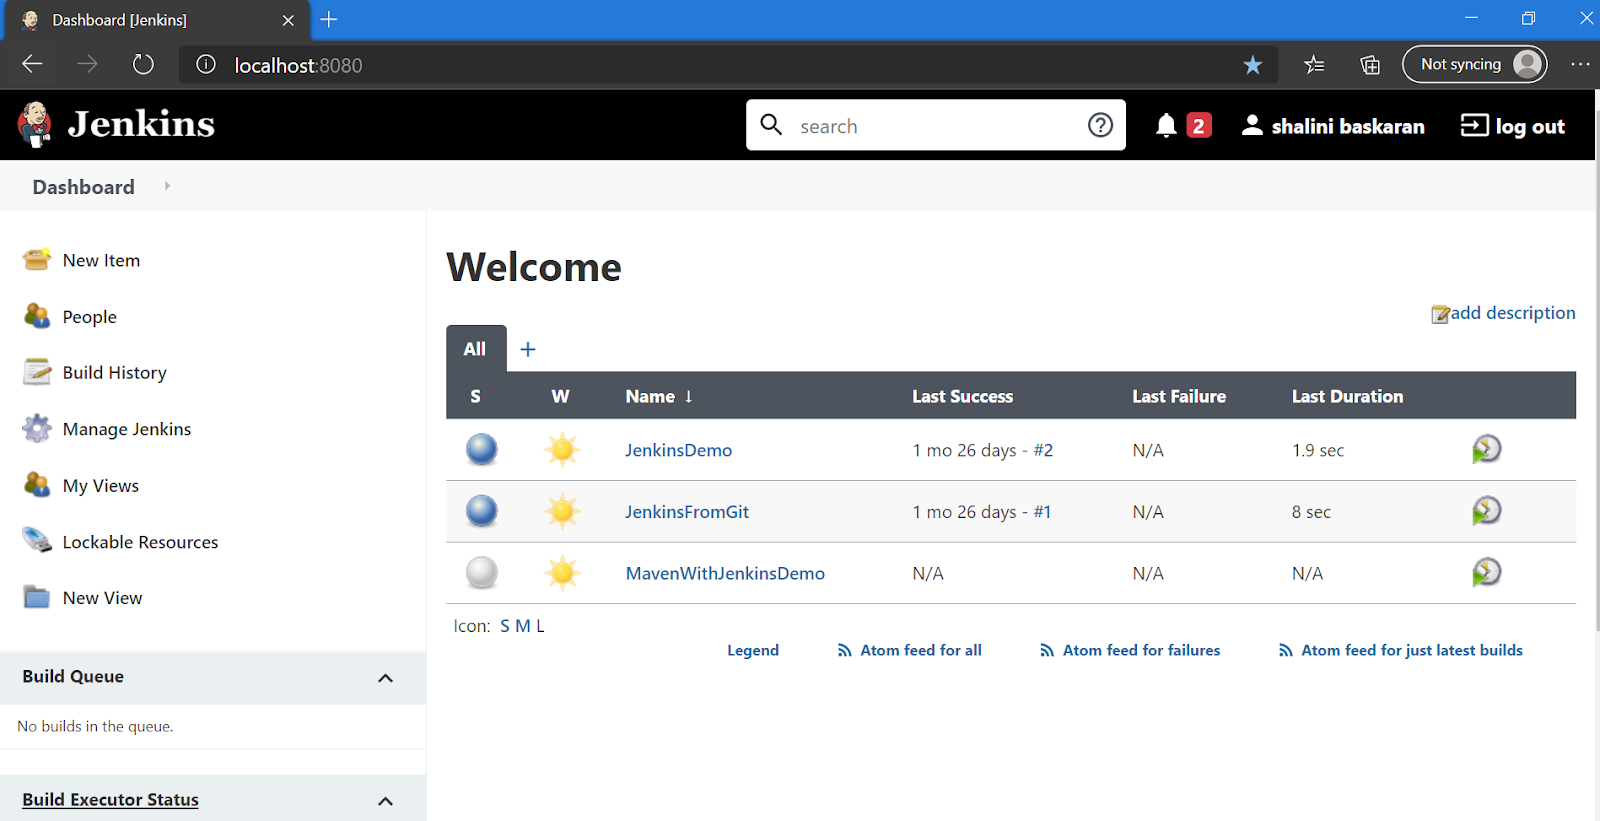
Now the Jenkins is installed and set up in the localhost, and you will be able to see the Jenkins dashboard.
There are multiple ways to integrate Jenkins with Selenium WebDriver. I will take you through different ways to do so, which would help implement based on your project requirements.
Jenkins Integration With Selenium – Method 1
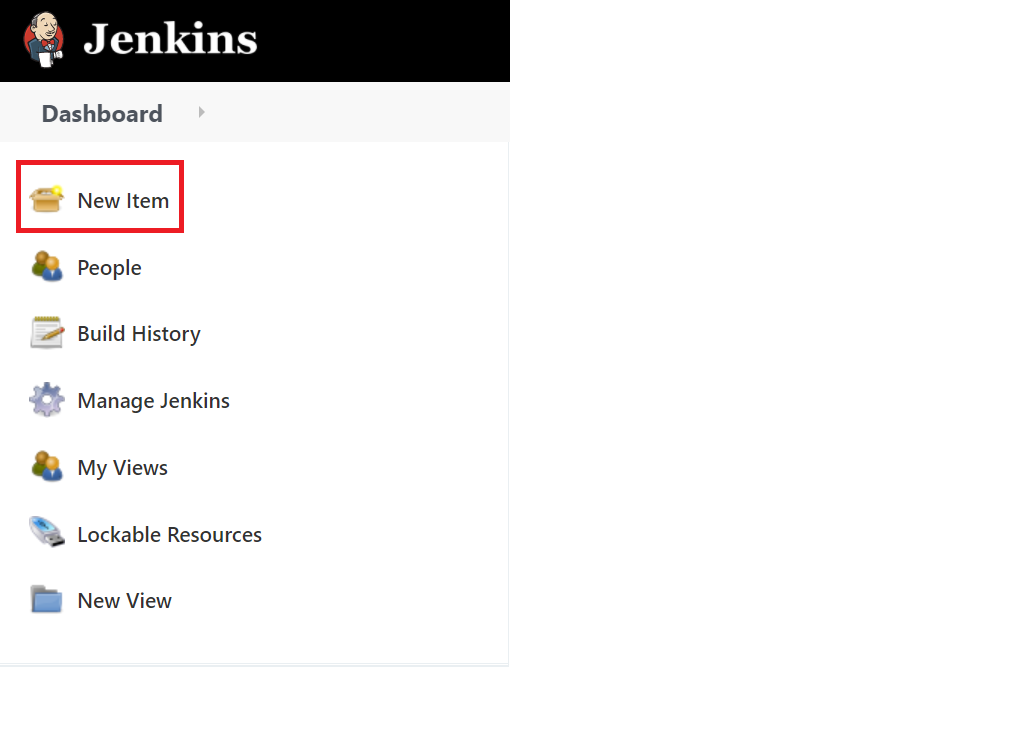
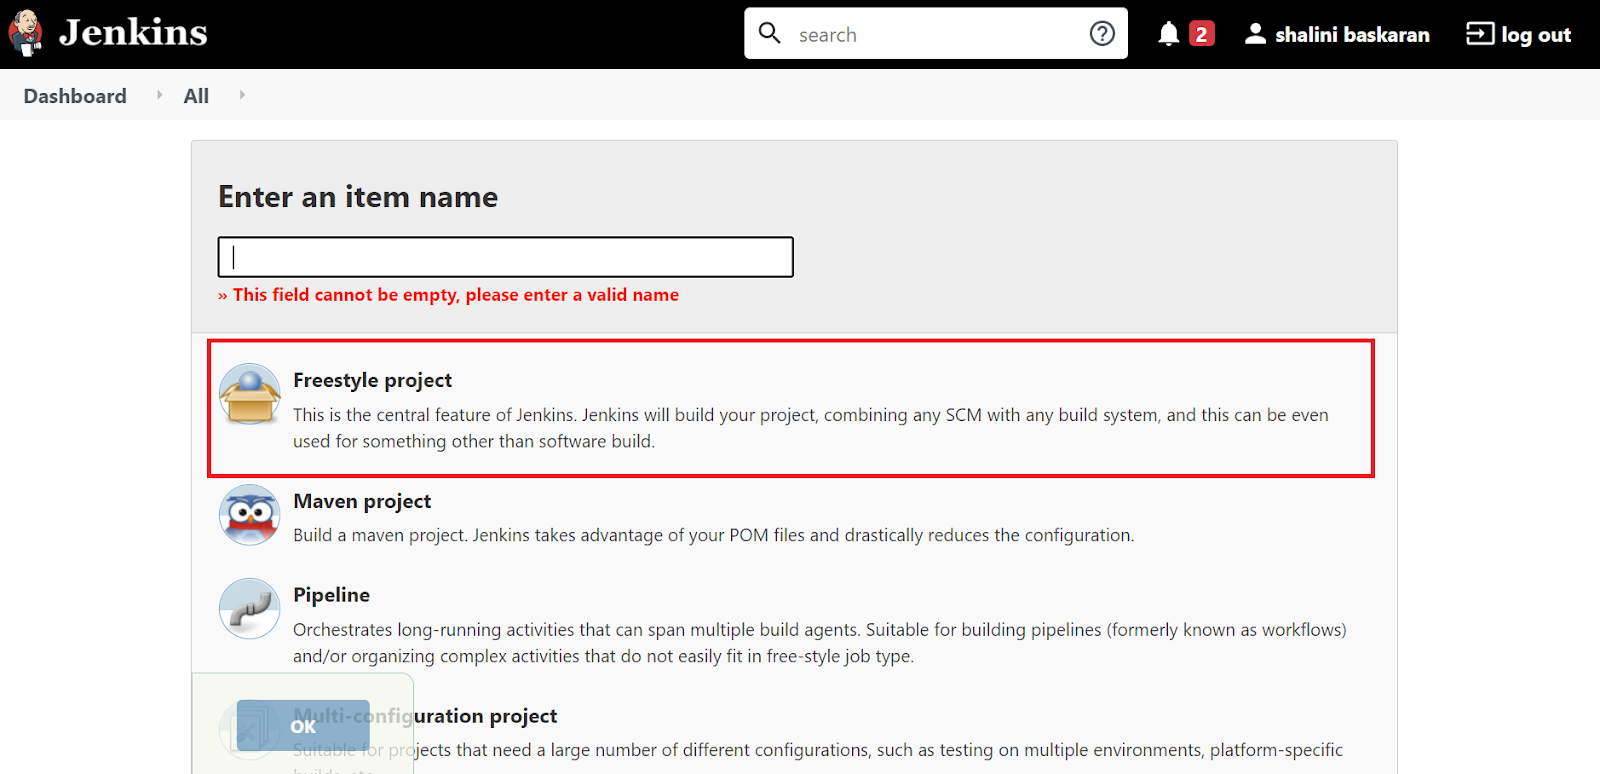
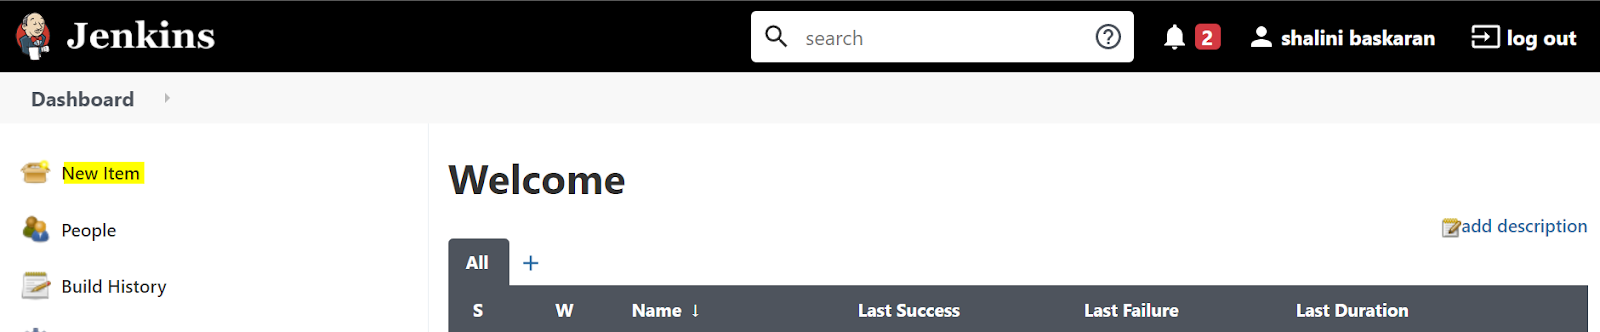
Step 1: In the Jenkins dashboard, click New Item to create a new project. Specify the name of the project and click Freestyle Project option. Click Ok.
Step 2: In the General section, enter the project description in the Description box.

Step 3: In the Source Code Management section, select None.

Step 4: To schedule the jobs, we can select the required option from the list given. Let us now specify the duration to schedule the jobs. To mention the duration, there is a set of rules that has to be followed as below.
| THE PERIOD HAS TO BE MENTIONED IN THE FORMAT | MINUTE HOUR DOM MONTH DOW |
|---|---|
| MINUTE | Minutes within the hour (0–59) |
| HOUR | The hour of the day (0–23) |
| DOM | The day of the month (1–31) |
| MONTH | The month (1–12) |
| DOW | The day of the week (0–7) where 0 and 7 are Sunday |
Step 5: Create a project for running the tests using Selenium WebDriver and TestNG.
package Pages;
import static org.testng.Assert.assertEquals;
import java.util.concurrent.TimeUnit;
import org.openqa.selenium.By;
import org.openqa.selenium.WebDriver;
import org.openqa.selenium.chrome.ChromeDriver;
import org.testng.annotations.AfterTest;
import org.testng.annotations.BeforeTest;
import org.testng.annotations.Test;
public class LoginPage {
WebDriver driver;
public void setUp() {
System.setProperty("webdriver.chrome.driver", "C:\\Users\\Shalini\\Downloads\\chrom86_driver\\chromedriver.exe");
driver = new ChromeDriver();
}
public void login() {
String login_url = "https://opensource-demo.orangehrmlive.com/";
driver.get(login_url);
driver.manage().window().maximize();
driver.manage().timeouts().pageLoadTimeout(10, TimeUnit.SECONDS);
driver.findElement(By.id("txtUsername")).sendKeys("Admin");
driver.findElement(By.id("txtPassword")).sendKeys("admin123");
System.out.println(driver.getTitle());
}
public void dashboard() {
driver.findElement(By.id("menu_dashboard_index")).click();
String textPresent = driver.findElement(By.xpath("//*[@id=\"content\"]/div/div[1]/h1")).getText();
String textToBePresent = "DashBoard";
assertEquals(textPresent, textToBePresent);
}
public void tearDown() {
driver.quit();
}
}
Step 6: Create a TestNG.xml file
xxxxxxxxxx
<suite name="TestSuite">
<test name="LoginTest">
<groups>
<run>
<include name="DemoTest"/>
</run>
</groups>
<classes>
<class name="Pages.LoginPage">
</class>
</classes>
</test>
</suite>
Step 7: In the project folder, add all the dependencies in a separate folder. Create a bat file with the below content.
ava –cp bin;lib/* org.testng.TestNG TestNG.xml
Specify the exact name of the TestNG.xml file that you have created in your project.
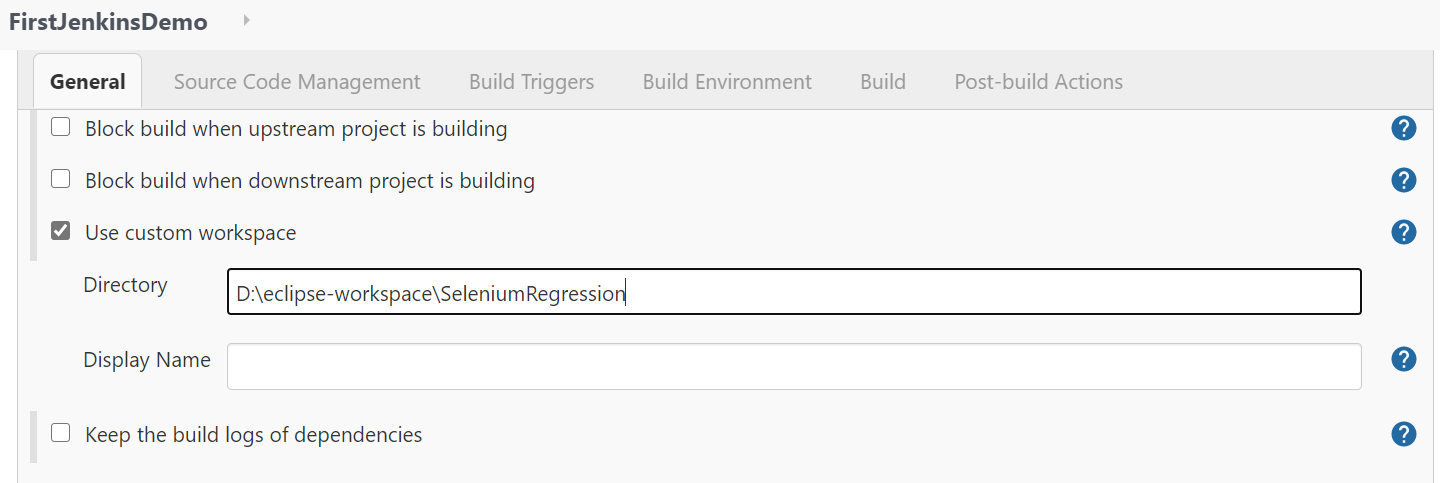
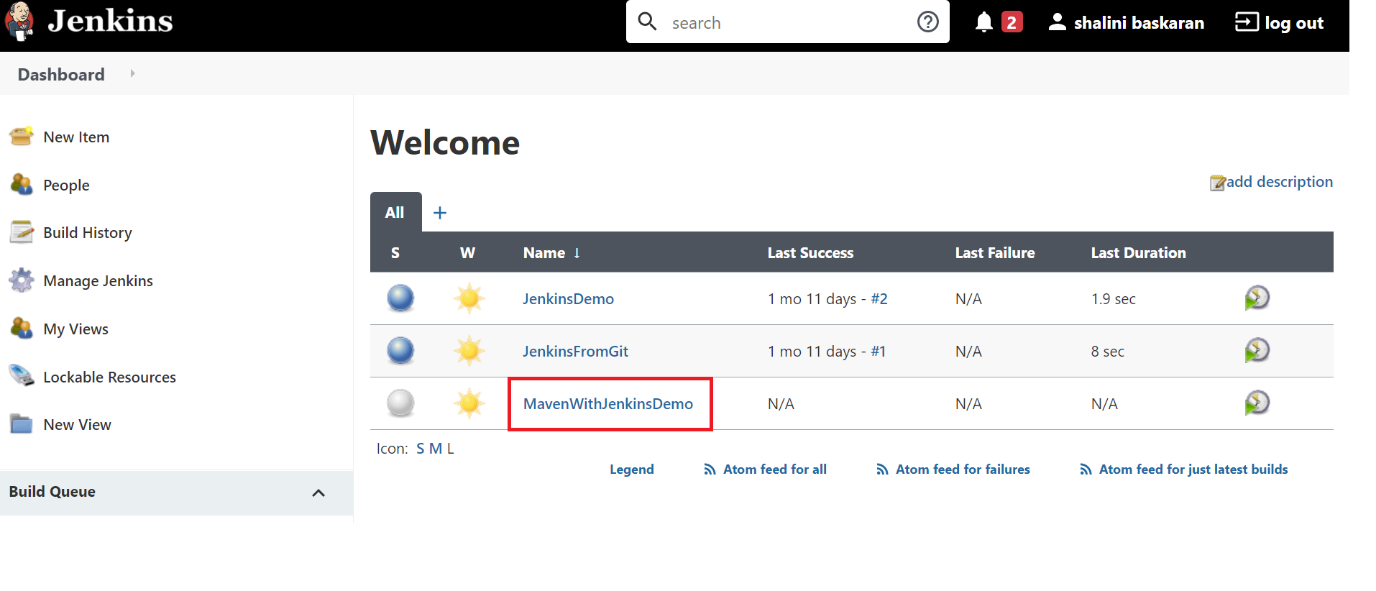
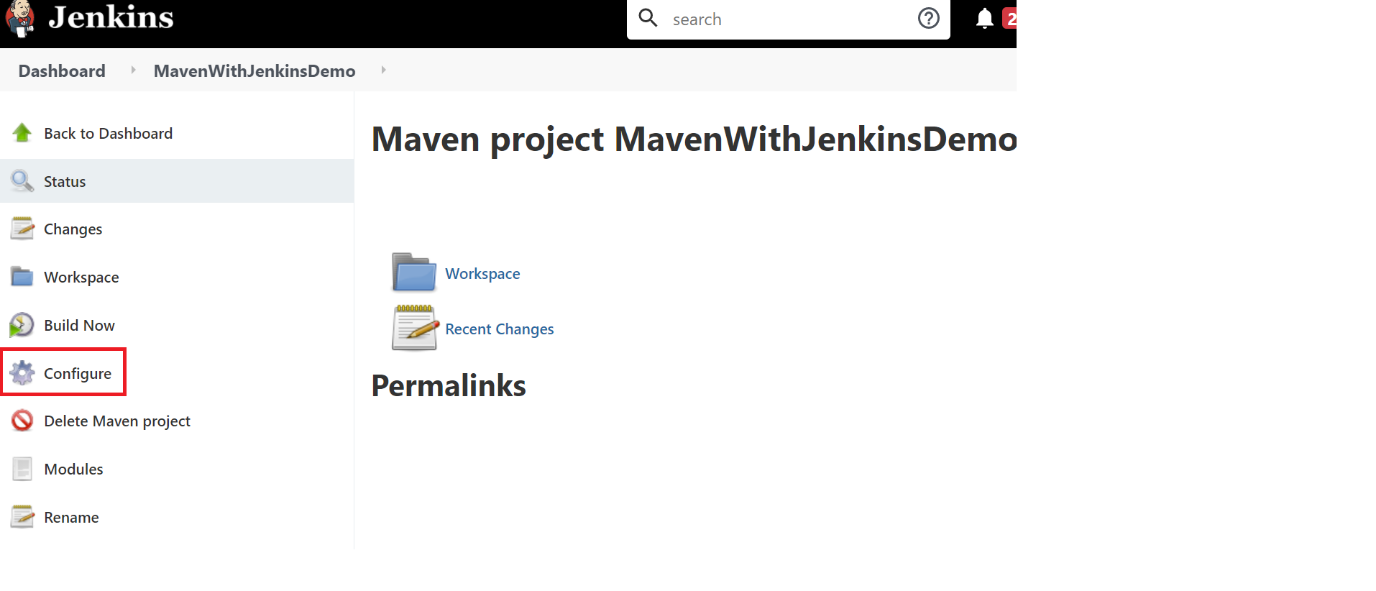
Step 8: In Jenkins dashboard, select the project that we have created initially. Click Configure. In the General section, click Advanced and then check the “Use custom workplace” option. Specify the test project path.
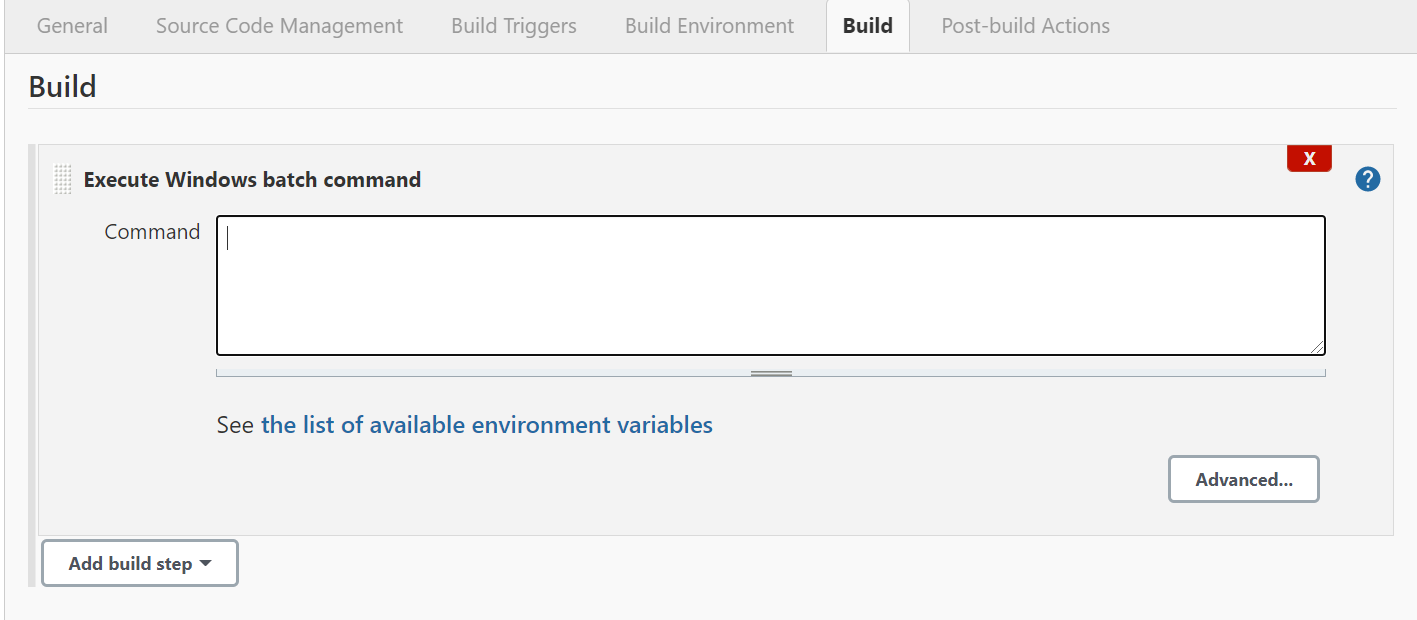
Step 9: In the Build section, click the Add Build Step dropdown box and select the “Execute Windows batch Command” option. Specify the name of the bat file that has been created in Step 7.
Step 10: Click Apply and then Save to apply all the changes to your Jenkins project. Now Click Build and you will be able to see the tests running on the Jenkins project.
Jenkins Integration With Selenium – Method 2
We can also perform Selenium test automation in Jenkins by integrating with Maven. Before we look into the integration, let us have a quick introduction to Maven and why it is popularly used with Jenkins to run the tests.
What Is Maven?
Maven is a build automation tool that allows us to add and manage all the dependencies in a single pom.xml file. This allows users to reuse the same dependencies across multiple projects. By adding the dependencies in a pom.xml file, the dependencies get automatically downloaded and added to the project, thereby eliminating the manual effort of adding each and every dependency as a JAR file to the project.
Thus, by integrating Maven, Jenkins, and Selenium WebDriver, the DevOps model could be adopted, thereby achieving Continuous Integration in the project.
How To Install Maven?
Step 1: Download Maven from their official website.
Step 2: Add MAVEN_HOME system variable.
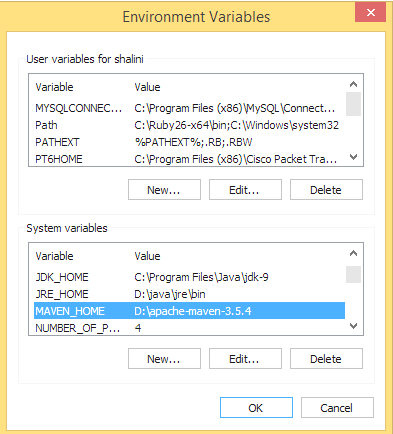
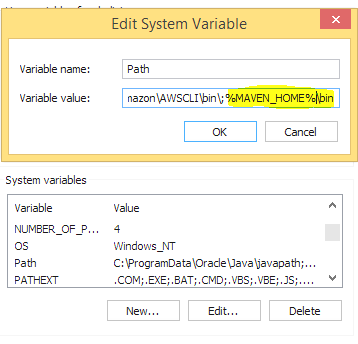
Step 3: Set the path which points to the bin directory of the maven directory.
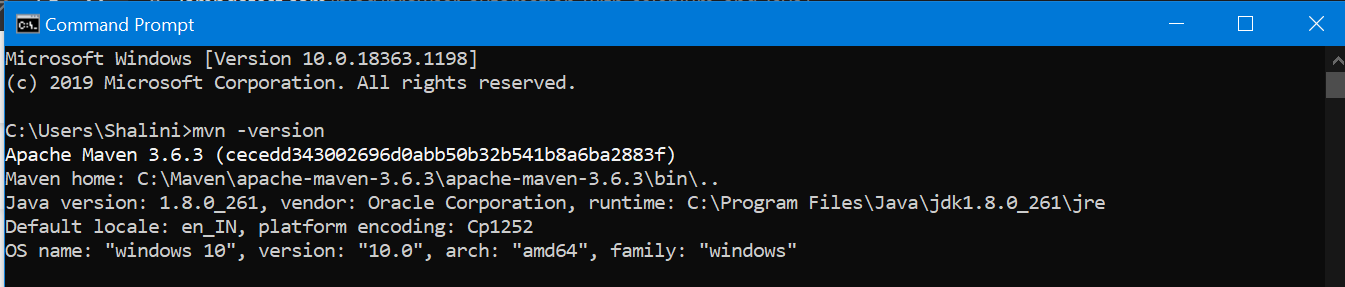
Step 4: To verify the successful installation of Maven, type mvn –version in the command prompt.
Step 5: Create a maven project and add all the maven dependencies in the pom.xml file.
xxxxxxxxxx
<project
xmlns="http://maven.apache.org/POM/4.0.0"
xmlns:xsi="http://www.w3.org/2001/XMLSchema-instance" xsi:schemaLocation="http://maven.apache.org/POM/4.0.0 http://maven.apache.org/xsd/maven-4.0.0.xsd">
<modelVersion>4.0.0</modelVersion>
<groupId>demoProject</groupId>
<artifactId>demoProject</artifactId>
<version>0.0.1-SNAPSHOT</version>
<build>
<sourceDirectory>src</sourceDirectory>
<plugins>
<plugin>
<artifactId>maven-compiler-plugin</artifactId>
<version>3.8.0</version>
<configuration>
<source>1.8</source>
<target>1.8</target>
</configuration>
</plugin>
</plugins>
</build>
<dependencies>
<dependency>
<groupId>org.seleniumhq.selenium</groupId>
<artifactId>selenium-java</artifactId>
<version>3.141.59</version>
</dependency>
<dependency>
<groupId>org.testng</groupId>
<artifactId>testng</artifactId>
<version>7.3.0</version>
<scope>test</scope>
</dependency>
</dependencies>
</project>
xxxxxxxxxx
package WebDriverProject;
import org.junit.Assert;
import org.openqa.selenium.By;
import org.openqa.selenium.WebDriver;
import org.openqa.selenium.firefox.FirefoxDriver;
public class LoginClass {
WebDriver driver;
public void setup(){
System.setProperty("WebDriver.gecko.driver","C:\\Users\\shalini\\Downloads\\geckodriver-v0.26.0-win64\\geckodriver.exe");
driver = new FirefoxDriver(); //initialise the WebDriver
}
public void loginTest(){
driver.get("https://opensource-demo.orangehrmlive.com/"); //define the url
String pageTitle = driver.getTitle(); //get the title of the webpage
System.out.println("The title of this page is ===> " +pageTitle);
Assert.assertEquals("OrangeHRM", pageTitle); //verify the title of the webpage
driver.findElement(By.id("txtUsername")).clear();//clear the input field before entering any value
driver.findElement(By.id("txtUsername")).sendKeys("Admin");//enter the value of username
driver.findElement(By.id("txtPassword")).clear();
driver.findElement(By.id("txtPassword")).sendKeys("admin123");//enter the value of password
driver.findElement(By.id("btnLogin")).click(); //click Login button
System.out.println(“Successfully logged in”);
}
public void teardown(){
driver.quit();
}
}
xxxxxxxxxx
<suite name="TestSuite">
<test name="LoginTest">
<groups>
<run>
<include name="DemoTest"/>
</run>
</groups>
<classes>
<class name=" WebDriverProject.LoginClass">
</class>
</classes>
</test>
</suite>
How To Integrate Selenium Tests In Maven With Jenkins?
We saw how to integrate Jenkins with Selenium WebDriver in the sections above. The best use case of this integration is to implement it for Selenium test automation. Jenkins integration with Seenium WebDriver makes your cross-browser testing scripts sturdier than ever. In this section, I will explain how to integrate Jenkins with Selenium test scripts with the help of Maven.
Step 1: Start the Jenkins server.
Step 2: Open the browser and navigate to the localhost and the port in which Jenkins is running.
Step 3: Click New Item in the dashboard.
Step 4: Enter the project name and select the project type as Maven project.

Step 5: Click Ok. Now you could see a job being created successfully in the dashboard.
Step 6: Click the project and click Configure.
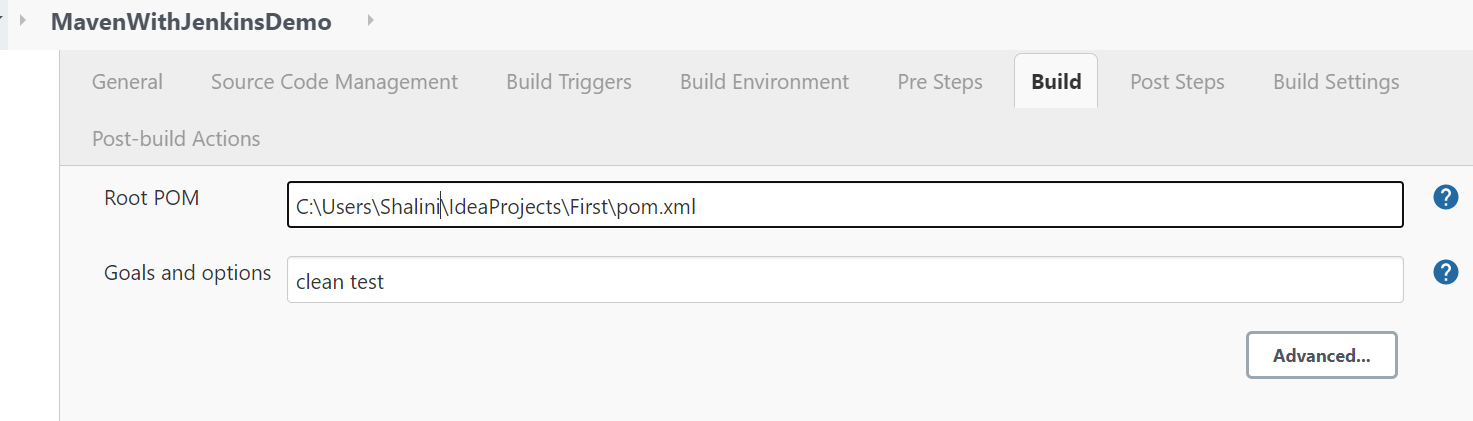
Step 7: Under the Build section, enter the complete path of your pom.xml . In the Goals and options, enter the command clean test.
Step 8: Click Apply and then Save.
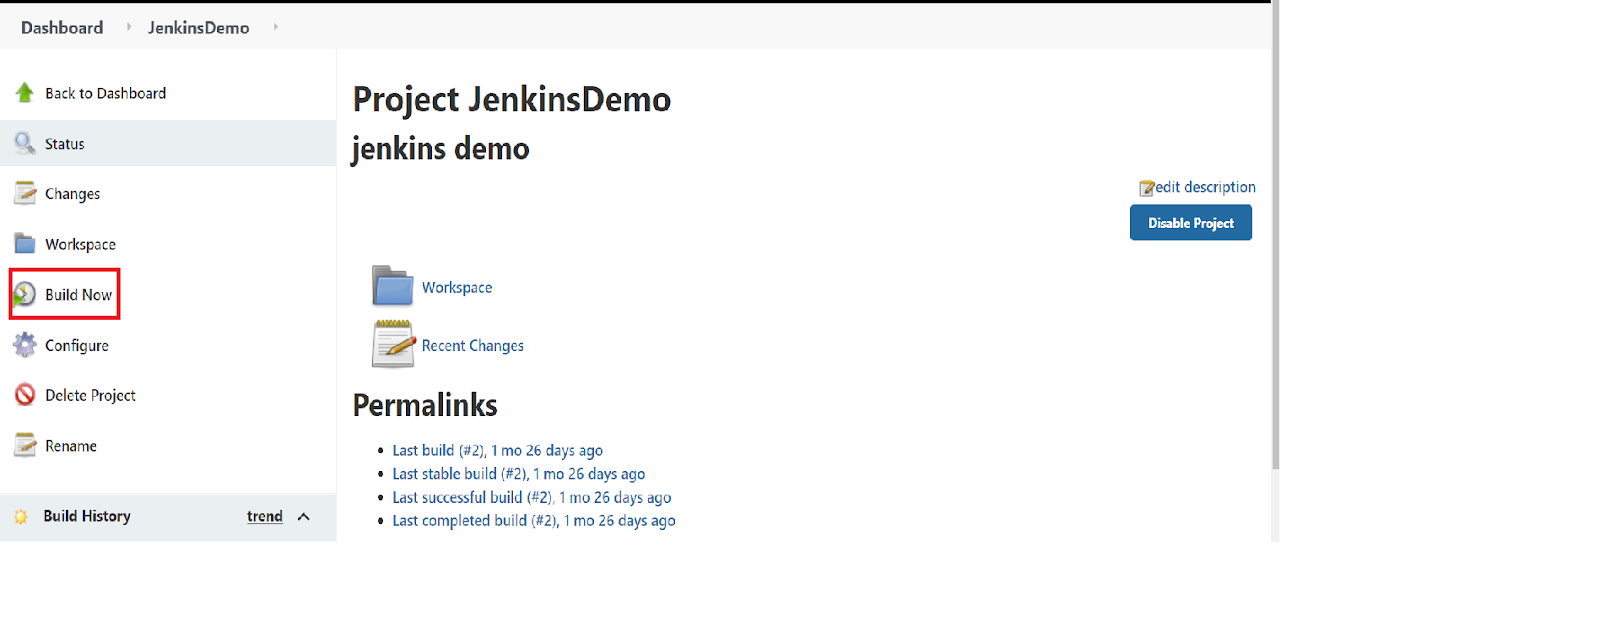
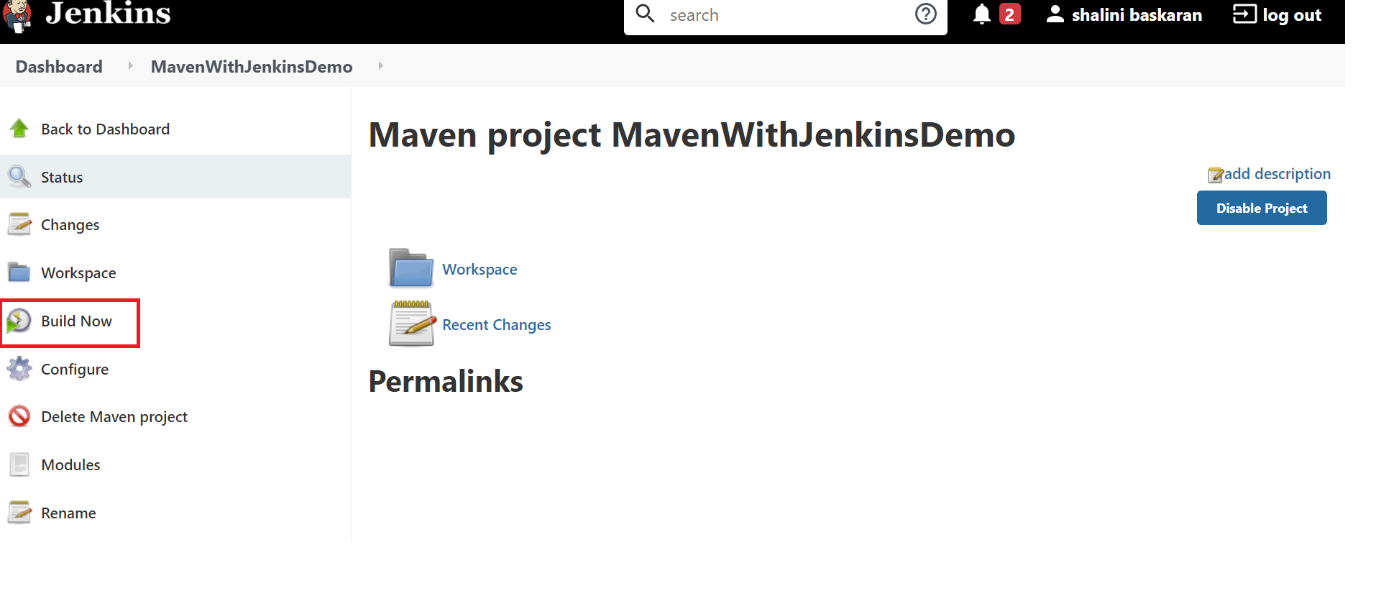
Step 9: Click Build Now.
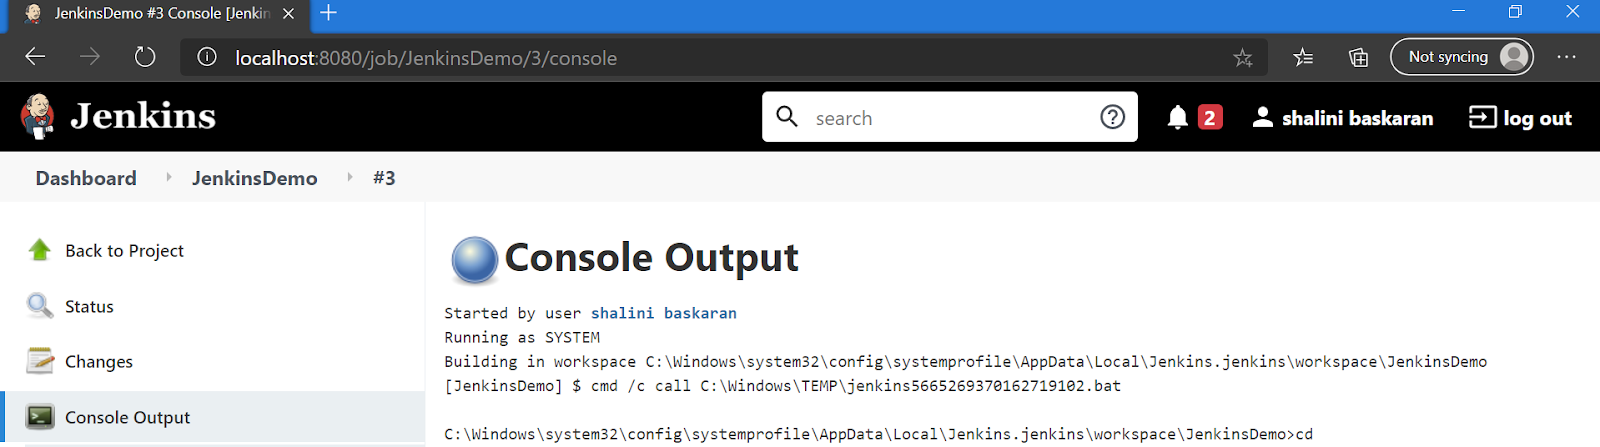
Step 10: Now the build will run and, after successful completion of the build, the results would be displayed. To view the complete logs, click the console output.
Wrapping Up!
To summarize, we have covered why Jenkins is so important and how it can be integrated with Selenium WebDriver to run our tests efficiently and achieve the goal of continuous integration. Using Jenkins to run our tests is time-effective, and the results can be visualized with complete logs. It helps fulfill the complete software development life cycle starting from development, deployment, testing, monitoring, and releasing. It supports various plugins for achieving the project requirements. It also supports alerting the user via emails regarding the stability of the build.
I hope now you can easily integrate Jenkins with Selenium WebDriver. Let us know your feedback on this article in the comment section below.
Happy Testing!
Published at DZone with permission of Shalini Baskaran. See the original article here.
Opinions expressed by DZone contributors are their own.
Comments