

Setting Up an MVC Core 3.1 Application With an Empty Template
A tutorial on how you can setup MVC Core 3.1 Application in visual studio 2019 from scratch and a breakdown of ASP.Net Core benefits.
Join the DZone community and get the full member experience.
Join For FreeIntroduction
Today I will explain you, how you can setup MVC Core 3.1 Application in visual studio 2019. We will understand it from scratch.
What is ASP.Net Core?
ASP.Net core is a free and open-source management and computer framework for Windows, macOS, and LINUX operating systems. It is a cross-platform .NET framework. Using ASP.NET core we can develop a modern internet-connected application for cross-platform use.
- Cross-platform and open source
- Unified programming model for MVC and Web API
- Dependency injection
- Testability
- Support for Cloud-Based Development.
A better understanding of ASP.Net Core MVC requires the basic knowledge below:
- C# programming
- ASP.Net MVC
- Razor Programming (good to have)
- Entity Framework
- Identity Framework for security
Step 1
Download Visual Studio 2019 and install it. Below is the download link for Visual Studio 2019. Download the community version. Click here to download.
Step 2
Download and install core 3.1 SDK. Click here to download.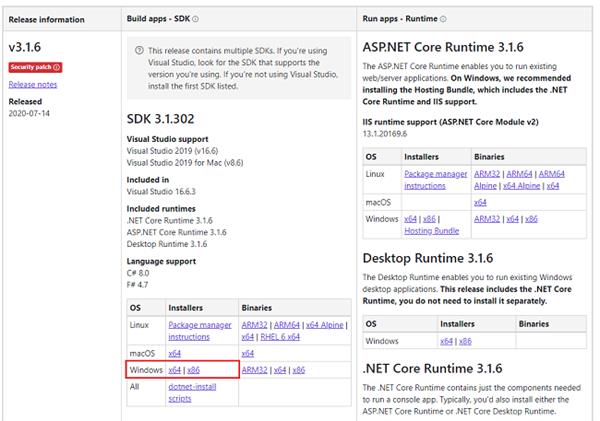
Step 3
Startup Visual Studio 2019. Choose ASP.NET Core Web Application and click on "Next"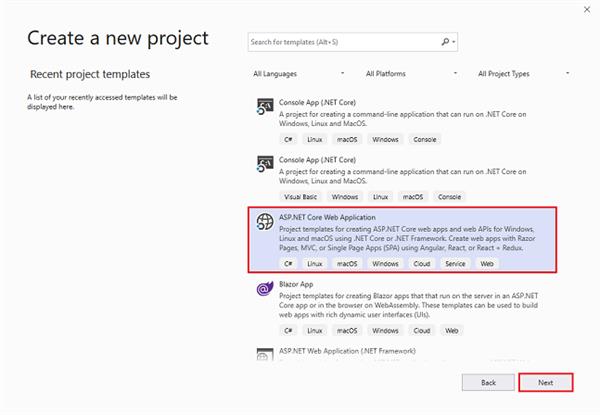
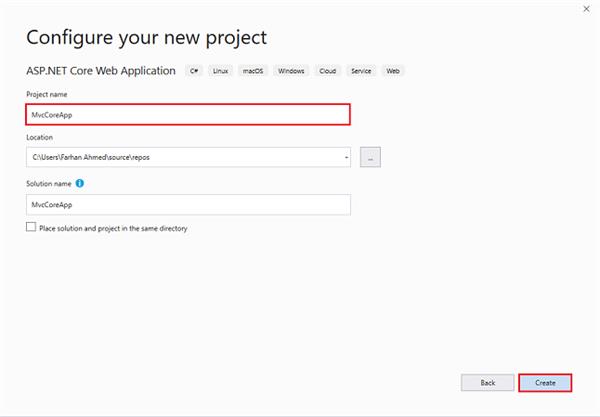
After clicking next, another wizard will open. Under the project name, give a meaningful name to your project and click on create.
That will open up another new wizard select ASP.Net Core 3.1 from the dropdown. If not, select default. Choose an empty template and click on create which will create your first ASP.Net Core Application.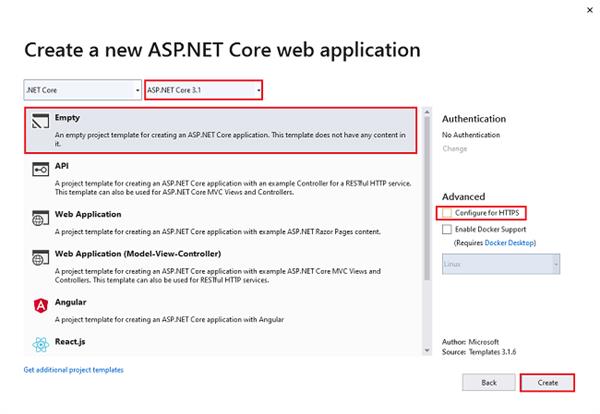
Step 4
Visual Studio 2019 will generate program and startup classes. Now open the startup file and configure ASP.Net MVC Core Application development. Under app.UseEndpoints method just map endpoints.MapControllerRoute.
xxxxxxxxxx
app.UseEndpoints(endpoints =>
{
endpoints.MapControllerRoute(
name: "default",
pattern: "{controller=Home}/{action=Index}/{id?}");
});
Now second configuration setting is under ConfigurationServices
public void ConfigureServices(IServiceCollection services)
{
services.AddControllersWithViews();
}
We are done with configuration settings in the startup file.
Step 5
Now under the project, create a folder with the name Controllers. After creating the "Controllers" folder, right-click on the "Controllers" folder and add a controller.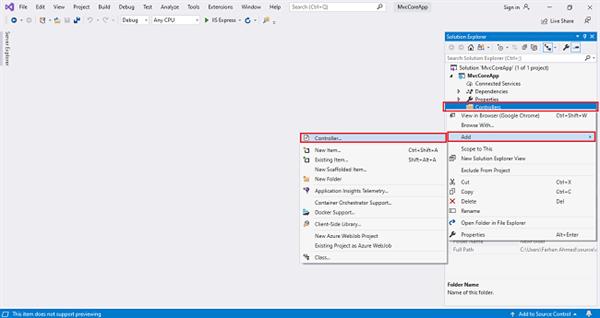
A window will appear. Choose MVC5 Controller-Empty and click "Add".
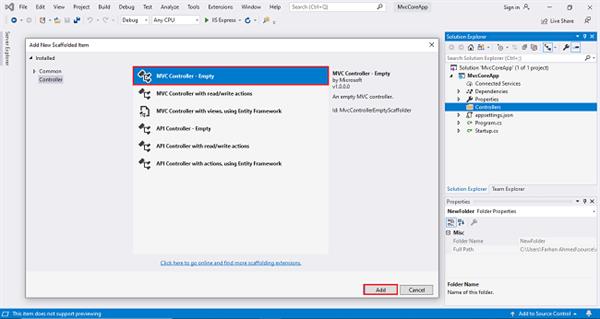
After clicking on "Add", another window will appear with DefaultController. Change the name to HomeController and click "Add". The HomeController will be added under the Controllers folder. Don't change the Controller suffix for all controllers, change only the highlight, and instead of Default, just change Home.
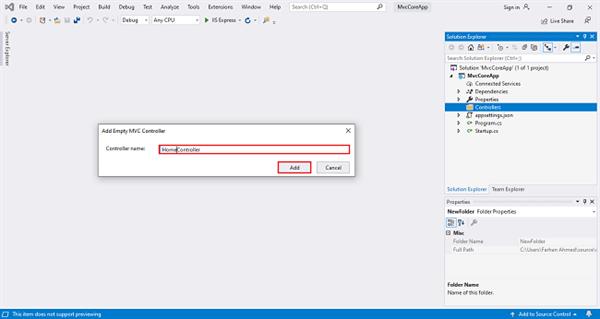
Step 6
Right-click on Index of ActionResult choose "Add View" and click on it. Now you will get another window that has the default view name as ActionResult name. Check to use a lay page, and click on "Add".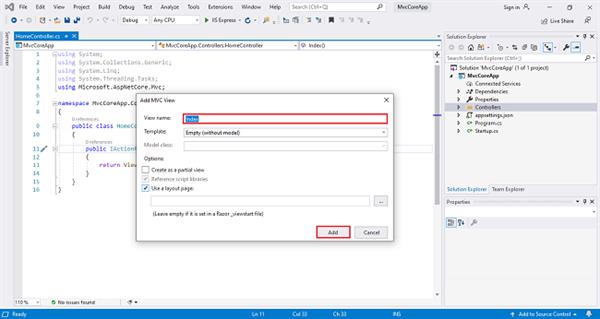
Step 7
Build and Run your project, ctrl+F5.
Summary
In this article, I have explained how to set up the development environment of an ASP.Net Core MVC Application.
I hope this is helpful for beginners. I will explain the development of an ASP.Net Core MVC Application step-by-step in my upcoming articles.C
Published at DZone with permission of Farhan Ahmed. See the original article here.
Opinions expressed by DZone contributors are their own.
Comments