Make Your Own Light Switch With Java and a Raspberry Pi
Looking for an IoT project? Look no further than developing your own switch with the helping hand of a library, some Java, and a Raspberry Pi.
Join the DZone community and get the full member experience.
Join For FreeIn this article, you'll learn the simple steps to control a light using a Raspberry Pi and Java.
Hardware (Total Cost: $43):
Raspberry Pi (I have chosen the Raspberry Pi 3 model B, which has a built-in Wi-Fi dongle, ethernet cable support, 4 USB ports, and 2 GB of RAM) — $35 on Amazon.
Arduino relay module (1 pin) — less than $5 on eBay.
Female-to-female connector wires — $1 on eBay.
Light bulb and a conducting wire — $2 on eBay.
Setup
Install Apache Tomcat on your Raspberry Pi to enable connectivity between the Pi and your other devices. I know it might be heavy to run a container on small scale devices. We can also achieve our goals by using a card reader or voice recognizer, but I chose this easy way to establish the connection.
Include the pi4j library to send signals to the Raspberry Pi GPIO to control the power.
<dependency>
<groupId>com.pi4j</groupId>
<artifactId>pi4j-core</artifactId>
<version>1.1</version>
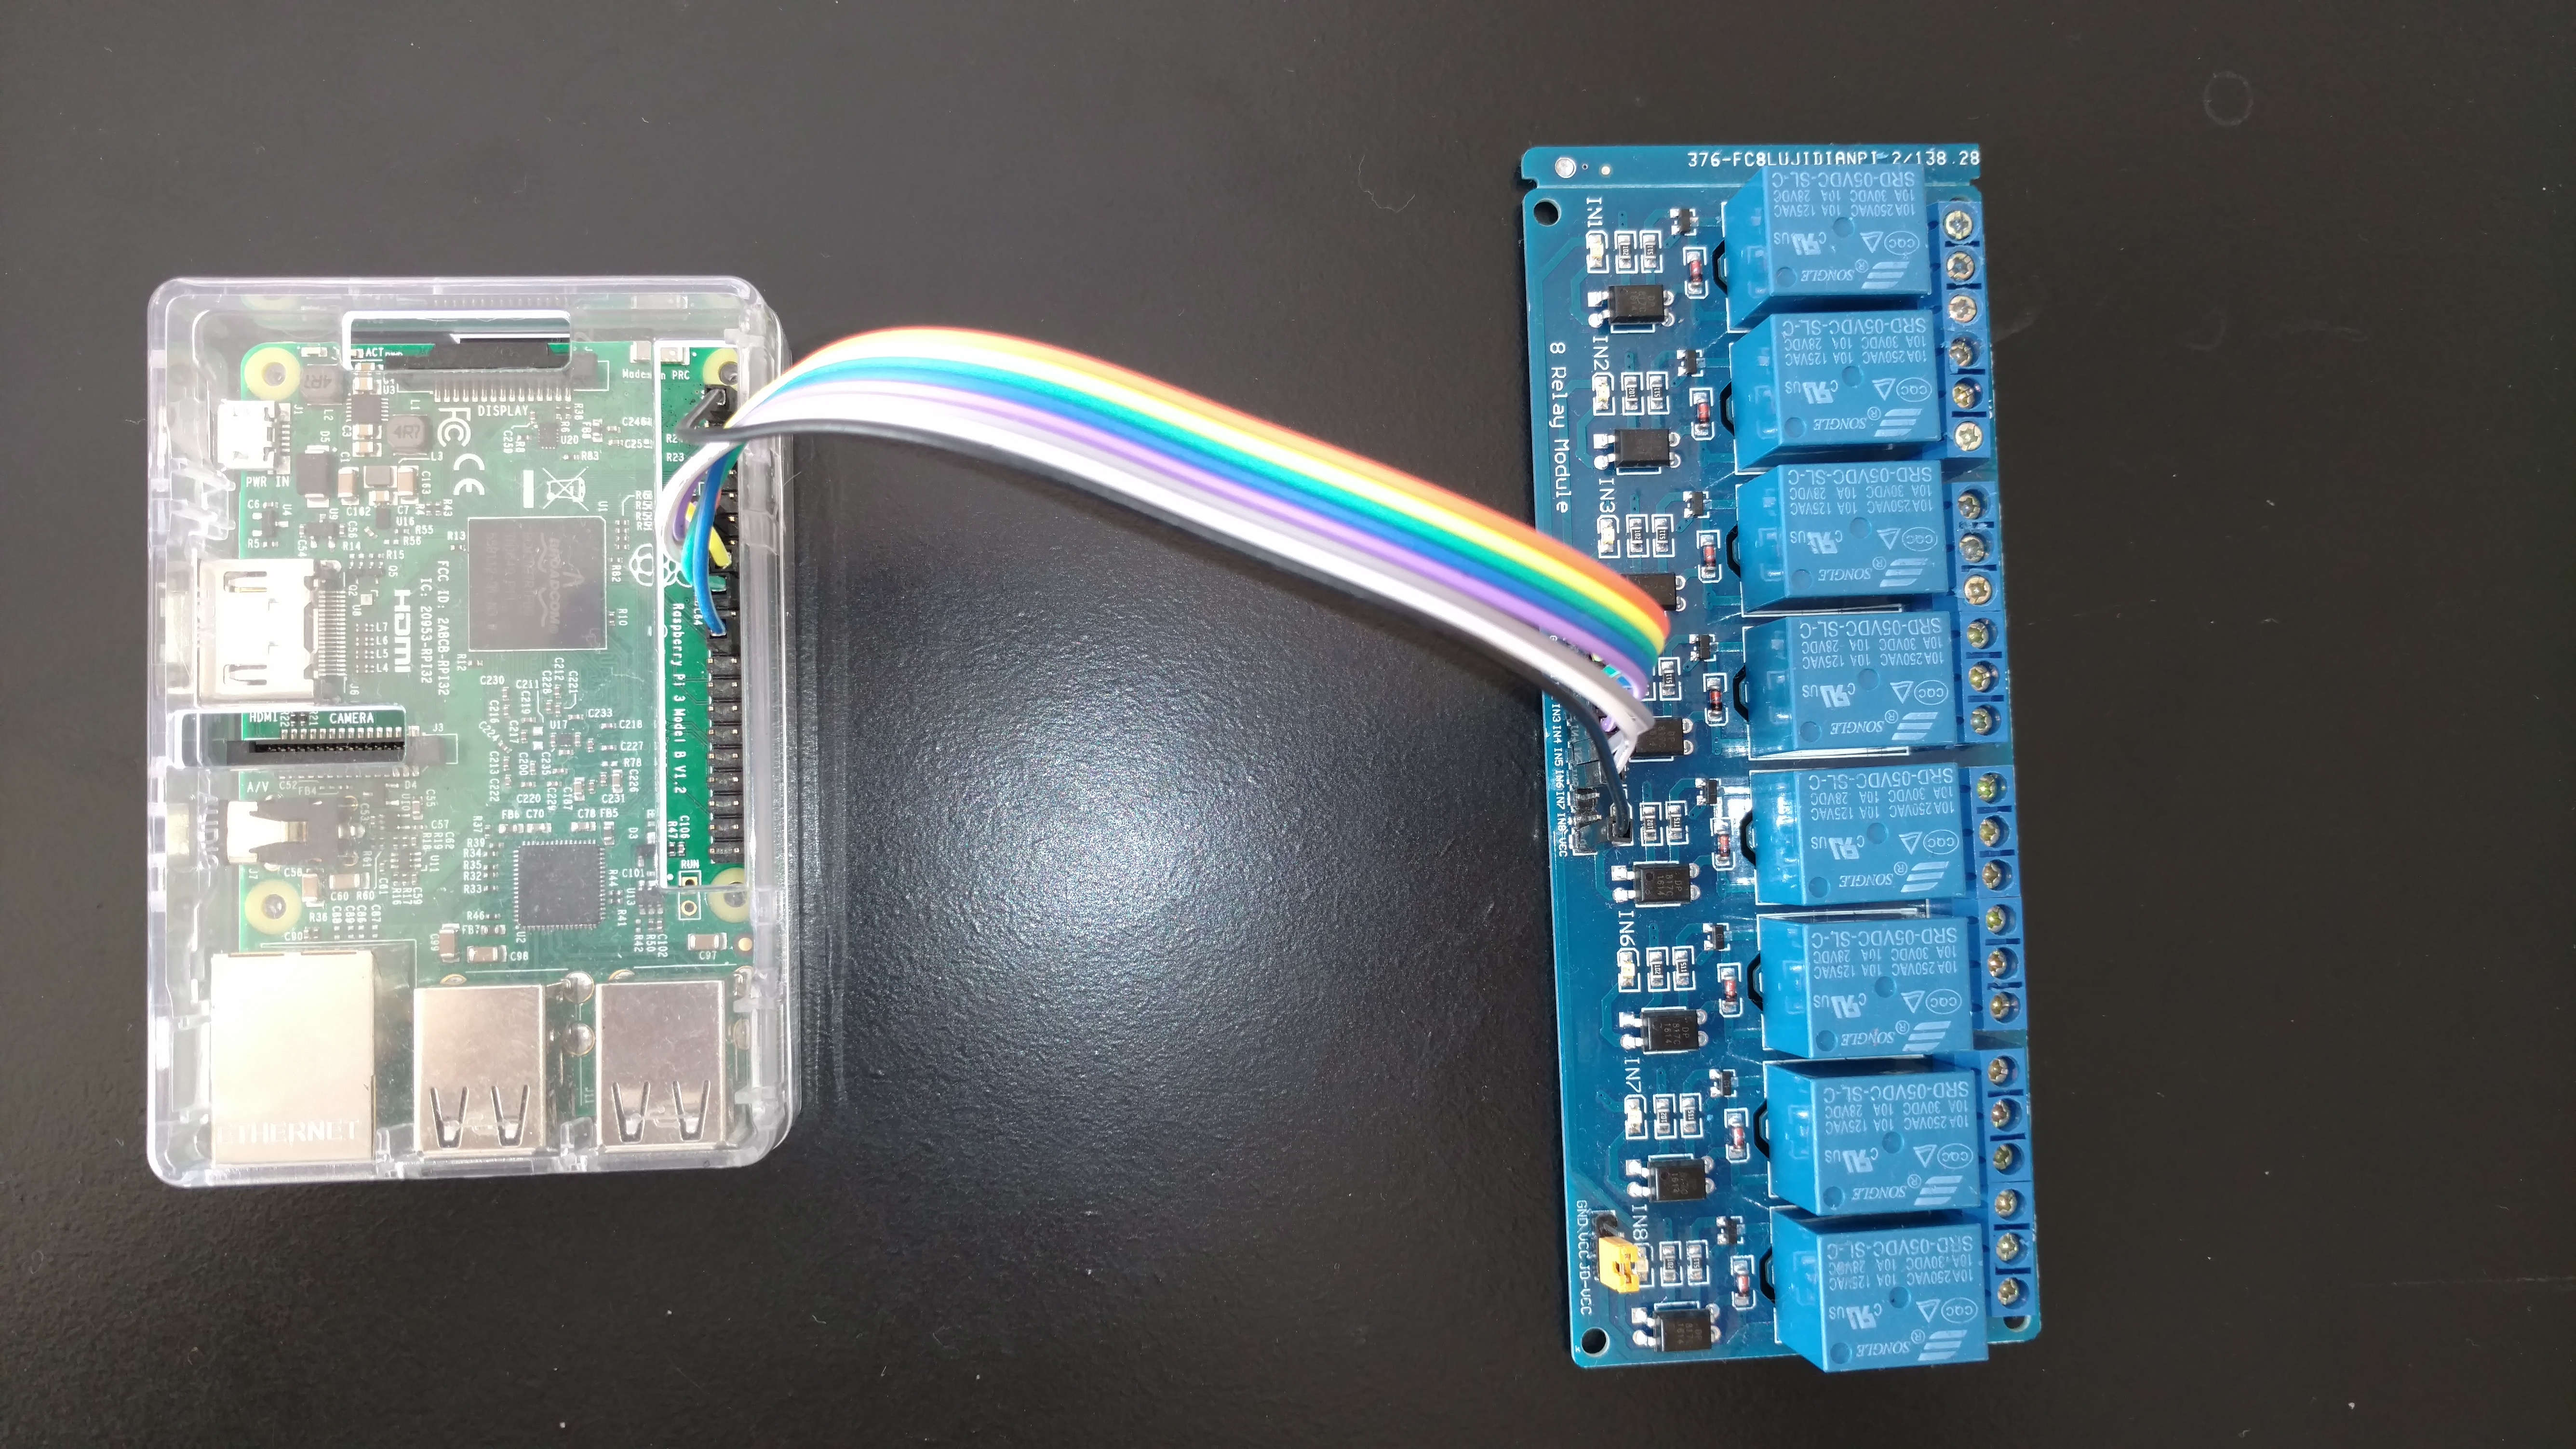
</dependency>Connect the GPIO pins and Arduino module using the female-female connector wires. GPIO pin numbers and Raspberry Pi pin numbers are different, so look at the diagram below for clear info. Also take a look at the video at the bottom of this article. Connect your Raspberry Pi:
Ground pin (6) to Arduino GRND.
VDC power pin (2) to Arduino VCC.
Any GPIO pin (22) to Arduino IN1.

Use the below code snippet to switch on/off (or) control the power using the pi4j lib. More examples of pi4j can be found here.
// create gpio controller
        final GpioController gpio = GpioFactory.getInstance();

        // lookup the pin by address
        Pin pin = CommandArgumentParser.getPin(
                RaspiPin.class,    // pin provider class to obtain pin instance from
                RaspiPin.GPIO_06);             // argument array to search in
// We are using PIN 06 as per the attached diagram

        GpioPinDigitalOutput output = gpio.provisionDigitalOutputPin(pin, "My Output", PinState.HIGH);

// switch ON
        output.high();
      // switch OFF
        output.low();
I have designed a web-app with JSP and a controller to send commands from the broswer. Based on the request parameter, we can send signals to GPIO pins. The complete web-app code is available here. Download and building it will generate smart-home-ui.war.
if("on".equalsIgnoreCase(request.getParameter("control"))) {
output.high();
} else {
output.low();
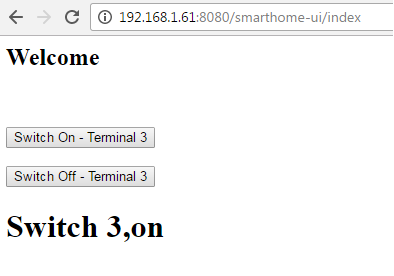
}After following the above steps, copy smart-home-ui.war to the Tomcat/webapps directory and start Tomcat. Enter the URL (https://<raspberry pi hostname (or) ip address>:8080/smarthome-ui/index) and click the Switch On/Off buttons and control the light in your home. Here is the sample UI.
Video
I hope you have enjoyed it. Any constructive comments/suggestions are than more welcome.
Opinions expressed by DZone contributors are their own.
Comments