Size Does Matter (in JavaFX)
Configuring your charts is serious business, so here are a few JavaFX commands to keep in mind when working on visualizing your data.
Join the DZone community and get the full member experience.
Join For FreeDoes size matter? That’s a question that’s been around for a while, and the answer is up for debate. But this is JavaFX, and the answer is a resounding, "Yes, size does matter." I’m not saying that user interfaces need to bigger to be better, I’m talking about controlling the size. If you don’t control it properly, you will end up having undesirable results. What if the user makes the window so small that part of the display gets cut out never to be seen again — unless the window is made larger again of course. Maybe it's resized so large that there is loads of empty space around the edge of the interface. So you're going to need to keep the size under control. And you're in luck, as in this article, I'll cover some ways to do that.

I am going to be reusing some of the code that I wrote in previous posts, so have a look at Getting Started with JavaFX and JavaFX Charts look pretty good! for explanations of some of the code that will be used here.
A good place to start is controlling the minimum and maximum size of the window, although controlling the maximum size is not as useful, as you will probably want users to be able to full-screen the application. The window is known as the Stage in JavaFX terminology, so to control the min/max size of the windowm some properties on the Stage will need to be adjusted.
public class SizeAppLauncher extends Application {

    public static void main(String[] args) {
        Application.launch(SizeAppLauncher.class, args);
    }

    @Override
    public void start(Stage stage) throws Exception {
        try {
            final Parent root = FXMLLoader.load(getClass().getClassLoader()
            .getResource("lankydan/tutorials/fxml/SizeApp.fxml"));
            final Scene scene = new Scene(root);
            stage.setScene(scene);
            stage.setTitle("Size Example");

            stage.setMinHeight(250);
            stage.setMinWidth(500);

            stage.setMaxHeight(500);
            stage.setMaxWidth(1000);

            stage.show();
        } catch (Exception e) {
            System.out.print(e);
        }
    }
}
There’s not much to explain here, all you need to do is call the setMaxHeight, setMaxWidth, setMinHeight and setMinWidth methods and pass in the sizes that you want to restrict the Stage to. If you decide that you don’t want to restrict the maximum size then just remove the set max methods and its all done. Now removing the max size is not a big deal but not controlling the minimum size of the window could make your application act unexpectedly. Its not a definite requirement as users do not normally make the windows really small but if it is possible for them to do so then someone will inevitably do it, so you’ve been warned.
Maintaining the aspect ratio of the window is also possible with a few lines of code, although it acts unexpectedly when decreasing size, which is pretty annoying… So take this with a pinch of salt as I personally don’t like using it very much.
public class SizeAppLauncher extends Application {

    public static void main(String[] args) {
        Application.launch(SizeAppLauncher.class, args);
    }

    @Override
    public void start(Stage stage) throws Exception {
        try {
            final Parent root = FXMLLoader.load(getClass().getClassLoader()
            .getResource("lankydan/tutorials/fxml/SizeApp.fxml"));
            final Scene scene = new Scene(root);
            stage.setScene(scene);
            stage.setTitle("Size Example");

            stage.minWidthProperty().bind(scene.heightProperty().multiply(1.5));
            stage.minHeightProperty().bind(scene.widthProperty().divide(1.5));

            stage.show();
        } catch (Exception e) {
            System.out.print(e);
        }
    }
}
The lines to control the min/max size of the Stage have been removed, as the code to maintain the aspect ratio overrides its function. You could try it for yourself and put them back in, increase/decrease the window size, and see that it doesn’t prevent you from doing it.
That’s enough about controlling the size of the window, you're going to need to know how to set up the components inside of it as well, or they might go crazy or disappear off the edge of the window. We’re going to need to use some re-sizable components to do this, such as AnchorPane, Hbox, and VBox, and use some anchors to control them.
<?xml version="1.0" encoding="UTF-8"?>

<?import javafx.scene.Cursor?>
<?import javafx.scene.chart.AreaChart?>
<?import javafx.scene.chart.LineChart?>
<?import javafx.scene.chart.NumberAxis?>
<?import javafx.scene.control.Button?>
<?import javafx.scene.layout.AnchorPane?>
<?import javafx.scene.layout.HBox?>
<?import javafx.scene.layout.VBox?>

<AnchorPane maxHeight="400.0" maxWidth="600.0" minHeight="400.0" minWidth="600.0" prefHeight="400.0" prefWidth="600.0" styleClass="root" stylesheets="lankydan/tutorials/fxml/css.css" xmlns="http://javafx.com/javafx/8.0.111" xmlns:fx="http://javafx.com/fxml/1" fx:controller="lankydan.tutorials.fxml.controller.MainAppController">
   <children>
      <HBox prefHeight="400.0" prefWidth="600.0" AnchorPane.bottomAnchor="0.0" AnchorPane.leftAnchor="0.0" AnchorPane.rightAnchor="0.0" AnchorPane.topAnchor="0.0">
         <children>
            <AnchorPane prefHeight="400.0" prefWidth="420.0" HBox.hgrow="ALWAYS">
               <children>
                  <LineChart fx:id="lineGraph" createSymbols="false" legendVisible="false" prefWidth="423.0" visible="false" AnchorPane.bottomAnchor="28.0" AnchorPane.leftAnchor="0.0" AnchorPane.rightAnchor="0.0" AnchorPane.topAnchor="0.0">
                    <xAxis>
                    <NumberAxis autoRanging="false" lowerBound="-10" side="BOTTOM" tickUnit="1" upperBound="10" />
                    </xAxis>
                    <yAxis>
                      <NumberAxis autoRanging="false" lowerBound="-10" side="LEFT" tickUnit="1" upperBound="10" />
                    </yAxis>
                    <cursor>
                       <Cursor fx:constant="CROSSHAIR" />
                    </cursor>
                  </LineChart>
                  <AreaChart fx:id="areaGraph" createSymbols="false" legendVisible="false" prefHeight="372.0" prefWidth="423.0" AnchorPane.bottomAnchor="28.0" AnchorPane.leftAnchor="0.0" AnchorPane.rightAnchor="0.0" AnchorPane.topAnchor="0.0">
                    <xAxis>
                    <NumberAxis autoRanging="false" lowerBound="-10" side="BOTTOM" tickUnit="1" upperBound="10" />
                    </xAxis>
                    <yAxis>
                      <NumberAxis autoRanging="false" lowerBound="-10" side="LEFT" tickUnit="1" upperBound="10" />
                    </yAxis>
                    <cursor>
                       <Cursor fx:constant="CROSSHAIR" />
                    </cursor>
                  </AreaChart>
                  <HBox layoutX="33.0" layoutY="366.0" prefHeight="29.0" prefWidth="377.0" AnchorPane.bottomAnchor="5.0" AnchorPane.leftAnchor="33.0" AnchorPane.rightAnchor="13.0">
                     <children>
                        <Button fx:id="lineGraphButton" maxWidth="Infinity" mnemonicParsing="false" onAction="#handleLineGraphButtonAction" prefHeight="29.0" prefWidth="183.0" text="Line Graph" HBox.hgrow="ALWAYS" />
                        <Button maxWidth="Infinity" mnemonicParsing="false" onAction="#handleAreaGraphButtonAction" prefHeight="29.0" prefWidth="184.0" text="Area Graph" HBox.hgrow="ALWAYS" />
                     </children>
                  </HBox>
               </children>
            </AnchorPane>
            <VBox prefHeight="398.0" prefWidth="183.0" HBox.hgrow="NEVER">
               <children>
                  <Button maxHeight="Infinity" mnemonicParsing="false" onAction="#handleXYButtonAction" prefHeight="66.0" prefWidth="266.0" text="y=x" VBox.vgrow="ALWAYS" fx:id="xyButton" />
                  <Button maxHeight="Infinity" mnemonicParsing="false" onAction="#handleXYButton2Action" prefHeight="66.0" prefWidth="266.0" text="y=x-3" VBox.vgrow="ALWAYS" fx:id="xyButton2" />
                  <Button fx:id="squaredButton" maxHeight="Infinity" mnemonicParsing="false" onAction="#handleSquaredButtonAction" prefHeight="67.0" prefWidth="266.0" text="y=x^2" VBox.vgrow="ALWAYS" />
                  <Button fx:id="squaredButton2" maxHeight="Infinity" mnemonicParsing="false" onAction="#handleSquaredButton2Action" prefHeight="67.0" prefWidth="266.0" text="y=x^2+2" VBox.vgrow="ALWAYS" />
                  <Button fx:id="cubedButton" maxHeight="Infinity" mnemonicParsing="false" onAction="#handleCubedButtonAction" prefHeight="67.0" prefWidth="266.0" text="y=x^3" VBox.vgrow="ALWAYS" />
                  <Button fx:id="cubedButton2" maxHeight="Infinity" mnemonicParsing="false" onAction="#handleCubedButton2Action" prefHeight="67.0" prefWidth="266.0" text="y=(x-3)^3-1" VBox.vgrow="ALWAYS" />
                  <Button fx:id="clearButton" maxHeight="Infinity" mnemonicParsing="false" onAction="#handleClearButtonAction" prefHeight="67.0" prefWidth="266.0" text="clear" VBox.vgrow="ALWAYS" />
               </children>
            </VBox>
         </children>
      </HBox>
   </children>
</AnchorPane>
I know that’s a lot of code to take in, so I’m going to break it down for you.
AnchorPane.bottomAnchor="0.0" AnchorPane.leftAnchor="0.0"
AnchorPane.rightAnchor="0.0" AnchorPane.topAnchor="0.0"
This piece of code is taken out of one of the HBox tags and anchors it to each side of the AnchorPane that is the HBox's parent. The “0.0” means that it is anchored to the edge of the parent, so if this was made to be “5.0”, then it is anchored 5 units from each edge.
To make this a bit clearer:
AnchorPane.bottomAnchor="5.0"
This means the bottom of the HBox is anchored to be 5 units from the AnchorPane‘s bottom edge.
AnchorPane.leftAnchor="100.0"
And this one means that the left of the HBox is anchored to be 100 units from the left of the parent AnchorPane's left edge.
Some more properties are coming your way.
HBox.hgrow="ALWAYS"
Use this to make components inside an HBox grow horizontally when the HBox changes size. If you don’t want it to change, then use…
HBox.hgrow="NEVER"
Components inside VBox’s can also use a very similar property, but instead of changing horizontally, they will grow or shrink vertically.
VBox.vgrow="ALWAYS"
The examples above have used ALWAYS and NEVER, but you can also use the values INHERIT and SOMETIMES. They seem pretty straightforward, where INHERIT will take the property of its parent, and the SOMETIMES option will share the space when size is increased between children that have the SOMETIMES option, as long as there are no children marked with ALWAYS.
The last thing of note in this example is the maximum height or width of the buttons.
maxHeight="Infinity"maxWidth="Infinity"
Without these properties inside of the Button tags, they will not grow to fit their Hbox or Vbox parent, even though each Button has defined either the vgrow or hgrow property.
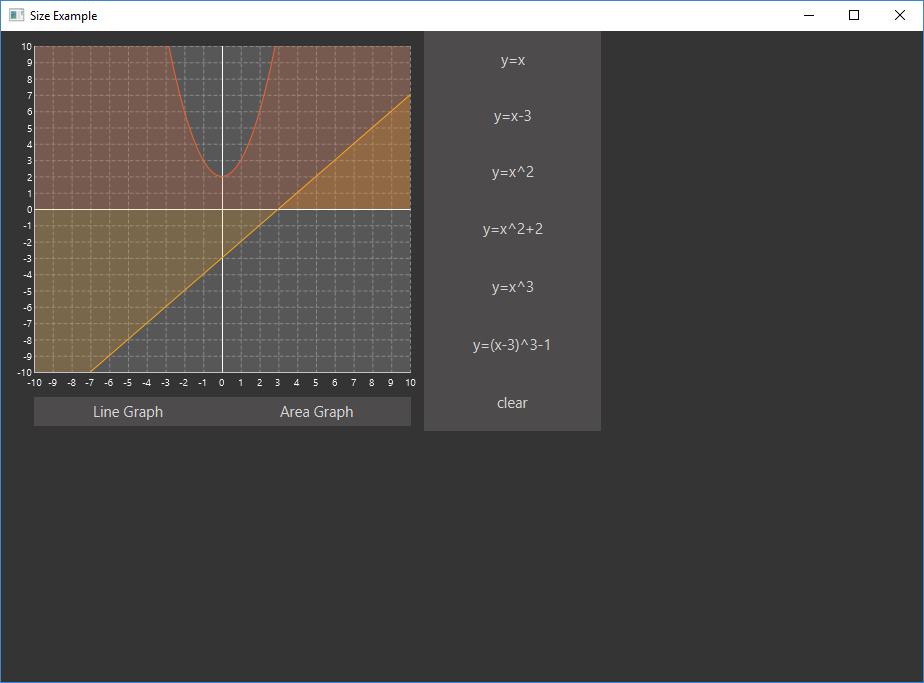
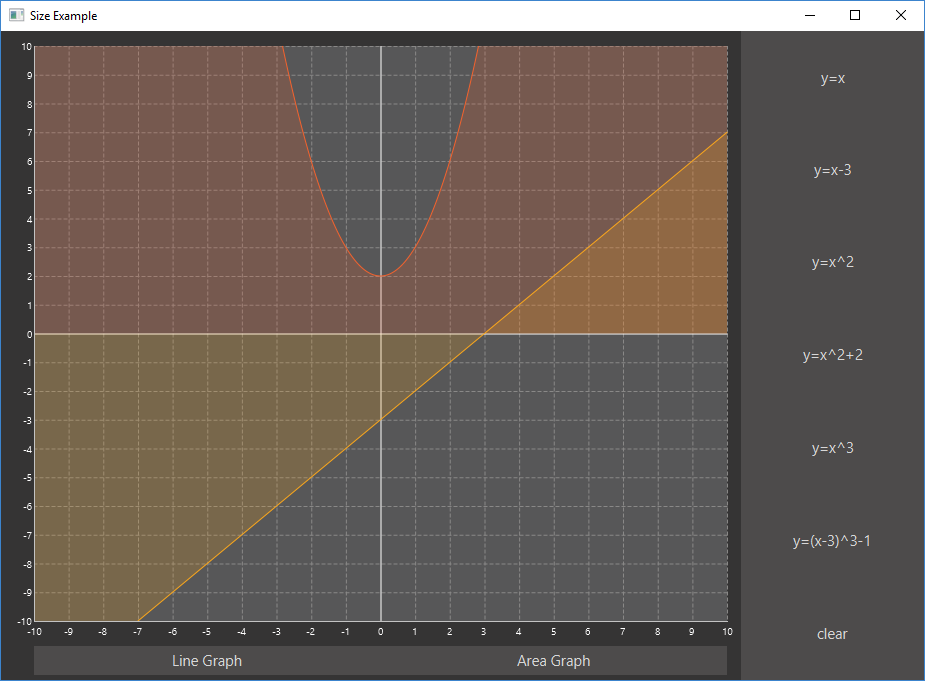
Adding this all together will leave you looking with a much nicer application.

That’s the end of this little tutorial. As you can see, size does matter. So go tell that to all your friends, just remember to tell them you are talking about JavaFX, or they might get the wrong impression!
Here is a link to all the code if you just want to plug in and go.
Published at DZone with permission of Dan Newton, DZone MVB. See the original article here.
Opinions expressed by DZone contributors are their own.

Comments