Spring Custom Validations
Spring makes our lives easier by providing us with built-in validations, but sometimes these are not enough. We will have a look at how we can add custom validations.
Join the DZone community and get the full member experience.
Join For FreeWhile building applications and services it is very important that we maintain data integrity especially if they are data-centric. It is crucial to have control over the data that the application interacts with to ensure it behaves as expected.
There are many times the data received may get corrupted before reaching the application or the user may provide wrong inputs. This will not create a problem if validations are applied as the application can return invalid requests and may ask the user to provide correct fields, but in the absence of validations, it is sure to cause problems in some instances, as it may process incorrect data and disrupt the flow.
Spring makes our lives easier by providing us with some built-in validations like:
- @NotNull
- @NotBlank
- @Size
- @Min
But sometimes these are not enough. For example: when we need to validate a field that should only expect a 10 digit phone number. In cases like these, we need to build our custom validations.
In this blog, we will have a look at how we can add custom validations with the help of an example.
Prerequisites
- Setup a Spring Boot Java 8 project using Spring Initializer.
The pom should look like this:
x
<dependencies>
<dependency>
<groupId>org.springframework.boot</groupId>
<artifactId>spring-boot-starter-validation</artifactId>
</dependency>
<dependency>
<groupId>org.springframework.boot</groupId>
<artifactId>spring-boot-starter-web</artifactId>
</dependency>
<dependency>
<groupId>org.hibernate</groupId>
<artifactId>hibernate-validator</artifactId>
<version>6.0.10.Final</version>
</dependency>
</dependencies>
<build>
<plugins>
<plugin>
<groupId>org.springframework.boot</groupId>
<artifactId>spring-boot-maven-plugin</artifactId>
</plugin>
</plugins>
</build>
Use Case
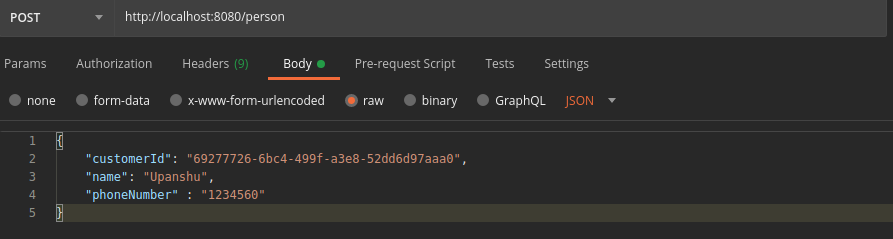
For this example, we will build a simple application that will provide us with an endpoint to POST data.
The Request body POJO looks like this. Here we have defined 3 fields which are name, customerId, and phoneNumber. We will validate customerId and phoneNumber by making our custom validations.
Defining Annotations
The first step is to define our Annotation with @interface.
- @Constraint: This is the annotation where we provide the class which will validate our field.
- @Retention: It defines at what point the annotation should be discarded. We will provide RetentionPolicy as RUNTIME so that it will be available to JVM during runtime.
- @Target: As the name suggests, here we define where this annotation can be used.
- @Documented: It ensures that classes using this annotation show this in their generated JavaDoc. Removing it won’t affect our code but it is a best practice to use it.
There are 3 attributes inside our annotation which are message(), groups() and payload(). Out of these we only need to know about message() for now which is the default message that will be given in case the validation fails.
Validation Class
This is the class where we will define the validation logic and provided in @Constraints.
The first step is to implement the ConstraintValidator<>.
An interface that provides us with two methods to @Override that initialize() and isValid().
Here we do not need to initialize any value for our validation hence we will not implement the initialize().
xxxxxxxxxx
public class CustomerIdValidator implements ConstraintValidator<CustomerId, String> {
private static final Logger log = LoggerFactory.getLogger(CustomerIdValidator.class);
public boolean isValid(String customerId, ConstraintValidatorContext constraintValidatorContext) {
if(!customerId.isEmpty() && customerId.matches(Constants.CUSTOMER_ID_REGEX)) {
log.info("Received valid customerId of type 'UUID'");
return true;
} else {
log.error("Received invalid customerId");
return false;
}
}
}
Implementing the Validation Annotation
As we have already seen in our POJO above we have applied @CustomerId on our customerId field, hence applying the validation.
Now that we have defined the constraints, we will now define our controller, which will accept Person as a body simply log the fields for this example.
Note: @Valid is very important here as it triggers the validation on the request.
xxxxxxxxxx
("person")
public class ValidationController {
private static final Logger logger = LoggerFactory.getLogger(ValidationController.class);
public Person create( Person person) {
logger.info("Received valid customerId {} and phone number {} ", person.getCustomerId(), person.getPhoneNumber());
return person;
}
}
Postman POST Request
![Postman POST Request]() Log
Log
 Log
Log
You can find this code here.
Opinions expressed by DZone contributors are their own.
Comments