Step-by-Step ASP.NET Core RESTful Web Service Development
In this post, we take a look at ASP.NET Core, and how to use this framework to create a RESTful web service and deploy that service.
Join the DZone community and get the full member experience.
Join For FreeIn this article, I am going explain step-by-step how to develop a RESTful Web service application in ASP.NET Core. ASP.NET Core is the latest technology released by Microsoft and is far better then it's predecessors, respectively WCF and Web API. You can download the project from here.
I have written one more article in .net Web API, you might like that too.
Prerequisite for this project:
Download the latest version of Microsoft Visual Studio. They have a free license version for practice.
For testing this application, download the SOAPUI tool from here, as we are going to use the SOAPUI tool for testing all the services.
Let's start our project step-by-step:
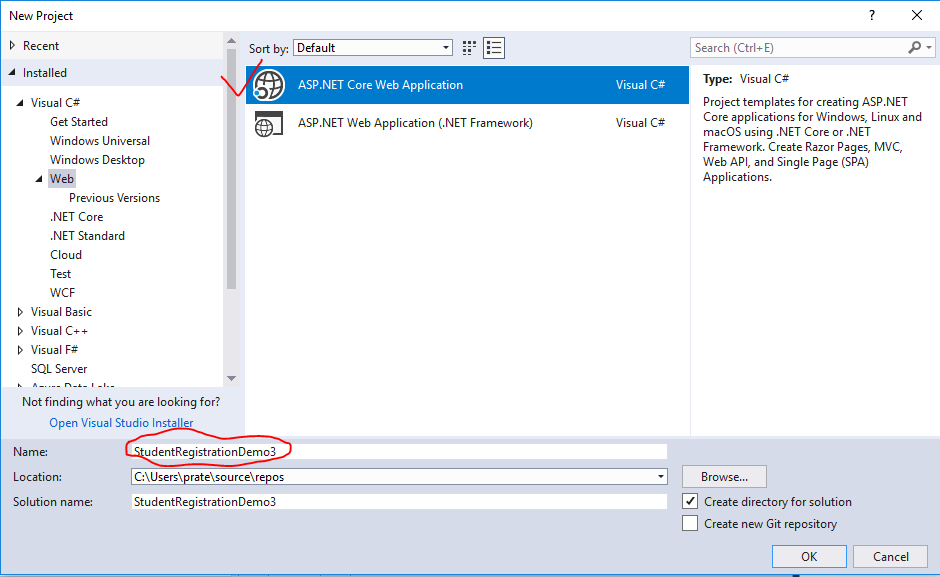
Step 1: First, create an ASP.NET Core Web Application project in Visual Studio and name it StudentRegistrationDemo3. For that, select File->New->Project->ASP.NET Core Web Application (see the below window) and click OK.
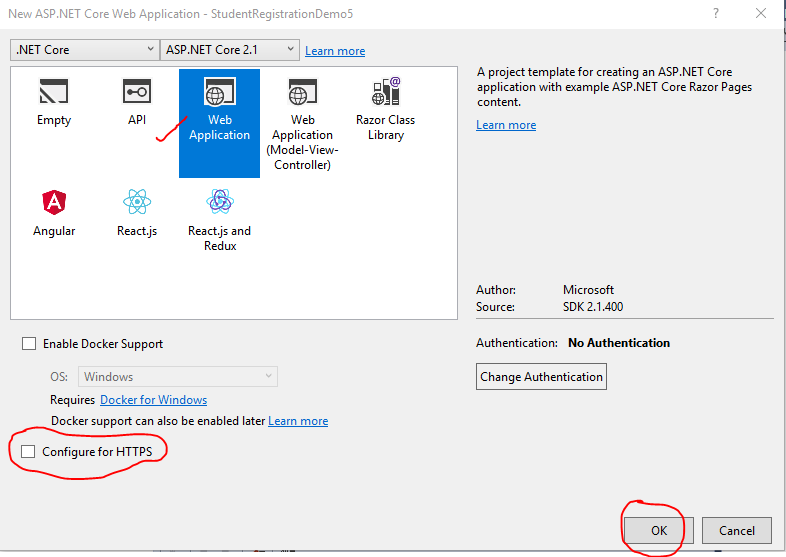
Once you click the OK button, you'll see the below window, where you need to select 'Web Application' and just uncheck the 'Configure for HTTPS' checkbox (otherwise, it will create an SSL-based project and you have to use HTTPS instead of HTTP in your all URLs during testing) and click the OK button.
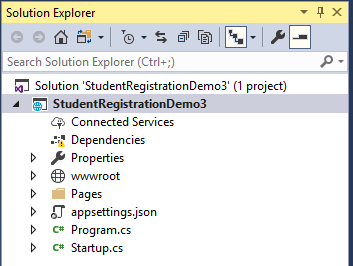
Once you click the OK button, it will create the below project structure:
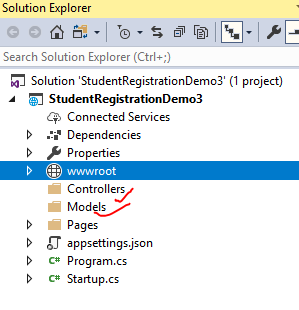
 Step 2: Now you need to add two folders in your project: one for Models and another one for Controllers. The Models folder is for resource classes and the Controllers folder is for Controller classes; this is required for this project. Just right-click on your project, Add=>New Folder, and rename it accordingly.
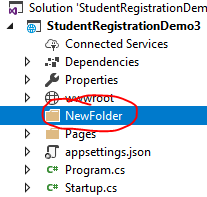
Finally, your project structure should look like below:
 Step 3: Now, we will create the below resource classes for handling our GET, POST, PUT, and DELETE services. Right click on the Models folder from the project explorer window and select Add=>Class (see below):
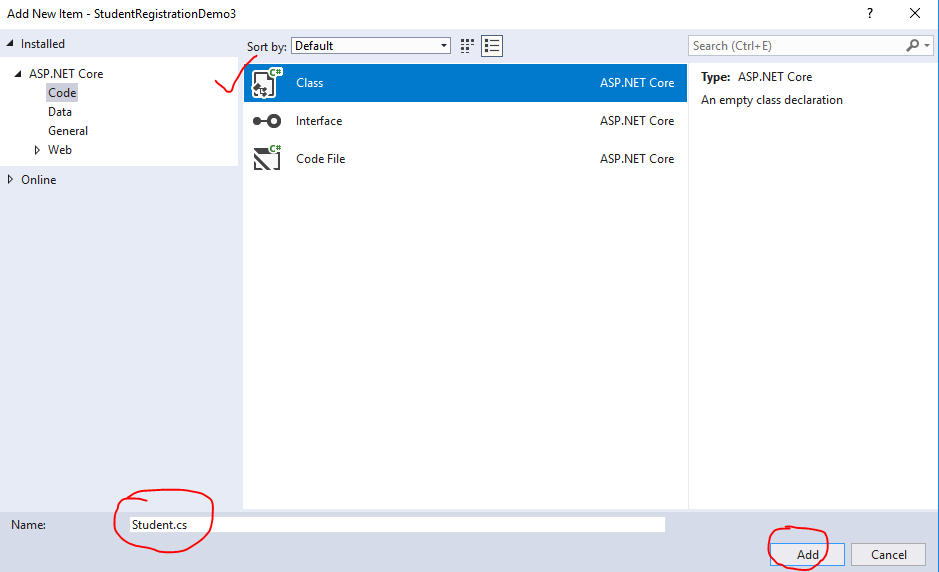
Now modify the Student class like below:
using System;
using System.Collections.Generic;
using System.Linq;
using System.Threading.Tasks;

namespace StudentRegistrationDemo3.Models
{
    public class Student
    {
        String name;

        public String Name
        {
            get { return name; }
            set { name = value; }
        }

        int age;

        public int Age
        {
            get { return age; }
            set { age = value; }
        }

        String registrationNumber;

        public String RegistrationNumber
        {
            get { return registrationNumber; }
            set { registrationNumber = value; }
        }
    }
}
Now follow the above step and add two more classes, respectively, StudentRegistration and StudentRegistrationReply, and modify them both like below:
using System;
using System.Collections.Generic;
using System.Linq;
using System.Threading.Tasks;

namespace StudentRegistrationDemo3.Models
{
    public class StudentRegistration
    {
        List<Student> studentList;
        static StudentRegistration stdregd = null;

        private StudentRegistration()
        {
            studentList = new List<Student>();
        }

        public static StudentRegistration getInstance()
        {
            if (stdregd == null)
            {
                stdregd = new StudentRegistration();
                return stdregd;
            }
            else
            {
                return stdregd;
            }
        }

        public void Add(Student student)
        {
            studentList.Add(student);
        }

        public String Remove(String registrationNumber)
        {
            for (int i = 0; i < studentList.Count; i++)
            {
                Student stdn = studentList.ElementAt(i);
                if (stdn.RegistrationNumber.Equals(registrationNumber))
                {
                    studentList.RemoveAt(i);//update the new record
                    return "Delete successful";
                }
            }

            return "Delete un-successful";
        }

        public List<Student> getAllStudent()
        {
            return studentList;
        }

        public String UpdateStudent(Student std)
        {
            for (int i = 0; i < studentList.Count; i++)
            {
                Student stdn = studentList.ElementAt(i);
                if (stdn.RegistrationNumber.Equals(std.RegistrationNumber))
                {
                    studentList[i] = std;//update the new record
                    return "Update successful";
                }
            }

            return "Update un-successful";
        }
    }
}
And:
using System;
using System.Collections.Generic;
using System.Linq;
using System.Threading.Tasks;

namespace StudentRegistrationDemo3.Models
{
    public class StudentRegistrationReply
    {
        String name;

        public String Name
        {
            get { return name; }
            set { name = value; }
        }
        int age;

        public int Age
        {
            get { return age; }
            set { age = value; }
        }
        String registrationNumber;

        public String RegistrationNumber
        {
            get { return registrationNumber; }
            set { registrationNumber = value; }
        }
        String registrationStatus;

        public String RegistrationStatus
        {
            get { return registrationStatus; }
            set { registrationStatus = value; }
        }
    }
}
Step 4: Now is the time to introduce controller classes to handle our GET, POST, PUT, and DELETE web requests. We will create separate controllers for GET, POST, PUT, and DELETE requests in this example even though it's not necessary, but I am using separate controllers for more clarity. Even one controller would suffice for all the above services, but, as per good design principles, we should have a separate controller so that it’s easy to maintain and debug the application.
Let’s start with the GET and POST request first. Right-click on the Controllers folder and select Add=>New Item, then select 'API Controller Class' and create a controller class called StudentRetriveController, as shown below, for handling GET requests.
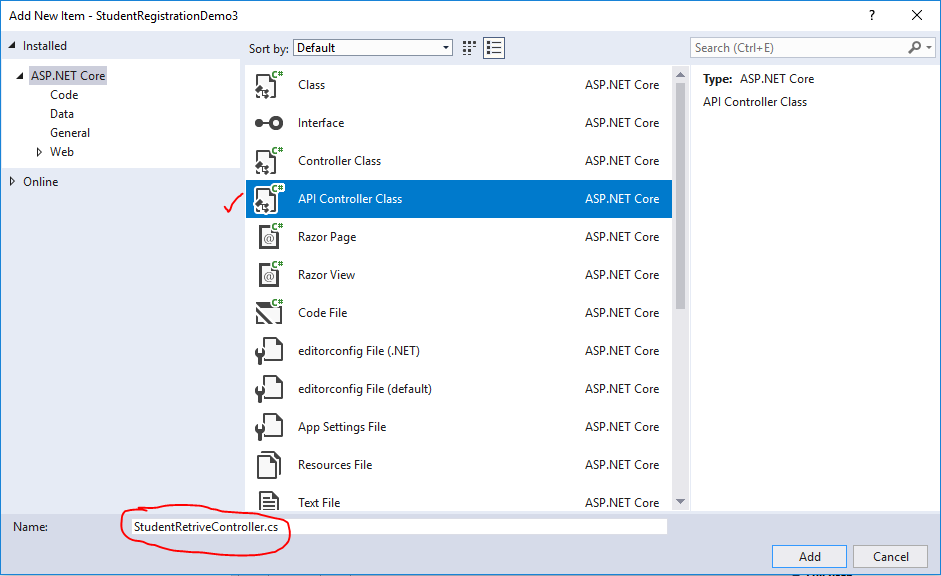
And modify the controller class like below:
using System;
using System.Collections.Generic;
using System.Linq;
using System.Threading.Tasks;
using Microsoft.AspNetCore.Mvc;

using StudentRegistrationDemo3.Models;

namespace StudentRegistrationDemo2.Controllers
{
    [Route("api/[controller]")]
    [ApiController]
    public class StudentRetriveController : Controller
    {
        // GET: api/<controller>
        [HttpGet]
        public List<Student> GetAllStudents()
        {
            return StudentRegistration.getInstance().getAllStudent();
        }

        [HttpGet("GetAllStudentRecords")]
        public JsonResult GetAllStudentRecords()
        {
            return Json(StudentRegistration.getInstance().getAllStudent());
        }
    }
}
Now, follow the above step and add one more controller class, StudentRegistrationController for handling POST requests and modifying the class like below:
using System;
using System.Collections.Generic;
using System.Linq;
using System.Threading.Tasks;
using Microsoft.AspNetCore.Mvc;

using StudentRegistrationDemo3.Models;

namespace StudentRegistrationDemo3.Controllers
{
    [Route("api/[controller]")]
    [ApiController]
    public class StudentRegistrationController : Controller
    {
        // POST: api/<controller>
        [HttpPost]
        public StudentRegistrationReply RegisterStudent(Student studentregd)
        {
            Console.WriteLine("In registerStudent");
            StudentRegistrationReply stdregreply = new StudentRegistrationReply();
            StudentRegistration.getInstance().Add(studentregd);
            stdregreply.Name = studentregd.Name;
            stdregreply.Age = studentregd.Age;
            stdregreply.RegistrationNumber = studentregd.RegistrationNumber;
            stdregreply.RegistrationStatus = "Successful";

            return stdregreply;
        }

        [HttpPost("InsertStudent")]
        public IActionResult InsertStudent(Student studentregd)
        {
            Console.WriteLine("In registerStudent");
            StudentRegistrationReply stdregreply = new StudentRegistrationReply();
            StudentRegistration.getInstance().Add(studentregd);
            stdregreply.Name = studentregd.Name;
            stdregreply.Age = studentregd.Age;
            stdregreply.RegistrationNumber = studentregd.RegistrationNumber;
            stdregreply.RegistrationStatus = "Successful";

            return Ok(stdregreply);
        }

        [Route("student/")]
        [HttpPost("AddStudent")]
        public JsonResult AddStudent(Student studentregd)
        {
            Console.WriteLine("In registerStudent");
            StudentRegistrationReply stdregreply = new StudentRegistrationReply();
            StudentRegistration.getInstance().Add(studentregd);
            stdregreply.Name = studentregd.Name;
            stdregreply.Age = studentregd.Age;
            stdregreply.RegistrationNumber = studentregd.RegistrationNumber;
            stdregreply.RegistrationStatus = "Successful";

            return Json(stdregreply);
        }

    }
}
We are done with our first stage, now is the time to test our application
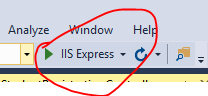
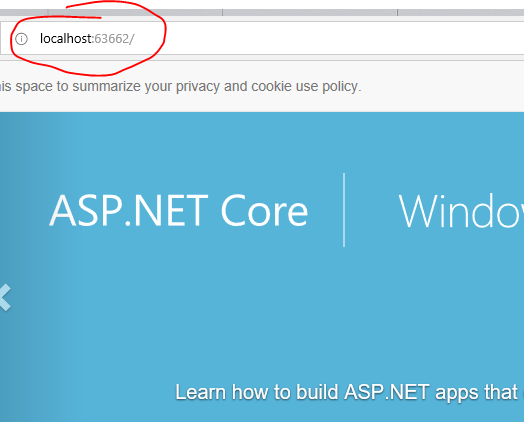
Step 5: In your Visual Studio menu bar, you can see a green arrow button. Here you can select a browser installed in your system and click it. It will start your web server and run your web service application.
 Now wait until your browser window loads properly, like below:
Now the server is running and we will do our first a GET service call.
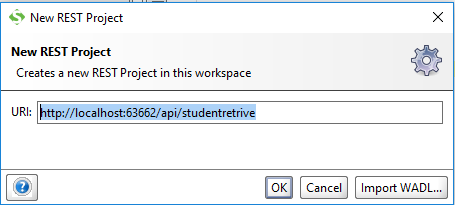
Step 6. I hope you have already installed SOAPUI to your system; if not, download SOAPUI from here. Now open the application and from the File menu select 'New REST Project' (File=>New REST Project) and copy-and-paste the below URL and click the OK button. Please change the port number 63662 as it might be different in your case.
http://localhost:63662/api/studentretrive
(Notice the URL we are using has the controller name, studentretrive (StudentRetriveController), as resource locator)
 Once the project is created, just click the green arrow button and you can see an empty records folder like below:
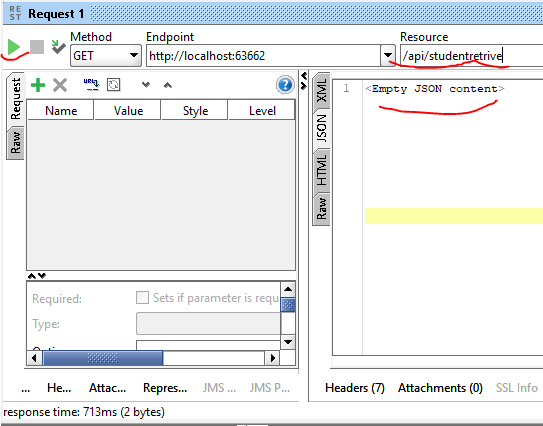 The reason is obvious, as our Student list is empty. So we have to insert a few records here. To add records, we will use our POST service. Let's test our POST service now.
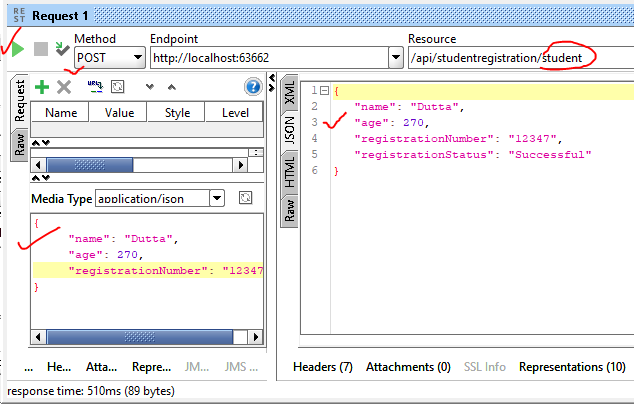
Step 7. Just follow step 6 and create a new REST project and add the below URL.
http://localhost:63662/api/studentregistration
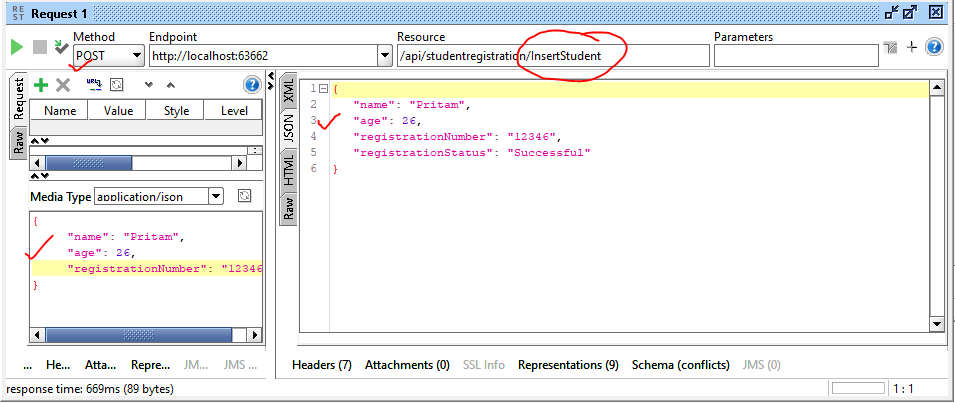
But, here, we need to do some extra configuration. First, select POST from the methods list and add the record in Media Type to insert it into the application. Now, click the green arrow button and you can see the below window.

Now, look at the StudentRegistrationController class. Here, I have introduced four different types of POST services. The reason for introducing four different types of POST methods is to provide you an example of using generic types as return type. In the first POST service method, RegisterStudent, the return type is a user define type, StudentRegistrationReply. Suppose that during insertion we get an exception; how will we inform the caller about the exception type? Because return type is StudentRegistrationReply, we must return an object of type StudentRegistrationReply only. Hence, we need a generic return type so that we can return any object type. But, we have a solution to handle this kind of situation. Now look at the other methods; the return types are generic and we use JSON so we can return any type of object.
Now use the URL http://localhost:63662/api/studentregistration/InsertStudent to invoke a POST method using InsertStudent (InsertStudent is not case sensitive). Notice here that the return type is IActionResult, a generic type. But the return type implementation logic is exactly the same as the first method, it's just used to add a record. Also notice [HttpPost("InsertStudent")], which helps us to design our resource path. Now you have to add the InsertStudent method at the end of the resource path. Using this the method, we can design a different resource path to execute different methods in a controller.
 Now we are going to test our third method,
 AddStudent. All of these three methods are doing the same operation, i.e. just adding records to the student list. But they have different return types and different resource paths. My intention is very clear here. First, what are the different ways we can return an object from a method? And second, how can we design different resource paths (routes) to call a specific web method?
Now use the URL http://localhost:63662/api/studentregistration/student to call the AddStudent method, where the return type is JsonResult. We can not use this as a return type if we return an XML message, and, in that case, we have to use IActionResult as a generic return type.
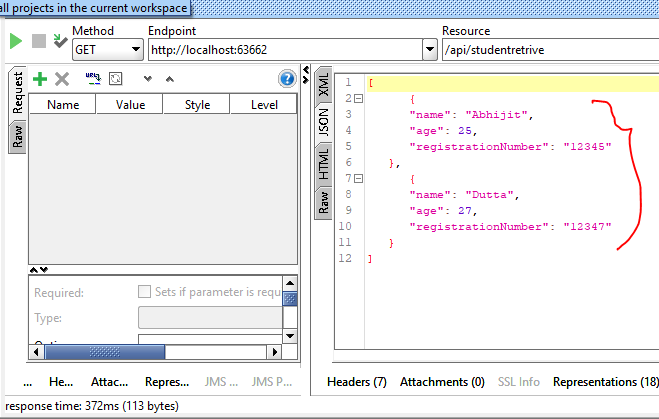
Now repeat the GET test and see the result:
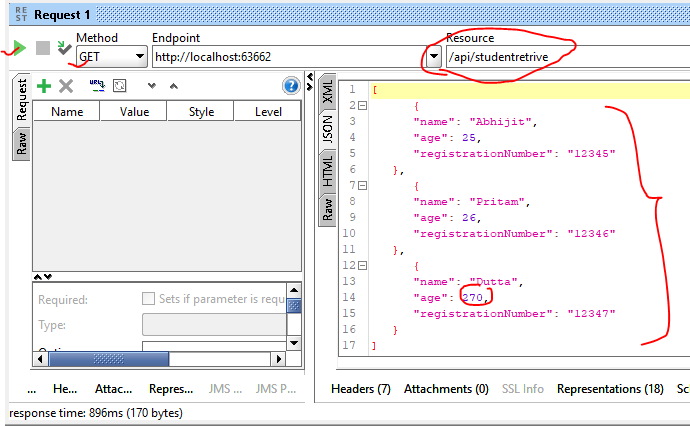 In the above screenshot, we have inserted the wrong age, which we are going to correct with our PUT request test.
So far so good. Now we are going to complete our last part of this project by introducing PUT and DELETE services.
Step 8. Now, first stop the server and follow Step 4 and add two more controller classes, StudentUpdateController and StudentDeleteController for PUT and DELETE services, respectively, and modify both the classes like below:
using System;
using System.Collections.Generic;
using System.Linq;
using System.Threading.Tasks;
using Microsoft.AspNetCore.Mvc;
using System.Text;

using StudentRegistrationDemo3.Models;

namespace StudentRegistrationDemo3.Controllers
{
    [Route("api/[controller]")]
    [ApiController]
    public class StudentUpdateController : Controller
    {
        // GET: api/<controller>
        [HttpPut]
        public JsonResult UpdateStudentRecord( Student stdn)
        {
            Console.WriteLine("In updateStudentRecord");
            return Json(StudentRegistration.getInstance().UpdateStudent(stdn));
        }
    }
}
And:
using System;
using System.Collections.Generic;
using System.Linq;
using System.Threading.Tasks;
using Microsoft.AspNetCore.Mvc;

using StudentRegistrationDemo3.Models;

namespace StudentRegistrationDemo2.Controllers
{
    [Route("api/[controller]")]
    [ApiController]
    public class StudentDeleteController : Controller
    {
        [Route("student/remove/{regdNum}")]
        // DELETE: api/<controller>
        [HttpDelete]
        public IActionResult DeleteStudentRecord(String regdNum)
        {
            Console.WriteLine("In deleteStudentRecord");
            return Ok(StudentRegistration.getInstance().Remove(regdNum));
        }
    }
}
Now, save the project and start the application again and insert three records where one of the records has the wrong value for age so that we can use a PUT service to correct it.
Step 9: Once you have inserted three records use below URL for a PUT request test. Here, select the PUT method.
http://localhost:63662/api/studentupdate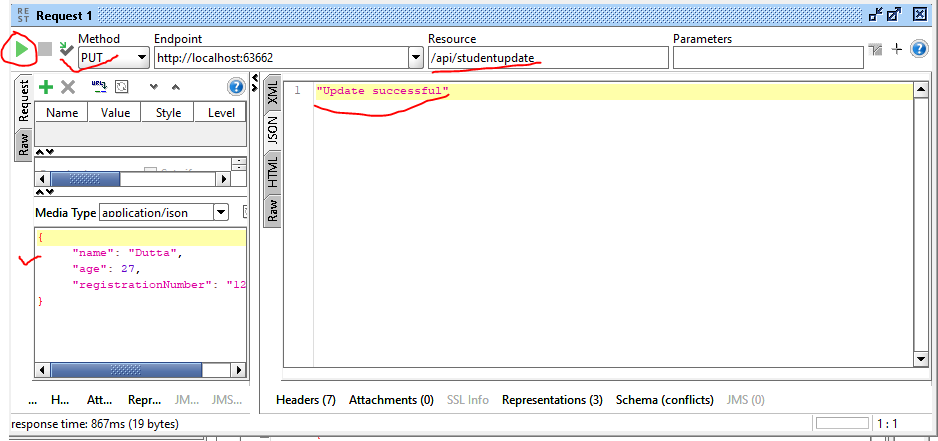
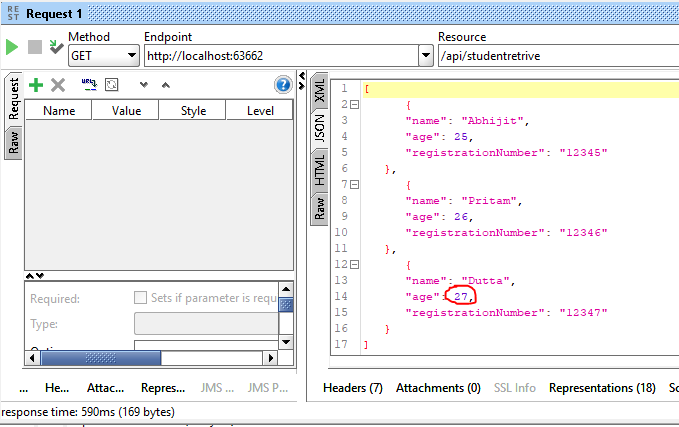
Now verify the updated record with a GET call.
Now is the time to test our last service, the DELETE request. Use the below URL and delete a record from the list. Also, take a look at how we have designed the resource path in the controller class, StudentDeleteController, as well.
http://localhost63662/api/studentdelete/student/remove/12346
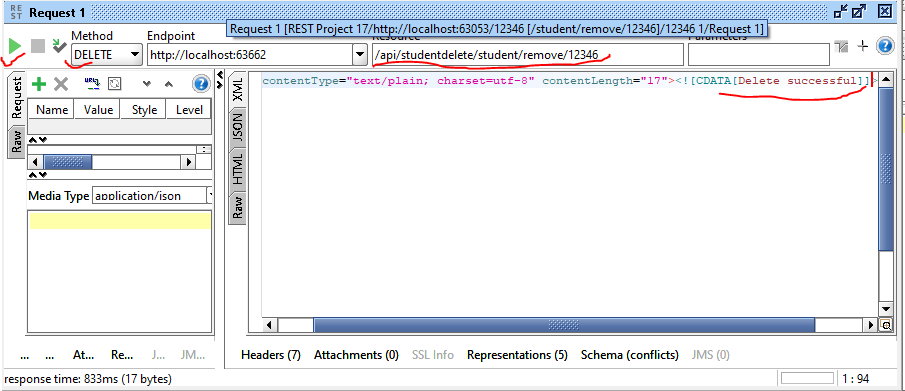
And finally verify the result:
Opinions expressed by DZone contributors are their own.
Comments