Test a Web Service Using Swagger UI
Swagger UI is a tool that makes the job of testing web APIs easier. In Part 1 we created a messaging app web API. In Part 2, we test our web service using Swagger.
Join the DZone community and get the full member experience.
Join For FreeSwagger UI is a tool that makes the job of testing web APIs easier.
In this sample, we build on on the previous sample where we created a messaging app web API using Linx. In that sample, we tested our web methods using Postman. In this sample, we will test them using the built-in Swagger UI feature of the Linx web service.
Before you start:
For a quick review of Linx, a low-code backend developer tool, and how it works, see this video.
Pre-requisites:
This sample builds on the Create a Messaging App Web API using a Linx Web Service sample. Alternatively, you can start with the following version of the Messaging_App solution: Messaging_App.lsoz (Requires the Linx IDE to view).
Add Swagger UI to the Messaging App
Open the Linx Designer, and open the Messaging_App solution, which was created in the 'Create a Messaging Server with a Linx Web Service' sample. Select the Web_service in the Solution Explorer, and change the API documentation property to Swagger UI.
Open the Messaging_App database in MongoDB, and delete all the documents from the User and Message collections.
Test the Add_user Web Method
Select the Web_service in the Linx Designer, and start the debugger. Since Swagger UI is enabled for the Web_service, it will be available at the sub-path /swagger of the base URI. Open a web browser, and browse to the Swagger UI at http://localhost:8095/messaging_app/api/swagger.
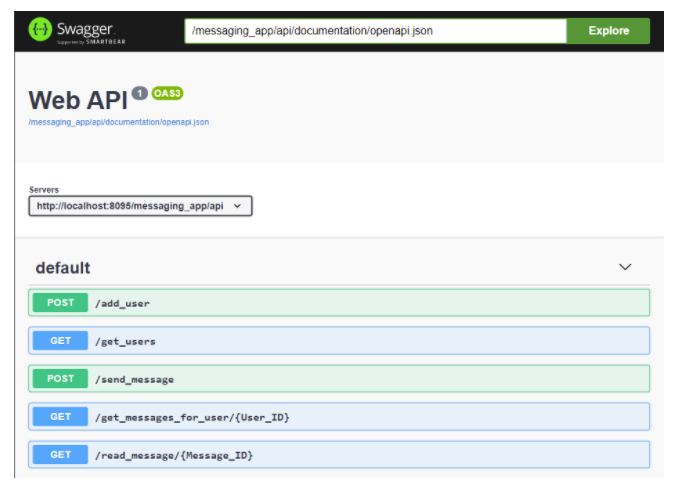
Expand the /add_user web method, and press the Try it out button. Change the text in the request body input box to the following:
{
"First_name": "Joe",
"Surname": "Bloggs",
"Email": "joe.bloggs@example.com"
}
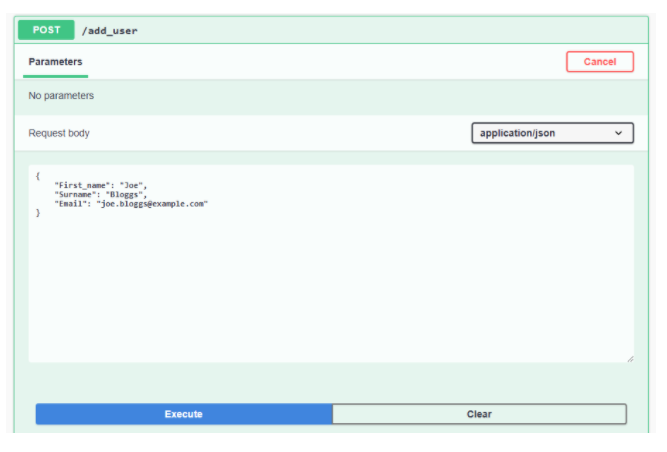
Execute the /add_user web method. The HTTP response code should be 200 OK. The newly created user should appear in the User collection in the Messaging_App database.
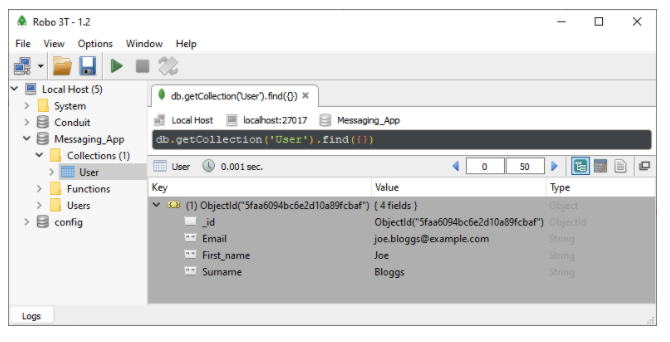
Execute /add_user again. The HTTP response code should be 500 Internal Server Error, with an error that indicates that the specified email address already exists in the system.
Add another user with the following request body:
xxxxxxxxxx
{
"Email": "joe.soap@example.com",
"First_name": "Joe",
"Surname": "Soap"
}
Test the Get_users Web Method
Expand the /get_users web method in the Swagger UI, press the Try it out button, and Execute it.
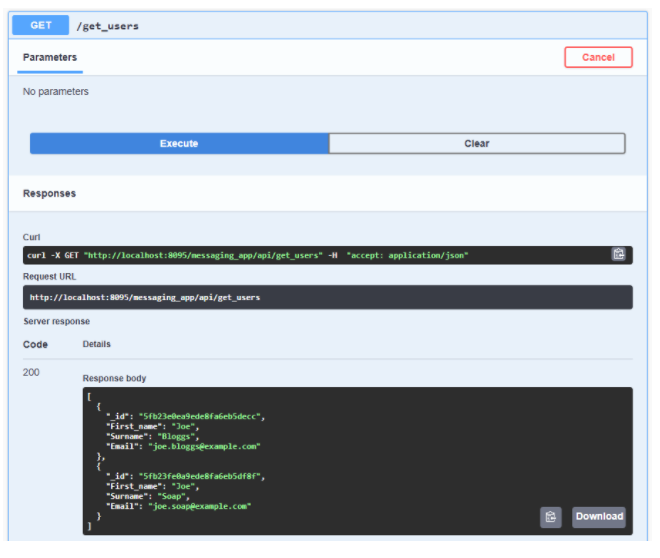
Test the Send_message Web Method
Expand the /send_message web method, and press the Try it out button. Change the text in the request body input box to the following:
xxxxxxxxxx
{
"User_ID": "5faa6094bc6e2d10a89fcbaf",
"Text": "Hello world."
}
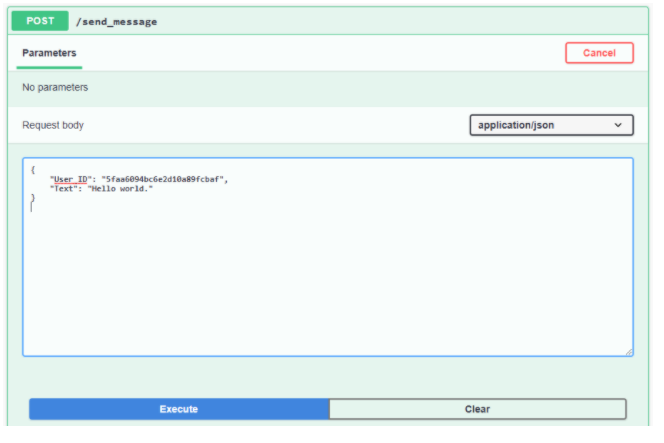
Execute /send_message. This request should fail with HTTP status code 500, and an error to indicate that the user with the specified ID is not found. This is because the User_ID in the /send_message request body, highlighted in red above, is from my database. You will have to change this to use the correct value from your database.
In Robo 3T, edit the document of the first user in the User collection. Copy the value of the ObjectId, and replace the User_ID in the /send_message request body in the Swagger UI.
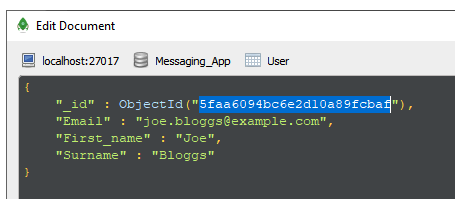
Execute /send_message again. This time the HTTP response code should be 200 OK. The newly sent message should appear in the Message collection in the database.
Execute /send_message once more. This should succeed because there is no natural key violation.
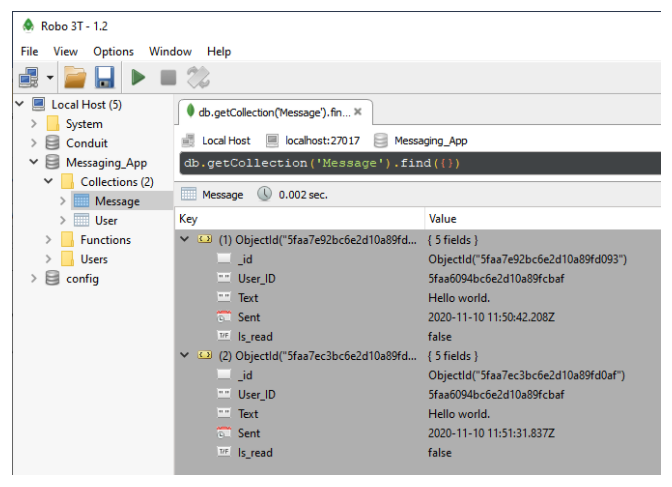
Test the Get_messages_for_user Web Method
Expand /get_messages_for_user in the Swagger UI, and press the Try it out button. Set the following parameter values in the parameter input boxes:
Parameter |
Value |
Is_read |
false |
User_ID |
5faa6094bc6e2d10a89fcbaf |
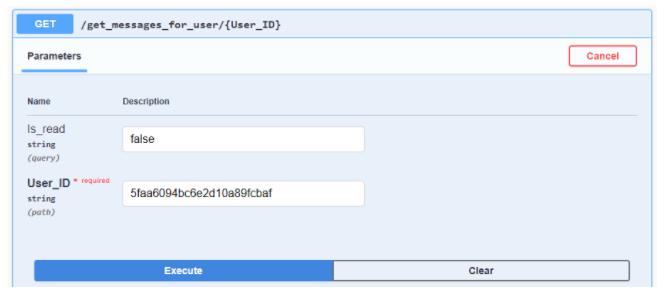
Execute /get_messages_for_user. This request should succeed but will return no messages. This is because the user ID parameter of /get_messages_for_user, highlighted in red above, is from my database. You will have to change this to use the correct value from your database.
In Robo 3T, edit the document of the user in the User collection, to which we have sent messages previously. Copy the value of the ObjectId, and replace the User_ID parameter of /get_messages_for_user in the Swagger UI.
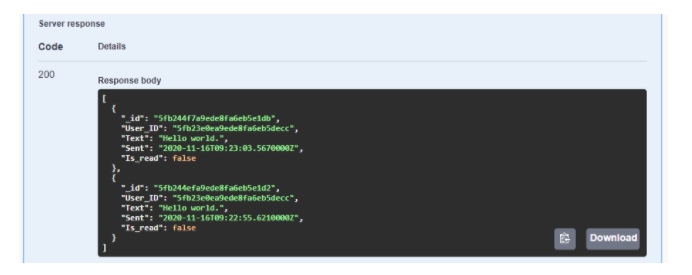
Now execute /get_messages_for_user again. The current list of messages for the specified user should be returned in JSON format.
Test the Read_message Web Method
Expand /read_message in the Swagger UI, and press the Try it out button. Set the Message_ID parameter to 5faa6094bc6e2d10a89fcbaf.
Execute /read_message. This request should fail with an error indicating that a message with the specified ID is not found. This is because the sample message ID, highlighted in red above, is from my database. You will have to change this to use the correct value from your database.
In Robo 3T, edit the document of the first message in the Message collection. Copy the value of the ObjectId, and replace the message ID parameter for /read_message in the Swagger UI.
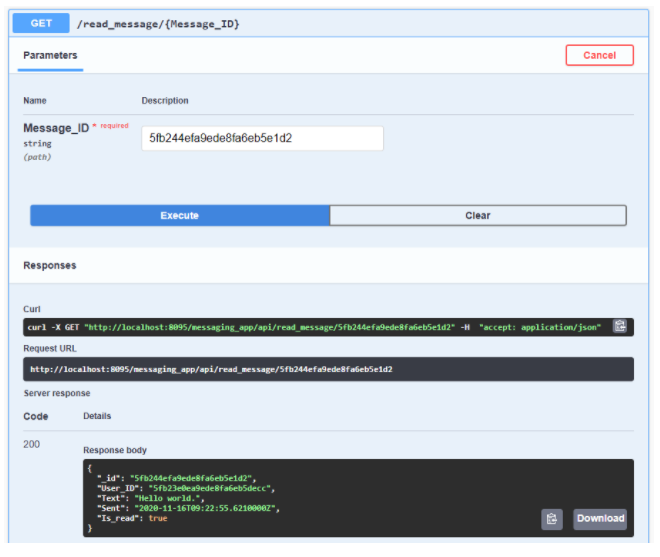
Now execute /read_message again. The message with the specified ID should be returned in JSON format.
Stop and close the debugger in the Linx Designer.
Voila! We're done.
Opinions expressed by DZone contributors are their own.

Comments