The @SpringBootApplication Annotation Example in Java + Spring Boot
Spring Boot has revolutionized how Java applications are created. Perhaps the most important annotation is @SpringBootApplication. Let's dive in and find out why.
Join the DZone community and get the full member experience.
Join For FreeHello guys! Today, we'll learn about one of the most important annotations from the popular Spring Boot framework, which has changed the way Java developers use Spring for writing Java applications. In this article, I'll explain the meaning of @SpringBootApplication and its use in a simple Spring Boot application. We use the @SpringBootApplication annotation in our Application or Main class to enable a host of features, e.g. Java-based Spring configuration, component scanning, and in particular for enabling Spring Boot's auto-configuration feature.
If you have been using Spring Boot for a long time, then you know that we need to annotate our Application class or Main class with quite a lot of annotations to start with, for example:
- @Configuration to enable Java-based configuration
- @ComponentScan to enable component scanning.
- @EnableAutoConfiguration to enable Spring Boot's auto-configuration feature.
But now you can do all that by just annotating your Application class with @SpringBootApplication.
By the way, this annotation is available from Spring 1.2 onwards, which means that if you are running on lower Spring Boot versions, then you still need to use @Configuration, @CompnentScan, and @EnableAutoConfiguration if you need those features.
The @SpringBootApplication Example
Here is a simple example of how to write a Spring Boot application using the @SpringBootApplication annotation. This code example is taken from my earlier article about consuming a RESTful web service using Spring. In this example, we have used a RestTempalte class to consume a RESTful web service.
package tool;

import org.slf4j.Logger;
import org.slf4j.LoggerFactory;
import org.springframework.boot.CommandLineRunner;
import org.springframework.boot.SpringApplication;
import org.springframework.boot.autoconfigure.SpringBootApplication;
import org.springframework.web.client.RestTemplate;


@SpringBootApplication
public class Hello implements CommandLineRunner {

    private static final Logger log = LoggerFactory.getLogger(Hello.class);

    public static void main(String args[]) {
        SpringApplication.run(Hello.class);
    }

    @Override
    public void run(String...args) throws Exception {

        RestTemplate restTemplate = new RestTemplate();
        Country country = restTemplate.getForObject("http://www.services.groupkt.com/country/get/iso2code/US", Country.class);
        log.info(country.toString());
    }
}
The Main class serves two purposes in a Spring Boot application: configuration and bootstrapping. First, it's the main Spring configuration class and second, it enables the auto-configuration feature of a Spring Boot application.
If you are interested in learning more about essential Spring Boot features, e.g. auto-configuration and the Starter dependency, then Spring Boot Essentials is a good place to learn them quickly.
@SpringBootApplication = @Configuration + @ComponentScan + @EnableAutoConfiguration
The @SpringBootApplication annotation is a combination of following three Spring annotations and provides the functionality of all three with just one line of code.
@Configuration
This annotation marks a class as a Configuration class for Java-based configuration. This is particularly important if you favor Java-based configuration over XML configuration.
@ComponentScan
This annotation enables component-scanning so that the web controller classes and other components you create will be automatically discovered and registered as beans in Spring's Application Context. All the@Controller classes you write are discovered by this annotation.
@EnableAutoConfiguration
This annotation enables the magical auto-configuration feature of Spring Boot, which can automatically configure a lot of stuff for you.
For example, if you are writing a Spring MVC application and you have Thymeleaf JAR files on the application classpath, then Spring Boot auto-configuration can automatically configure the Thymeleaf template resolver, view resolver, and other settings automatically.
So, you can say that @SpringBootApplication is a 3-in-1 annotation that combines the functionality of @Configuration, @ComponentScan, and @EnableAutoConfiguration.
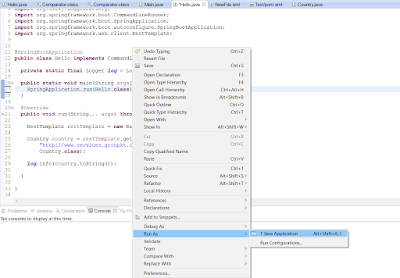
It also marks the class as a BootStrap class, which means you can runt it as a normal Java class, e.g. by running its JAR file from the command prompt as shown here, or just right-clicking and running it as a Java program in Eclipse IDE.
This will start the embedded server that comes along with Spring Boot and runs your web application inside it. Once you see the log without any errors, you can go to the browser and open the localhost with the server port to access your Spring Boot application.
That's all about the @SpringBootApplication annotation and a simple application to demonstrate how to use it. As I said, this nice little annotation packs quite a lot of punch. You can just write this one line of code to enable Java-based configuration, component scanning, and to enable the auto-configuration feature of Spring Boot. It makes your code more readable.
Published at DZone with permission of Javin Paul, DZone MVB. See the original article here.
Opinions expressed by DZone contributors are their own.


Comments