Three Ways to Integrate Slack With Heroku
Heroku makes it easy to integrate with the Slack business communication platform. Three available options are presented in this article by a DZone Core member.
Join the DZone community and get the full member experience.
Join For FreeOn December 1, Salesforce made the decision to acquire the industry-leading business communication platform, Slack, in order to combine functionality with the Salesforce Customer 360 software product. Heroku, a cloud-based platform as a service (PaaS) offering, has been a Salesforce product since being purchased ten years ago, nearly to the day.
As a result of this announcement, I thought it would be fun to demonstrate how to integrate Slack with three Heroku add-ons. For this article, the following products will be utilized:
- Activity To Go
- Coralogix Logging
- RollBar
My goal is to demonstrate how Slack—a tool already used for intra-team communication—can also be the target for application status updates, logging, and unexpected issues.
Activity To Go
Activity To Go keeps your team notified of all Heroku app changes and integrates quickly and easily with Slack. In fact, of all the integrations performed in this exercise, Activity To Go is by far the easiest to implement.
Installing the Activity To Go add-on can be done using the Heroku user interface or the following command:
heroku addons:create activitytogo:free
Once installed, the Activity To Go dashboard is available via the Heroku user interface:
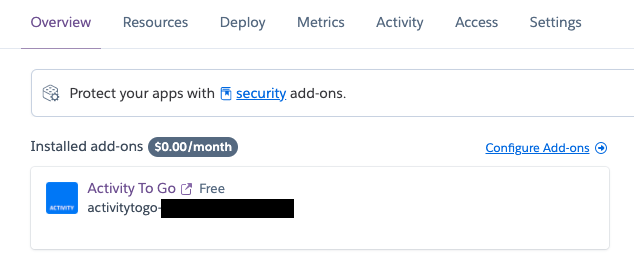
Once launched, the Dashboard appears as shown below:

Connecting to Slack
For the purposes of this example, Activity To Go will be used to send alerts any time the Heroku Dyno changes. The use case here is to alert the feature team when changes are being pushed to Heroku.
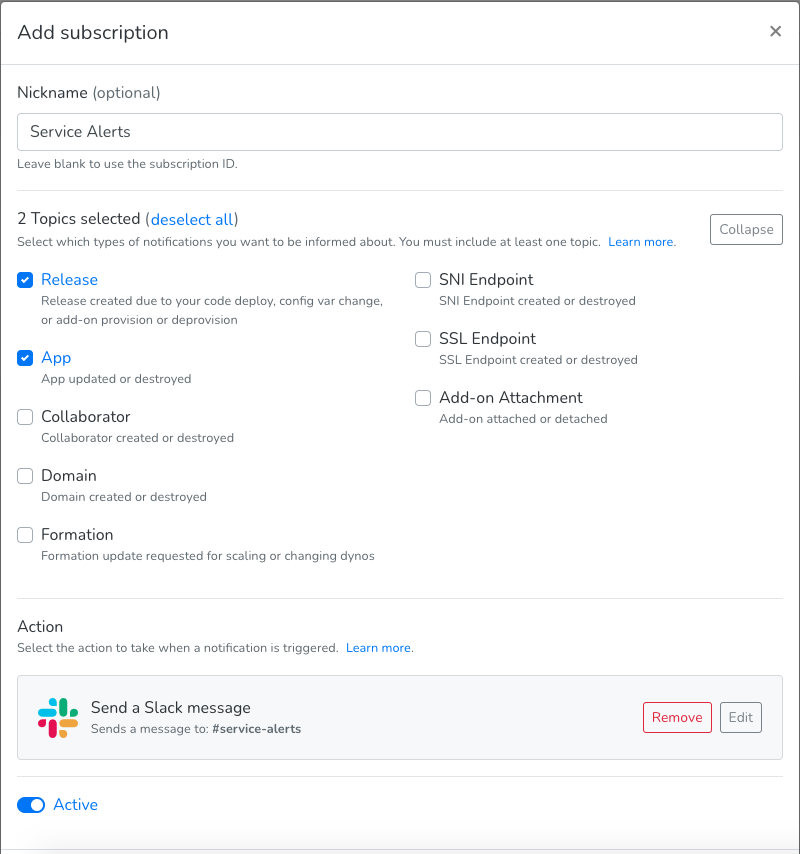
In order to accomplish this, the Add subscription button is used from the Activity To Go dashboard. That opens a new subscription form:
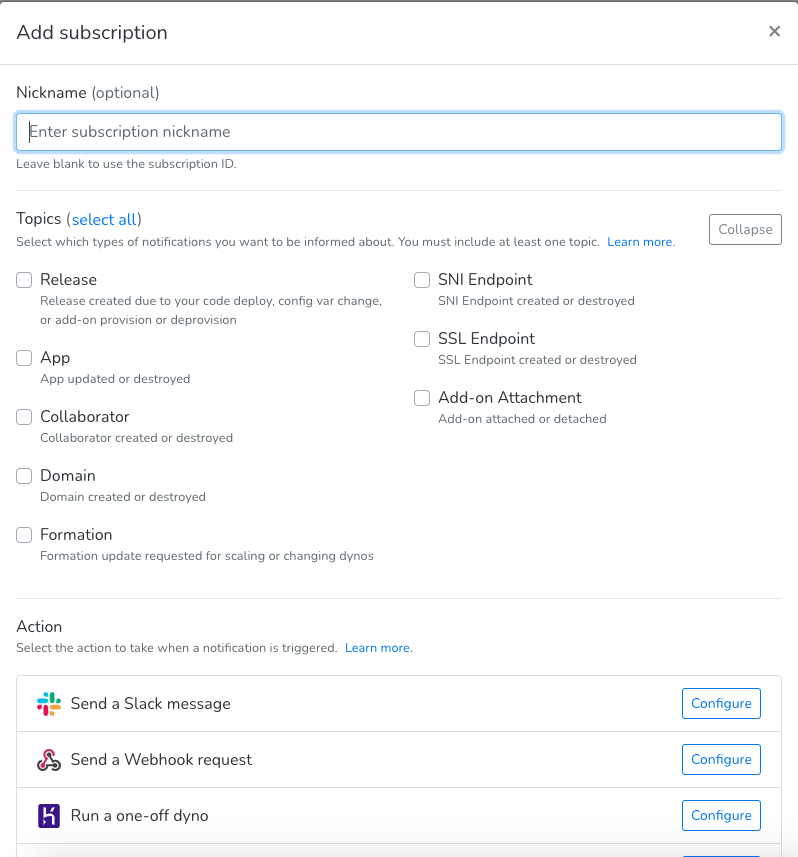
For the purposes of this example, I named my subscription Service Alerts and selected the Release and App options. Next, click the Configure button for "Send a Slack message."
This pops up a modal to allow access to Slack:
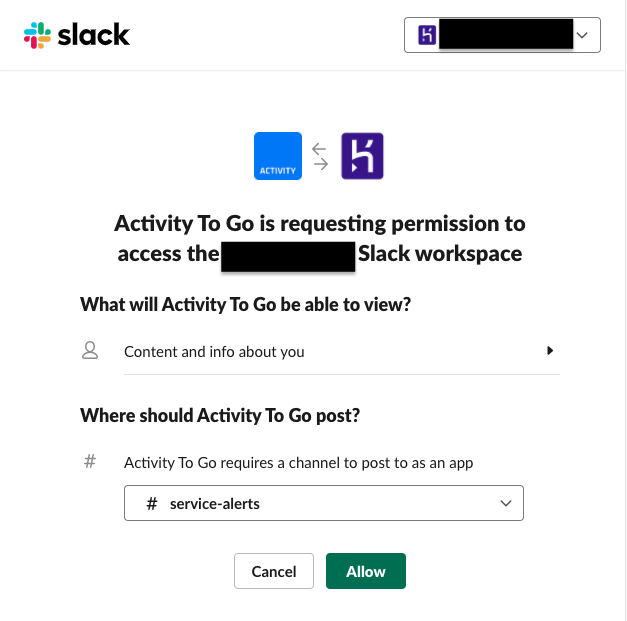
From here, select the service-alerts Slack channel and choose the Allow button.
The Configure Slack action modal is displayed so the settings can be confirmed:
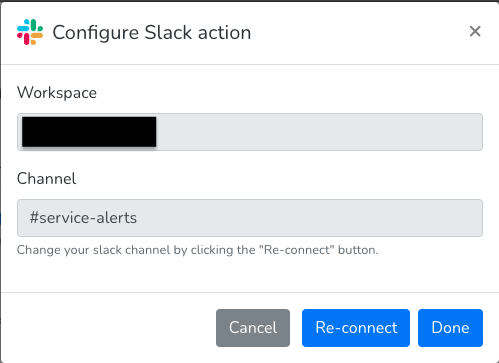
Upon pressing the Done button, you are ready to save the new subscription:
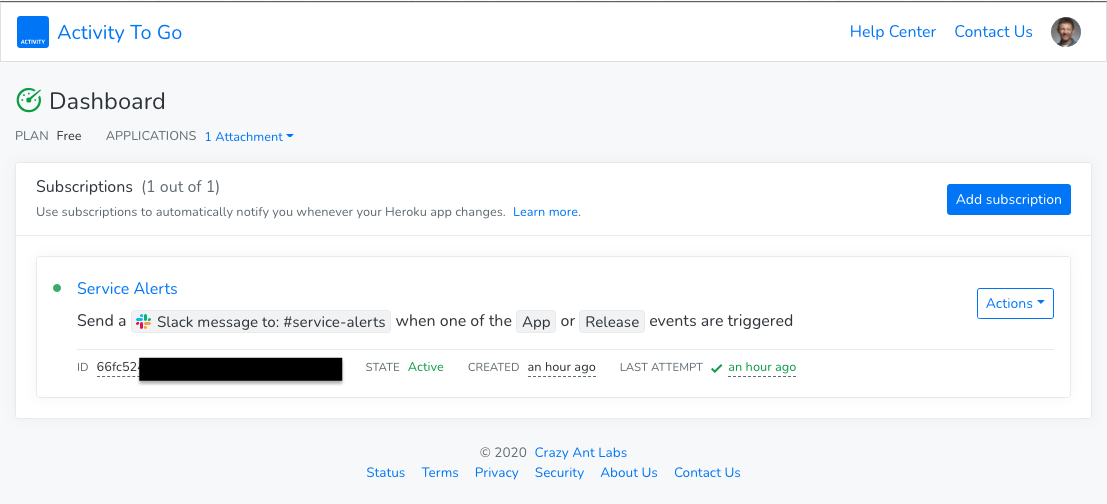
Once saved, the Activity To Go Dashboard is updated:
Coralogix Logging
Coralogix Logging provides logging which is integrated with Heroku's existing status levels.
Adding the Coralogix Logging add-on can be completed using the Heroku user interface or the following command:
heroku addons:create coralogix:free-30mbday
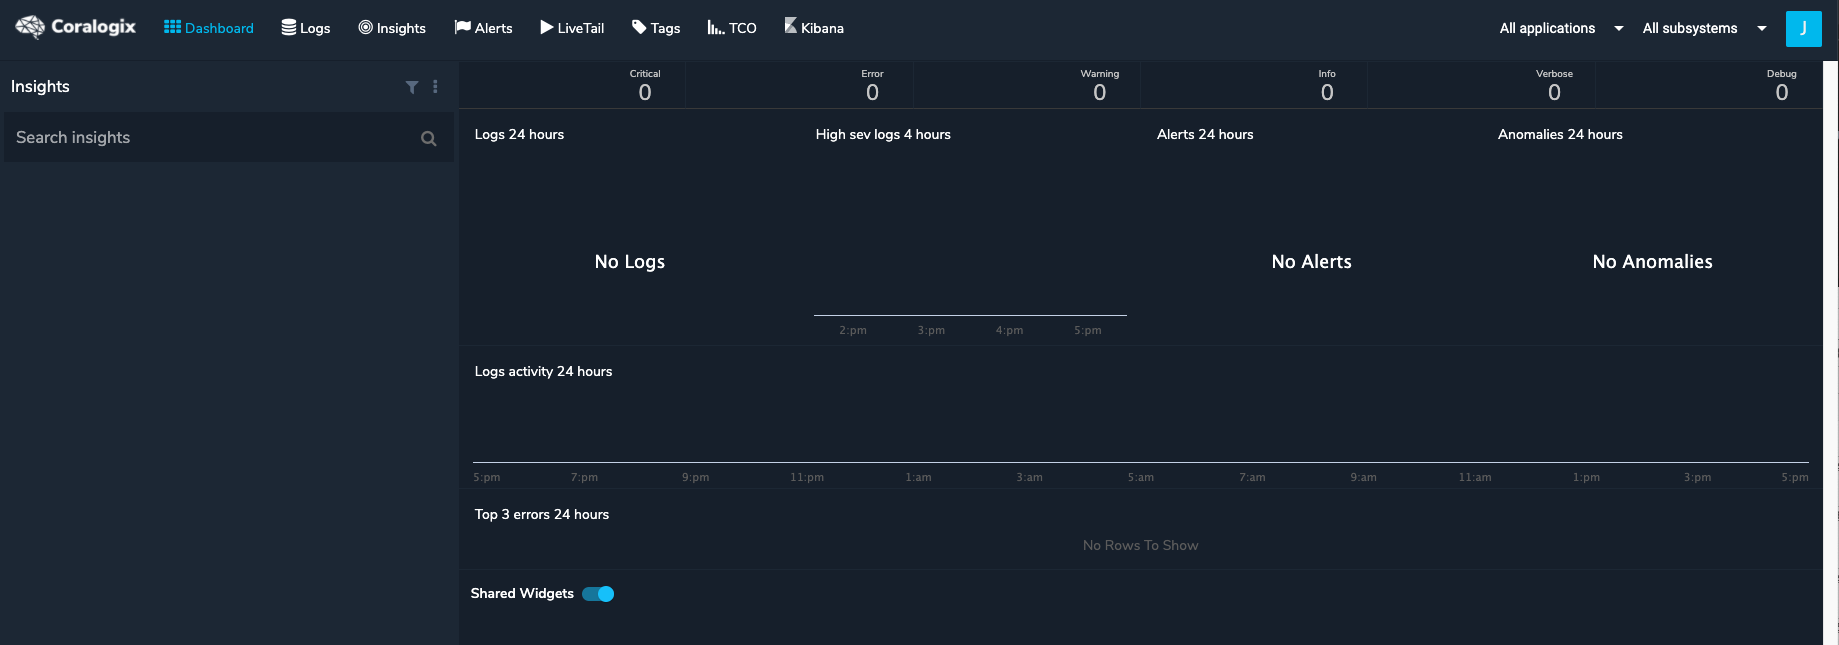
Once installed, the Coralogix dashboard can be displayed from the Heroku user interface:
Connecting to Slack
In order to connect to Slack, enter the Settings within the Coralogix dashboard. Next, select the Webhooks option and select the Add new webhook option (use the plus icon on the right side of the screen). Provide an alias as shown below and make sure to select the Slack option.
With the Slack instance open, launch the following URL:
Select the channel you wish to use (or create a new one) and single-click the Add Incoming Webhooks Integration button:

If the page does not automatically refresh, refresh it yourself and note the Webhook URL value.

Copy and paste the value in the Coralogix webhook form.

To validate, single-click the Test Configuration button. A message similar to what is displayed below should appear in the Slack instance:

At this point, Coralogix is now integrated with the specified Slack channel.
Configuring Alerts
With Coralogix ready for use, I decided to create two custom alerts:
- Activity alert
- Out of bounds error alert
Activity Alert
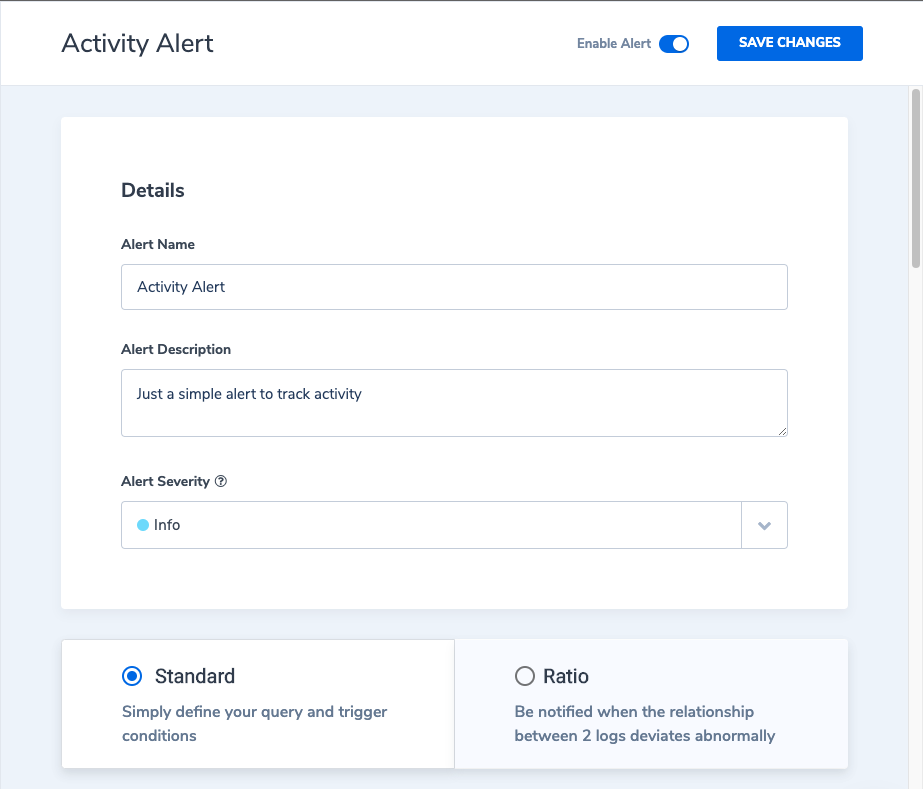
Within the Alerts section of the Coralogix dashboard, I made a new alert with the following attributes to track activity for the API:
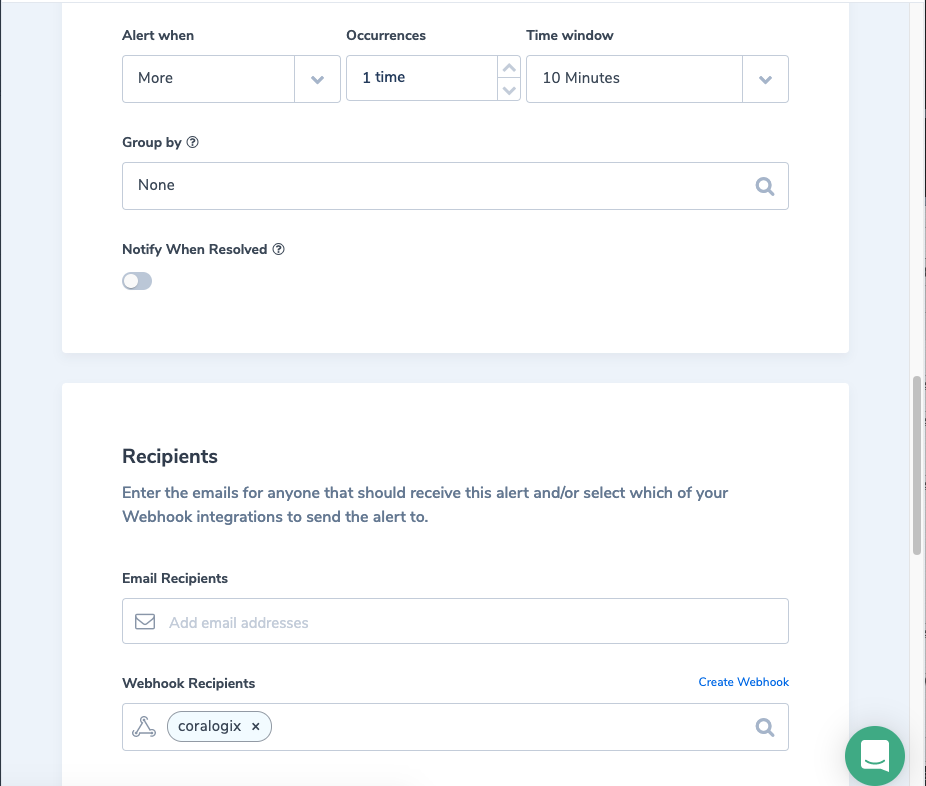
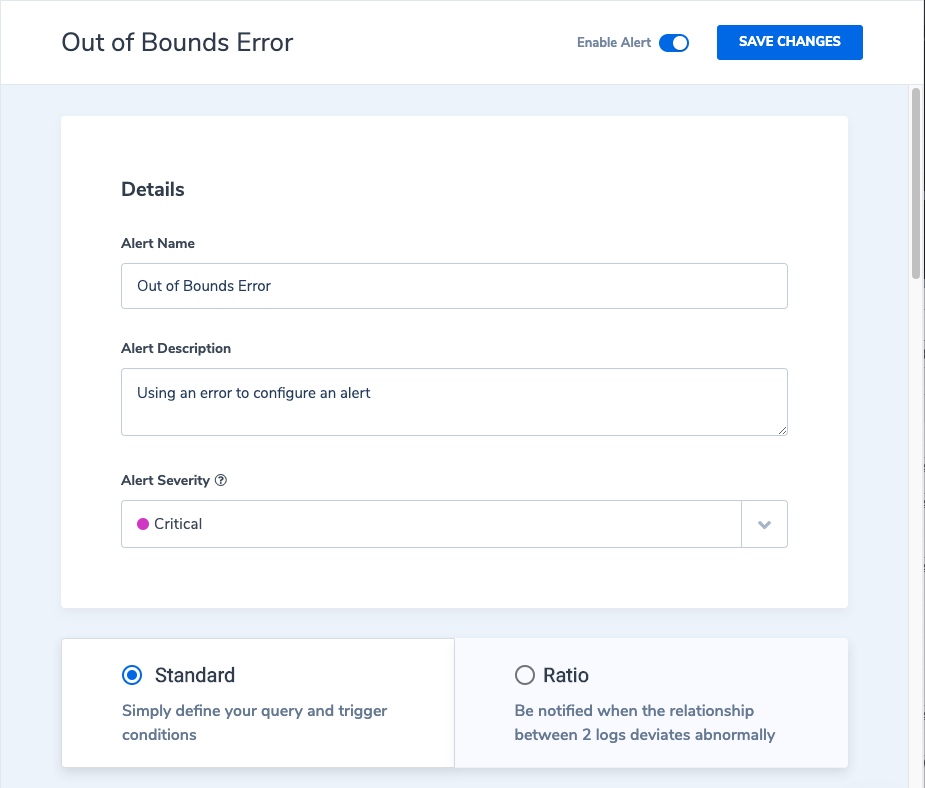
Out of Bounds Error Alert
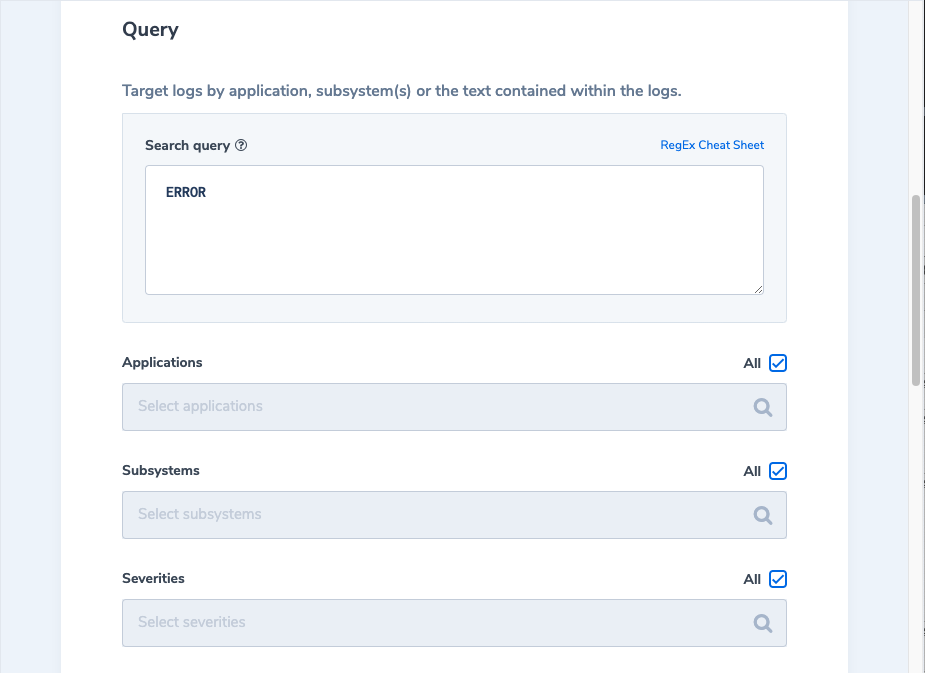
Within the Alerts section of the Coralogix dashboard, I created this new alert with the following attributes to track when the out of bounds exception occurs:

Adding Rollbar
Rollbar provides a different approach to application monitoring. It's not only focused on agile development and continuous delivery, but on providing real-time visibility into your application without having to refresh cluttered log screens and mine mountains of data. Furthermore, the data that arrives into the Rollbar dashboard links to the underlying source code—even to the point where existing tickets can be linked to an unexpected event, or a new ticket can be created directly from Rollbar itself.
To install the Rollbar add-on, use the Heroku user interface or the following command:
heroku addons:create rollbar:free
The pom.xml file has already been updated in this repository to include the following dependency:
<dependency>
<groupId>com.rollbar</groupId>
<artifactId>rollbar-spring-boot-webmvc</artifactId>
<version>1.7.4</version>
</dependency>
Next, the application.yml file was updated to include the following settings:
xxxxxxxxxx
rollbar
access-token$ROLLBAR_ACCESS_TOKEN
branchmaster
environment$ROLLBAR_ENVIRONMENT
code-version$HEROKU_RELEASE_VERSION
spring
application
nameheroku-slack
Finally, sending information to Rollbar can be as easy as this example from the RollbarEvents:
xxxxxxxxxx
public class RollbarEvents {
private final Environment environment;
private final RollbarConfigurationProperties rollbarConfigurationProperties;
private final Rollbar rollbar;
public void postConstruct() {
log.info("Started {} on port #{} using Rollbar accessToken={} ({})",
environment.getProperty("spring.application.name"),
environment.getProperty("server.port"),
SecurityUtils.maskCredentialsRevealPrefix(rollbarConfigurationProperties.getAccessToken(), 5, '*'),
rollbarConfigurationProperties.getEnvironment());
rollbar.info(String.format("Started %s on port #%s using Rollbar accessToken=%s (%s)",
environment.getProperty("spring.application.name"),
environment.getProperty("server.port"),
SecurityUtils.maskCredentialsRevealPrefix(rollbarConfigurationProperties.getAccessToken(), 5, '*'),
rollbarConfigurationProperties.getEnvironment()));
}
}
The following configuration items were set up in the Heroku instance for use by Rollbar:

Connecting to Slack
In order to connect to Slack, use the Settings menu from the Rollbar application (launched from Heroku). Once the Rollbar project is selected, navigate to the Integrations | Notifications option. Simply single-click the Slack icon in the list of Available Channels.
After selecting my existing access token, I selected the #application-errors channel and left all other defaults in place.
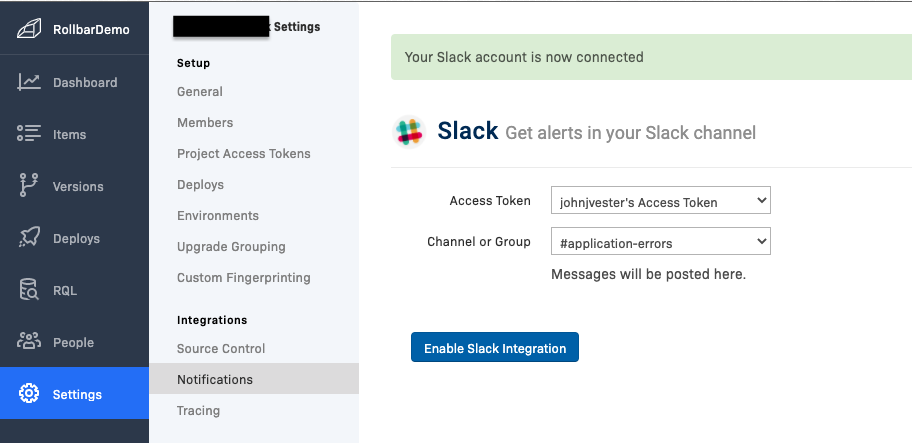
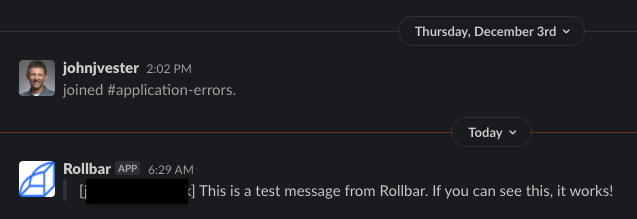
Pushing the Send Test Notification button will send a test message to Slack. Navigating to Slack and the #application-errors channel show the following test message:
Our Example - A Simple RESTful Application
Now let's see all three products in action. We'll create a simple RESTful application (integrated with all of these products), execute a few actions to trigger messages (deploy a new release, make config changes, make a request), and see how these integrations look in practice. For the example, we'll use a Heroku Dyno containing a simple RESTful API using Spring Boot, called heroku-slack which can be found at the following URL:
https://gitlab.com/johnjvester/heroku-slack
The heroku-slack service returns the Artist object in all available URIs.
The object is quite simple and is displayed below:
xxxxxxxxxx
public class Artist {
private String name;
}
Please review the heroku-slack repository for additional information on this RESTful service.
Interacting With Slack
Now that everything is set up and configured, we can demonstrate how the simple Spring Boot service running in Heroku can integrate with Slack.
Deploying a New Release
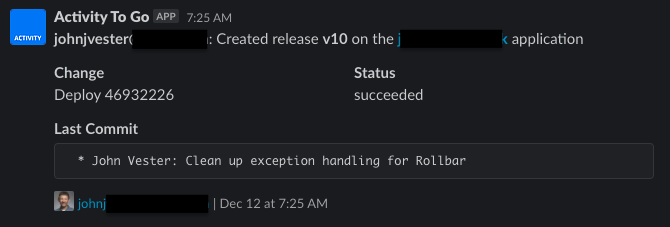
Giving feature team members the ability to see when the application is deployed to a Heroku Dyno has a number of benefits. With the Activity To Go add-on in place, the following message will appear in the #service-alerts Slack channel:
Heroku Dyno Configuration Changes
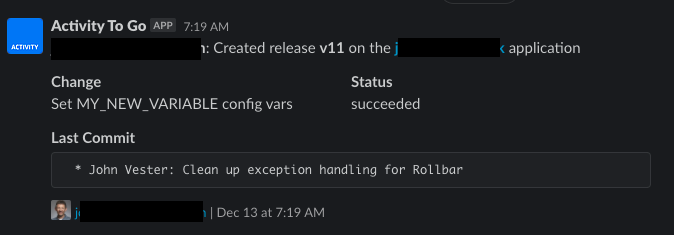
The Activity To Go add-on will also post a message in the #service-alerts Slack channel when system variables change in the Heroku instance:
Making a Simple Request
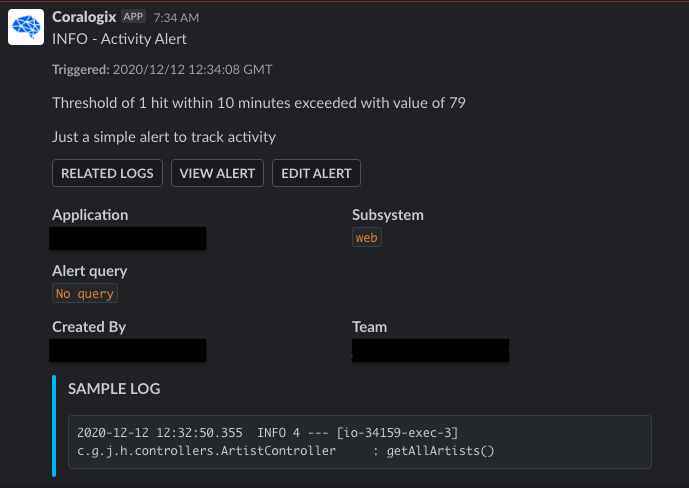
In this simple repository, using the GET /artists URI returns a list of hard-coded artists. Coralogix Logging is configured to publish the following Slack message in the #coralogix channel:
Generating a Bad Request
When a bad request is created—in this case by requesting an Artist for a position value which does not exist—both the Coralogix Logging and Rollbar add-on products provide information to Slack.
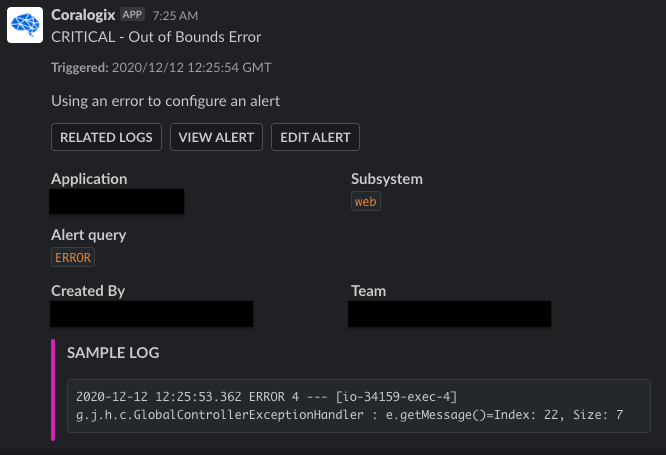
Trigging off the ERROR alert, Coralogix Logging posts the following message in the #coralogix channel in Slack:
Based upon the Java code updates and the GlobalControllerExceptionHandler, Rollbar posts the following message in the #application-errors channel in Slack:

The Rollbar product provides additional value in its ability to assign the error to a configured team member, directly from the Slack instance:

Please note that the error level can also be updated directly from Slack.
Summary Information
Both Coralogix Logging and Rollbar provide additional information from their user interfaces.
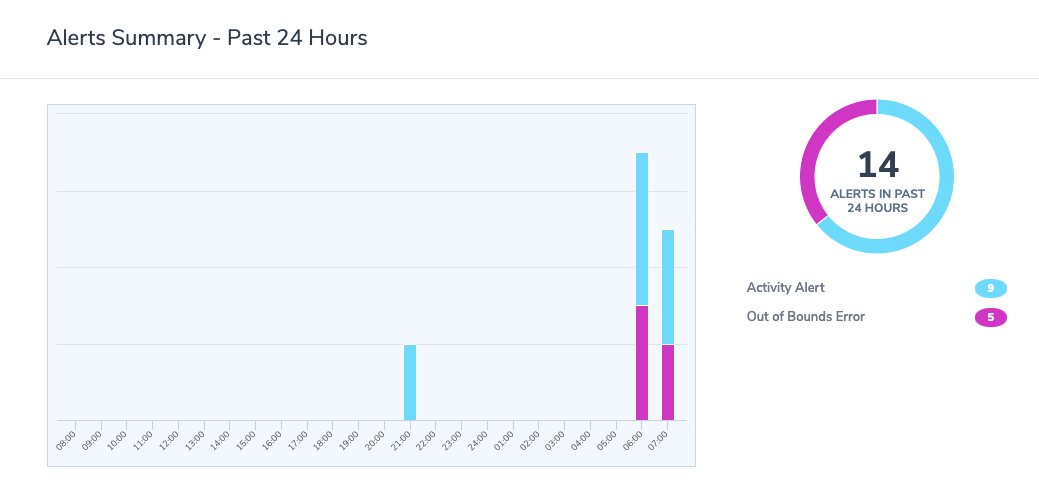
The Coralogix Logging alert summary provides a nice break-down of all the alerts that have been captured:
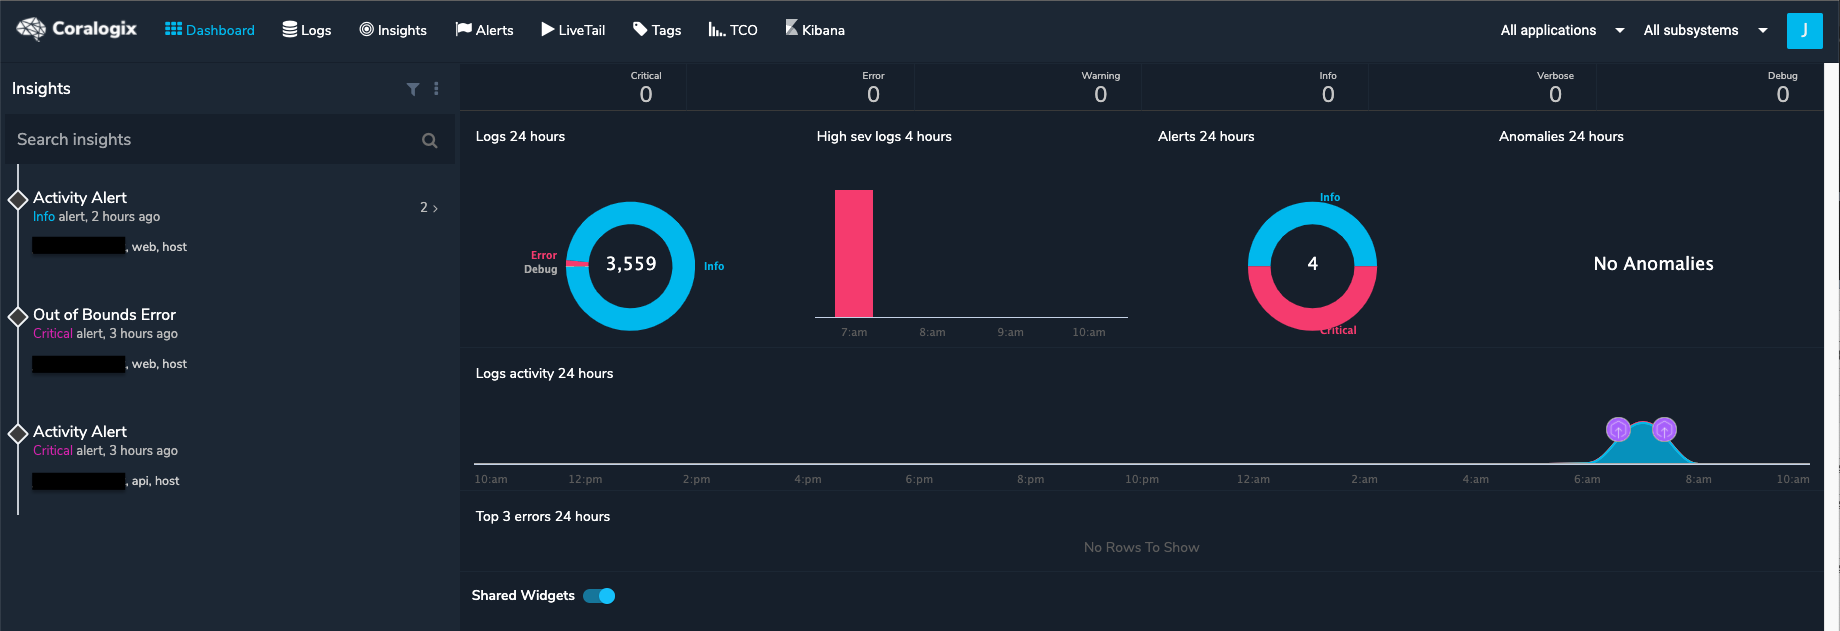
Coralogix Logging provides a high-level dashboard as well:
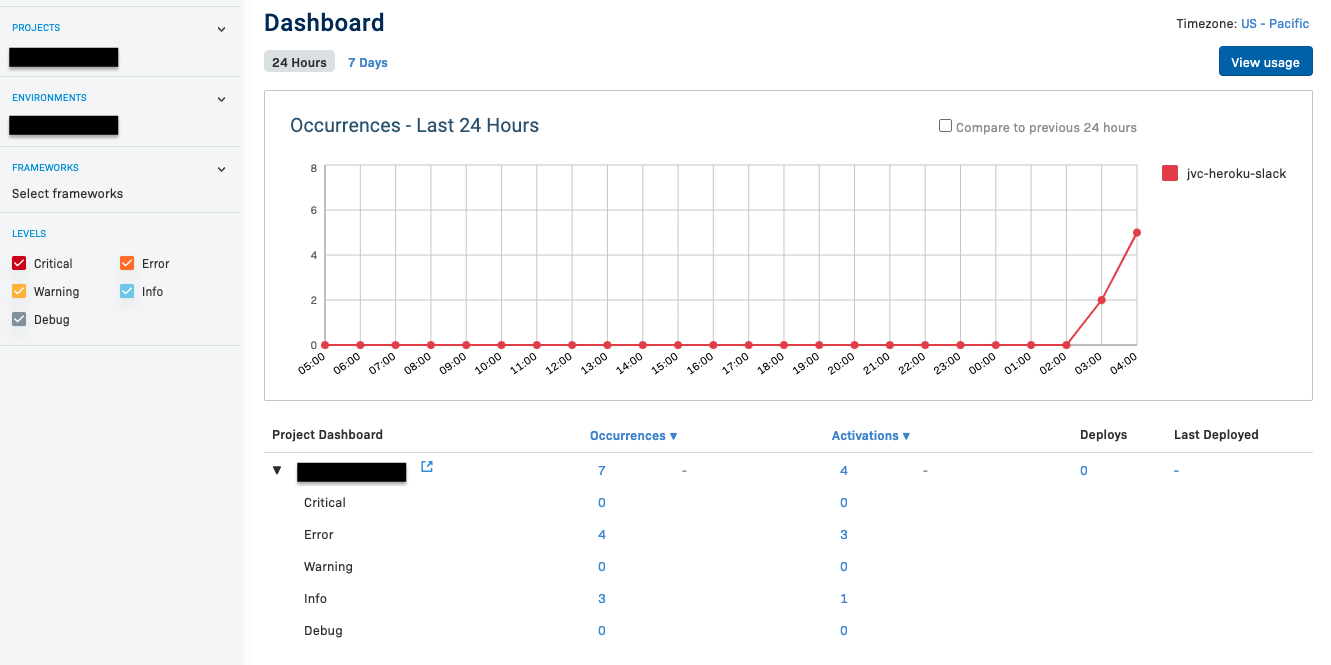
Rollbar provides an advanced dashboard which can even link directly to the source code:
The Items view provides a high-level summary of each error as well:

Conclusion
With a very low investment in both time and effort, an existing Heroku Dyno can be integrated with Slack. Feature team members and DevOps engineers can easily keep up-to-date with the application or service simply by logging into the specified Slack workspace.
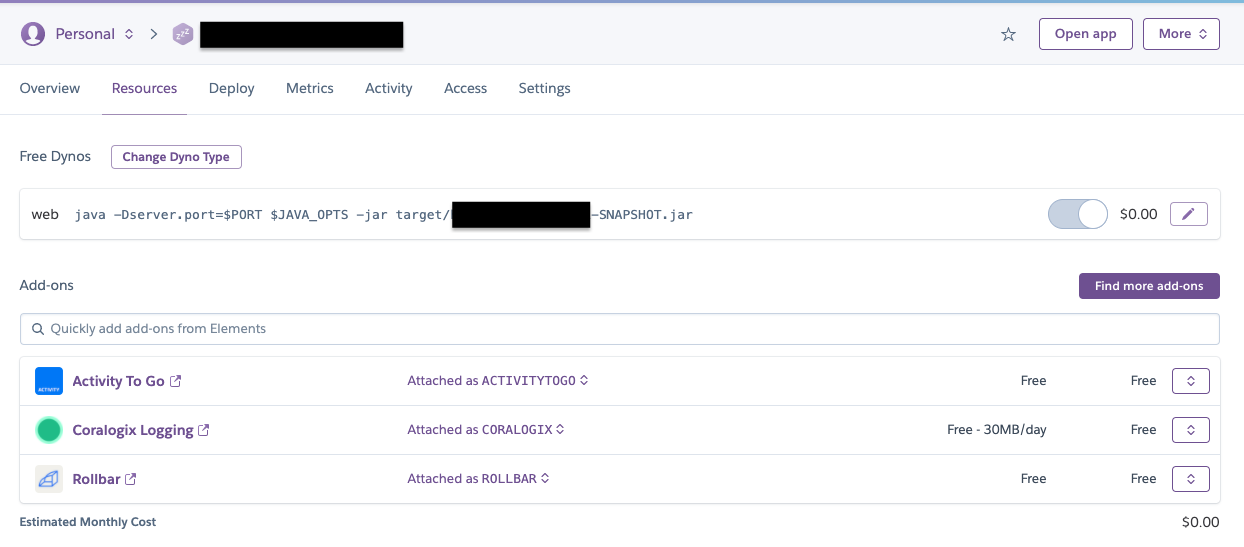
In the end, the project in Heroku contains the following add-ons. As you can see, for this demonstration, none of the employed items will carry a monthly cost for use:
This article focused on three add-ons currently available in the Heroku catalog. Using a keyword search of "slack" provided a list of twenty options ready for use with the Slack program. Of course, more options likely exist via standard webhook connectivity.
Heroku was designed to help developers focus on meeting the business needs of their application. Integrating with Slack is another example of how feature teams can remain focused while keeping a pulse on their dynos running in Heroku. After all, many feature teams are likely already using Slack.
If you are interested in the source code for this article, please review the following repository on GitLab:
https://gitlab.com/johnjvester/heroku-slack
Have a really great day!
Published at DZone with permission of John Vester, DZone MVB. See the original article here.
Opinions expressed by DZone contributors are their own.

Comments