Using HTTPS in Mule
Creating a Keystore and Truststore with Mule's out-of-the-box support for HTTPS is simple. Once you do that, you can create Mule projects with HTTPS configuration.
Join the DZone community and get the full member experience.
Join For FreeMule provides out-of-the-box support for HTTPS. In this post, I am going to explain how to create and access a simple HTTPS server.
Before We Begin
Before we begin, let’s learn a little bit about Keystore and Truststore.
Keystore — In short, Keystore is a server-side asset that stores the private keys and the certificates with their public and private keys.
Truststore — Truststore is a client-side asset that serves as a repository of certificates (CA or simple) that the client should trust.
To learn more about Keystore and Truststore, please read this article.
Create a Keystore and Truststore
Let’s get our hands dirty now. The three-step process is as follows.
1. Create the Keystore and Generate a Certificate
We will use the keytool that comes with Java. Create a temporary directory somewhere in your drive. Then, open a terminal and navigate to the directory and execute the following command:
keytool -genkey -alias mule -keyalg RSA -keystore keystore.jksOn execution, it will ask for the Keystore password and some general information. At the end, it will ask for the password of the key.
Key —
mule.Keystore —
keystore.jks.Keystore password — keystorepass.
Key password — keystorepass.
Feel free to use different passwords for Keystore and key. I used the same password for the sake of simplicity. Here is a simple screenshot:

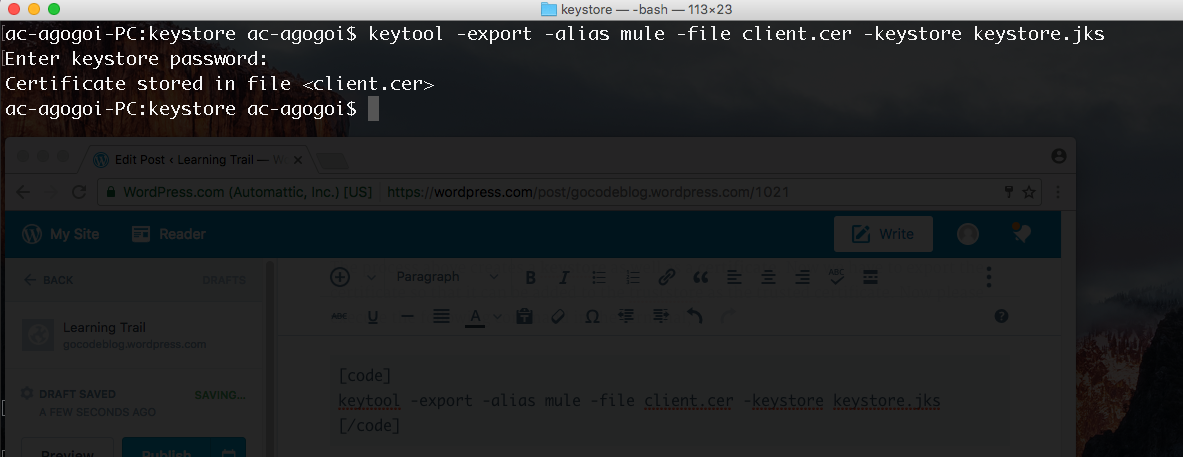
2. Export the Certificate
The process above creates a Keystore as well as a certificate. We have to export the certificate so that it can be added to the Truststore as the trusted certificate. Execute the following command in the terminal:
keytool -export -alias mule -file client.cer -keystore keystore.jksThe key point here is to specify the key (mule) and the Keystore (keystore.jks) that we created in the previous step. You can use any file name for the certificate being exported. Here, I am calling it client.cer. On execution, it will ask for the password of the Keystore. In our case, it is keystorepass. Here is a screenshot:
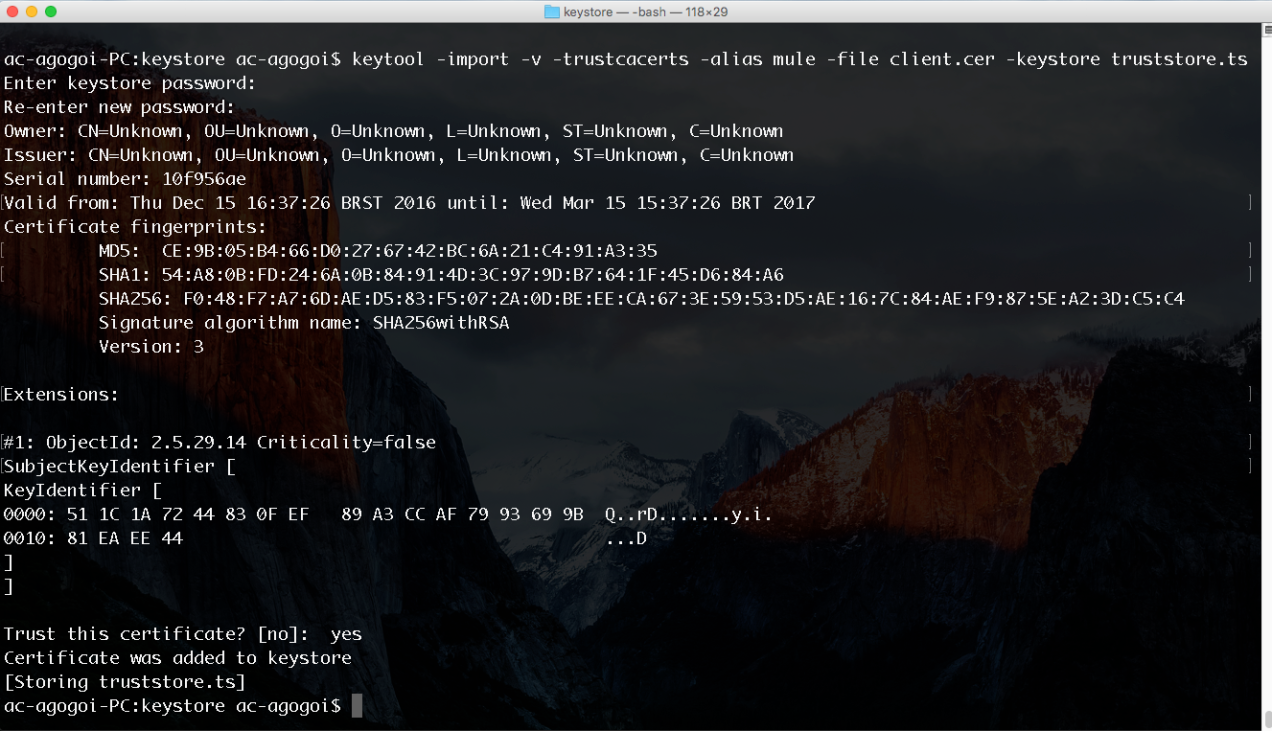
3. Import the Certificate to the Truststore
After creation of the certificate client.cer, we will populate our Truststore with it. So, let’s create a Truststore. Please execute the following command in the terminal:
keytool -import -v -trustcacerts -alias mule -file client.cer -keystore truststore.tsImportant points to be noted here is the key (mule), the certificate file (client.cer), and the name of the Truststore (truststore.ts). Upon execution of the command, it will ask for the password for the Truststore being created. You can choose anything you want. I have chosen truststorepass for simplicity. Here is a screenshot:
Okay, you are done with the creation of your Keystore and Truststore. Congrats! Now, let’s move on to the next steps.
Create a Simple Mule Project
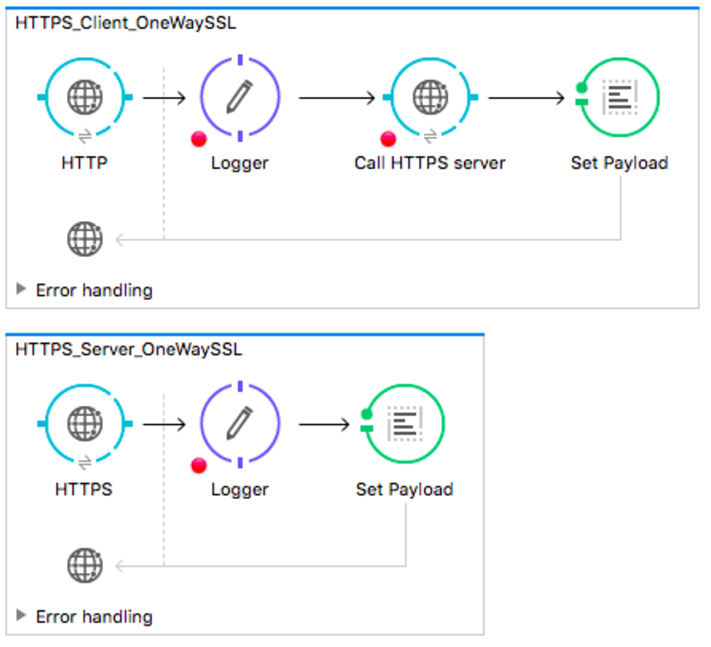
Let’s create the simplest Mule project and the simplest flow. We have an HTTP server running on port 8081. Upon sending a request to the server on the http://localhost:8081/app/ URI, it will call an HTTPS server running on port 8082. That’s it. Here is a screenshot:
HTTPS Server Configuration
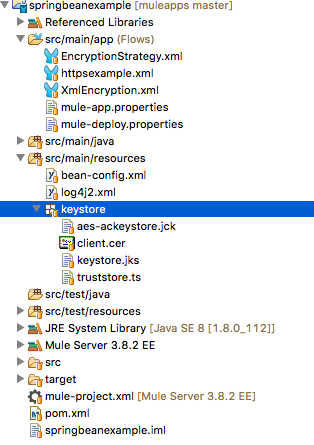
I have copied the Keystore and Truststore to the resource/keystore directory of the project. Here's the screenshot:
Let’s configure the flow HTTPS_Server_OneWaySSL. Here is the screenshot:
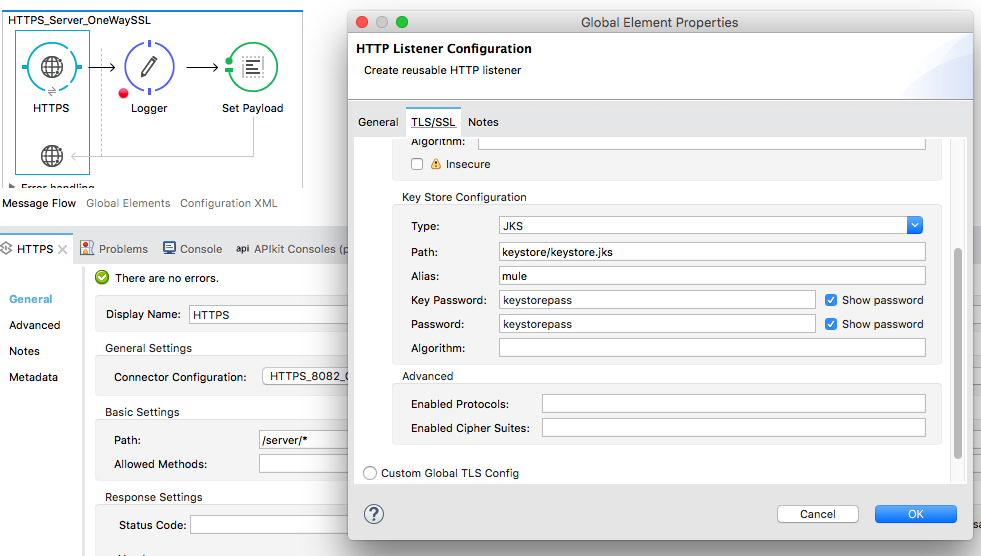
Remember that in the server, we are using the Keystore.
HTTPS Client Configuration
Let’s configure the flow HTTPS_Client_OneWaySSL.

Configure the Truststore in the TLS/SSL tab.
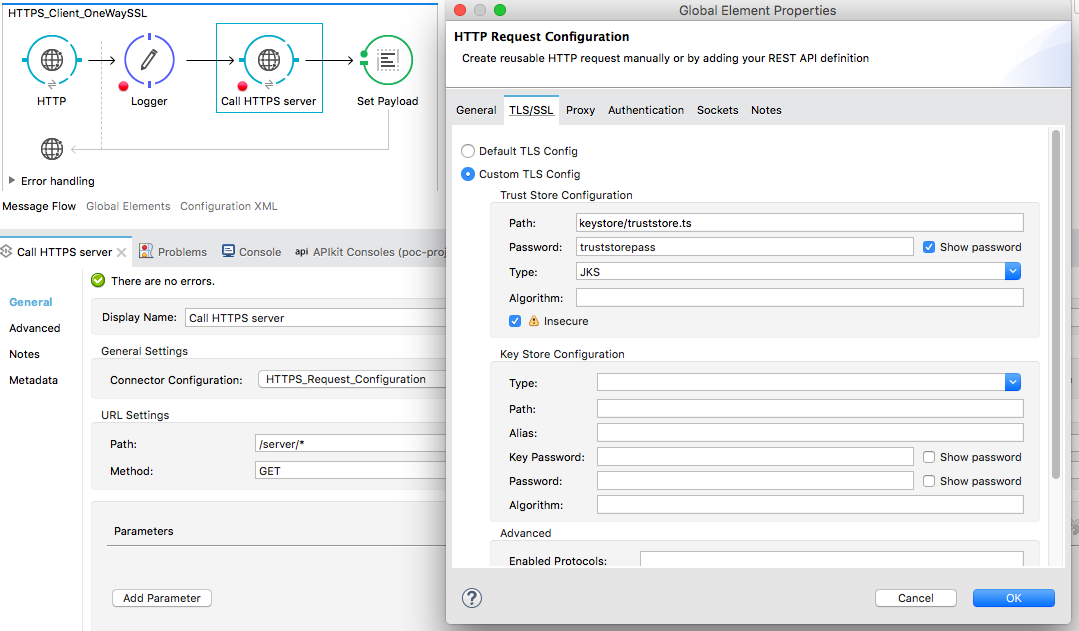
Remember that here in the client configuration, we are using the Truststore created.
Now, execute the flow and make a request in the URI http://localhost:8081/app/. You should get a response from the HTTPS server running on 8082.
That’s it. You can find the source code here!
Opinions expressed by DZone contributors are their own.
Comments