Using JMeter's RTE Plugin
JMeter's Remote Terminal Emulator (RTE) plugin helps you run performance tests on mid-range and mainframe systems that use the RTE protocol.
Join the DZone community and get the full member experience.
Join For FreeTerminal emulators are software that is often used to interact with servers such as AS400, IBM i Systems, IBM z Systems, and many other mid-range and mainframe systems which are usually used by companies. Emulators can run either on the same machine or on a different one by using the Remote Terminal Emulator (RTE) protocol.
Companies need to run performance tests on these systems to ensure the stability of the servers and short response times. Mainly, performance tests ensure systems can run all the required processes while returning the correct data, with many users concurrently connected.
To achieve these goals, JMeter’s RTE plugin was created.
The RTE Plugin
The RTE plugin adds two elements to Apache JMeter™ when it is installed: a config element to set the parameters to establish the connection with the server (RTE Config) and a sampler to compose and send the requests to the server (RTE Sampler).
The config element is quite intuitive to set up. Among the information required is the server IP (or URL) and the protocol to use in the connection (nowadays it supports TN5250 and TN3270 protocols).
The JMeter sampler has many options to choose from for simulating the interaction between a real user and the terminal. In this kind of system, all the interactions are made through a keyboard, so basically what the sampler does (as well as a real user) is to send keystrokes to the server and wait for the response.
More information about the plugin’s features can be found in “Introducing JMeter Mainframe Testing with the New RTE Plugin”.
Using the RTE Plugin
The best way to show how the plugin can be used is through an example of a typical workflow. In this case, we will simulate a real user performing the following steps in an iSeries application:
1. Connect to a TN5250 terminal emulator.
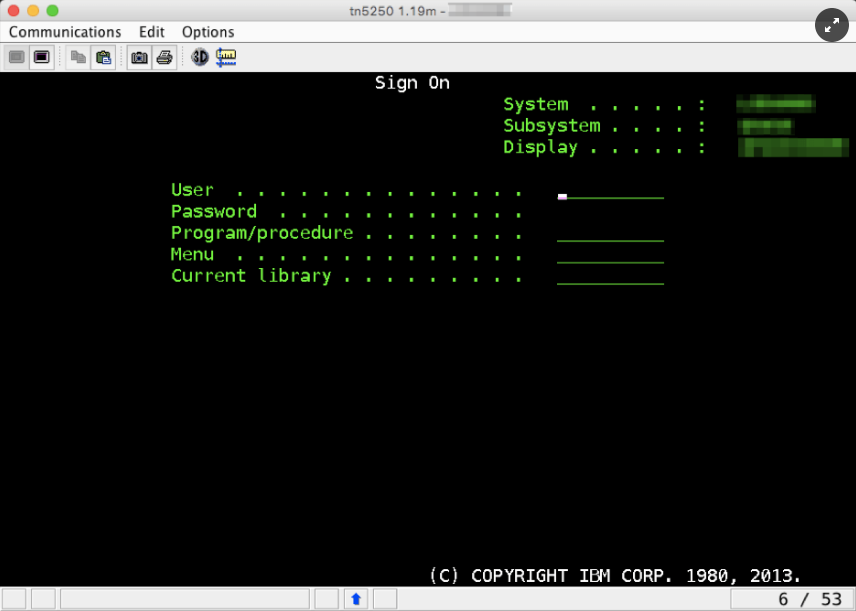
2. Type the username and the password, and press Enter to Login into the app.
3. Type "1" and press Enter to enter in the “User tasks” menu.
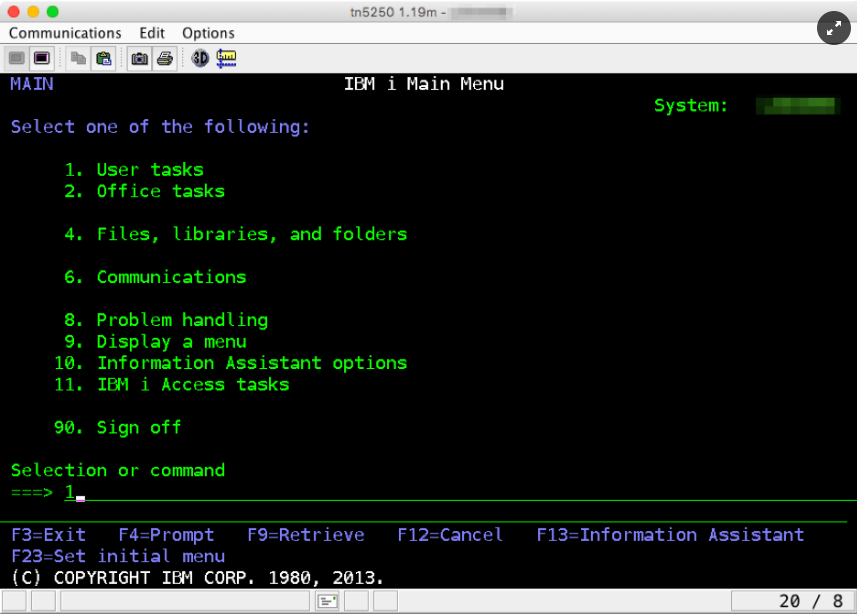
4. Type "6" and press Enter to enter in the “Work with your batch jobs” menu.
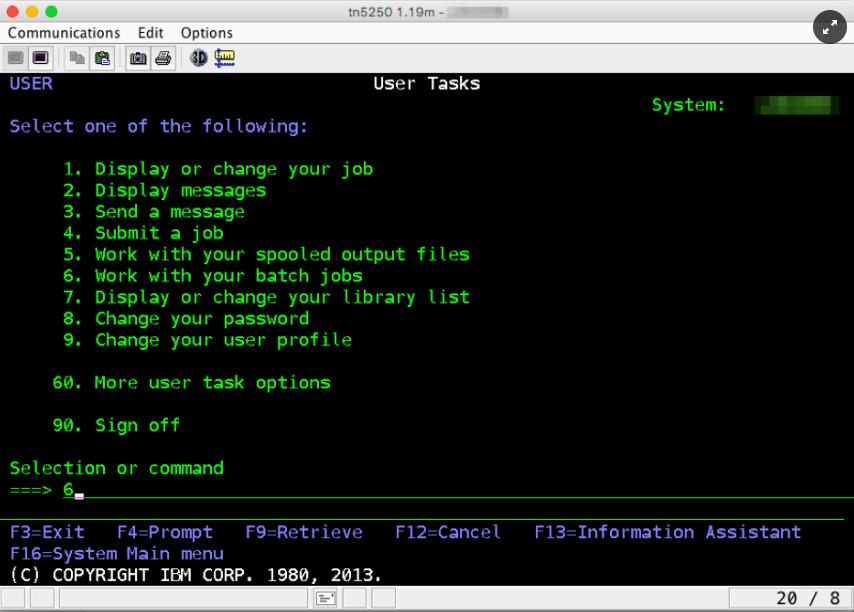
5. Type "4" and press Enter to end the job.
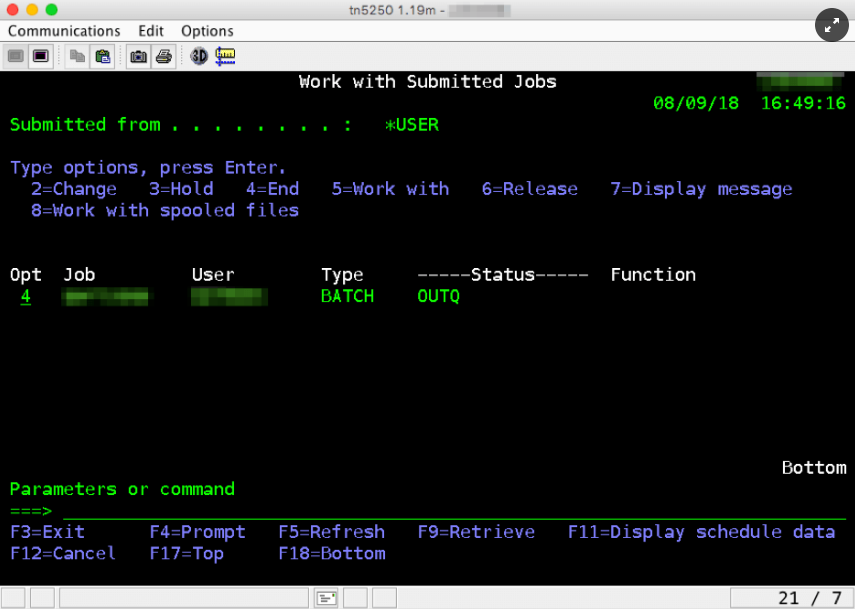
6. Press Enter again to confirm and wait that the application ends the job.
7. Disconnect from the terminal.
Following, we will see how this workflow can be automated using JMeter and RTE plugin.
First of all, we should add a Thread Group to the Test Plan and add an RTE Config element to set the parameters of the connection:

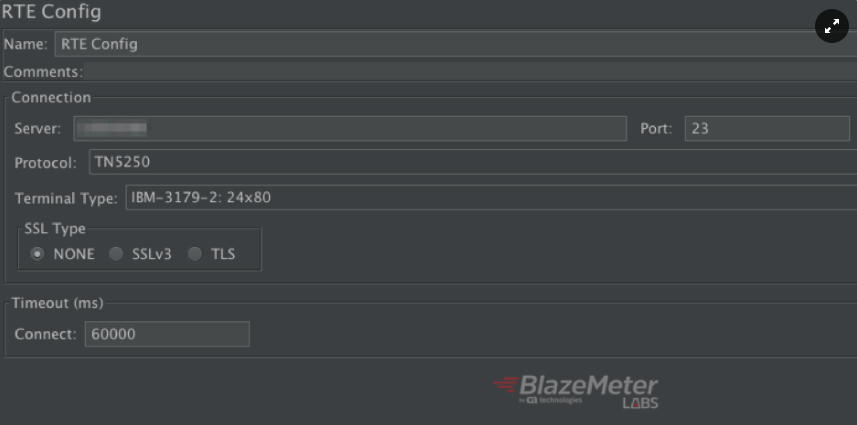
The only two fields required in the config element are the Server IP and the Protocol (TN5250 in this example). We left the other fields with the default values.
Then, we should add one RTE Sampler for each step. We can also add Response Assertions to validate that the returned screen is the correct one.
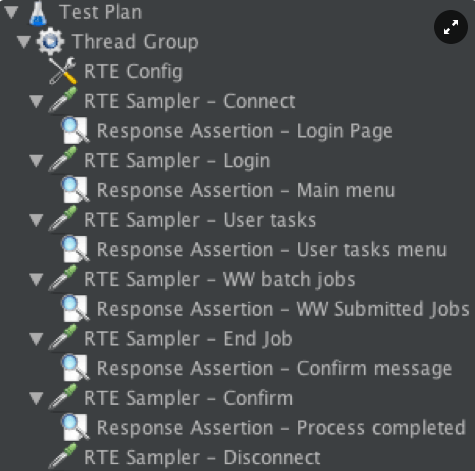
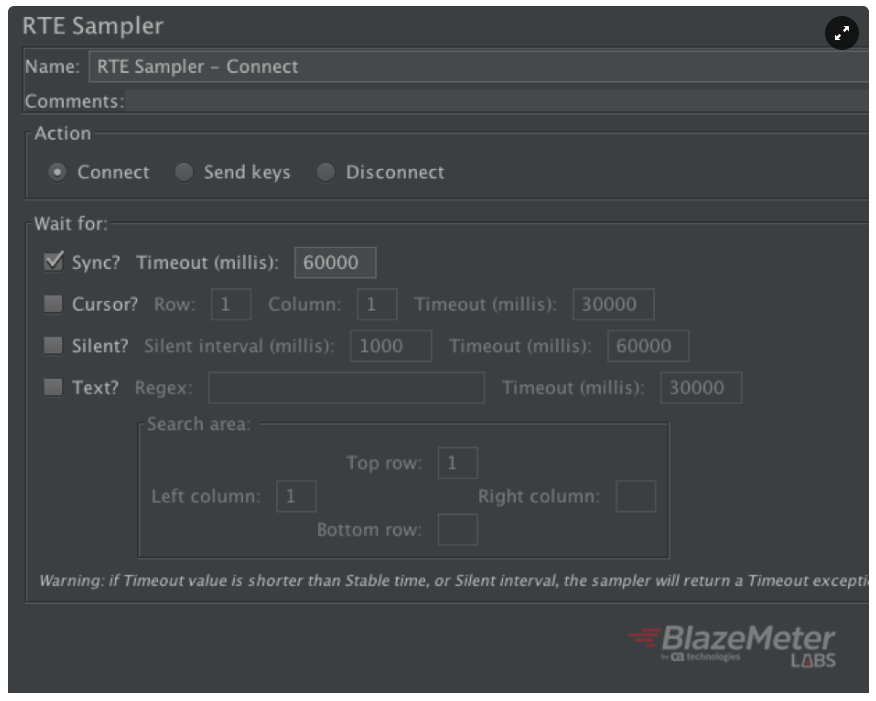
The first RTE Sampler will connect to the server, and validate that the screen returned is the Sign On screen. To do this, we choose the action “Connect” in the RTE Sampler and we add a Response Assertion that validates that “Sign On” appears in the response.
The second sampler will log into the app. To achieve this we should:
- Select the radio button “Send keys” in the “Action” panel
- Specify the row and column of the username and password fields in the screen in the “Payload” grid
- Put the username and the password in the “Value” column of the grid
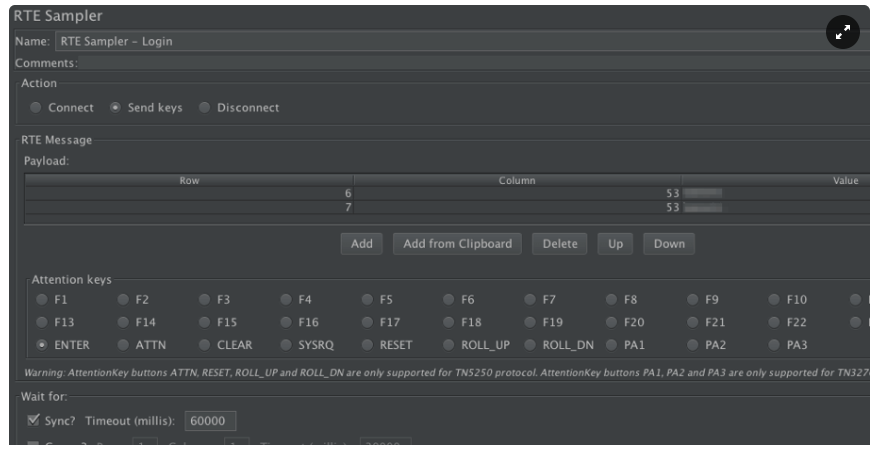
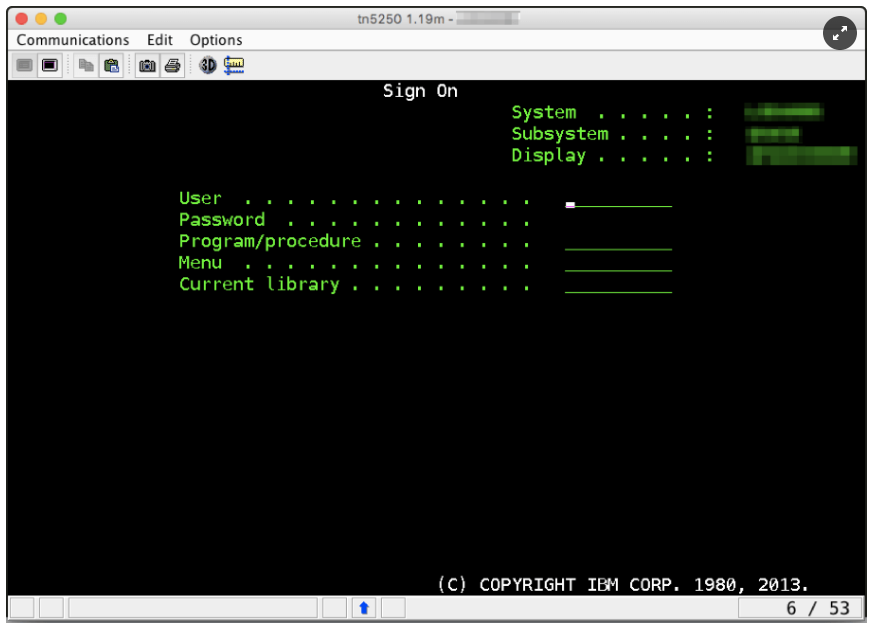
The row and column of the fields can be seen in the terminal emulator. In this case, for example, the cursor is positioned in the “User” field. We can see the position of this field in the bottom right corner. In this case, it is Row: 6, Column: 53. See the image below.
Then we should choose the radio button “ENTER” in the “Attention keys” panel in order to simulate a pressed Enter key after putting the values in the fields. Then, set a proper Response Assertion (in this case, we validate that the response screen contains “IBM i Main Menu”).
The following samplers (the ones for steps 3, 4 and 5) are pretty similar to each other, since they select a specific option from the menu and press the Enter key. To do this we should create 3 samplers with the “Send keys” Action selected, and the coordinates of the field in order to set the menu option with the proper value. Then, the Attention key selected should be “ENTER” again.
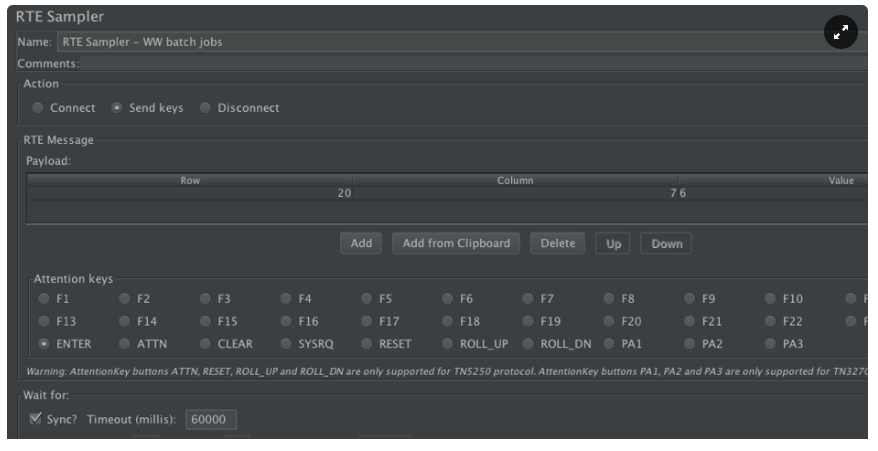
The Response Assertions in these samplers should check for some text in the expected screens.
To automate Step 6, we should create a sampler that only sends an Enter keystroke to the server. To do this we select again the “Send keys” radio button in the “Action” panel but this time we leave the payload grid in the “RTE Message” panel empty. Then, we select the “ENTER” radio button in the “Attention keys” panel.
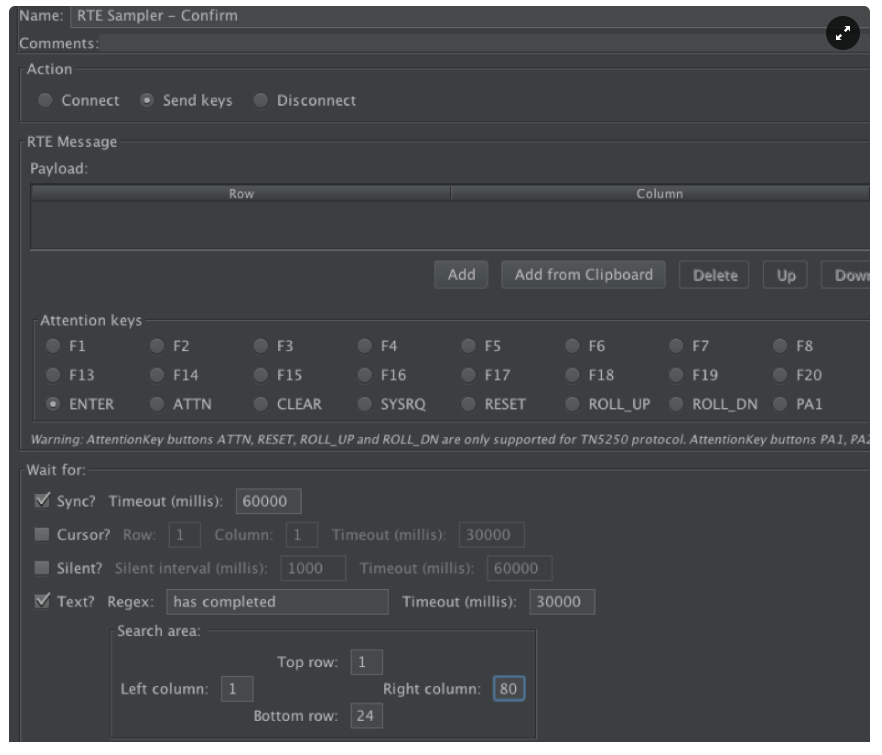
After this step, the app ends the job chosen and shows a message in the screen confirming that the process has been completed. To ensure that the process has ended, we can set a “Wait for Text?” condition in the sampler, checking that the message “has completed” is shown in the following screenshot.
The sampler will wait for this text to appear in the specified “Search area” of the screen before jumping to the next sampler of the Thread Group:
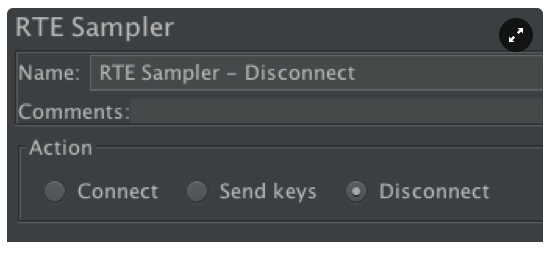
Finally, the last step will disconnect the terminal emulator from the server. To do this we just put an RTE Sampler with the “Disconnect” radio button selected in the “Action” panel. If the disconnection is successful, the response from this request will be empty.
After creating your script, upload it to BlazeMeter to be able to massively scale your tests, share tests and reports, get advanced reporting and shift left your testing.
Published at DZone with permission of Andrei Guchin, DZone MVB. See the original article here.
Opinions expressed by DZone contributors are their own.

Comments