Web Application Automated Testing With Testsigma
Learn how to use Testsigma, a test automation software that uses a shift-left approach for continuous testing and provides an alternative to Selenium.
Join the DZone community and get the full member experience.
Join For Free
Introduction
Given today's fast-paced Agile software development approach that demands short and frequent software Product Release Cycles (weekly and even daily builds), it is hard to rely on manual test practices alone to ensure before deployment that your product works as intended.
Test automation is the best bet for software testing mainly regression testing but, the development of a test automation framework is time-intensive to implement and difficult to maintain. A test automation tool that is both easy to maintain and quick to implement would make the testing process effortless while allowing to meet the continuous delivery demands.
One among the preferred test automation tools today, Testsigma is an AI-driven test automation software for web and mobile applications that employ a shift-left approach to achieve continuous testing. It is one among the top alternatives to Selenium if you are looking for Test Automation.
Let’s see how a Web Application is automated using Testsigma.
We will take a simple scenario of account login for OrangeHRM(an HR and Leave Management Application) and see how we automate this.
There are 4 simple steps in logging into the OrangeHRM page:
1. Go to the OrangeHRM Login page
2. Enter the Username
3. Enter the Password
4. Click on the Login button
Let us try automating the 4 steps using Testsigma now.
When an account is created in Testsigma for the first time, a default project named “Testsigma Examples” will already be available that contains an Application, an application Version, a few Test Cases with some Test Steps. We may use the same project in this case.
You may also start by creating a new Project, Application and Version and manage them easily as discussed below.
Create Project
Click on Create New button(first icon on the left Navigation bar) and then click on Project in the overlay that pops up.
Enter the following details in the Create Project page that opens up:
Click on the Create button at the bottom right corner to Create the Project, Application and Version in a single step. You will be taken to the Test Cases page now.
Note: Check the two checkboxes above Application details if you want to have multiple Applications and Versions in the same Project
Create Test Case
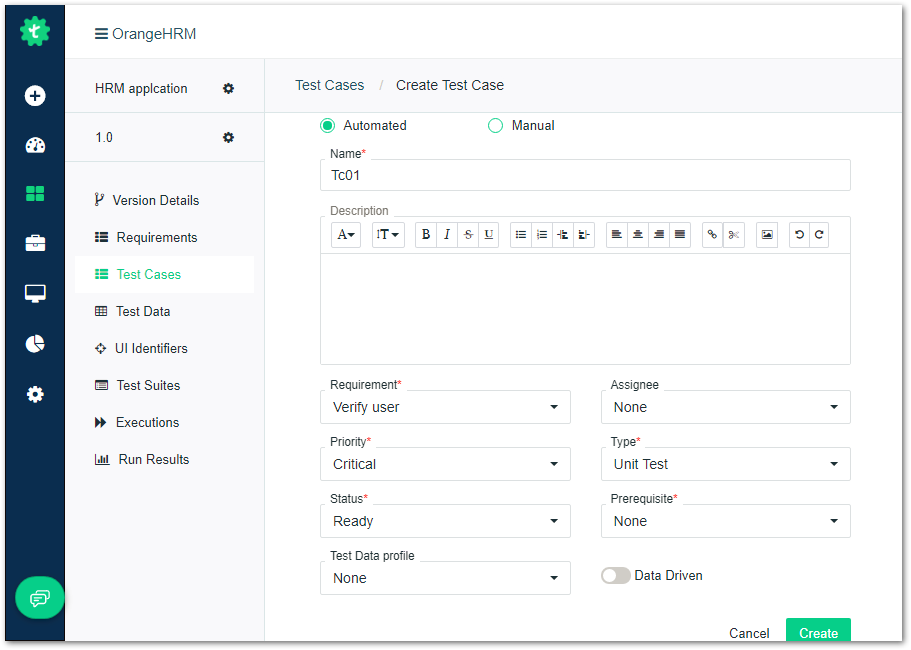
Once you are in the Test Cases page, click on + Test Case to add a new Test Case.
Choose Automated since we are going to create an automated Test Case.
Give a name for the Test Case and click Create.
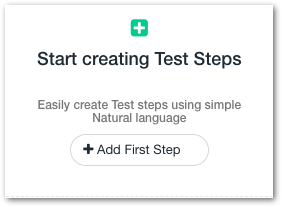
To add a Test Step, Click on + Add First Step button.
The Test Step creation wizard opens up.
Testsigma uses simple English sentences or Natural Language statements to write automated tests without programming even a single line of code.
Based on the action you wish to perform you can start typing your test in simple natural language.
Let's perform the 4 action steps this way.
We need to navigate to the OrangeHRM Webpage first.
1. Go to OrangeHRM
Enter the URL of the application(https://opensource-demo.orangehrmlive.com/) in the 'Enter your Application URL' box and hit the Start button.
The first step is completed. That was easy!
2. Enter the Username
Now let’s create a Test Step to enter some value in the Username field.
Click on "Create Test step" once again to open the Test Step creation wizard.
In the Action Text Area, start entering the word “type” or "enter" and choose from the suggested grammar list, your desired Test Step.
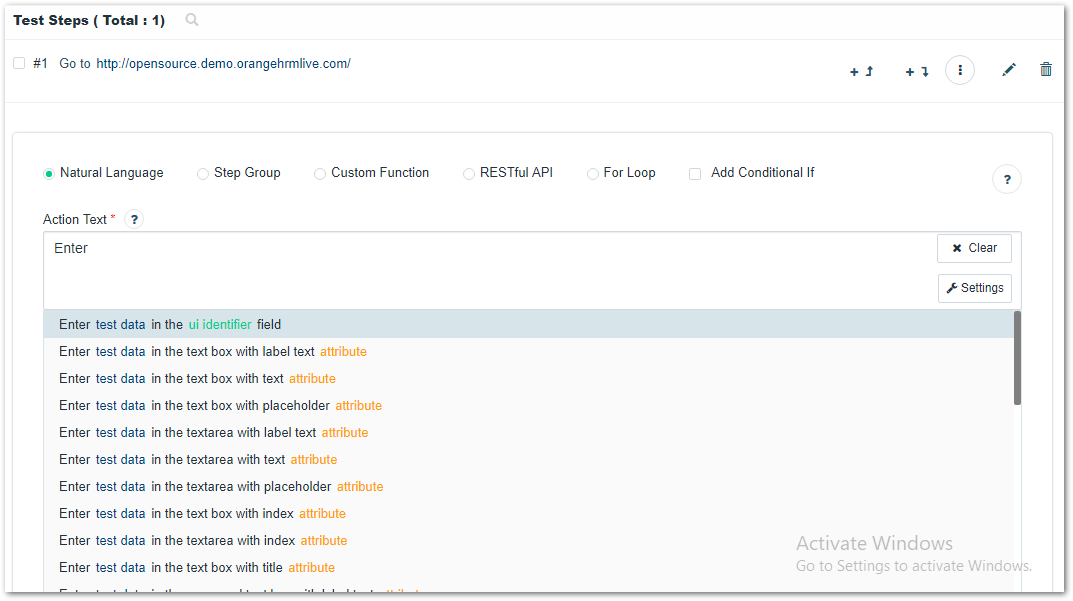
You may see two parts in these grammar suggestions, mainly test data and ui identifier.
(i) test data is nothing but the user inputs, e.g. names like Alice, Bob, a phone number or a website/application URL etc. In our case, the application URL http://opensource.demo.orangehrmlive.com/, the username 'admin', the password 'admin123' are all test data.
(ii) ui identifiers are locators used to locate an element (an input field, link, image, button, etc) in a web page. It is an equivalent of web element locators that we use in Selenium.
Let's continue from where we left off.
Let us choose the grammar, "Type test data in ui identifier field" or "Enter test data in ui identifier field"
This simply means to type/enter the test data in a particular field located by ui identifier on the webpage. Just replace the test data part with “admin” and UI identifier part with a UI identifier variable say, “username.” We will assign its value after creating the Test Step.
Now click on Create to create the Test Step.
In this step, we have used a UI Identifier variable ("username"). We need to specify the UI identifier value now.
Click on the Expand icon to show the details of Test Step and click on the UI identifier name as shown in the image below:
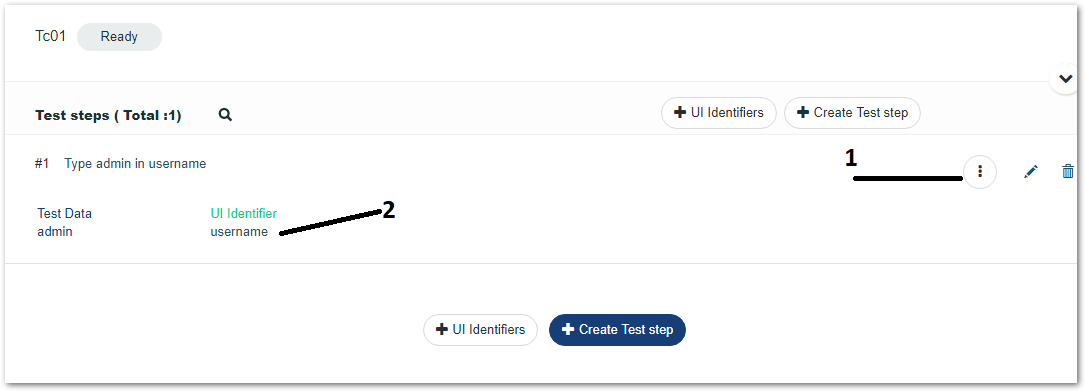
The following page appears now:
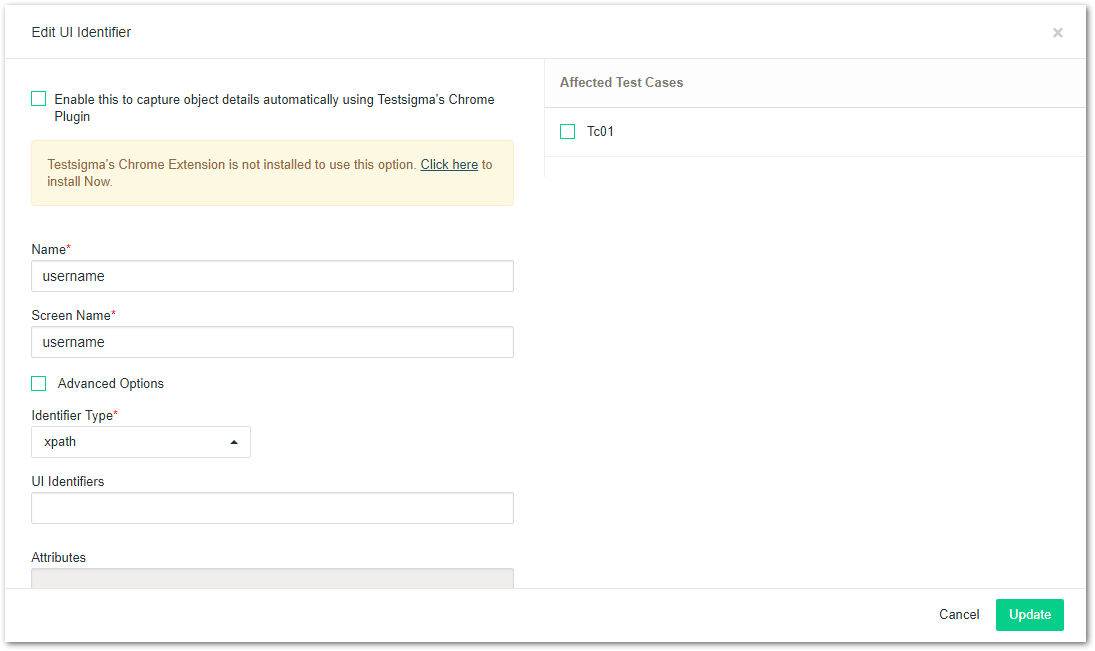
Here, let us assign the UI identifier value.
There are two ways to give the UI identifier variable a value to locate it in the web page. One way is manually entering the UI identifier value by checking the id, XPath, class name, etc like we discussed earlier. A simpler way would be using the Record option to automatically record the UI identifier of an element or a field in a web page.
Let's try the Record option. Check the video to know how.
3. Enter the Password
Similarly, to enter the password, click on the Create Test step button.
Start typing “type” and choose the grammar, "Type test data in ui identifier" from the suggestions.
Replace the test data part with “admin” and the ui identifier with a variable name, say ”password.” Click on Create Test step. The Step has been created.
Now, click on the Expand icon and click on the variable that we just created, “password.”
As discussed earlier, the UI identifier variable can be defined in 2 ways: One using the Record option and two, by manually entering it.
Let us try manually entering the UI identifier this time. Refer to this video.
4. Click the Login Button
Now, Let's see how a click operation is performed in Testsigma.
We need to click on the Login button to submit the Username and Password.
Click on Create Test step and start typing “click” on the Action text area.
There’s no need for Test Data or input, in this case, we do not have any input to enter but UI identifier to locate this click button.
So, let us choose the grammar, "Click ui identifier".
Replace the UI identifier with a variable, say, "submit." Now, click on Create.
Click on the Expand icon and click on the UI identifier variable submit.
Let us record the UI identifier for the Login button on the OrangeHRM page.
Since the Testsigma extension is already added (refer to the video for the Record option), all you need to do is click on the Record option. Check the checkbox and click on the “Login” button on the OrangeHRM web page and Click on Refresh in the "Edit UI identifier" page of Testsigma.
Now that the UI identifier is automatically added, click on Update.
Here's the final list of Test Steps.
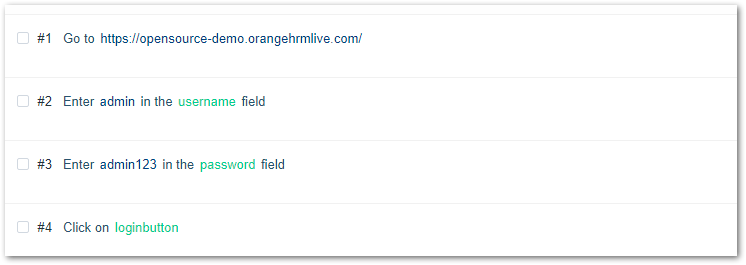
Executing the Test Case
Now that all the automated Test Steps are added, let us see how they are executed.
There are 3 Execution methods in Testsigma.
- Dry Run is the quickest method to execute individual Test Cases in Testsigma.
- Quick Run and Regular Executions can be used to execute multiple Test Cases and Test Suites(a group of Test Cases).
Executions can be done on your local devices (Hybrid Execution), on Testsigma’s very own cloud infrastructure called 'Testsigma Lab' and also on third-party platforms like BrowserStack and Sauce Labs.
Let’s perform a Dry Run of the automated test case on Testsigma Lab.
Simply click on 'Run' at the top right corner of the Test Case details page.
In the next page that opens up, enter the details of the execution like the Name of the Execution, The Operating System, its version and the browser and its version being used for the test execution.
Testsigma Lab is the Execution Model we have chosen. Click on Create and Run.
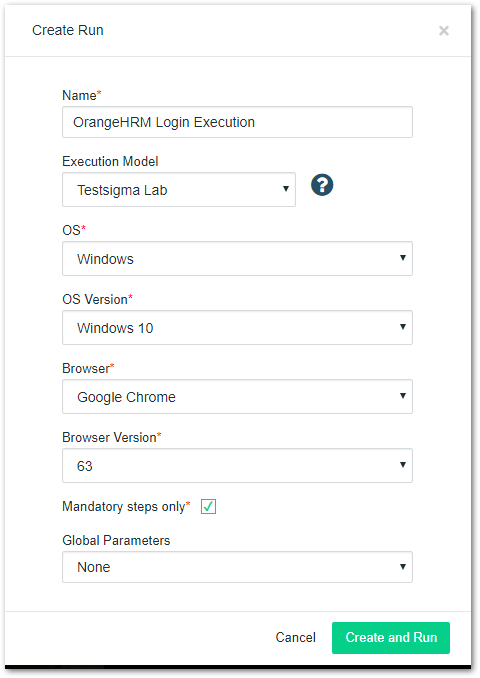
The test case execution will start now.
Viewing Results
Wait for some time once the Execution is started and click Refresh.
Click on Run Results in the left pane to see the test status.
Also, you can click on the Test Case name to see the test run details whether a Test Case failed or passed, why it failed, etc. You can also watch videos of the executions and refer test logs.
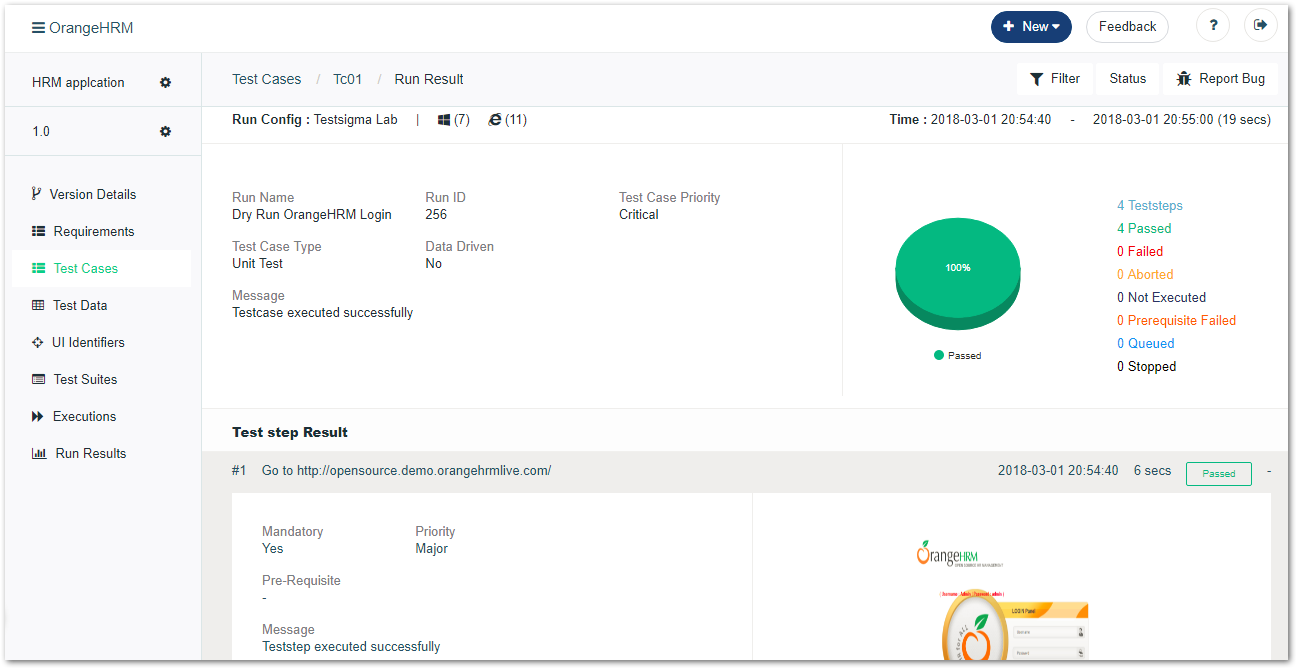
That's how a web application automated test case is created and run using the AI-driven test automation tool, Testsigma. Mobile apps too can be automated easily with slight changes using Testsigma. Check out Testsigma website and reach out to support@testsigma.com for any help. You may also refer to Testsigma's Knowledge base for reference docs.
Opinions expressed by DZone contributors are their own.


Comments