Working With Custom Policy in Mule 4
Let's work with custom policy in Mule 4.
Join the DZone community and get the full member experience.
Join For FreeMuleSoft Custom Policies can be layered on top of the implementation of the APIs to provide the governance, security, and visibility required. While the out-of-the-box API management policies cover the majority of use cases, an organization may need to create a custom policy to meet specific business needs.
There is a lot of documentation that shows how to work with MuleSoft custom policies through API manager, however, developing the custom policy and debugging them locally has been always challenging. In this article, I will demonstrate how to develop and test Mule custom policy on your local standalone Mule runtime instances before uploading to the API manager or Exchange for live running APIs.
Developing Mule Custom Policy
The first step to develop a custom policy is setting up a project with required files using a Maven archetype. The Maven archetype is not currently available in a Maven Central Repository, so we need to configure our Maven settings to find the archetype in one of MuleSoft’s repositories.
One way to do so is by configuring Maven’s settings.xml with the following section:
<profiles>
   <profile>
     <id>archetype-repository</id>
     <repositories>
       <repository>
         <id>archetype</id>
         <name>Mule Repository</name>
         <url>https://repository-master.mulesoft.org/nexus/content/repositories/public</url>
         <releases>
           <enabled>true</enabled>
           <checksumPolicy>fail</checksumPolicy>
         </releases>
         <snapshots>
           <enabled>true</enabled>
           <checksumPolicy>warn</checksumPolicy>
         </snapshots>
       </repository>
     </repositories>
   </profile>
 </profiles>
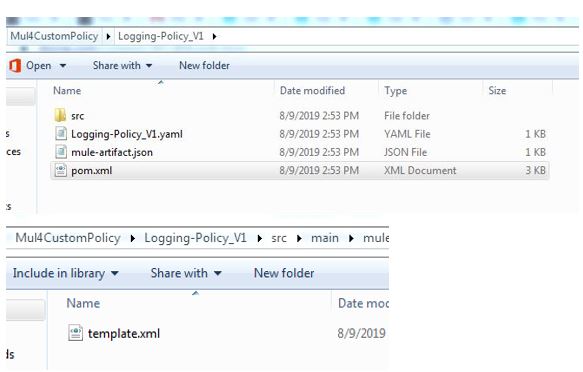
Once Maven is configured, Create a directory where the custom policy project will reside and run the below command from there by specifying Mule OrgId, custom policy name, and later policy description to create a custom policy project with all the required files, as shown below.
mvn -Parchetype-repository archetype:generate -DarchetypeGroupId=org.mule.tools -DarchetypeArtifactId=api-gateway-custom-policy-archetype -DarchetypeVersion=1.1.0 -DgroupId=${orgId} -DartifactId=${policyName} -Dversion=1.0.0-SNAPSHOT -Dpackage=mule-policy
In the YAML file, we will define all the policy configuration parameters that will appear in the UI, and the template.xml is where the actual policy logic will go. The best way to develop the template is to create a corresponding Mule flow in the studio and later convert them into the corresponding Mule custom policy codes.
Packaging a Custom Policy
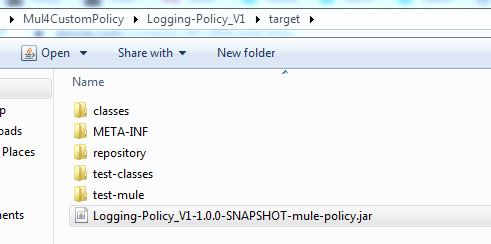
Once the template.xml and YAML file for the policy is ready, we need to package the custom policy to create a JAR file using command "mvn clean install". In the target folder of the policy, we will have a ready JAR package for the custom policy, as shown below.

Applying and Testing Custom Policy to the API on Mule 4 Standalone Runtime
Follow the below steps to deploy the Mule API and custom policy created above on standalone Mule runtime for testing.
1. Deploy a Mule API with "autodiscovery" on the Mule standalone runtime by placing the API jar file in the "apps" folder of the runtime.
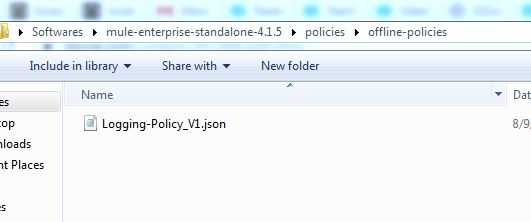
2. In the runtime folder, "policies", create a folder "offline-policies" (%MULE_HOME%/policies/offline-policies) and create a JSON file that defines the policy configurations as shown below. The name of the JSON file should be exactly the same as the policyID.
In the JSON file, we will define the "autodiscovery", which has been given in the API and the rest of the custom policy configuration parameters as below.
{
 "template" : {
   "groupId" : "com.mulesoft.anypoint",
   "assetId" : "Logging-Policy_V1",
   "version" : "1.0.0-SNAPSHOT"
 },
 "api": [
   {
     "id": "123"
   }
 ],
 "order": 1,
 "configuration" : {
   "payload" : "payload",
   "logging_req": true

 }
}
3. In the runtime folder, "policies", create another folder, "policy-templates" ("%MULE_HOME%/policies/policy-templates) and place the Mule custom policy JAR file created after packaging the custom policy. Please refer to the screenshot below for reference.

Now that everything is in place, let's start the Mule runtime using command "mule -M-Danypoint.platform.gatekeeper=disabled" from the server bin folder. In the server logs, we can see that the custom policy gets applied to the API. Now we can make a request to the API and test the logic, which we have written in our custom policy. For debugging purposes, we can place logger statements in the policy template.xml and see them in the server logs after making requests to the API to which this policy is applied.
Uploading Custom Policy to Exchange
Once the testing completes, we will now publish this policy to exchange using "mvn clean deploy". The policy will then be available in the API manager custom policy section and will be ready to use for the live running APIs.
Let’s share our knowledge to expand our MuleSoft community.
Thank you!
Opinions expressed by DZone contributors are their own.

Comments